


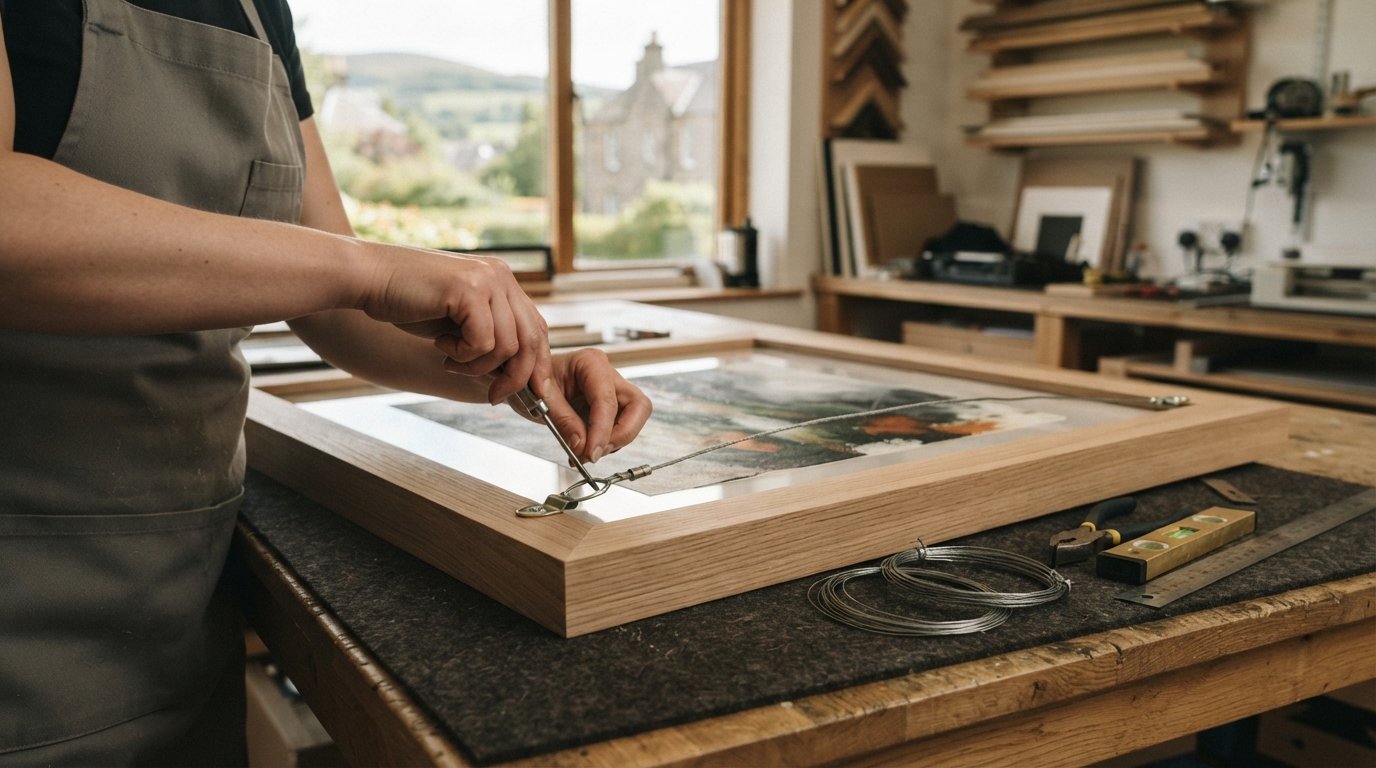
What if the reason your picture hangs crooked has nothing to do with your wall hooks? You can measure meticulously, but if hanging wire has slackened or factory brackets are misaligned, your artwork will inevitably tilt forward or drift off-centre. Learning the craft of adjusting the hanging hardware on a frame is the true secret to keeping any piece sitting securely and beautifully flush against the wall.
We know how frustrating it feels when a treasured print refuses to hang straight, especially when cheap fittings threaten to split delicate moulding or fail under the weight of authentic glass. In this guide, you will discover how to safely reposition D-rings, balance wire tension, and calculate proper weight support for your favourite pieces. Here is our practical, step-by-step walkthrough to achieving a secure, perfectly level finish every single time.
Key Takeaways
- Understand the mechanics of D-rings, heavy-duty strap hangers, and wire tension to protect your walls and eliminate frame drift.
- Master adjusting the hanging hardware on a frame using the proven one-third measurement rule to keep your artwork balanced and completely flush.
- Safely calculate weight distribution for substantial timber profiles glazed with authentic 2mm float glass rather than lightweight synthetic alternatives.
- Discover when to save time by choosing bespoke, ready-to-hang wall art fitted with workshop-grade hardware tailored specifically to your piece.
Identifying Frame Hardware: D-Rings, Wire, and Brackets Explained
Every well-crafted display relies entirely on what sits hidden behind the moulding. Before adjusting the hanging hardware on a frame, you need to understand the mechanical role each fitting plays. Proper selection protects your plasterwork, maintains level lines, and ensures your artwork hangs safely for years. As professional framers know, accurate hardware placement prevents tilt and structural frame joint separation entirely. Investing time in fitting the right components to your bespoke picture frames safeguards both your walls and your art.
Common Hardware Types and Their Ideal Weight Capacities
Different frame profiles and glazing weights demand specific load-rated fittings:
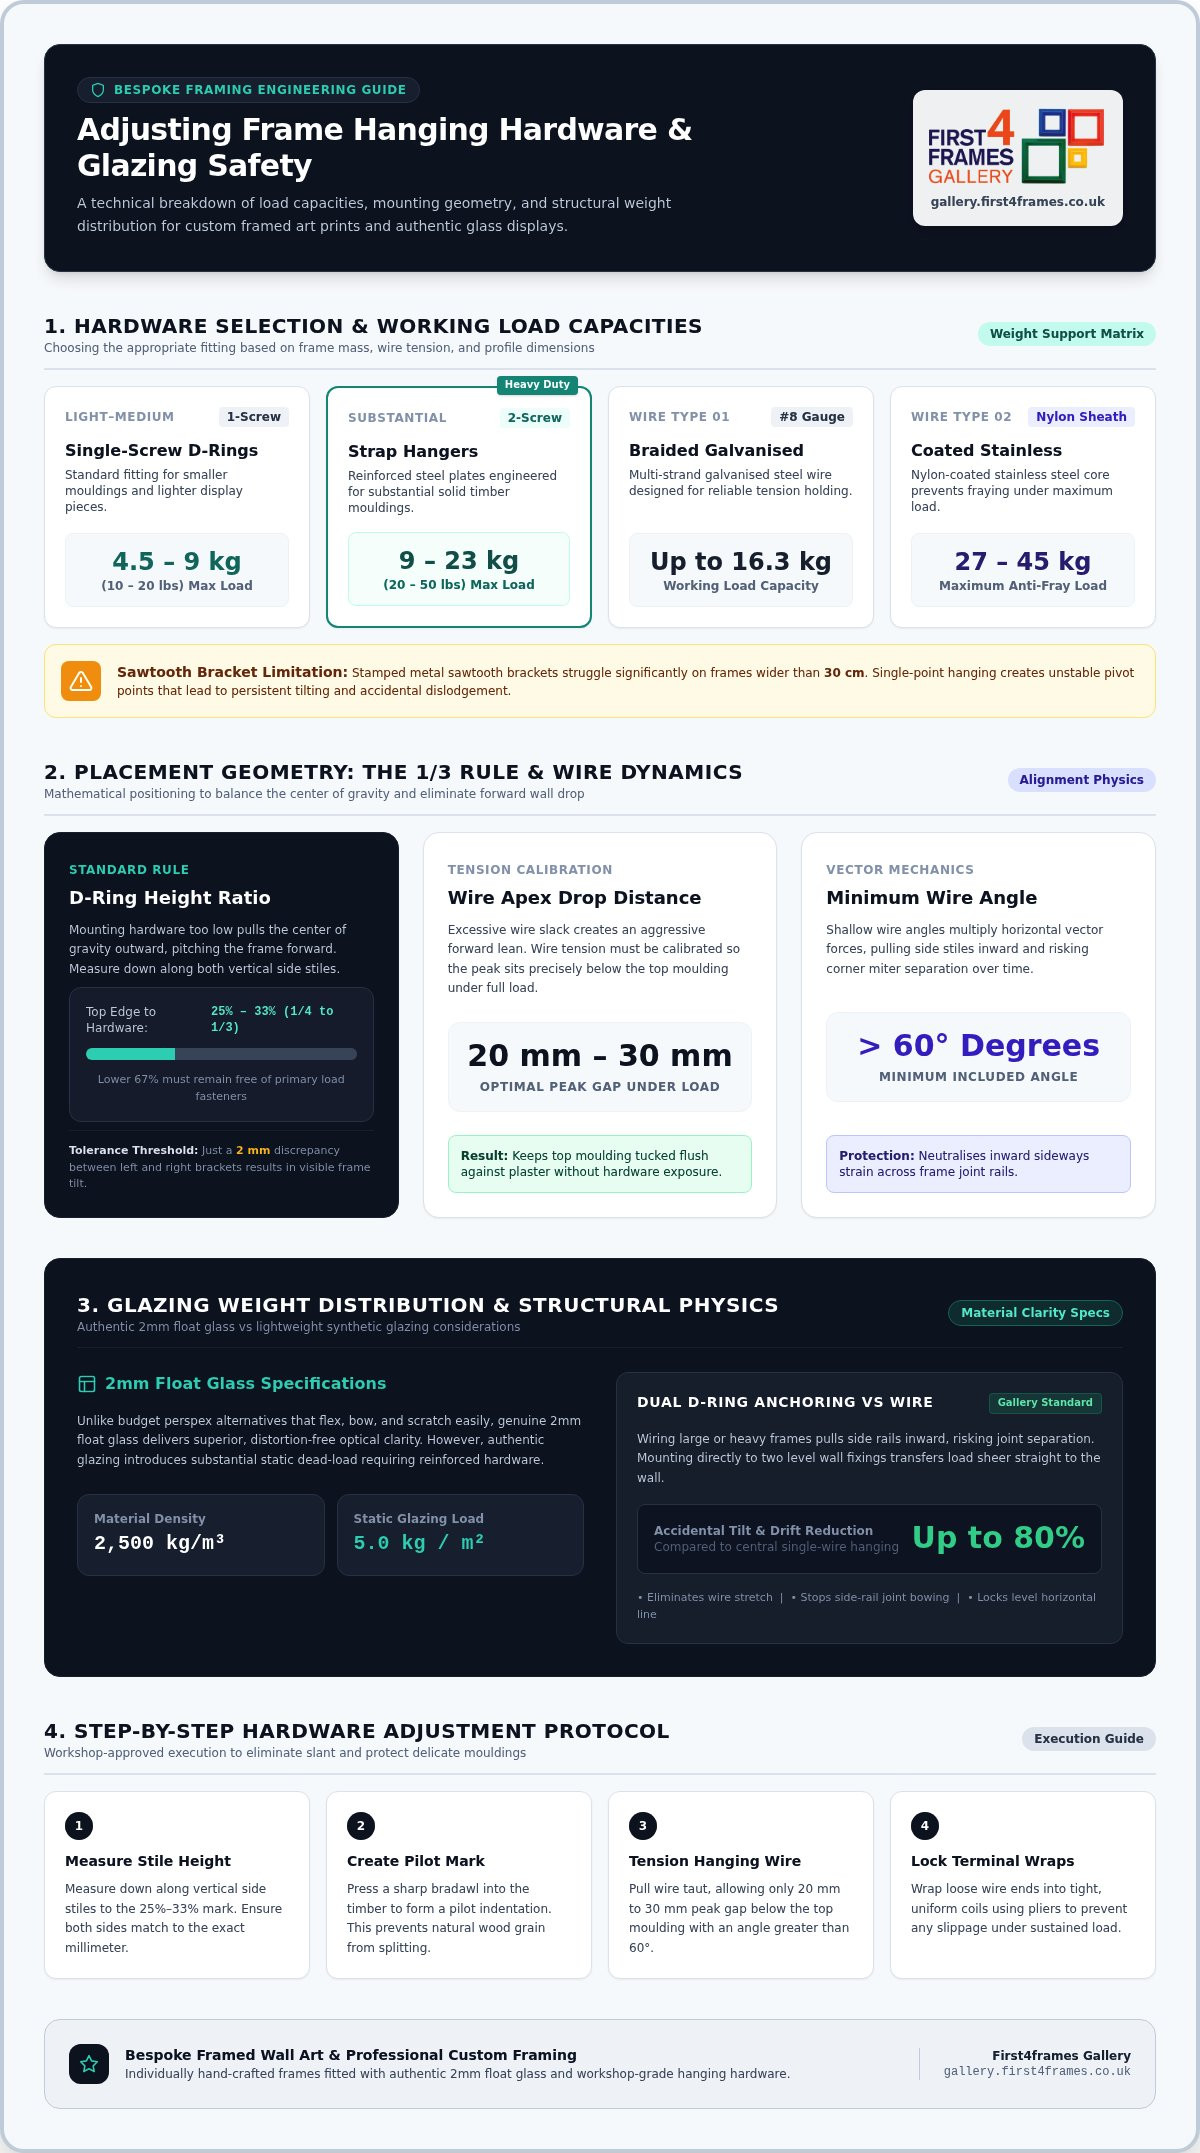
- Single-screw D-rings: Rated for small to medium pieces weighing up to 4.5-9 kg (10-20 lbs).
- Two-screw heavy-duty strap hangers: Ideal for substantial wooden mouldings, safely bearing 9-23 kg (20-50 lbs).
- Braided vs. plastic-coated steel wire: Braided galvanised wire supports working loads up to 16.3 kg (#8 gauge), while nylon-coated stainless steel supports 27-45 kg without fraying.
- Sawtooth brackets: Stamped metal brackets struggle on pieces wider than 30 cm, as single-point hanging causes unstable pivot points.
Why Flimsy Factory Hardware Causes Hanging Problems
Budget off-the-shelf mouldings often rely on pressed tin loops or tiny nails tapped into soft composite backing. Over time, downward tension forces these weak fasteners loose, risking wall gouges or catastrophic falls. Misaligned factory brackets also guarantee persistent tilting, as even a two-millimetre height discrepancy produces a noticeably crooked picture. For lasting stability, adjusting the hanging hardware on a frame by replacing flimsy factory fixings with solid, screw-anchored steel D-rings is essential.
Step-by-Step Guide to Adjusting the Hanging Hardware on a Frame
When adjusting the hanging hardware on a frame, you don’t need a full carpentry workshop. A steel tape measure, a sharp bradawl, and a precision screwdriver are plenty. Most hanging frustrations come down to uneven anchor points or excessive wire slack rather than poor wall fixings. By adjusting the hanging hardware on a frame directly, you can restore perfect alignment without drilling unnecessary holes in your plaster.
Repositioning D-Rings to Eliminate Slanted Artwork
Measure down along both vertical side stiles, placing your D-rings between one-quarter and one-third (25% to 33%) of the distance from the top edge. Hardware placed lower pulls the centre of gravity outwards, creating an unsightly forward drop. Once your marks match to the nearest millimetre, press a bradawl into the timber to form a pilot indentation. This simple step prevents the wood grain from splitting as you drive the screws home securely.
Shortening and Tensioning Hanging Wire to Stop Forward Tilt
Loose hanging wire is the main reason framed pictures lean away from the wall. To correct this issue:
- Unwind the terminal wraps carefully without kinking the inner steel strands.
- Pull the wire taut, leaving just enough slack so the peak sits 20 mm to 30 mm below the top moulding under tension.
- Maintain an included wire angle greater than 60 degrees to prevent inward sideways strain on the frame rails.
- Secure the loose ends with tight, uniform wraps using pliers so the wire cannot slip under load.
If you prefer ready-balanced artwork without the workshop tinkering, browse our curated bespoke framed wall art collection for pieces crafted to hang flush right out of the box.

Securing Heavy Frames: Weight Distribution and Glazing Safety
Solid timber mouldings and archival backing create significant structural mass, especially when paired with authentic glazing. Unlike budget perspex that flexes and scratches easily, premium 2mm float glass delivers distortion-free optical clarity. However, with a density of 2,500 kg/m³ (5.0 kg per square metre), real glass adds considerable static load. When adjusting the hanging hardware on a frame carrying genuine glass, proper weight distribution becomes non-negotiable.
Hanging Directly from D-Rings Versus Using Cross Wires
Wiring wide or heavy frames pulls the side rails inward, risking joint separation over time. Gallery testing shows mounting directly onto two level wall fixings via D-rings reduces accidental drift and tilt by up to 80% compared to a single central wire loop. By resting the frame directly onto two wall anchors, you eliminate wire stretch and keep the load sheer against the wall. For comprehensive display guidance, explore our expert insights on custom picture framing to safeguard your display.
Protecting Float Glass and Frame Mouldings During Adjustments
Never carry out hardware adjustments while a frame rests on a bare floor or hard table. Place a soft, folded woollen blanket on your workbench before laying the frame face down. This cushions the moulding profile and relieves uneven pressure points that could otherwise fracture the 2mm float glass. Double-check screw lengths before adjusting the hanging hardware on a frame to ensure fasteners never penetrate through to the front rebate.
Ready to upgrade your home with professionally mounted art? Explore our bespoke framed art collection to find pieces balanced and fitted for effortless hanging.
Eliminate Hanging Headaches with Professional Ready-to-Hang Framing
While mastering DIY adjustments solves immediate problems, true display perfection begins at the craft bench. Cheap, mass-produced store frames rely on standard dimensions and flimsy stamped brackets that often pull away from soft synthetic mouldings. In contrast, choosing hand-made bespoke framed wall art ensures your display arrives precisely weighted, balanced, and ready to hang on your wall immediately. You skip the delicate hassle of adjusting the hanging hardware on a frame entirely.
Why Bespoke Custom Framing Offers Superior Balance and Longevity
Every bespoke piece from First4Frames Gallery is individually crafted to order in our Falkirk workshop. Rather than relying on generic fixings, we calculate the exact centre of gravity for each piece, fitting heavy-duty D-rings paired with crystal-clear 2mm float glass. Reinforced timber corner joints prevent bowing, whilst multi-layer bespoke packaging ensures professional UK couriers deliver your finished artwork completely pristine and ready for mounting.
Design Your Display Online with Digital Wall Visualisers
Curating your home gallery should feel inspiring, not intimidating. Through modern online picture framing tools, you can:
- Use an interactive wall art visualiser to visualise art on your wall before ordering.
- See artwork before you buy to verify scale, frame widths, and mount colours.
- Choose your frame online and design your framed artwork alongside fine art photography prints or contemporary art prints.
- Select custom framed art prints celebrating coastal wall art, landscape wall art, and evocative Scottish landscape art from famous artists and best-selling artists.
Whether you require a full art print framing service, want to upload personal digital pictures through our print and frame workflow, or need custom dimensions, professional framing bypasses tricky hardware woes. Explore our curated selection of bespoke ready-to-hang art to display your collection with effortless confidence.
Transform Your Walls with Perfectly Balanced Framed Art
Taking time to get your fittings right transforms how your collection looks in your home. By mastering adjusting the hanging hardware on a frame, you’ll correct forward tilt, balance wire tension, and safely anchor heavy timber mouldings. Whether you reposition D-rings or switch to direct dual-point wall fixings, precision alignment keeps your favourite pieces hanging level and flush.
If you want to avoid workshop guesswork entirely, choosing expertly hand-crafted framing makes all the difference. Every bespoke frame from our Falkirk workshop is built to order with individually fitted hardware and glazed with crystal-clear 2mm float glass rather than cheap perspex. Arriving in multi-layer protective packaging via professional UK couriers, your artwork is ready to mount with total confidence. Find perfectly balanced, ready-to-hang framed art today and give your living space the striking display it deserves.
Frequently Asked Questions
How do I stop a picture frame from tilting forward from the wall?
Shorten your picture hanging wire and reposition your mounting hardware higher up the frame rails. When wire has too much slack or D-rings sit below the upper third, gravity pulls the top forward. Tighten the steel wire so it deflects only 20 mm to 30 mm beneath the top moulding, or mount directly to hooks. Adding small felt pads to the lower corners also keeps the frame perfectly flush.
Where should D-rings be placed on the back of a picture frame?
Position D-rings precisely one-quarter to one-third of the total frame height down from the top edge. Measuring along both side stiles within this range creates an ideal centre of gravity. If placed too low, the artwork tilts away from the wall; placed too high, the hanging hooks become visible. For flawless balance, measure accurately to the millimetre before adjusting the hanging hardware on a frame.
Can you adjust hardware on a frame without removing it from the wall?
No, you should always take the frame down from the wall before attempting hardware adjustments. Trying to tighten screws or reposition brackets while the piece is suspended risks gouging your plaster or dropping the frame. Lay the piece face down on a soft, padded blanket instead. This workshop precaution protects delicate mouldings and authentic glazing, such as 2mm float glass, from unexpected pressure cracks or scratches.
Why is my picture frame still crooked when the wall hooks are level?
A crooked frame despite level wall fixings almost always indicates misaligned brackets or uneven wire knots on the frame itself. Even a two-millimetre discrepancy between left and right D-rings produces a noticeable tilt. When adjusting the hanging hardware on a frame, use a steel ruler to ensure both fittings sit at identical heights from the top edge, and verify that the hanging wire hasn’t slipped on one side.
Is it better to hang a heavy frame using picture wire or D-rings directly?
Direct hanging from two D-rings is far superior and safer for heavy or oversized frames. Stringing heavy glass-glazed artwork with wire exerts intense inward tension on side rails, which can pull timber corner joints apart over time. Resting D-rings directly onto two level wall anchors distributes static weight evenly, prevents wire stretch, and reduces accidental tilting by up to 80% compared to single-point hanging.