Posted on

Can I Change the Mount on an Existing Frame? A Complete Guide to Refreshing Your Art

Can I Change the Mount on an Existing Frame? A Complete Guide to Refreshing Your Art

What if the only thing standing between your favorite Giclée print and a gallery-worthy display is a single piece of yellowing card? Many art lovers look at a beloved piece of Scottish landscape art and ask, can I change the mount on an existing frame without causing permanent damage? It’s a valid concern when you want to modernize your decor or protect valuable photography prints from the “acid burn” caused by cheap, factory-standard materials.

We agree that your artwork deserves a presentation that matches its quality. Refreshing a mount is a great way to breathe new life into your collection while ensuring its safety. This guide will teach you how to safely disassemble your display, clean your 2mm float glass for perfect clarity, and select professional-grade mountboards. We’ll walk you through precise measuring techniques and explain when it’s best to call a professional framer in Falkirk for a bespoke touch. You’ll also learn how to use our online picture framing tools to visualise art on your wall before you buy any new components.

Key Takeaways

  • Discover that you definitely can I change the mount on an existing frame to upgrade from acidic factory mats to conservation-grade materials that prevent long-term damage.
  • Master the professional measurement process by calculating the internal rebate of your frame and ensuring a 3-5mm overlap to secure your artwork perfectly.
  • Learn why choosing 2mm float glass over standard perspex provides the superior clarity and protection your fine art or photography prints deserve.
  • Understand when to use an online picture framing tool to design your framed artwork or when to visit our Falkirk workshop for complex bespoke needs.

Understanding the Basics: Can You (and Should You) Replace a Picture Mount?

Refreshing your artwork often starts with a simple question: can I change the mount on an existing frame? The answer is a resounding yes. As long as your frame has enough depth to accommodate the new board, you can easily swap out old components. Many people choose to do this when updating their home decor or when they notice their picture framing mats have started to fade. It’s an excellent way to breathe new life into a piece without the cost of a completely new frame.

While it’s possible to do this yourself, there’s a significant difference between mass-produced mats and professional alternatives. Standard shop-bought frames often use acidic wood-pulp boards that can cause “acid burn” on your art. Upgrading to custom picture framing components ensures your Giclée prints or Scottish landscape art stay protected. Unlike cheap alternatives, our hand-made mounts are individually crafted to fit your artwork perfectly, providing a superior aesthetic and long-term preservation.

To better understand how to refresh your art using existing frames, watch this helpful video:

Signs Your Current Mount Needs an Upgrade

Your art might be trying to tell you it’s time for a change. If you are wondering can I change the mount on an existing frame, look for these warning signs first:

  • Discolouration: Brown spots or “foxing” suggest acid damage from low-quality materials.
  • Faded Tones: If the colours no longer complement your contemporary art prints, the board has likely lost its vibrancy.
  • Structural Sagging: When a mount loses its rigidity, it fails to keep the art flat against the 2mm float glass.

The Aesthetic Impact of a New Mount

A new mount does more than protect; it transforms. Moving from a single to a double mount creates a sophisticated shadow line that adds depth. By using an online picture framing tool, you can adopt a “see artwork before you buy” approach. This helps you choose a colour that highlights specific details in your photography prints, making the image truly pop against the wall.

Measuring and Choosing Your New Mount Like a Professional

Precision is the hallmark of a great artisan. If you’ve asked can I change the mount on an existing frame, the success of your project relies on accurate measurements. Start by measuring the internal “rebate” of your frame. This is the recessed area where the 2mm float glass and backing board rest. Next, measure your artwork itself. You should allow for a 3mm to 5mm overlap on all four sides. This ensures the mount window secures the print without showing any unprinted edges. This level of detail is why bespoke framed wall art always outperforms mass-produced alternatives.

While understanding standard photo & picture sizes helps as a baseline, bespoke cutting is always superior. It prevents the artwork from shifting or buckling over time. Once you have these figures, subtract the aperture size from the rebate size and divide by two to find your border widths. This step guarantees your art is perfectly centred within the display. Knowing you can change the mount on an existing frame gives you the creative freedom to customise every detail of your display.

Selecting the Right Colour and Texture

A new mount is a chance to elevate your aesthetic. Choose a colour that complements the subtle highlights in your fine art prints rather than the dominant shade. For dramatic coastal wall art, a bold or deep-toned mount can create a striking focal point. If you’re unsure, neutral off-whites are timeless choices. You can explore our curated gallery to see how different mount pairings influence the final look of a piece.

The Importance of Conservation-Grade Materials

Quality materials are non-negotiable for protecting your investment. We recommend following the Library of Congress preservation matting guidelines by selecting acid-free, PH-neutral mountboard. Unlike cheap alternatives that off-gas and cause yellowing, professional boards maintain the fidelity of Giclée prints for decades. This level of care ensures your contemporary art prints remain as vibrant as the day they were first framed.


Step-by-Step Guide: How to Safely Change the Mount

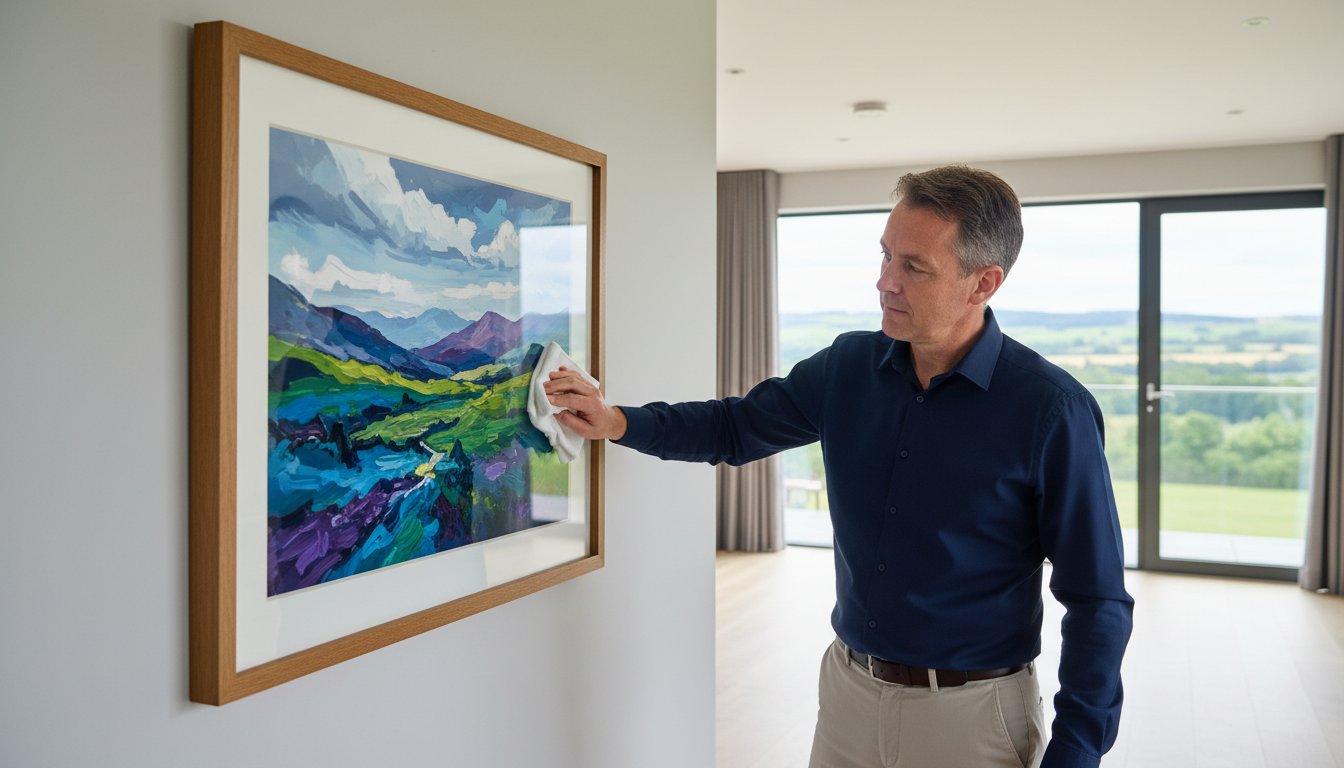
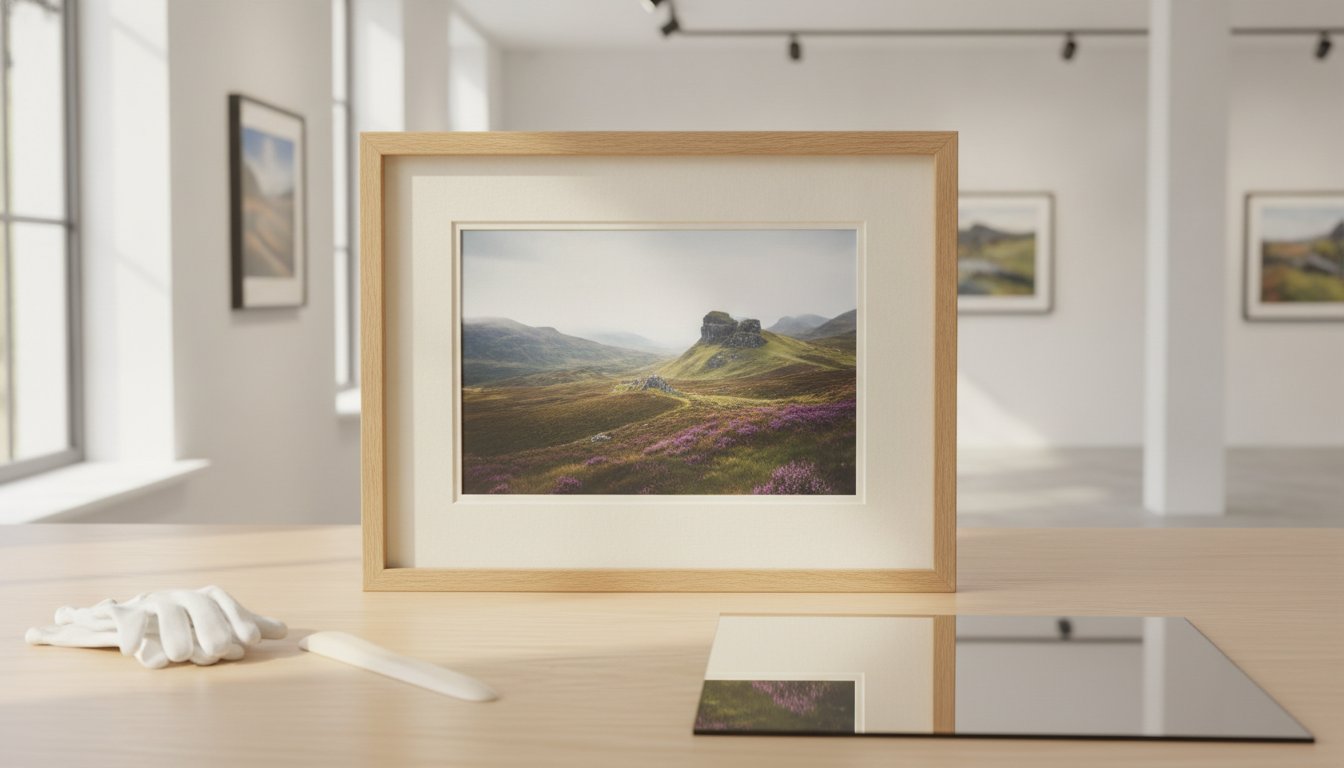
To successfully answer can I change the mount on an existing frame, you need a methodical approach and a clinical workspace. Begin by gathering your tools: pliers, archival tape, and a high-quality glass cleaner. Lay the frame face down on a soft surface. Carefully remove the backing board by lifting the flexipoints or staples. As you do this, take note of how the 2mm float glass is positioned. Unlike the cheap, static-prone perspex often found in high-street frames, this professional glass offers superior clarity for your photography prints.

Clean the glass thoroughly on both sides before reinserting it. When you’re ready to attach the artwork to your new mount, use the “hinge” method. This involves applying archival-safe tape only to the top edge of the print. It allows the paper to expand and contract naturally, which is vital for preserving bespoke framed wall art. This technique ensures your art remains flat and tension-free inside its housing.

Handling Glass and Artwork with Care

Safety is paramount when working with sharp components. Use pliers to remove old staples or flexipoints to avoid scratching the frame or yourself. When handling Giclée fine art prints, we strongly recommend wearing white cotton gloves. This prevents natural skin oils from leaving permanent fingerprints on the delicate surface of your contemporary art prints or fine art collections.

Reassembling and Sealing the Frame

Before closing the frame, ensure the environment is entirely dust-free. Any speck trapped behind the glass will be magnified. Following the Canadian Conservation Institute’s framing recommendations, verify that your frame rebate is deep enough for the new mount sandwich. Finally, seal the back with framing tape. This professional finish prevents moisture and insects from damaging your Scottish landscape art. If you’d prefer a fresh start, you can choose your frame online and let us handle the precision work for you.

When to Choose Bespoke Framing Over a DIY Mount Swap

While asking can I change the mount on an existing frame is a fantastic starting point for a refresh, a simple swap isn’t always the best solution. If your current frame is warped or the glass is compromised, a DIY fix may fail to protect your art. By choosing our online picture framing service, you can design your framed artwork from scratch. This is the ideal choice for works by best-selling artists and famous artists, where the precision of a hand-made frame is essential to maintain the piece’s value and aesthetic appeal.

Our professional art print framing service explicitly contrasts with mass-produced alternatives that use cheap, standard frames. We individually craft every order using high-quality materials, including 2mm float glass for superior clarity over standard perspex. For those looking to display their own digital memories, our print and frame service ensures your photography prints are produced to gallery standards before being housed in bespoke framed wall art.

Visualise Art on Your Wall Before You Buy

The uncertainty of DIY projects is removed when you use our wall art visualiser. This tool allows you to visualise art on your wall and choose your frame online with total confidence. Whether you are selecting custom framed art prints or contemporary art prints, the ability to see artwork before you buy ensures the final result harmonises perfectly with your room’s existing light and colour palette.

Bespoke Framed Wall Art for Commercial Spaces

For commercial clients across Scotland, professional curation is key to a polished environment. From coastal wall art to landscape wall art, we provide a complete solution that outshines simple DIY fixes. We ensure all finished pieces are fully packaged to prevent damage and dispatched via professional couriers. This reliable logistical process means your Scottish landscape art or fine art arrives ready to hang, providing a hassle-free transformation for any office or gallery space.

Give Your Art the Professional Display it Deserves

Refreshing your display is a rewarding way to modernise your home. If you’ve been wondering can I change the mount on an existing frame, you now have the tools to do so safely. By choosing conservation-grade materials and 2mm float glass, you protect your artwork from acid damage while enhancing its visual impact. Whether you’re upgrading a piece of Scottish landscape art or a contemporary Giclée print, quality components ensure your art remains vibrant for years to come.

If a simple mount swap feels like a compromise, our team is here to help. Every frame we create is individually crafted in our Falkirk workshop using premium materials that offer superior clarity over standard perspex. You can use our online picture framing tools to see artwork before you buy, ensuring a perfect match for your decor. We fully package every order for nationwide professional courier delivery. Design your bespoke framed artwork online today and let us help you create a lasting legacy for your collection.

Frequently Asked Questions

Will changing the mount damage my artwork?

Changing the mount won’t damage your art if you use conservation-grade materials. Always choose acid-free, PH-neutral mountboards to prevent yellowing. Use archival-safe tape for the “hinge” method rather than household adhesives. If you’re handling delicate Giclée fine art prints, we recommend wearing white cotton gloves. This prevents skin oils from leaving permanent marks on the surface of your contemporary art prints during the swap.

What is the best type of glass for a picture frame?

We always recommend 2mm float glass as the professional standard for glazing. It provides superior clarity compared to the cheap perspex used by many online competitors. Perspex often attracts static dust and flexes, which can touch the artwork. In contrast, 2mm float glass offers a stable, scratch-resistant surface that beautifully showcases the intricate details of Scottish landscape art and high-quality photography prints.

Can I cut a new picture mount at home?

While you can cut mounts at home, achieving a perfect 45-degree bevel is challenging without professional equipment. Hand-held cutters often produce ragged edges or visible over-cuts at the corners. If you’re wondering can I change the mount on an existing frame to get a gallery finish, ordering a bespoke, machine-cut mount is much safer. It ensures a crisp, clean border that complements your hand-made frame perfectly.

How much overlap should a mount have over the art?

The standard professional overlap is 3mm to 5mm on each side of the image. This small margin is essential for securing the print behind the mount window. It prevents the artwork from slipping out of place or showing white paper gaps around the edges. When you’re calculating measurements to see if can I change the mount on an existing frame, always include this overlap for a secure fit.

What is the difference between a mount and a mat?

These terms describe the same product. “Mount” is the preferred terminology in the UK, while “mat” is more common in the United States and Canada. Both refer to the decorative board that creates a window around your art and keeps it away from the glass. Whether you call it a mount or a mat, ensure it’s made from high-quality, acid-free materials to preserve your collection’s fidelity.
Posted on

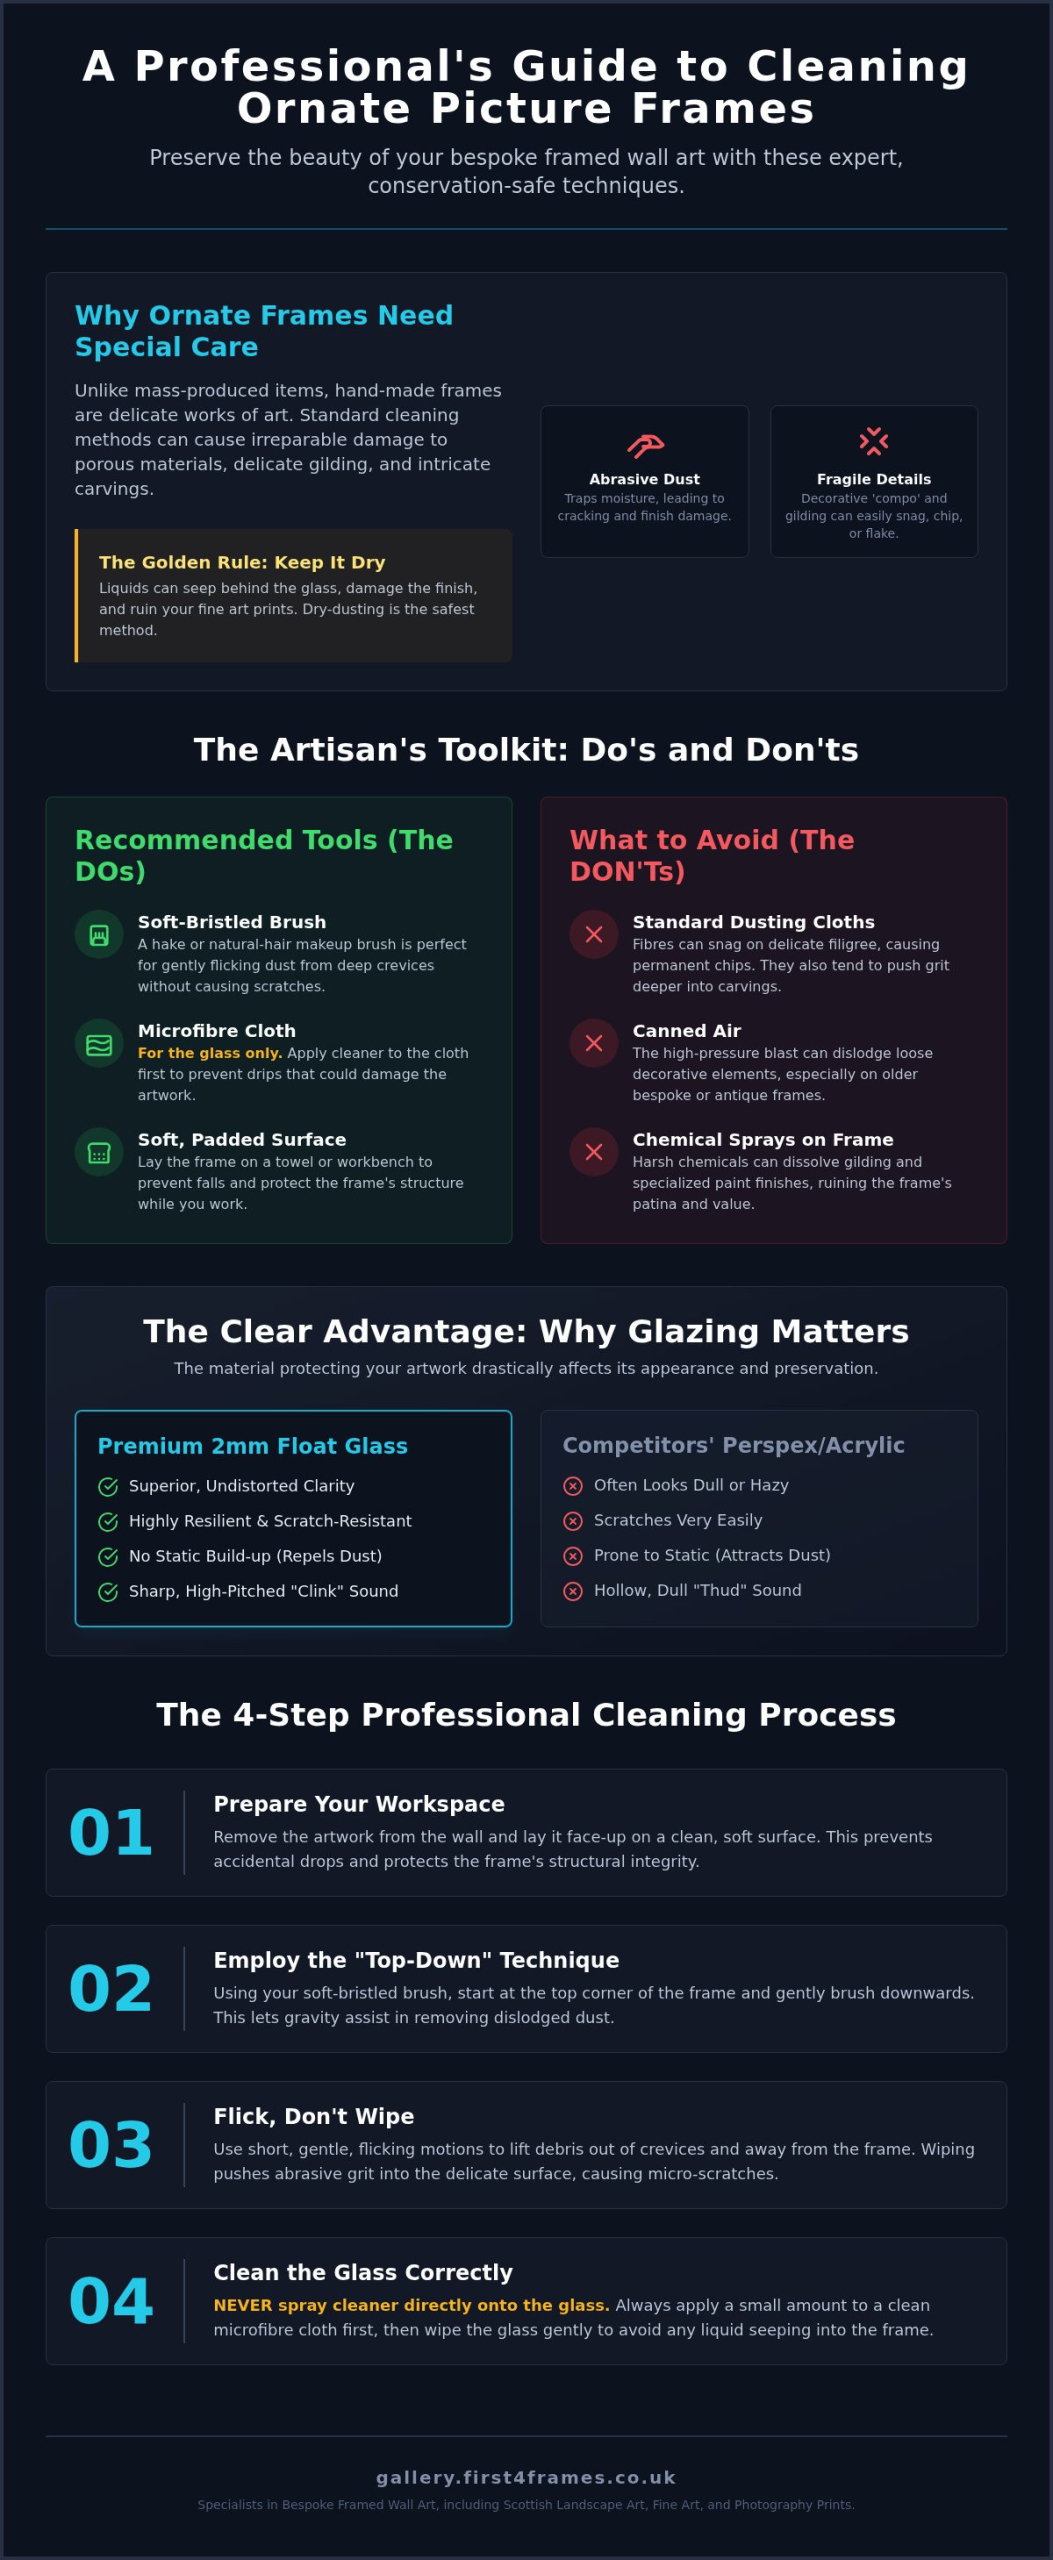
How to Clean Dust from Ornate Picture Frames Without Damaging Them

Your ornate picture frame is less of a border and more of a sculpture. Treating it like a common bookshelf is a recipe for heartbreak, especially when cleaning dust from ornate picture frames requires such a delicate touch. It’s frustrating to watch a grey film settle into those deep, hand-carved crevices. It’s even more terrifying to think about snagging a fragile decorative leaf or accidentally dissolving the gilding with the wrong chemical spray. You’ve invested in bespoke beauty, and you want to keep it that way.

We understand that a hand-made frame is a vital part of the creative process. This guide will teach you the professional techniques for safely removing debris, ensuring you can maintain that museum-quality glow without risking the integrity of the piece. You’ll learn which specialized tools the experts use and why high-quality components, like our signature 2mm float glass, provide the superior clarity and protection your Scottish landscape art or fine art prints deserve. We’ll walk you through a gentle, step-by-step process to restore the vibrancy of your home’s most precious displays with absolute confidence.

Key Takeaways

  • Learn why standard dusting cloths can damage delicate plaster mouldings and how to identify the porous materials often found in bespoke frames.
  • Discover the essential artisan toolkit for cleaning dust from ornate picture frames, including why soft-bristled brushes are safer than cloths and how 2mm float glass offers superior clarity over cheap perspex.
  • Master the professional “top-down” brushing technique to remove trapped debris from deep crevices without scratching the finish or redistributing dust.
  • Understand how premium materials and strategic placement away from heat sources protect your Scottish landscape art and fine art prints from long-term damage.

Why Ornate Frames Require a Specialized Cleaning Approach

Bespoke framed wall art represents a significant investment in your home’s aesthetic environment. Unlike cheap, mass-produced alternatives that use standard sizes and flimsy plastic, a hand-made frame is a unique piece of craftsmanship. Because of this, cleaning dust from ornate picture frames requires a gentle touch rooted in the principles of conservation and restoration of painting frames. Standard household cleaning methods can easily ruin these delicate structures.

To see the difference between routine maintenance and deep cleaning, watch this helpful guide:

Ornate mouldings often use “compo,” a blend of resin, oil, and plaster that is surprisingly porous. Standard household dust is actually quite abrasive under a microscope. When left to sit, it traps moisture against the frame’s finish, which eventually leads to unsightly cracking. It’s vital to remember the golden rule: keep it dry. Liquids can seep behind the 2mm float glass we use for superior clarity, potentially reaching and ruining your Giclée fine art prints. High-quality bespoke framing is actually easier to maintain long-term because the superior materials used are more resilient than flimsy, standard alternatives.

The Anatomy of an Ornate Frame

Most ornate frames feature delicate finishes like gold leaf, silver leaf, or specialized paints. These layers are incredibly thin. The deep, intricate crevices found in high-end Scottish landscape art or landscape wall art frames act as natural dust traps. If you use a standard cloth, you risk snagging these decorative elements or simply pushing the grit deeper into the detail. This is why a specialized approach is non-negotiable for preserving your fine art collection.

The Artisan Toolkit: What You Need for Delicate Dusting

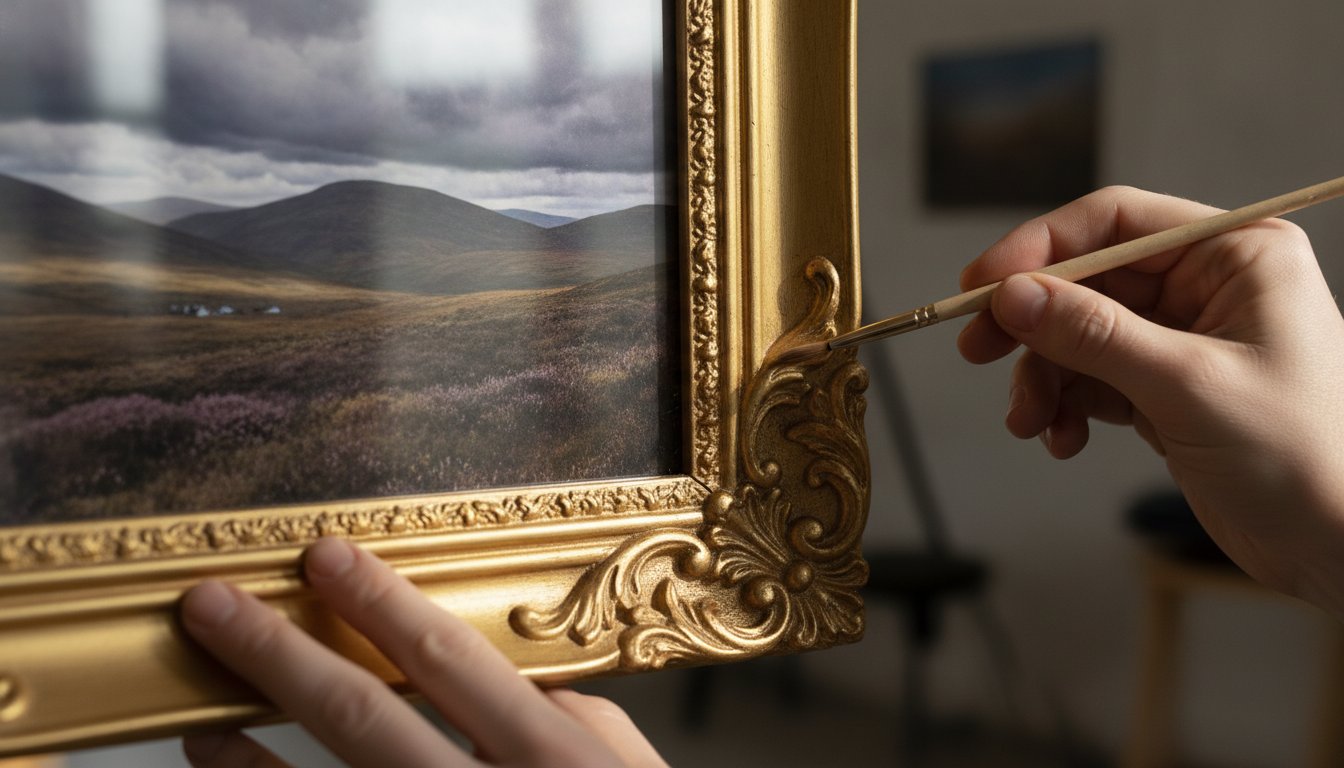
You wouldn’t use a scouring pad on a fine painting, so don’t use a standard household rag on your frame. For cleaning dust from ornate picture frames, the most important tool in your arsenal is a soft-bristled brush. A hake brush or a clean, natural-hair makeup brush allows you to reach into deep carvings without the friction that causes damage. Following expert guidance on caring for frames, we recommend “dry-brushing” to flick dust away rather than wiping it into the surface. This technique prevents abrasive grit from scratching the delicate finish of your investment.

Avoid using canned air. While it seems convenient, the high-pressure blast can dislodge loose decorative “compo” or gilding flakes on older, bespoke pieces. Keep your microfibre cloths strictly for the glazing. Using them on the frame itself often leads to snagging on delicate filigree, which can cause permanent chips in the ornate detail.

Why 2mm Float Glass Matters

The soul of a piece of bespoke framed wall art from First4Frames Gallery is its clarity. We exclusively use 2mm float glass because it offers a crisp, undistorted view that cheap perspex can’t match. Perspex often looks dull and is highly prone to static, which actually attracts more dust. To identify your glazing, gently tap the surface with a fingernail; glass has a sharp, high-pitched “clink,” whereas perspex sounds like a hollow, dull thud.

Glass requires specific care. While it’s more resilient than acrylic, you should still apply any glass cleaner to the cloth first, never directly to the surface. This prevents liquid from running down into the frame’s rebate where it could damage the artwork. Because our frames are individually crafted and fully packaged for professional couriers, you start with a pristine surface that stays vibrant for much longer than standard off-the-shelf options.

Step-by-Step: How to Clean Dust from Ornate Picture Frames

Before you begin cleaning dust from ornate picture frames, proper preparation is essential. Remove the artwork from the wall and lay it face-up on a clean, soft towel or a dedicated padded workbench. This prevents accidental drops and protects the structural integrity of the piece. Working while the frame is still hanging is risky; gravity often pulls loosened debris into the lower crevices where it becomes harder to remove. By placing the frame on a flat, stable surface, you can safely access every intricate angle of your bespoke framed wall art.

Use your soft brush to work from the top of the frame downwards. This ensures that any loosened particles fall onto uncleaned areas rather than settling back into finished sections. For deeper grime in contemporary art prints frames, a dry cotton swab is excellent for precision. As seen in this conservation case study, professional conservators utilize incredibly targeted methods to lift surface dirt without introducing harmful moisture. Use light, circular motions to coax the dust out of the intricate geometry without applying pressure.

Dealing with Stubborn Grime in Crevices

Gold and silver leaf finishes are exceptionally thin and fragile. Use a “dry-wipe” method with a clean, dry swab for these areas. Avoid even a hint of water or chemical cleaners, as they can cause the leaf to lift, flake, or tarnish. This meticulous level of care ensures that your investment in Scottish landscape art remains vibrant and protected for decades to come.

Cleaning the Glazing Safely

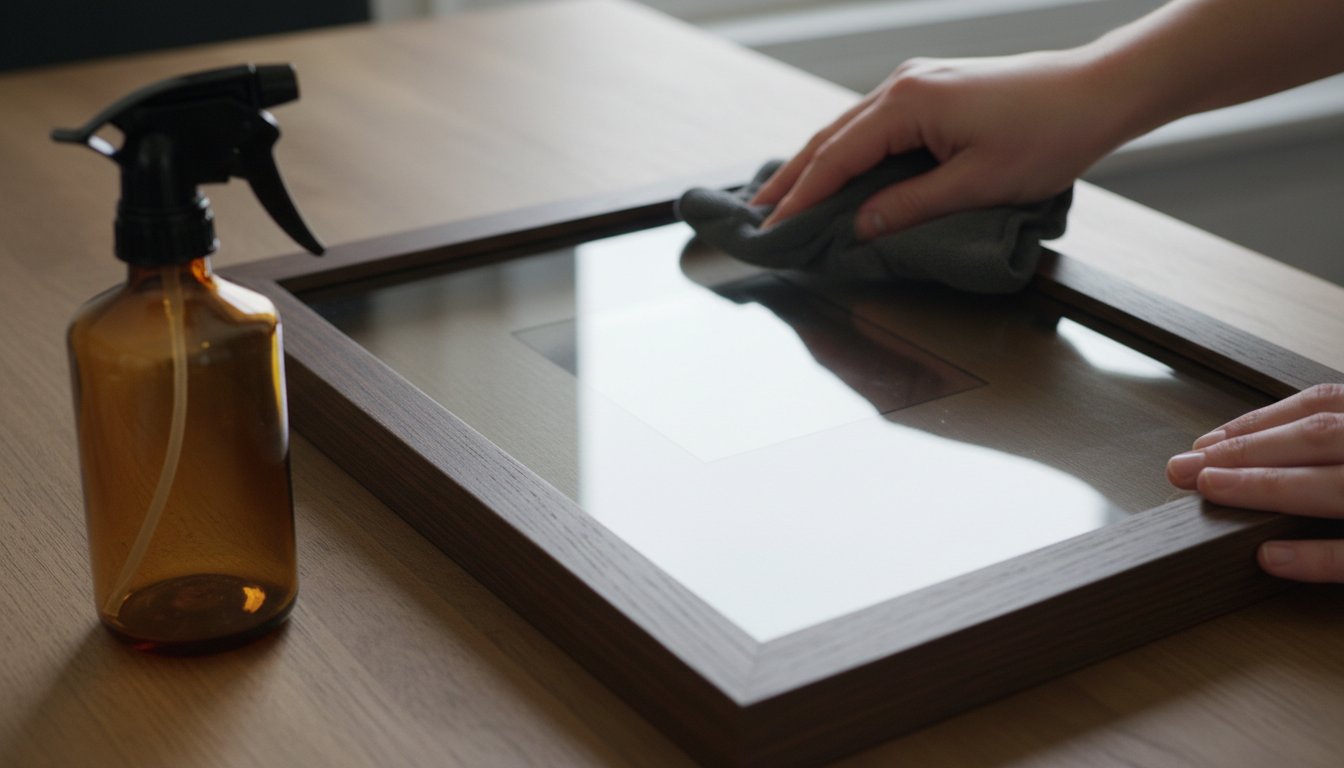
When maintaining the 2mm float glass on your custom framed art prints, never spray liquid directly onto the surface. This causes “wicking,” where the cleaner seeps under the frame’s lip and permanently stains the mount or the print itself. Dampen a microfibre cloth first, then wipe gently. If your current glazing lacks the clarity you desire, you can explore our photo printing and framing online service to upgrade to premium components.

Finally, adopt a wall art visualiser mindset. Move a bright light across the frame at different angles to check for missed spots or streaks. Once satisfied, your artwork is ready to return to its place of honor. To find your next masterpiece, choose your frame online from our extensive curated collection.

Preventing Dust and Preserving Your Bespoke Framing

Prevention is the best way to reduce the frequency of cleaning dust from ornate picture frames. Strategic placement is your first line of defense. Avoid hanging your Coastal wall art or Scottish landscape art directly above radiators or on damp exterior walls. Fluctuating heat causes wood to contract and expand, which leads to cracks in delicate plaster mouldings. Dampness can cause “blooming,” a cloudy white haze that develops under the glazing. For more expert advice on perfect placement, read The Ultimate Guide to Choosing and Displaying Art.

High-quality materials naturally resist the elements better than mass-produced alternatives. Bespoke framed wall art from a professional shop uses seasoned wood and 2mm float glass. This glass is superior to the cheap perspex used by many online competitors because it doesn’t carry a heavy static charge. Perspex acts like a magnet for airborne particles, whereas 2mm float glass stays clearer for longer. This ensures your photography prints and contemporary art prints maintain their museum-quality fidelity with minimal intervention.

Choosing Low-Maintenance Frames Online

When you use an online picture framing service, you can design your framed artwork to fit your specific lifestyle. If you prefer a lower-maintenance home, you might choose a frame with slightly shallower carvings. Our wall art visualiser allows you to see artwork before you buy. This tool helps you visualise art on your wall and decide if a particular ornate style balances beauty with your cleaning routine.

Sometimes, cleaning dust from ornate picture frames isn’t enough. If you notice the gilding is actively flaking or the underlying “compo” is crumbling, stop immediately. These are signs that the frame requires professional restoration rather than a simple clean. Preserving works by famous artists or best-selling artists requires knowing when to put the brush down to protect the artwork’s long-term value.

Protect Your Artistic Investment with Confidence

Maintaining the long-term vibrancy of your collection is a rewarding part of art ownership. By mastering the delicate process of cleaning dust from ornate picture frames, you ensure that the intricate details of your mouldings remain as sharp as the day they left our workshop. You now have the artisan knowledge to choose the right tools and care for your premium glazing without the risks associated with standard household cleaning or abrasive rags.

Every piece of bespoke framed wall art we create is individually hand-made in our UK workshop and shipped via professional courier with full protective packaging. We remain committed to using 2mm float glass for superior clarity, ensuring your Scottish landscape art or contemporary art prints look their absolute best. Design your own bespoke framed artwork today with First4Frames Gallery and enjoy the peace of mind that comes with professional-grade materials. Your home is a gallery; let’s keep it shining.

Frequently Asked Questions

Can I use a vacuum cleaner with a brush attachment on my ornate frame?

Avoid using a vacuum cleaner on your bespoke frames. The powerful suction can easily dislodge fragile decorative elements or loose flakes of gilding. Even with a soft brush attachment, the mechanical pressure is often too aggressive for hand-made mouldings. Stick to the dry-brushing technique using a hake brush. This ensures you are cleaning dust from ornate picture frames safely without risking structural damage to the intricate carvings.

What is the best way to clean the glass on a bespoke framed art print?

Use a clean microfibre cloth and a high-quality glass cleaner. Always spray the liquid onto the cloth rather than the surface to prevent moisture from seeping into the frame rebate. Our frames feature 2mm float glass, which provides superior clarity compared to the dull perspex used by many competitors. This premium glazing is more resilient to static, helping your custom framed art prints stay vibrant and dust-free for longer.

How do I know if my frame is too delicate to clean at home?

Inspect the surface for active flaking, deep cracks, or crumbling plaster before you begin. If the decorative “compo” feels loose or if the frame joints seem unstable, it is best to consult a professional. Cleaning dust from ornate picture frames that are already failing can accelerate the damage. We recommend a cautious approach for historic pieces to preserve the long-term value of your Scottish landscape art and fine art prints.

Will water damage the gold finish on my picture frame?

Yes, water is a major threat to traditional gold and silver leaf finishes. These materials are often applied using water-based size, meaning moisture can literally dissolve the bond and cause the leaf to lift. Dampness also leads to tarnishing and unsightly spots on the metal surface. Always use a dry brush for the mouldings. This preserves the hand-made quality of your bespoke framed wall art without introducing harmful liquids.

How often should I dust my framed wall art to prevent buildup?

Aim for a light dusting every two to four weeks to prevent heavy accumulation. Frequent maintenance is much safer than an annual deep clean because it prevents abrasive grit from bonding with the frame’s finish. If you have positioned your art prints away from radiators or damp walls, the buildup will be significantly slower. Regular care ensures your photography prints and contemporary art prints remain a stunning focal point in your home.

Posted on

How to Care for Framed Artwork: The Expert Gallery Guide to Longevity

Last week, a collector at the First4frames gallery discovered a small ripple in their favorite landscape print, a common worry when a radiator is placed too close to a bespoke frame. You’ve likely felt that same flash of concern when the afternoon sun hits your wall, wondering how to care for framed artwork without accidentally causing damage with the wrong cleaning spray. It’s natural to want to protect the fine art prints that serve as the bridge between your room decor and your personal style.

We’ve spent over 20 years helping people preserve their treasures, earning a 5-star reputation for our professional framing service and craftsmanship. This guide shares the expert secrets to maintaining your prints and frames for a lifetime of enjoyment. You’ll walk away with a clear cleaning routine, the confidence to choose the perfect hanging spot, and the knowledge of when to bring a piece back to our workshop for professional attention. We’re here to ensure your journey of artistic discovery stays as vibrant as the day it began.

Key Takeaways

  • Discover how to identify and manage environmental “danger zones” in your home to protect your fine art prints from fading and UV damage.
  • Learn the professional “less is more” cleaning philosophy to safely maintain your bespoke frames and delicate artwork without the risk of moisture damage.
  • Understand the vital role of conservation framing and how First4Frames uses acid-free mounts to prevent “mount burn” and long-term deterioration.
  • Master the expert secrets of how to care for framed artwork to ensure the spectacular colours of artists like Jolomo and Jack Vettriano remain vibrant for a lifetime.
  • Explore why professional framing acts as a protective bridge between your décor and your art, safeguarding both its emotional resonance and financial value.

Why Caring for Your Framed Artwork Matters for Longevity

Owning a piece from the First4Frames Gallery isn’t just about filling a gap on your wall. It’s about preserving a story and a specific moment in time. Whether it’s a vibrant, limited-edition landscape by one of our featured artists or a cherished personal photograph, understanding how to care for framed artwork ensures these treasures remain spectacular for generations. A frame isn’t just a border; it’s the bridge between your room décor and the artwork. It does the heavy lifting in the relationship, pulling the viewer into the picture while providing a necessary barrier against the harsh elements of a typical home environment.

Neglect leads to irreversible damage that can devalue your collection both emotionally and financially. Issues like foxing, which appears as unsightly brown spots caused by fungal growth, or acid burn from low-quality mounting materials can ruin a piece in less than 10 years. At First4Frames, our commitment to quality is a point of pride. This dedication is reflected in our 5-star customer reviews across major platforms, where clients frequently highlight our expertise and the lasting durability of our work. For those wanting to understand the complex science behind preservation, the Conservation and restoration of paintings offers a comprehensive look at how professionals maintain artistic integrity over centuries.

To better understand the fundamentals of keeping your art in top condition, watch this helpful video:

Protecting Your Artistic Investment

Giclée prints are the heart of the First4Frames Gallery collection. These prints offer incredible colour depth and detail, but they require specific care to maintain their brilliance. Unlike standard digital prints, Giclée uses pigment-based inks that are designed to be lightfast. However, they still need protection from direct UV exposure to prevent gradual fading. Our professional framing service provides a level of security that off-the-shelf options simply can’t match. While a cheap, mass-produced frame might look fine initially, our bespoke solutions use archival-grade, acid-free materials. When you treat your art with this level of professional respect, a well-cared-for piece should last between 75 and 100 years without any noticeable loss in quality.

The Frame as a Protective Shield

A frame serves a vital structural role beyond its aesthetic appeal. It prevents paper warping, often called cockling, which happens when paper fibres expand and contract due to changes in room humidity. Our print-and-frame service ensures every piece is fitted with a precision-cut mount. This isn’t just for visual breathing room. The mount creates a necessary 2mm air gap between the artwork and the glazing. Without this gap, condensation can trap moisture directly against the print surface, leading to mould or the ink sticking to the glass. Additionally, we use a sealed backboard system. This keeps out dust and tiny insects, such as silverfish, which are known to cause significant damage to paper-based art in just a few months if left unchecked.

Managing Environmental Factors: Light, Heat, and Humidity

The First4frames gallery features spectacular works from talented artists that are designed to be the centerpiece of your home. To keep these pieces looking as fresh as the day they left our workshop, you need to understand the unique “danger zones” found in many British houses. From drafty Victorian hallways to modern kitchens with high humidity, every room has its own microclimate. Learning how to care for framed artwork starts with identifying these environmental threats before they cause lasting damage.

We’ve spent over 20 years perfecting our craft, and our high customer ratings reflect our commitment to quality. We treat every piece as a bridge between your room décor and the artist’s vision. To maintain that bridge, you must control the three big variables: light, temperature, and moisture. These factors don’t just affect the surface; they can alter the structural integrity of the paper and the frame itself.

Shielding Prints from UV Light and Fading

UV light is the primary enemy of vibrant colours. It triggers a chemical reaction in the ink and paper, leading to irreversible bleaching. You shouldn’t hang art directly opposite a south-facing window, as this exposure can cause noticeable fading in as little as 24 months. According to the preventive conservation guidelines, light damage is cumulative and cannot be reversed once it occurs.

Our bespoke framing service addresses this by offering premium UV-protective glass. This specialized glazing filters out up to 99% of harmful rays, acting like a high-factor sunblock for your art. Be careful with artificial lighting too. Halogen bulbs are notorious “hotspots” that emit both heat and UV. We recommend switching to LED bulbs, which stay cool and provide a safe, beautiful glow for your collection. You can explore our latest arrivals and see how professional glazing enhances clarity on our online gallery.

Balancing Temperature in the British Home

Temperature fluctuations cause organic materials like paper and wood to “breathe.” When a room gets warm, the paper fibers expand; when it cools, they contract. Over time, this constant movement leads to “cockling,” which is that unsightly wavy appearance you sometimes see behind the glass. Following the “Radiator Rule” is essential: never hang artwork directly above a radiator or heat vent. The intense, dry heat can make the wooden frame shrink and the artwork become brittle.

External walls are another hidden risk because they often stay colder than the rest of the room. This temperature gap can cause moisture to condense inside the frame. To prevent this, we use small spacers or “bumpers” on the back of the frame. These create a 5mm gap that allows air to flow freely behind the piece. For high-risk areas like bathrooms or kitchens, our print-and-frame service often suggests using acrylic instead of glass. It’s more resistant to thermal shock and won’t trap condensation as easily as traditional glazing. This practical approach ensures your investment stays protected while looking perfect on your wall.

Practical Cleaning and Handling Techniques for Fine Art

Maintaining the pristine condition of your collection starts with understanding that how to care for framed artwork is as much about handling as it is about cleaning. At First4frames gallery, we’ve spent over 20 years perfecting the art of presentation. Before you touch a large piece, such as a 100cm wide landscape print, clear a flat, stable workspace. Laying the piece on a clean, soft towel prevents accidental scratches to the moulding. Always grip bespoke frames by the sides. Lifting from the top rail puts unnecessary stress on the joined corners, which can lead to structural failure over time.

Our expert team recommends a “less is more” philosophy. Dry cleaning is almost always superior to wet cleaning for fine art. Moisture is a primary enemy of paper-based art and can seep under the glazing to cause foxing or mould growth. We’ve earned our 4.9-star customer rating by ensuring every piece leaves our workshop in peak condition; keeping it that way requires a gentle touch and the right tools. Don’t rush the process, as most damage occurs during hasty cleaning sessions.

How to Clean Glazing Without Risking Damage

If your artwork features acrylic glazing, put away the paper towels. Paper is abrasive and creates microscopic scratches that dull the surface over time. Use a high-quality, clean microfibre cloth instead. Never spray glass cleaner directly onto the frame. Liquid can run down the glass and soak into the mount board, ruining the artwork. Spray a small amount of ammonia-free cleaner onto the cloth first. This protects the delicate bond between the frame and your fine art prints.

Safe Methods for Dusting Bespoke Frames

Intricate mouldings on gilt or painted frames require a delicate approach. A soft-bristled brush, like a 1-inch natural hair artist’s brush, is the best tool for removing dust from deep crevices. This prevents the buildup of grime that can become difficult to remove without damaging the finish. Check your hanging hardware every six months. Ensure that wires haven’t frayed and that D-rings remain tight. Our professional framing service uses premium steel components, but seasonal temperature shifts in UK homes can occasionally loosen screws.

Follow this simple seasonal maintenance checklist to ensure longevity:

  • Spring: Dust the top edge of the frame where debris accumulates during winter.
  • Summer: Check for any signs of insect ingress behind the glass or within the frame spacers.
  • Autumn: Inspect the backing tape for peeling or gaps that might let in moisture.
  • Winter: Verify that the artwork hasn’t been placed too close to active radiators or heat sources.

Learning how to care for framed artwork properly ensures that your investment remains a beautiful bridge between your room décor and the artist’s vision for decades. Whether you’re displaying a piece from our latest gallery collection or using our print-and-frame service for your own photography, these small steps preserve the spectacular quality of the work.

Understanding Conservation Framing Standards

Conservation framing is the gold standard we uphold at First4Frames. It’s the difference between a frame that merely looks good and one that preserves your investment for 75 years or more. When you’re learning how to care for framed artwork, understanding what happens inside the frame is vital. We treat every piece from our gallery with archival principles to prevent environmental decay and chemical damage. This professional approach ensures the frame acts as a protective cocoon for the art inside.

One critical element is the mounting process. We never use standard adhesive tapes or “pressure-sensitive” glues that can permanently bond to the paper. Instead, we utilize reversible hinging techniques. This allows the artwork to expand and contract naturally with temperature changes. If the art ever needs to be removed, these hinges can be safely detached without tearing the paper fibers or leaving sticky residues. We also offer various glazing options. While standard float glass is a common choice, we often recommend museum-grade acrylic for high-value pieces. This specialized glazing blocks 99% of harmful UV rays, preventing the colors in your favorite prints from fading over time.

Acid-Free Materials and pH Neutrality

The chemistry of your frame matters. Traditional wood-pulp paper contains lignin, an organic polymer that turns acidic over time. This leads to “mount burn,” which appears as unsightly brown stains on the edges of the artwork. Our bespoke framing service avoids this by using alkaline-buffered boards with a pH level of 8.5. These boards neutralize acidic gases and pollutants before they can reach the art. You can identify acid damage in older, non-professional frames by looking for yellowing paper or brittle edges. Our Falkirk workshop replaces these damaging materials with museum-quality alternatives to halt further deterioration.

The Professional Difference in Print-and-Frame Services

Our “one-stop-shop” model ensures your art is handled safely from the moment it’s printed. By combining Giclée printing with archival-quality framing, we guarantee a product that won’t fade or warp. Since we opened our doors in 2003, our Falkirk workshop has become a trusted choice for Scottish art lovers who demand excellence. We don’t just frame a picture; we build a bridge between your room décor and the artwork. Our 5-star customer ratings across review platforms reflect our dedication to this craft. When you choose a piece from our collection, you’re benefiting from twenty years of technical expertise and a genuine passion for fine art preservation.

Discover our latest collection of professionally preserved pieces and how to care for framed artwork in your own home.

Explore the First4Frames Gallery

At First4Frames, we believe a frame is more than just a border; it’s the vital bridge between your room décor and the artwork itself. Whether you’ve recently acquired a moody Jack Vettriano or a sun-drenched John Lowrie Morrison (Jolomo) piece from our Falkirk gallery, knowing how to care for framed artwork is the key to protecting your investment for decades. Our team has spent over twenty years perfecting the art of preservation, ensuring that every limited edition print remains as striking as the day it left our workshop.

Preserving the Vibrant Colours of Jolomo Prints

John Lowrie Morrison’s signature style relies on high-contrast, vibrant palettes that capture the raw energy of the Scottish Highlands. To keep these colours spectacular, we always recommend UV-protective glass. This specific barrier prevents bold pigments from fading when exposed to the changing Scottish light. We also focus on the “heavy lifting” for large-scale Jolomo works. This means using sturdy, high-quality wood frames that provide the structural integrity needed to prevent the paper from bowing or warping over time. Choosing a neutral or subtly complementary mount colour further enhances the landscape’s tones without distracting from the artist’s bold brushwork.

Why Professional Framing is the Best Insurance

While off-the-shelf options might seem convenient, professional framing is the only real insurance for your art. Our bespoke services are designed to pull you into the picture, using materials that actively protect the print’s texture and detail. This commitment to quality is why we maintain excellent customer ratings on major review platforms, where clients frequently praise our attention to detail and craftsmanship. If you have a cherished item at home, you can easily get a quote for our framing service to ensure it receives the same level of care as our gallery collections.

To keep your collection in peak condition, we recommend following these expert steps:

  • Monitor the environment: Avoid hanging vibrant Scottish landscapes directly opposite large, south-facing windows.
  • Check the seals: Every five to seven years, bring your artwork to our Falkirk gallery for a professional check-up to ensure no dust or moisture has breached the frame.
  • Trust the experts: For limited edition prints with delicate textures, only use our professional print-and-frame service to guarantee acid-free mounting.

We pride ourselves on being a one-stop-shop for art lovers. If you’re unsure about the current state of your display, don’t wait for visible damage to appear. Visit us in Falkirk for a consultation. We’ll help you understand how to care for framed artwork while ensuring your Jack Vettriano or Jolomo pieces continue to tell their story for generations to come. Our passion for fine art is matched only by our dedication to the craftsmanship that protects it.

Preserving the Beauty of Your First4Frames Collection

Your fine art collection deserves a home where it can thrive for decades. By managing light exposure and maintaining stable humidity, you ensure that every vibrant detail of your Scottish fine art prints remains as spectacular as the day you brought them home. Master the basics of how to care for framed artwork to prevent irreversible damage from environmental stressors. Choosing high-quality conservation materials is the best way to safeguard your investment for the long term.

At First4Frames, we’ve spent over 20 years providing bespoke framing expertise in Falkirk. Our team specializes in conservation standards that act as a protective bridge between your room’s decor and the delicate art itself. We’re proud of our excellent customer ratings on review platforms, which reflect our commitment to craftsmanship and professional service. Whether you’re selecting a new piece from the First4frames gallery or need a bespoke solution for a cherished heirloom, our artisans are ready to assist.

Browse our Ready-to-Hang Gallery or book a Bespoke Framing consultation today

Let your walls tell a story that lasts a lifetime with pieces that stay as bright and inspiring as your very first discovery.

Frequently Asked Questions

Can I hang my framed artwork in a bathroom?

You shouldn’t hang delicate paper artwork in a bathroom because humidity levels often spike above 70 percent. This moisture causes the paper to warp and can lead to mould growth within 48 hours. If you want to display a piece from our gallery in a humid space, choose our print-and-frame service with an acrylic glaze to provide better protection against damp conditions.

How do I clean the glass on my picture frame without streaks?

To clean frame glass without streaks, apply a small amount of ammonia-free cleaner directly to a microfibre cloth. Never spray liquid onto the glass because it can seep under the edges and ruin the artwork. First 4 Frames recommends using a 50/50 distilled water and white vinegar solution. This simple mixture ensures your Giclée prints remain crystal clear and visible.

Why is my artwork starting to ripple inside the frame?

Artwork ripples, a process called cockling, when it reacts to changes in temperature and humidity. When you learn how to care for framed artwork, you’ll find that a 10 percent shift in room moisture can cause paper fibers to expand. Our professional framing service uses conservation mounting techniques to allow the art to breathe, which prevents this permanent distortion from occurring.

What is the best way to dust a bespoke wooden frame?

The best way to clean a bespoke wooden frame is by using a soft, dry brush or a dedicated ostrich feather duster. Avoid all liquid polishes or damp cloths, as moisture can penetrate the wood grain and cause the finish to swell. Since we’ve spent 20 years crafting premium frames, we know that a gentle, dry touch preserves the wood’s natural beauty for decades.

How can I tell if my frame uses acid-free materials?

You can tell if materials are acid-free by checking for a conservation or museum grade stamp on the mounting board. These materials maintain a pH level between 7.5 and 9.5, which prevents the yellowing seen in older, cheaper frames. Every piece of art we frame for our customers uses these high-quality materials to ensure your investment stays in perfect condition.

Is it safe to hang art directly above a radiator?

It’s not safe to hang art directly above a radiator because the rising heat will quickly dry out the frame and the paper. Temperatures exceeding 25 degrees Celsius can cause wooden joints to shrink and separate by several millimetres. To protect your collection, keep a distance of at least 1 metre from any active heat source or direct sunlight.

How often should I check the hanging wires on my heavy frames?

You should check the hanging wires and wall fixings on heavy frames at least once every 12 months. Wires can fray over time, especially when supporting pieces over 5kg. Our 4.9-star customer rating is built on providing secure, professional-grade hardware, but annual inspections are essential for total peace of mind. Regular checks prevent accidental falls and glass breakage.

What should I do if I see small insects behind the glass?

If you spot small insects like 1mm thunderflies behind the glass, you must take the frame to a professional for cleaning and resealing. These pests crawl through tiny gaps in the backing tape and can leave permanent stains on your artwork. Our workshop team can safely dismantle the frame, remove the insects, and apply a fresh, airtight seal to protect your prints.

Posted on

What Are Giclée Prints? A Complete Guide to Fine Art Quality

Have you ever browsed for the perfect piece of art, only to be stopped by a word you’re not quite sure of: Giclée? It’s a common question-is it just a fancy marketing term for a poster, or is there a real difference in quality? When you’re investing in art for your home, you deserve to know that your chosen piece won’t fade and that its quality matches its beauty. True Giclée prints represent the pinnacle of fine art reproduction, a world away from a standard print in both their spectacular detail and their longevity.

As passionate artisans with a love for craftsmanship, we want to demystify the jargon and share our expertise with you. In this complete guide, we will embark on a journey into the technology and artistry behind Giclée. You’ll discover exactly what makes these prints so special, learn how to identify genuine fine art quality, and understand the simple steps to care for your artwork, ensuring it remains a cherished masterpiece for a lifetime. Let’s explore the beauty and brilliance of Giclée together.

Key Takeaways

  • Understand the crucial differences between a standard poster and a true fine art Giclée, from the archival inks to the premium paper it’s printed on.
  • Discover the meticulous process that gives Giclée prints their spectacular colour accuracy and detail, making them a worthwhile art investment.
  • Learn how to confidently identify high-quality Giclee Prints by asking the right questions and looking for specific signs of professional craftsmanship.
  • Protect your beautiful new artwork by learning the essential care and framing techniques that will preserve its vibrancy for decades to come.

What Exactly is a Giclée Print? Beyond the Buzzword

You’ve likely seen the term ‘Giclée’ when browsing for premium art, but what does it truly mean? In simple terms, a Giclée (pronounced zhee-KLAY) print is the highest quality art reproduction available today. The term itself comes from the French verb ‘gicler,’ meaning ‘to spray,’ which aptly describes how microscopic droplets of ink are applied to the paper with incredible precision. But to truly understand what is a Giclée print, we must look beyond the name to the meticulous process that creates a near-perfect, museum-quality copy of an original piece.

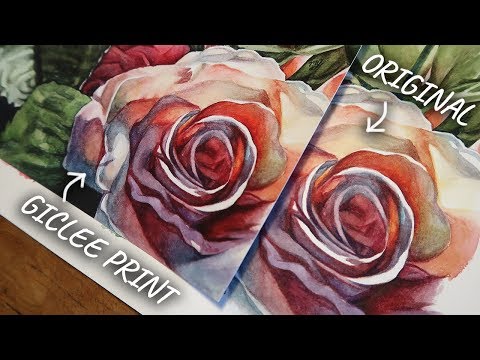
To see this process in more detail, this video offers a fantastic overview:

This sophisticated method is worlds away from a standard desktop inkjet print. While a home printer uses a few dye-based inks on basic paper, the Giclée process relies on a combination of superior technology and premium materials. This synergy is what gives Giclée prints their spectacular colour accuracy, detail, and impressive longevity.

The Three Pillars of Giclée Quality

True Giclée quality rests on three essential components working in perfect harmony:

  • The Printer: We use sophisticated, large-format printers that hold up to 12 different pigment ink cartridges. This allows for a much wider colour gamut, capturing subtle tones and hues that standard printers simply cannot replicate.
  • The Ink: Giclée printing uses archival-quality pigment-based inks, not standard dyes. These pigments are lightfast and designed to resist fading for over 100 years, ensuring your artwork remains as vibrant as the day it was printed.
  • The Paper: The foundation of the print is just as crucial. We use acid-free, archival certified fine art papers made from materials like 100% cotton rag. This premium substrate ensures the ink is absorbed perfectly and prevents the paper from yellowing over time.

Is Giclée Considered Fine Art?

Absolutely. The Giclée process has earned its place in the world’s most prestigious galleries, museums, and private collections. Artists embrace it as a way to create faithful reproductions of their original works, often in limited, hand-signed editions that hold significant value. This technology makes fine art more accessible, allowing collectors and art lovers to own a beautiful, lasting piece that captures every brushstroke and nuance of the original at a more approachable price point.

Giclée vs. Standard Prints: A Side-by-Side Comparison

When choosing art for your home, one of the most common questions is: what’s the real difference between a standard print and a Giclée? While both can look beautiful initially, the distinction lies in the premium materials and the precision of the process. This difference determines not just how the art looks today, but how it will look for generations to come, transforming a simple picture into a treasured heirloom. Let’s break down the key factors.

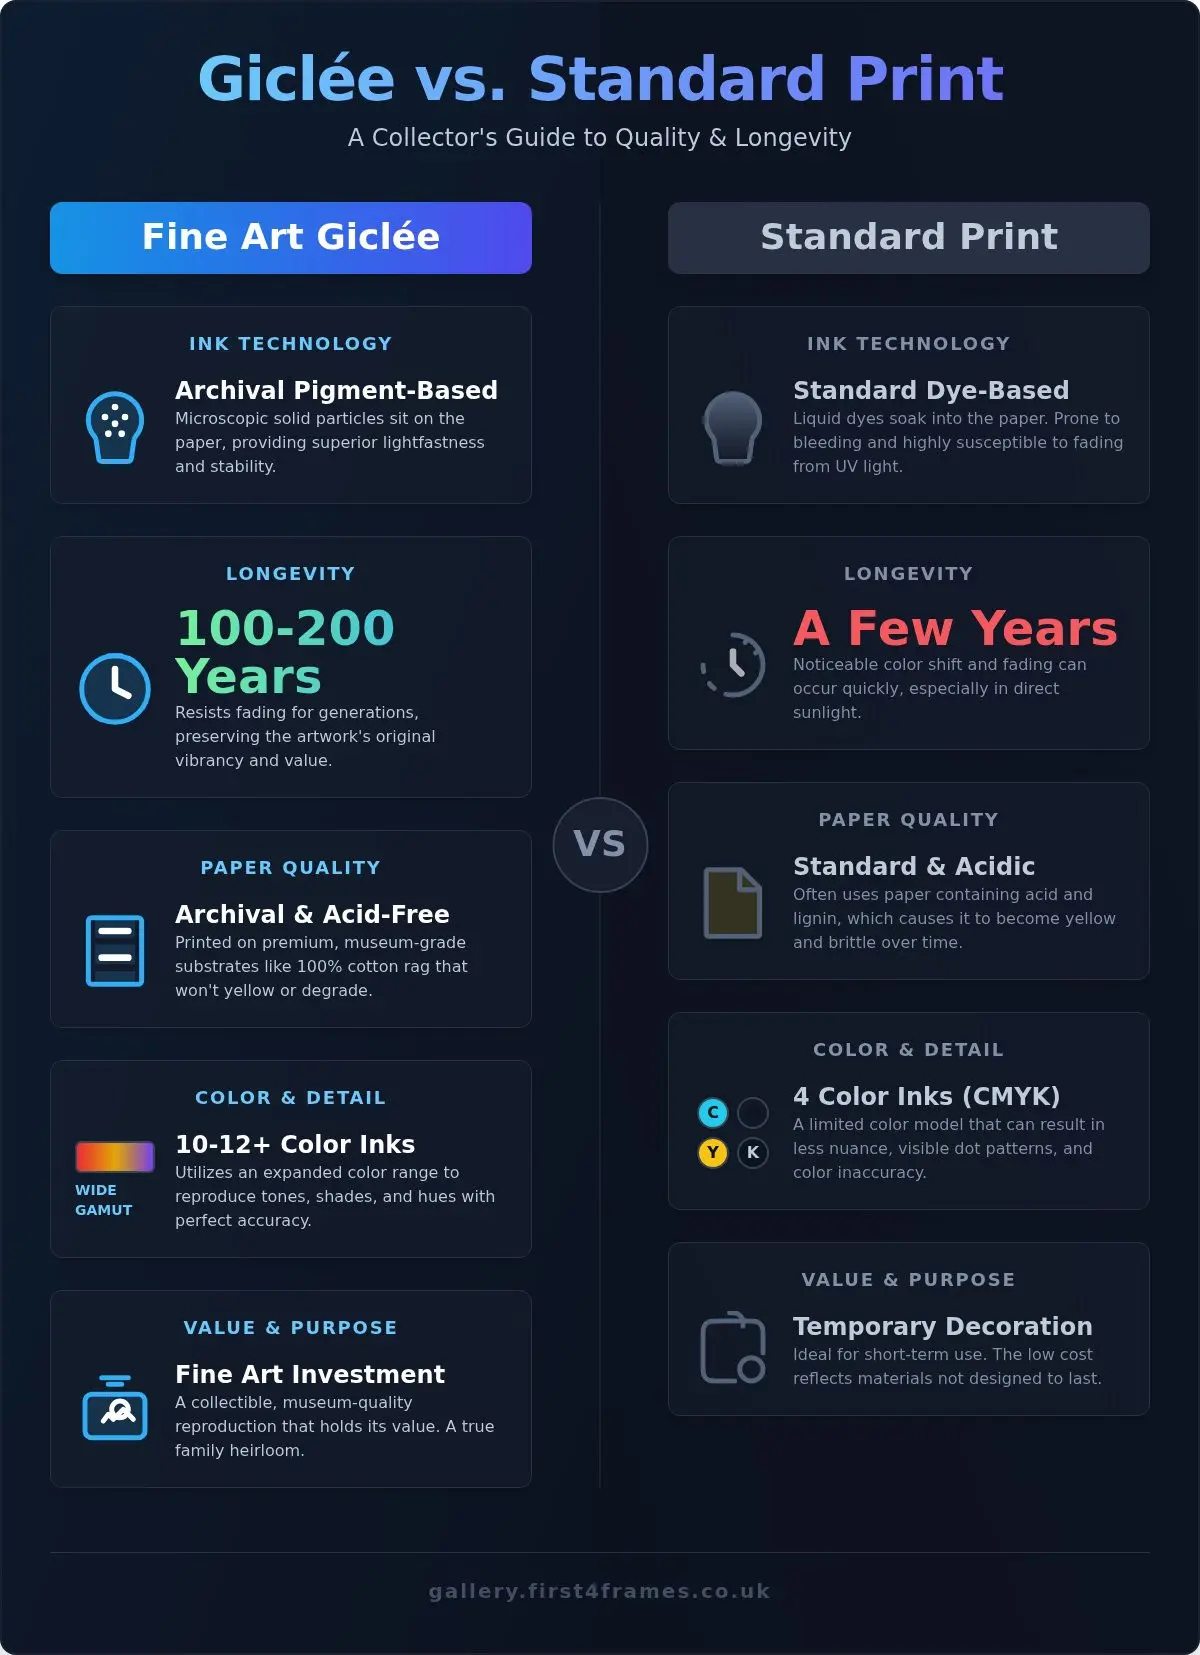
The Great Ink Debate: Pigment vs. Dye

The soul of a print is its ink, and this is where the first major difference appears. Standard printers typically use dye-based inks. These inks soak into the paper to create vibrant colours, but they are highly susceptible to fading from UV light and environmental factors. Their brilliance can sadly diminish in just a few years.

In contrast, Giclée prints use archival-quality pigment-based inks. These are microscopic particles of solid colour suspended in a liquid that sit on the surface of the paper. This method provides superior lightfastness, ensuring your art resists fading for 100-200 years under normal conditions, preserving the artist’s original vision.

Paper & Longevity: Why ‘Archival’ Matters

The foundation of a lasting print is the paper it’s printed on. Standard posters often use paper containing acid and lignin, which cause it to yellow and become brittle over time. Archival paper, essential for Giclée printing, is acid-free and made from high-quality materials like 100% cotton rag, alpha-cellulose, or premium canvas. To be considered a true fine art reproduction, the materials must meet strict criteria, often guided by Fine Art Trade Guild standards, ensuring your artwork is beautifully preserved for a lifetime.

Colour Accuracy and Detail

This is where the artistry of the Giclée process truly shines. A standard printer uses four colours (CMYK: Cyan, Magenta, Yellow, and Black) to create an image. A professional Giclée printer uses a far more sophisticated system with up to 12 different pigment inks. This dramatically expands the colour gamut, allowing for the reproduction of breathtakingly subtle tones, deep blacks, and delicate gradients that are simply impossible with standard printing. The result is a near-perfect, true-to-life copy of the original masterpiece.

Ultimately, the higher price of a Giclée print-often ranging from £50 to over £200 depending on size and artist-directly reflects an investment in longevity, colour fidelity, and museum-grade quality. It’s the choice for anyone who sees art not just as a decoration, but as a beautiful piece to be enjoyed for a lifetime.

The Giclée Printing Process: From Digital File to Masterpiece

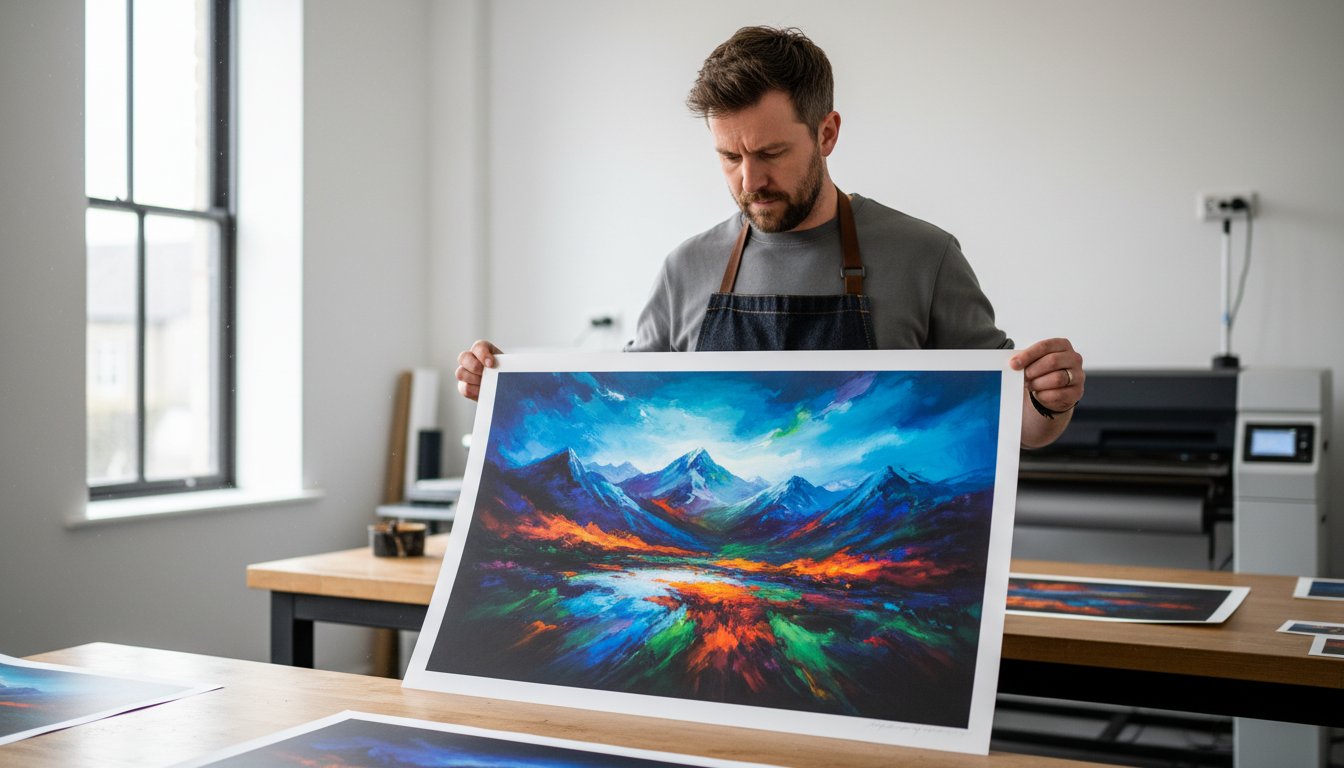
Creating a giclée print is far more than just clicking ‘print’. It’s a meticulous, hands-on process where art and technology meet, guided by the expert eye of a master printer. This dedication to craftsmanship is what transforms a digital file into a breathtaking piece of fine art, justifying its value and longevity. The difference in quality is immediately apparent; this hands-on approach is a world away from a standard desktop printer, a distinction expertly detailed in this comparison of Giclée vs. Standard Prints.

Step 1: The Perfect Digital Capture

Everything begins with the source. The final print can only ever be as good as the digital file it comes from. For an original piece of art, this means using a professional, high-resolution scanner or camera to capture every subtle brushstroke and colour nuance. This digital master file is then painstakingly colour-corrected and proofed by a specialist, who adjusts tones and brightness to perfectly match the original artwork. This foundational step ensures the digital file is a flawless blueprint for the final print.

Step 2: The Master Printer’s Role

This is where human expertise truly shines. A skilled printer doesn’t just load the paper; they act as a custodian for the artist’s vision. Their first decision is crucial: selecting the perfect archival paper. Whether it’s a textured cotton rag or a smooth matte finish, the choice is made to complement the artwork’s style and mood. Next, they calibrate the specialised giclée printer, ensuring its wide-gamut pigment inks are perfectly aligned to reproduce the colours from the proofed digital file with stunning accuracy. They oversee the entire printing process, making micro-adjustments to guarantee a flawless result.

Step 3: Quality Control and Finishing

The journey isn’t over when the print emerges from the machine. Each piece is carefully inspected under controlled lighting for any imperfections, no matter how minor. The print is then left to ‘cure’ for up to 24 hours, allowing the pigment inks to fully set and stabilise, which is vital for its archival quality. For limited edition Giclee Prints, this is also when the artist or publisher will sign and number each piece by hand, adding a final, authenticating touch to the masterpiece.

How to Choose and Identify a High-Quality Giclée Print

Embarking on your art-buying journey is an exciting experience. To ensure you invest in a piece that offers lasting beauty and value, it helps to know the hallmarks of quality. A little knowledge empowers you to become a savvy collector, choosing spectacular art with confidence. Think of this as your checklist for identifying premium giclée prints that you will treasure for a lifetime.

What to Look For Before You Buy

The difference between a standard poster and a fine art print lies in the details. A truly exceptional giclée print is a testament to craftsmanship, built from superior materials. Before you purchase, look for transparency from the seller on these key components:

  • The Paper: The foundation of the print must be of archival quality. Look for descriptions like “acid-free,” “100% cotton rag,” or “museum-grade.” This ensures your print won’t yellow or degrade over time, preserving its original beauty.
  • The Inks: The printer should use high-quality, pigment-based archival inks. Unlike standard dye-based inks that can fade in a few years, pigment inks are rated to last for 100+ years without noticeable fading when kept out of direct sunlight.
  • The Visual Quality: Examine the print closely if you can. The colours should be deep, rich, and accurately represent the original artwork. Details should be crisp and clear, with no signs of pixelation or blurriness, even on close inspection.

Understanding Limited vs. Open Editions

You will often see prints described as either “open” or “limited” editions. An open edition means an unlimited number of prints can be produced, making them more affordable and accessible. A limited edition, however, has a fixed production run-for example, only 50 or 100 prints will ever be made. These are often hand-signed and numbered by the artist (e.g., 5/50), adding a layer of scarcity and collectability that can help the piece hold or even increase its value over time.

Trust the Seller: The Importance of a Good Gallery

Ultimately, the best way to guarantee quality is to buy from a reputable source. A trusted gallery or printmaker will be passionate about their craft and completely transparent about their process. They should be able to tell you exactly what paper and inks they use and provide details about the artist. This expertise is your assurance that you are purchasing a genuine, high-quality piece of fine art.

At First4Frames, we pride ourselves on this transparency and our commitment to premium craftsmanship. We believe art should be both beautiful and built to last. Ready to find your perfect piece? Browse our curated collection of artist prints.

Caring for Your Giclée Print: The Crucial Role of Framing

You’ve invested in a beautiful piece of fine art-a giclée print that captures every nuance of the original artist’s vision. To ensure this spectacular artwork remains vibrant for generations, proper care is essential. The single most important step you can take to protect its longevity and value is professional framing. A frame is far more than a decorative border; it is the bridge between your art and its environment, providing crucial protection from the elements that can cause damage over time.

The Golden Rules of Framing a Giclée Print

To preserve the archival quality of your print, a few non-negotiable rules apply. These conservation-grade practices ensure your art is shielded from harm:

  • Use UV-Protective Glazing: Always opt for glass or acrylic that filters out at least 97% of harmful ultraviolet (UV) light. This is your first line of defence against fading and discolouration caused by light exposure.
  • Choose Acid-Free Materials: The mount (also known as a mat) and backing board must be 100% acid-free and of archival quality. Standard materials contain acids that can leach into the paper over time, causing yellowing and irreversible damage.
  • Create a Breathing Space: The surface of the print should never be in direct contact with the glazing. A mount or special spacers create a small air gap, preventing moisture build-up, mould growth, and the print potentially sticking to the glass.

Choosing the Right Display Location

Where you hang your art is just as important as how it’s framed. Even the best conservation framing needs a helping hand. Avoid placing your treasured Giclée prints in environments that could compromise their integrity. Steer clear of hanging them in direct sunlight, as constant exposure can cause fading. It’s also wise to keep them away from areas of high humidity or fluctuating temperatures, such as bathrooms, kitchens, or above radiators, which can cause the paper to warp or ripple.

Why Professional Framing Makes a Difference

While DIY framing is an option, the expertise of a professional framer is an investment in the life of your art. We understand the science behind art preservation, using only premium, conservation-grade materials and proven techniques to protect your piece. A perfectly chosen bespoke frame does more than just protect; it enhances the artwork, complements your décor, and draws the viewer’s eye to the image. It’s the final, perfect touch that allows your art to truly shine. Let our experts frame your art perfectly and give it the presentation and protection it deserves.

Embrace the Lasting Beauty of Giclée

As we have explored, a Giclée print is far more than just a reproduction; it is a testament to artistic quality and longevity. By understanding the meticulous process involving archival inks and premium paper, you can confidently distinguish a true fine art piece from a standard print. Remember that professional framing is the final, crucial step in preserving its spectacular colour and detail for generations to come.

At First4Frames Gallery, we combine our passion for art with over 20 years of bespoke framing expertise. We collaborate with talented Scottish artists and use only museum-quality materials to create our beautiful Giclee Prints, ensuring every piece is a lasting masterpiece. We handle the craftsmanship so you can focus on finding the art you love.

Your journey into the world of fine art is just beginning. Discover your next masterpiece in our Giclée print gallery and find the perfect piece to bring your space to life.

Your Giclée Print Questions Answered

Are Giclée prints worth the money?

Absolutely. Think of a Giclée not as a simple poster, but as a long-term investment in art. While the initial cost, which can range from £50 to over £200, is higher than a standard print, you are paying for superior quality. Giclée printing uses archival inks and acid-free paper, ensuring spectacular, fade-resistant colours that faithfully capture the artist’s original vision. This level of craftsmanship ensures your art remains beautiful for a lifetime.

How long will a Giclée print last?

A professionally produced Giclée print is created to museum-quality standards. When cared for properly and displayed away from direct, prolonged sunlight, it can last for over 100 years without any significant fading or discolouration. This exceptional longevity is thanks to the use of stable, pigment-based archival inks and premium, acid-free paper. It’s a testament to a process designed to preserve the integrity and beauty of an artwork for generations to enjoy.

Can I make my own Giclée prints at home with a desktop printer?

Unfortunately, a standard home printer isn’t equipped for true Giclée printing. The process requires a specialised, professional-grade inkjet printer that uses a minimum of 8 to 12 pigment-based archival inks. This technology achieves a far wider range of colours and much finer detail than typical home devices. For a genuine fine art reproduction that captures every nuance, it’s essential to use a trusted professional printing service with the correct equipment and expertise.

Is a Giclée print the same as a canvas print?

Not always, though you can have a Giclée print on canvas. “Giclée” refers to the premium printing *process*-using archival pigment inks for superior colour and detail. “Canvas print” simply refers to the *material* the image is printed on. You can have a lower-quality print on canvas, or you can elevate it by choosing the Giclée method. The key difference is the print quality, ink longevity, and colour fidelity that makes Giclée the fine art standard.

How can you tell if a print is a genuine Giclée?

There are a few clear signs of genuine Giclée craftsmanship. The print should exhibit incredibly fine detail with no visible dot patterns, even under close inspection; the colour should appear as a continuous tone. It will be on heavy, high-quality archival paper or canvas, not thin or glossy photo paper. Reputable sellers and artists will also often provide a certificate of authenticity, giving you confidence that you are purchasing true Giclée prints.

Do Giclée prints increase in value?

While their primary value is in their exceptional quality and longevity, a Giclée print can increase in monetary value. This is most likely to happen with a limited-edition print that is hand-signed by a well-regarded or rising artist. Factors like the artist’s reputation, the rarity of the edition, and the print’s condition all play a crucial role. It is best viewed as an investment in lasting, beautiful art, with the potential for financial appreciation.

Posted on

How to Protect Art From Sun Damage: An Expert Guide

That beautiful shaft of sunlight streaming into your living room brings life and warmth to your space. But for the cherished artwork on your walls, it can be a silent, slow-motion threat. Do you ever worry that your favourite pieces are losing their vibrancy, or feel you must choose between a bright, airy home and the preservation of your art? It’s a common dilemma for art lovers, but the solution is simpler and more elegant than you might imagine.

Thankfully, understanding how to protect art from sun damage doesn’t mean sacrificing your light-filled rooms. In this expert guide, we will walk you through the essential techniques to keep your collection safe. From the secrets of strategic placement to demystifying the world of UV-protective glass and bespoke framing, we’ll provide clear, actionable steps. You will gain the confidence to display your art beautifully and the knowledge to ensure its colours remain rich and true for a lifetime, safeguarding the pieces you love.

Why Sunlight is Art’s Greatest Enemy: Understanding the Damage

That beautiful stream of sunlight pouring into your room may feel warm and inviting, but for your cherished artwork, it’s a silent and persistent threat. The primary culprit is invisible to the human eye: ultraviolet (UV) radiation. This high-energy light is the single greatest cause of irreversible damage to art. The harm is cumulative, building up slowly over time until one day you notice that the vibrant colours you fell in love with have become a pale, faded memory. Understanding this process is the first step in learning how to protect art from sun damage effectively.

To see how different solutions can mitigate this damage, this video offers a helpful visual guide:

The Science of Fading: How UV Rays Break Down Pigments

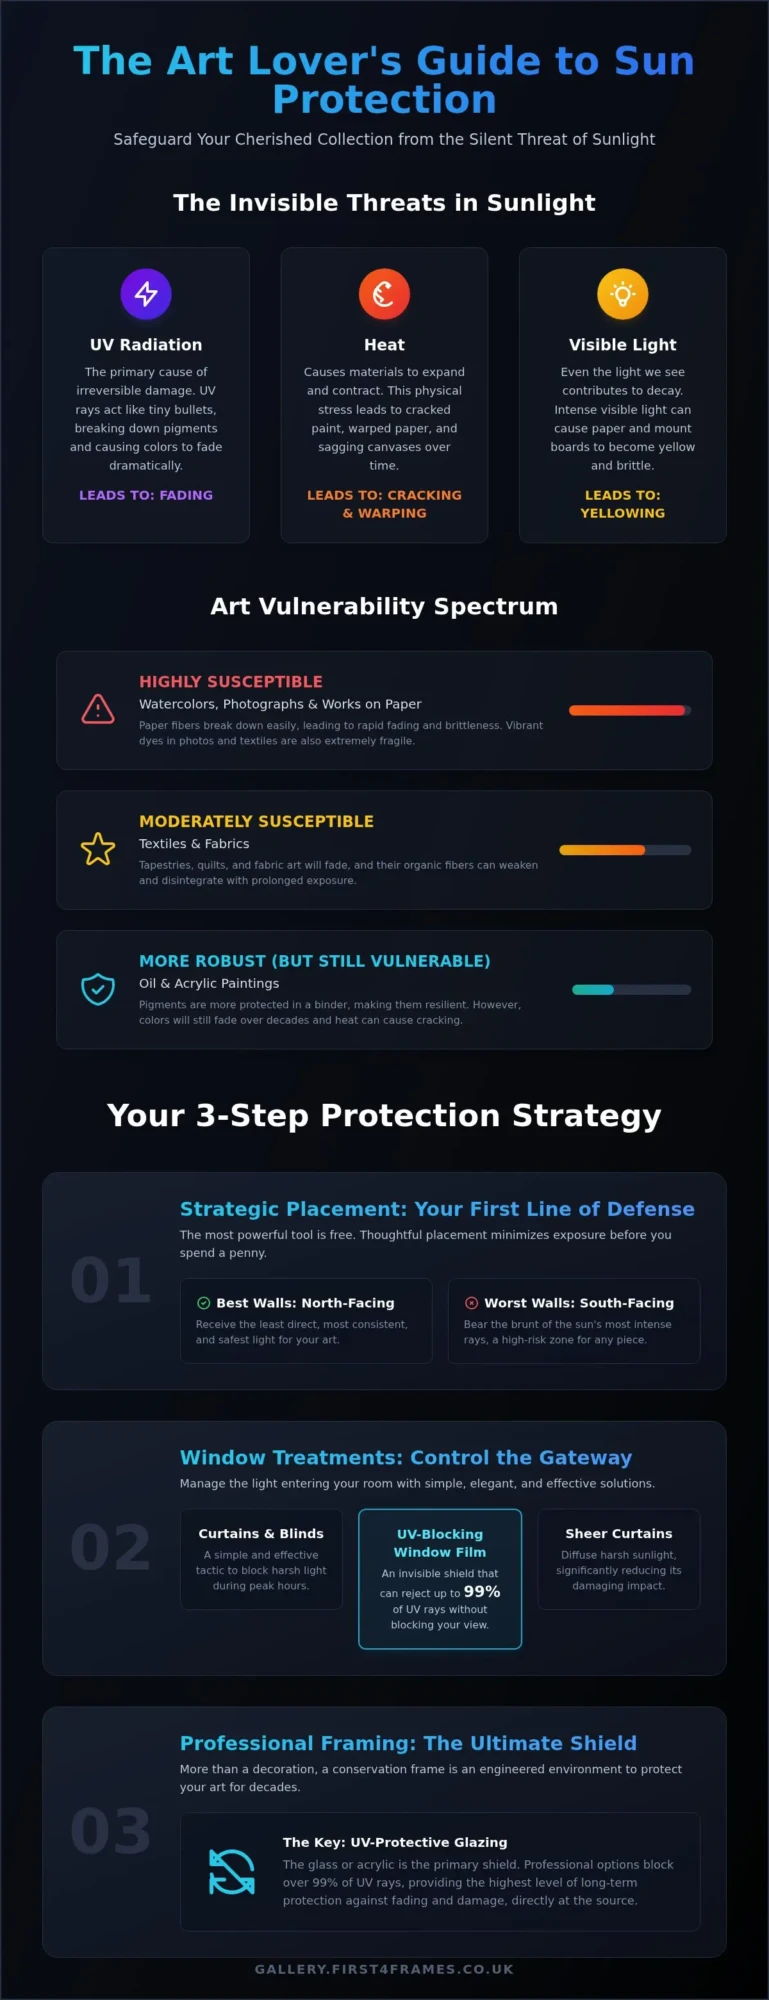
Think of UV rays as tiny, energetic bullets that constantly bombard your artwork. When they strike the surface, they trigger chemical reactions that break down the molecular bonds in the pigments and dyes. This process, known as photodegradation, is what causes colours to fade. Certain pigments are more fragile than others; vibrant reds, yellows, and purples often fade much faster than earthy tones like browns and blues. Even our premium Giclée prints, which use archival-quality inks for longevity, are not immune and require proper protection to preserve their spectacular detail.

Beyond Fading: Heat and Visible Light Damage

UV radiation isn’t the only danger lurking in sunlight. The heat from direct sun causes materials to expand and contract, a cycle that puts immense physical stress on your art. Over time, this can lead to oil paint cracking, canvases sagging, and paper or photographs becoming warped and distorted. Furthermore, even intense visible light contributes to the decay, causing paper and mounting boards to yellow and become brittle. Managing these environmental factors is a core part of the preventive conservation techniques used by museum professionals to ensure a piece’s longevity.

Which Art is Most at Risk?

While all art is vulnerable to sunlight, some types are far more susceptible than others. It is crucial to know where your collection stands to provide the right level of care.

  • Highly Susceptible: Watercolours, photographs, and any works on paper are at the top of the list. Paper is absorbent and its fibres are easily broken down, leading to rapid fading and brittleness.
  • Textiles and Fabrics: Tapestries, quilts, and other fabric-based art can fade and their fibres can weaken and disintegrate very quickly when exposed to direct light.
  • More Robust (But Still Vulnerable): Oil and acrylic paintings are generally more resilient, as the pigments are suspended in a protective binder. However, they are still prone to cracking from heat and their colours will inevitably fade over many years of exposure.

Strategic Placement: Your First and Easiest Line of Defence

Before you even think about specialist glazing or frames, the most powerful tool in your art protection arsenal is completely free: the layout of your room. When learning how to protect art from sun damage, controlling the environment where your art lives is the foundational first step. A little planning when you first hang a piece can prevent a lifetime of irreversible fading and damage. It’s about working with your home, not against it.

Mapping the Sun in Your Home

Take a day to become a light cartographer in your own home. Observe which walls receive direct sunlight and, crucially, at what time of day. In the UK, north-facing walls are your safest bet, as they receive the least direct, most consistent light. Conversely, south-facing walls bear the brunt of the sun’s intensity, especially during midday, and require the most careful consideration for any valuable artwork.

The Best and Worst Walls for Hanging Art

With your new sun map in hand, choosing the right spot becomes much simpler. The goal is to minimise direct UV exposure as much as possible. Follow these key principles:

  • The Golden Rule: Never hang important or delicate art, like watercolours or photographs, in a location that receives prolonged, direct sunlight.
  • Avoid Direct Opposition: Walls directly opposite large, south-facing windows are high-risk zones. They receive both direct and intense reflected light.
  • Beware of Reflections: Be mindful of light bouncing off shiny surfaces. A polished wooden floor, a glass coffee table, or a mirror can redirect harmful rays onto a seemingly safe wall.

Using Window Treatments to Your Advantage

Your windows are the gateways for UV rays, but they don’t have to be an open invitation for damage. Simple, elegant solutions can make a spectacular difference. During peak sunlight hours, drawing curtains or lowering blinds is a highly effective tactic. For a more permanent and invisible solution, you can install professional window films that block UV rays, often rejecting up to 99% of them without obscuring your view. Even a simple set of sheer curtains can work wonders, diffusing harsh light and significantly reducing its damaging impact.

The Protective Power of a Professional Frame

While strategic placement and window films offer a great first line of defence, the single most effective, long-term solution for protecting your art is professional conservation framing. A beautiful bespoke frame is far more than a decorative border; it is a precisely engineered conservation tool designed to create a safe, stable environment for your treasured piece. This is the ultimate answer to how to protect art from sun damage, safeguarding it from multiple environmental threats for decades to come.

Choosing the Right Glazing: A Shield Against UV Rays

The glass or acrylic (glazing) is your artwork’s primary shield against light. Standard picture glass offers minimal protection, blocking less than half of damaging UV rays. To truly protect your art, you need specialist glazing. Invisible UV radiation is the main culprit behind fading, breaking down the chemical bonds in pigments. You can learn more about the science of how UV rays cause fading from university research, but the solution lies in choosing the right material:

  • Conservation Clear Glass/Acrylic: This is the industry standard for preservation. It is specially coated to block up to 99% of harmful UV rays, dramatically slowing down the fading process.
  • Museum Glass/Acrylic: The premium choice for both protection and viewing. It offers the same 99% UV protection but includes an advanced anti-reflective coating, making the glazing virtually invisible for breathtaking clarity.

The Importance of Archival Mounts and Backing

Light isn’t the only enemy. The materials touching your artwork are just as critical. Standard mount boards contain acidic compounds that, over time, can leach into the paper, causing irreversible yellowing and brown marks-a phenomenon known as ‘mat burn’. We only use premium, acid-free archival mount boards (made from pure rag mat or alpha-cellulose) that will never discolour or damage your art.

Furthermore, a professional frame is sealed with a sturdy, archival backing board. This creates a robust barrier against dust, moisture, pollutants, and even insects, ensuring the artwork remains pristine from all sides.

How a Bespoke Frame Provides a Complete Seal

An off-the-shelf frame rarely provides the perfect fit, leaving small gaps that allow dust and humidity to creep in. A bespoke frame is crafted to the exact dimensions of your artwork, ensuring a complete and secure seal. This creates a stable micro-environment, buffering your art from the damaging effects of fluctuating humidity that can cause paper to warp or ripple. It’s this complete, 360-degree approach that provides true, lasting protection.

Let our experts create the perfect protective home for your art. Explore Bespoke Framing.

Long-Term Care for Your Art Collection

Protecting your beautiful art doesn’t stop once it’s perfectly hung on the wall. The journey of preserving its vibrancy and value is an ongoing one, built on simple, consistent habits. By understanding how to protect art from sun damage and other environmental factors inside your home, you can safeguard your entire collection-from professionally framed prints to unframed canvases-ensuring they remain a source of joy for years to come.

The Hidden Danger of Artificial Lighting

While direct sunlight is the most obvious threat, it’s a common misconception that your art is completely safe indoors. All light sources contribute to gradual fading over time. To minimise this risk, choose your lighting with care.

  • Embrace LED Bulbs: Modern LEDs are the best choice for illuminating art. They emit negligible UV radiation and very little heat, which helps preserve the delicate pigments in your favourite pieces.
  • Avoid Direct Halogen Spotlights: Older halogen and incandescent bulbs produce significant heat and UV rays, which can accelerate fading and cause lasting damage. Never aim a powerful, hot spotlight directly at your artwork.

Maintaining a Stable Environment

Fine art, much like any object of premium craftsmanship, thrives in stability. Drastic fluctuations in temperature and humidity cause materials like paper, canvas, and wood to expand and contract. This can lead to warping, cracking, or even mould. To create a safe haven for your art, avoid hanging it in areas with extreme environmental shifts, such as:

  • Directly above radiators or near fireplaces.
  • In the direct path of an air conditioning or heating vent.
  • In rooms prone to high humidity, like bathrooms or damp conservatories.

A consistent, moderate environment is crucial for long-term preservation.

The Art of Rotation: Keep Your Collection Fresh and Safe

One of the best professional tips for collectors is also one of the most enjoyable: rotate your art. Periodically swapping the pieces on your walls with those you have in storage significantly limits the cumulative light exposure for any single work. This simple practice not only preserves your most treasured pieces but also gives you a wonderful opportunity to refresh your home’s decor and fall in love with your collection all over again. It’s the perfect excuse to find a spectacular new print to add into the mix. Why not explore our gallery for fresh inspiration?

Give Your Art the Lasting Protection It Deserves

Protecting your cherished artwork from the irreversible effects of sunlight is a vital part of being a collector. As we’ve explored, from strategic placement away from direct light to mindful long-term care, every step you take makes a difference. Ultimately, understanding how to protect art from sun damage is about combining these smart daily habits with the unparalleled security and aesthetic finish of professional conservation framing.

At First4Frames Gallery, we bring over 20 years of bespoke framing experience to every piece we handle. We are passionate about our craft and believe a frame does more than just decorate-it protects. Trusted by artists and collectors across Scotland, we use premium, high-quality conservation materials to build a beautiful shield that preserves colour and detail for generations to come. Your art is an investment in joy, and it deserves to be preserved with expert care.

Your art deserves the best protection. Talk to our experts about conservation framing today.

Frequently Asked Questions About Protecting Your Art

Can sun-damaged art be repaired or restored?

Unfortunately, prevention is far better than a cure. Fading caused by UV light is irreversible, as the light has permanently altered the pigments in the ink or paint. While a professional art conservator may be able to treat issues like yellowing or brittle paper, the process is often complex and costly. The best strategy is always to protect your beautiful artwork from the very beginning to preserve its original vibrancy and integrity for years to come.

How can I tell if my artwork is already sun-damaged?

Look for tell-tale signs of UV exposure. The most obvious is fading, where colours appear washed out or less vibrant-reds and purples are often the first to go. You might also notice the paper or canvas has turned yellow or brown. In advanced cases, the material may feel brittle to the touch. A simple check is to carefully lift a corner of the art from under the frame’s lip and compare its colour to the exposed area.

Does UV-protective glass make the artwork look darker or change its colours?

This is a common concern, but rest assured, modern conservation-grade glazing is designed for optical purity. High-quality UV-protective glass is exceptionally clear and will not make your artwork look darker or alter its true colours. In fact, premium options often include anti-reflective properties, which can reduce glare and actually enhance the viewing experience, allowing the piece’s spectacular details and colours to shine through without interference from distracting reflections.

Is reflected or indirect sunlight still harmful to my art?

Yes, absolutely. UV rays are relentless and can bounce off walls, floors, and even furniture to reach your artwork. This means a piece hung on a wall opposite a bright window is still at significant risk. Understanding how to protect art from sun damage means recognising that any exposure to natural light, direct or indirect, contributes to cumulative and irreversible harm over time. Even on a cloudy day, harmful UV radiation is still present.

How much more does a frame with UV-protective glass cost?

Investing in UV-protective glazing is a wise choice for preserving your art. Typically, you can expect it to add between £20 and £60 to the cost of a standard-sized frame in the UK, depending on the size and the specific grade of protection. While it is an additional upfront cost, consider it a small price to pay for the priceless peace of mind that comes with safeguarding a valuable or sentimental piece from permanent damage.

Are LED lights completely safe for artwork?

LEDs are by far the safest lighting option for art, as they emit negligible UV radiation and very little heat compared to older incandescent or halogen bulbs. However, no light source is completely harmless. All visible light can cause fading over time, so it’s still best practice to use low-wattage LEDs, position them a sensible distance from the artwork, and only illuminate the piece when it’s being enjoyed rather than leaving lights on continuously.

Posted on

How to Clean Picture Frame Glass Like a Professional (Without Streaks)

There’s a unique frustration that comes with cleaning a beloved picture frame. You aim for a crystal-clear view, but instead, you’re left with stubborn streaks, distracting smudges, or a fine layer of lint. The worry is real, too: will the cleaner damage the beautiful wooden frame, or seep behind the glass and ruin the artwork itself? Knowing how to clean picture frame glass properly can feel like a secret reserved only for professional galleries.

It’s a secret we’re ready to share. As passionate artisans with over two decades of bespoke framing experience, we believe the glass is the invisible hero that protects and presents your art. In this guide, we will walk you through the simple, safe techniques our expert framers use to achieve that perfect, gallery-worthy finish on any type of glass, from standard glazing to special anti-glare or acrylic surfaces.

Prepare to say goodbye to streaks and worry. You’ll gain the confidence to care for your framed art safely, ensuring the view is always as spectacular as the piece itself.

Before You Start: Gathering the Right Tools for a Streak-Free Shine

The secret to a flawless, streak-free finish lies not in aggressive scrubbing, but in careful preparation. Before you even touch the glass, assembling the right tools is the most crucial step in learning how to clean picture frame glass professionally. Using the wrong supplies can lead to frustrating streaks, lint, or worse, permanent damage to your frame or the precious artwork it protects. This simple preparation is the foundation for a beautiful result every time.

For a quick visual guide on the correct technique, take a look at this helpful video:

The Best Cleaning Solutions (And What to Avoid)

Put down the standard blue window spray. The best solution is one you can make yourself: a simple 50/50 mix of isopropyl alcohol and distilled water in a spray bottle. This mixture cleans effectively and evaporates quickly without leaving residue. If you prefer a commercial product, choose one that is specifically labelled as ammonia-free and vinegar-free.

Why is this so important? Ammonia and vinegar-based cleaners are too harsh. They can seep under the edge of the glass and damage your artwork or photo mount. These chemicals can also damage special coatings found on different types of picture frame glass, such as anti-reflective or UV-protective layers. Never use abrasive cleaners or furniture polish, as they will scratch or smear the surface.

Choosing Your Cleaning Cloths

Your choice of cloth is just as critical as your cleaning solution. Forget paper towels or old t-shirts, which are notorious for leaving behind a trail of lint and fine scratches. Instead, arm yourself with two high-quality, clean microfiber cloths. Designate one for applying the cleaning solution and gently wiping the surface, and the second, completely dry cloth for buffing the glass to a perfect, streak-free shine.

Other Helpful Tools

To tackle dust and dirt like a true professional, a few extra items can make all the difference. Having these on hand will help you manage the fine details with ease.

  • A soft-bristled brush: A clean paintbrush or a camera lens brush is perfect for whisking away loose dust from the frame and glass corners before you apply any liquid.
  • Cotton swabs: Ideal for getting into the tight edges where the glass meets the frame, removing any grime that a cloth can’t reach.
  • A can of compressed air: For stubborn dust particles that refuse to be brushed away, a quick blast of compressed air provides a touch-free solution.

The Professional 5-Step Method for Cleaning Standard Picture Glass

In our twenty years of professional framing, we’ve learned that achieving a spectacular, streak-free finish isn’t about harsh chemicals or aggressive scrubbing. It’s about precision and technique. This is the exact, fail-safe method we use in our workshop to ensure every piece of art is presented perfectly. Following these steps in order is the key to understanding how to clean picture frame glass without trapping dust under the edges or leaving behind frustrating smudges. This process works beautifully whether your frame is hanging on the wall or laid flat for a more detailed clean.

Step 1: Prepare Your Workspace and Remove Dust

Before any liquid touches the glass, your first task is to remove all loose dust and debris. If you’ve taken the frame down, lay it on a soft, clean, lint-free towel to protect both the frame and your surface. Using a very soft-bristled brush (like a watercolour or makeup brush) or a gentle puff of compressed air, carefully clear the dust from the glass surface. Pay special attention to the corners and the join between the glass and the frame, as this is where dust loves to accumulate.

Step 2: Apply the Cleaner Correctly

This is the most critical step for protecting your artwork. Never, ever spray cleaner directly onto the picture frame glass. This prevents any possibility of the liquid seeping under the edge of the glass and causing irreversible moisture damage to the mount, or worse, the artwork itself. Instead, lightly dampen a clean, folded microfiber cloth with your chosen cleaning solution. The cloth should be moist, not dripping wet.

Step 3: Wipe with a Purpose

Technique is everything when it comes to a flawless finish. Starting at the top corner of the glass, wipe downwards in a continuous ‘S’ pattern until you reach the bottom. Use gentle, even pressure to lift away fingerprints and grime. This professional method is echoed in many expert Tips For Cleaning Glass Surfaces, as it ensures you cover the entire surface efficiently. Avoid scrubbing in circles, which can create static electricity that attracts more dust and often just pushes the dirt around, leading to streaks.

Step 4: Dry and Buff to a Perfect Finish

Timing is key for this final step. Immediately after wiping with the damp cloth, take your second, completely dry microfiber cloth and follow the exact same path. Using the same top-to-bottom ‘S’ motion, wipe away any remaining moisture. The goal is to dry the glass before any evaporation can occur, as that’s what causes streaks. Once dry, give the glass a final, gentle buff to reveal a crystal-clear surface that lets your beautiful art shine through without distraction.

Specialty Glass Care: Cleaning Acrylic, Anti-Glare, and Museum Glass

The first step in achieving a flawless, professional finish is understanding that not all picture frame ‘glass’ is actually glass. Modern framing utilises a range of premium glazing options, each designed to protect and display your beautiful artwork perfectly. Using the wrong cleaner on these specialty surfaces can cause irreversible damage, such as clouding, crazing, or stripping away protective coatings. Before you begin, it’s crucial to identify your glazing type.

Knowing the material is the most important part of learning how to clean picture frame glass correctly. Using the wrong products can be a costly mistake, but with the right technique, you can maintain that crystal-clear view for years. For a complete overview, these professional cleaning tips for picture frames offer excellent guidance on caring for both the glazing and the frame itself.

How to Clean Acrylic or Plexiglas (Perspex)

Acrylic, often known by brand names like Plexiglas or Perspex, is a lightweight and shatter-resistant alternative to glass. However, its main drawback is that it is a soft plastic that scratches very easily. Standard glass cleaners are your enemy here.

  • NEVER use cleaners containing ammonia, alcohol, or other harsh solvents. These chemicals can cause the acrylic to become cloudy or develop fine cracks over time, a process known as crazing.
  • Choose the right solution. Opt for a dedicated anti-static acrylic cleaner or a simple mixture of mild washing-up liquid and water.
  • Use an exceptionally soft cloth. A premium, non-abrasive microfiber cloth is essential to avoid creating fine scratches on the surface. Never use paper towels or rough fabrics.

Cleaning Anti-Reflective (AR) and Museum Glass

Premium options like Anti-Reflective (AR) and Museum Glass feature sophisticated optical coatings that minimise reflections and glare, offering an incredibly clear view of your artwork. These delicate coatings demand specific care to maintain their performance. Harsh chemicals can easily damage them, leaving you with a hazy, streaky finish. For these surfaces, the two-cloth method is essential for a professional, streak-free result. Use one clean, lightly dampened microfiber cloth to wipe the surface, and a second, completely dry microfiber cloth to immediately buff it dry.

Tips for UV-Protective Glass

UV-protective glass is designed to filter out harmful ultraviolet light that can cause the colours in your prints and photographs to fade over time. The UV-protective layer is typically integrated into the glass or applied as a durable coating. For cleaning, you should treat it like the high-quality glazing it is. If it also has an anti-reflective coating, follow the guidance for AR glass. Otherwise, a gentle, ammonia-free glass cleaner is always the safest and most effective choice to preserve both the clarity and the protective properties of the glass.

Unsure what kind of glazing is protecting your art? Explore our framing options to see the difference premium materials can make.

Top Mistakes to Avoid When Cleaning Your Framed Art

You’ve gathered your premium materials and are ready to restore that crystal-clear view of your beautiful artwork. But wait. The secret to a professional, streak-free finish isn’t just about what you do-it’s also about what you don’t do. A few common errors can quickly lead to streaks, trapped dust, or even permanent damage to your art. Learning what to avoid is a crucial step in mastering how to clean picture frame glass perfectly every time.

The Error of Spraying Directly on the Frame

This is the single most important mistake to avoid. When you spray cleaner directly onto the glass, the excess liquid inevitably runs down and pools at the bottom edge of the frame. Through a process called capillary action, this moisture can be wicked up under the glass, seeping into the mount board and, in the worst cases, onto the artwork itself. This can cause irreversible water stains and ruin your treasured piece.

Using Paper Towels or Abrasive Cloths

While convenient for other household jobs, paper towels are the enemy of a flawless finish on glass. They are made from coarse wood fibres that can leave behind tiny micro-scratches, which are especially noticeable on acrylic glazing (Perspex). Worse still, they break down as you wipe, depositing a fine layer of lint that clings to the surface. For a truly professional, lint-free result, always stick with high-quality, clean microfiber cloths.

Cleaning in Direct Sunlight or a Dusty Environment

Your environment matters more than you might think. Cleaning glass in direct sunlight or under a hot lamp causes the cleaning solution to evaporate almost instantly, before you have a chance to wipe it away cleanly. This is a primary cause of stubborn streaks. Likewise, trying to clean in a dusty room is a losing battle, as new particles will settle on the glass as fast as you can remove them. Always choose a clean, well-lit spot away from direct sun for the best results.

Avoiding these simple pitfalls is the key to ensuring your artwork remains the centrepiece, viewed through impeccably clean glass. The care you take in cleaning reflects the love you have for the art-a passion we share in the craftsmanship of every beautiful frame we create.

Long-Term Care: Keeping Your Picture Frames Dust-Free and Beautiful

Achieving a perfect, streak-free shine is a fantastic start, but the true art of preservation lies in consistent, long-term care. Proper maintenance is the bridge between a one-time clean and the lasting beauty of your framed art. By adopting a simple, regular routine, you can prevent the build-up of dust and grime that can dull your display and even cause microscopic scratches over time. This proactive approach significantly reduces how often you need to perform a deep clean with liquids, protecting both the glass and the artwork within.

While knowing how to clean picture frame glass is an essential skill, understanding how to care for the entire piece ensures its longevity and spectacular appearance on your wall.

The Weekly Dusting Routine

Your best line of defence against dirt is a quick, gentle dusting once a week. This simple act prevents airborne dust particles from settling and becoming abrasive. Use a soft, dry microfiber cloth or a traditional feather duster to lightly wipe the glass and the frame. This takes only a moment but is the single most effective way to maintain that just-cleaned clarity and protect the surface from harm.

Caring for the Frame Itself

The frame does the heavy lifting in the relationship between your art and your decor, and it deserves its own cleaning regimen. Always use a separate cloth from the one you use for the glass. Depending on the material, your approach may vary slightly:

  • Wood Frames: Use a separate, lightly dampened microfiber cloth. For a deeper clean, apply a pH-neutral wood cleaner sparingly to the cloth, never directly onto the frame.
  • Metal Frames: A simple wipe with a lightly damp cloth is typically all that’s needed to restore the shine to aluminium or other metal frames.
  • Ornate Frames: For frames with intricate details and crevices, a soft, clean paintbrush or a new makeup brush is perfect for gently whisking away dust from hard-to-reach areas.

When to Seek Professional Help

Sometimes, a problem is beyond a simple surface clean. If you ever notice dust, condensation, or-in the worst case-mould inside the glass, do not attempt to open the frame yourself. Professionally sealed frames are designed to create a protective micro-environment for your fine art. Breaking that seal can introduce new contaminants and risk irreparable damage to the print and mount. For deep cleaning, frame repairs, or any issues within the glass, it’s always best to consult our expert team to ensure your art is handled with professional care and craftsmanship.

A Clear View of Your Cherished Art

Now that you’re equipped with professional techniques for a streak-free shine, you can preserve the beauty of your favourite pieces with confidence. The key takeaways are simple: always use the right tools, like soft microfiber cloths, and tailor your approach for specialty materials like acrylic or museum glass. Mastering how to clean picture frame glass is a vital skill for any art lover, ensuring nothing stands between you and the artwork.

Of course, a perfect clean starts with a premium frame. At First 4 Frames, we believe the frame is the bridge between your room and the art it holds. With over 20 years of bespoke framing experience, our team are experts in conservation and speciality glazing. We are proud to be trusted by artists and collectors across Scotland to deliver unparalleled craftsmanship that protects and enhances every single piece.

If you’re ready to find a new masterpiece for your space, already protected by professionally fitted, premium glass, we invite you to explore our gallery. Discover our collection of beautifully framed art, ready to hang and enjoy a spectacular, crystal-clear view from the moment it arrives.

Frequently Asked Questions

How often should I clean my picture frame glass?

The ideal frequency depends on your home’s environment. For general upkeep, a light dusting with a soft, dry microfibre cloth every one to two weeks is perfect for preventing build-up. A more thorough, streak-free clean is best done every few months or whenever you notice fingerprints or smudges. This simple routine ensures your beautiful artwork always remains the centre of attention, free from distracting marks and dust, maintaining its pristine gallery look.

What’s the best way to remove old sticker residue from frame glass?

Tackling stubborn sticker residue requires a gentle touch to protect the glass. Start by dabbing a small amount of isopropyl alcohol or a dedicated citrus-based sticker remover onto a cotton pad. Press it onto the residue for a minute to soften the adhesive, then gently rub in a circular motion. Use a plastic scraper or an old credit card to carefully lift the softened residue. Always test on an inconspicuous corner first to ensure it doesn’t affect any special coatings.

Can I use Windex or other household window cleaners on picture frames?

We strongly advise against using standard household window cleaners. Many contain ammonia or harsh chemicals that can damage the picture frame’s finish, seep behind the glass to harm the artwork, or strip away special UV-protective or anti-glare coatings. For a safe and spectacular result, stick to a simple homemade solution of distilled water and white vinegar. This professional method ensures both your frame and the precious art within are perfectly preserved for years to come.

What should I do if dust or a hair gets on the inside of the glass?

An internal speck of dust requires careful disassembly of the frame. Lay the frame face down on a soft, clean towel. Gently bend back the tabs holding the backing board in place and remove it, along with the artwork. Using a soft, dry brush or a can of compressed air, carefully remove the debris from the inside of the glass and the artwork itself. Reassemble with care, ensuring everything is perfectly aligned before securing the backing board again.

How do I clean the actual picture frame without damaging it?

The frame itself deserves just as much care as the glass. For wood or composite frames, a soft, dry microfibre cloth is usually sufficient for dusting. For a deeper clean, use a cloth that is very slightly dampened with water. For ornate or gilded frames, use only a dry, soft-bristled brush to avoid damaging the delicate finish. Never spray cleaner directly onto the frame, as moisture can cause irreparable damage. This gentle approach maintains the craftsmanship of the frame.

Is it safe to clean a very old or antique picture frame myself?

When it comes to antique frames, we recommend extreme caution. While our guide on how to clean picture frame glass is safe for most items, antique frames can be incredibly fragile. The gilding, finish, and structural integrity may be compromised by age. For pieces with significant monetary or sentimental value, we always advise consulting a professional art restorer or framer. They possess the specialist knowledge to clean and preserve your treasured item without risking damage.