

What gives a mounted print breathing room from the wall? To understand what a subframe is for mounting artwork, think of it as a support fixed to the back of the piece. It creates space behind the artwork and can give it a clean, floating appearance.
With foamboard, the hanging method matters as much as the finish. A subframe is one option for foamboard-mounted artwork, creating a neat profile while keeping the hanging structure out of sight from the front.
This guide explains what a subframe does, when a larger mounted print may benefit from one, and how the gap from the wall affects the finished look. It also covers how to consider mounting and hanging choices so the artwork feels well planned, from the wall to the frame.
Key Takeaways
- Consider an aluminium sub-frame for larger mounted prints; pieces over 1 metre may need one for added stability.
- Use a sub-frame to create space between the artwork and wall for a clean, floating effect.
- Rigid mounting can help keep prints flat, while the right hanging method depends on the artwork and backing.
- Explore how foamboard and a sub-frame work together to support a neat, considered display.
When larger mounted prints may need an aluminium sub-frame
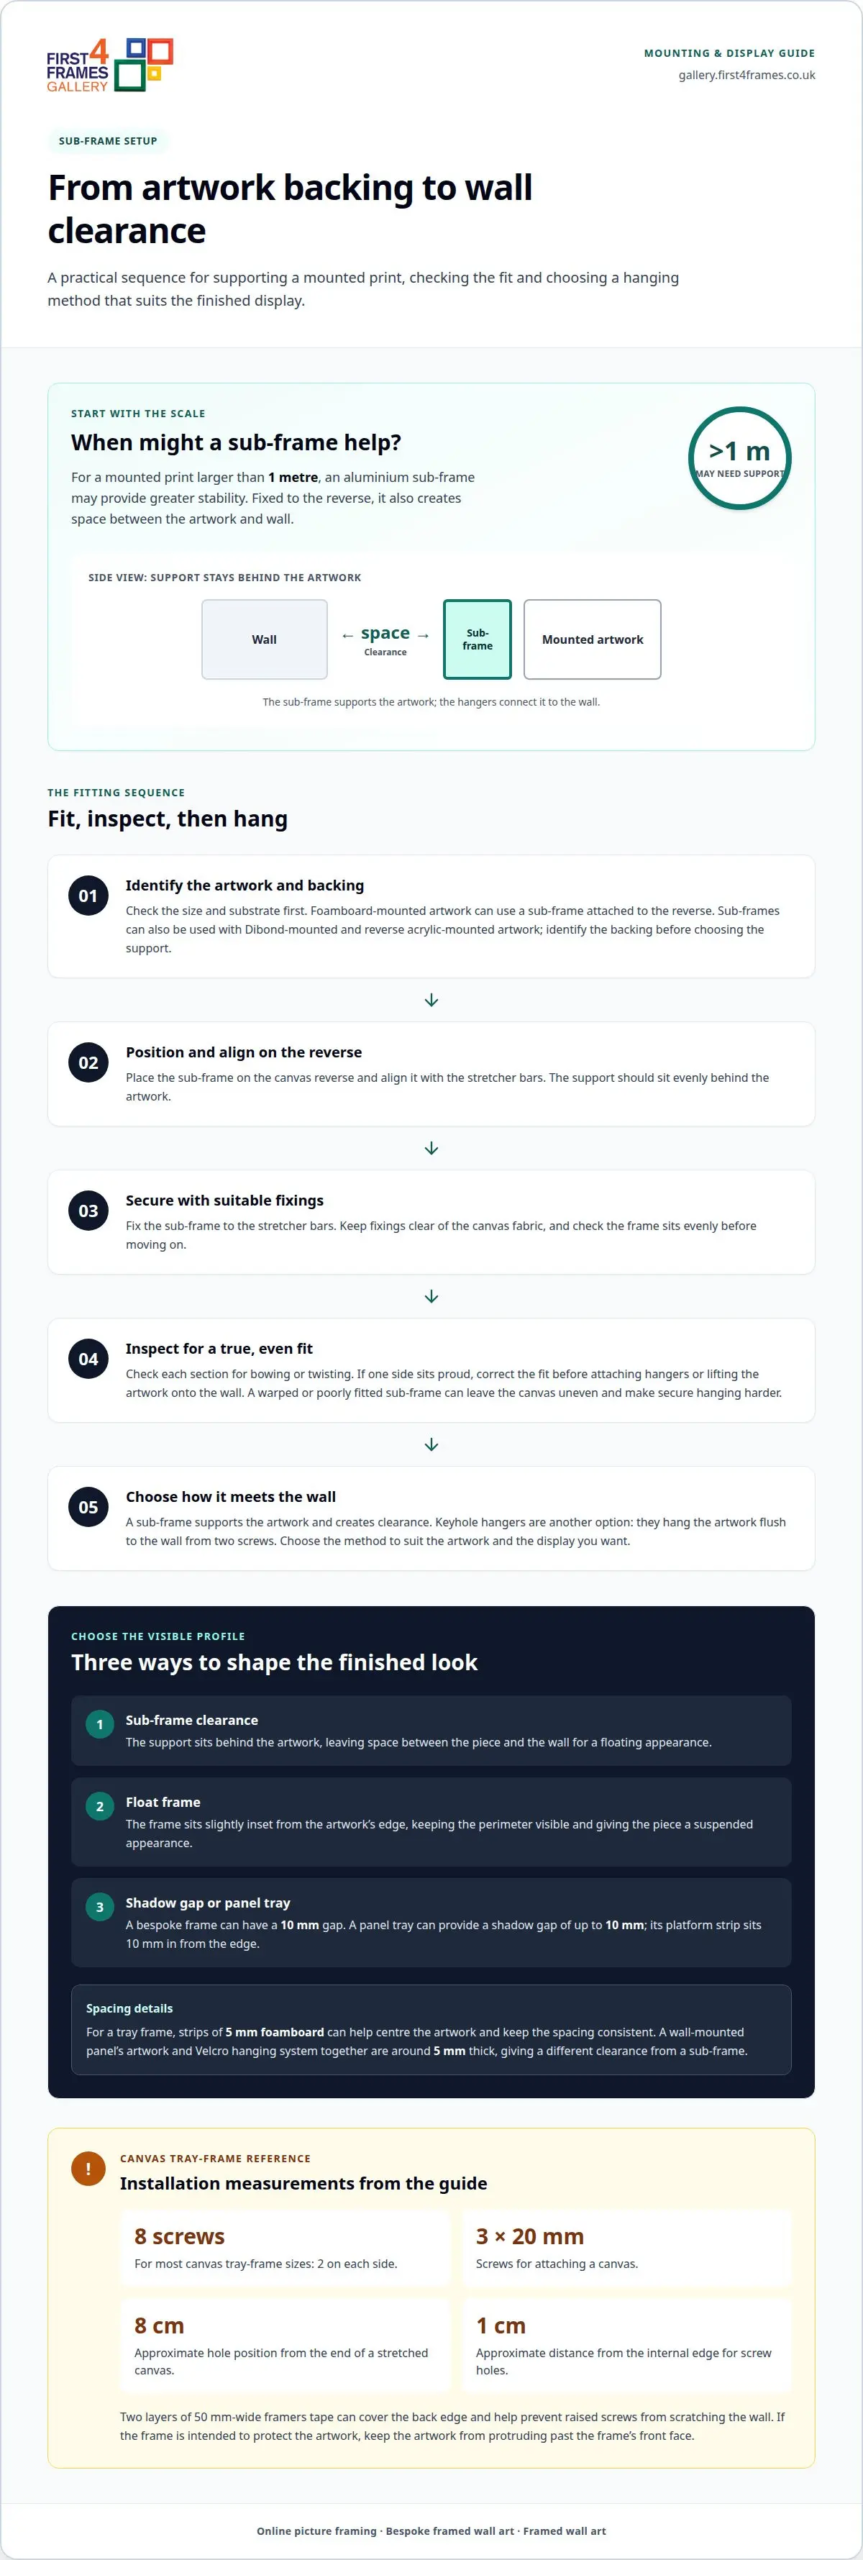
For a mounted print larger than 1 metre, an aluminium sub-frame may provide greater stability. Its position behind the artwork also creates space between the print and wall.
Understand Aluminium Subframe Support
- Choose a sub-frame to support the canvas from behind and create clearance from the wall. An aluminium sub-frame is a structure attached to the artwork’s reverse, where it supports the hanging arrangement without covering the image. That gap can help keep the canvas from resting directly against the wall, but it does not protect the painted surface from every source of damage.
For example, a canvas with a support attached at the back can sit away from the wall while its front remains visible.
Assess Subframe Strength and Hanging Methods
- Match the hanging system to the artwork’s size and backing. Aluminium sub-frames are described as light and durable, and mounted prints larger than 1 metre may require one for greater stability. Keyhole hangers are another option: they allow artwork to hang flush to the wall from two screws. Consider whether that flush position suits the look you want.
Aluminium mounting and hanging are related but distinct: the subframe supports the artwork, while the hangers connect it to the wall.
Fit a Canvas and Check Subframe Suitability
- Position the sub-frame on the canvas’s reverse, align it with the stretcher bars, then secure it to those bars with suitable fixings. Keep fixings clear of the canvas fabric, and check that the frame sits evenly before hanging. A DIY sub-frame is possible if you can make a square, stable structure that fits the canvas.
Before installation, check each section for bowing or twisting. A warped or poorly fitted subframe can leave the canvas uneven, make secure hanging harder, or strain the artwork. If one side sits proud, correct the fit before attaching hangers or lifting the canvas onto the wall.
Floating appearance and wall clearance
Choose the frame position and wall clearance to suit your artwork and display. A bespoke frame can give your piece a distinctive floating appearance, with professional online picture framing helping you find the right look.
- Consider a float frame if you want the artwork’s perimeter to remain visible. The frame sits slightly inset from the artwork’s edge, making it less prominent and giving the piece a suspended appearance. This can work particularly well for a landscape print with visible edges, creating a different look from conventional framing where the frame meets the artwork or mount.
- Choose a shadow gap to match the effect you want. A bespoke frame can have a 10 mm gap between the artwork and frame, creating a clear outline around the piece. A panel tray frame can also provide a shadow gap, up to 10 mm, because its platform strip sits 10 mm in from the edge. Considering the side profile as well as the front can help you decide whether a wider gap suits your framed wall art.
- For a tray frame, strips of 5 mm foamboard can help centre the artwork and keep the spacing consistent around its edges. For a wall-mounted panel, the combined thickness of the artwork and Velcro hanging system is around 5 mm, giving it a different clearance from a sub-frame. Choose the option that suits your preferred display. To explore artwork for your room, browse the framed art gallery and see how bespoke framed wall art could look.
For most canvas tray frame sizes, the guide recommends 8 screws, with 2 on each side, and 3 x 20 mm screws for attaching a canvas. For a stretched canvas, screw holes are positioned about 8 cm from the end and about 1 cm from the internal edge.
Two layers of 50 mm-wide framers tape can cover the back edge and help prevent raised screws from scratching the wall. For a frame intended to protect the artwork, ensure the artwork does not protrude past the frame’s front face.
Benefits of mounting artwork
- Use dry mounting when a print needs a firm, even backing. The process permanently affixes the artwork to a rigid substrate, helping it stay flat and smooth. Prints and photographs can be dry-mounted with or without a frame. For example, a loose print intended for display without glazing can gain a smooth, supported surface this way.
- Add a single mount to create a border around a picture. The mount separates the artwork’s surface from the glass, helping prevent direct contact. For artwork on paper, the window aperture is normally 5 mm smaller than the artwork in both width and height. This overlap helps keep the edge of the paper covered while leaving the image visible.
- Choose a double mount if a layered edge would suit the image. It uses two layers of mountboard, with the lower layer slightly visible beneath the top one. A coloured inner layer can pick out a shade in the artwork, such as a muted green in a landscape print. A V-groove adds another detail: a thin decorative line cut into the mountboard, usually following the aperture shape.
- Attach paper-based artwork using a method that allows it to respond to changes in the air. T-hinges connect the artwork to an undermount, and at least two should be used. Avoid taping all four sides, as this can restrict movement and cause the paper to buckle. A print fixed around every edge, for example, may ripple instead of lying smoothly.
Foamboard backing and subframes
- Identify the backing before choosing a hanging method. Foamboard-mounted artwork can be hung with a subframe attached to the reverse. This creates support behind the panel and space between the artwork and wall. For example, a foamboard print without a conventional outer frame can have a neat, floating profile with this arrangement.
- Match the hanging support to the substrate. A subframe can also be used with Dibond-mounted and reverse acrylic-mounted artwork, but these materials are not interchangeable with foamboard. The panel’s backing determines how the support relates to the piece. Identify whether the artwork is foamboard, Dibond or reverse acrylic before choosing a hanging approach.
- Consider the front finish and back structure together. A subframe sits behind the artwork, so its position affects the gap from the wall without changing the visible image area. With foamboard, decide whether you want the piece to sit away from the wall or hang closer. This establishes the intended profile before attaching the support.
- Inspect the panel and support before hanging. Check that the backing sits evenly and that the subframe follows the reverse without looking out of line. The hanging system should suit the mounted piece, rather than use a method intended for a different backing. For comparison, card-mounted artwork can be fixed with Velcro, but paint may come off during removal.
Once you’ve chosen a suitable approach, explore framed artwork for inspiration on your display.
When placing a panel in a frame, use the backing-strip step as part of positioning: peel back the second backing strip by 1/4 at two opposite corners. Make the same adjustment at both corners, keeping the instruction limited to those opposite points. Then place the panel in the frame with those corners serving as the prepared locations. This follows the guide’s recommendation without peeling back the second backing strip across the full panel. Check the panel’s placement in the frame before continuing, and keep the two prepared corners opposite one another. The specified amount is 1/4, and the recommendation applies to the second backing strip, not a different strip.
First4Frames Gallery: Commercial Artwork Curation
First4Frames Gallery’s Commercial Artwork Curation helps businesses select artwork for properties, offices and galleries. Choose coastal wall art, landscape wall art or Scottish landscape art to set the mood, with contemporary art prints, fine art, photography prints and work by famous artists or best-selling artists adding character.
For a coordinated finish, frames are handmade to order from high-quality materials and glazed with 2 mm float glass. This bespoke framing complements custom framed art prints and ready-to-hang pieces. With online picture framing, you can choose your frame online and design your framed artwork to suit the space. Consider the image, frame and intended position together; the aim is to visualise art on your wall and see artwork before you buy. An art print framing service can bring these choices together, while a wall art visualiser may help you picture the arrangement.
Explore framed wall art and contact First4Frames Gallery to discuss artwork for your space.
Give your artwork a place to belong
The final choice involves more than how a print hangs. Consider how its depth, visible edges and spacing will work in the room. A subframe can shape the presentation, but the artwork’s backing and your intended display should guide the hanging approach.
If you’re still wondering what a subframe is for mounting artwork, use the idea as a starting point: picture the position and finish you want, then choose artwork and framing to suit. A carefully chosen piece can bring a room together and create a personal connection with the space.
Take the next step by exploring artwork that suits your setting, then decide how you’d like it displayed. For help planning your choice, contact First4Frames Gallery today. Your next display can begin with one image that feels just right.
Frequently Asked Questions
What is a subframe for mounting artwork?
A subframe for mounting artwork is a support fixed to the back of a mounted piece to provide a structure for hanging. It is separate from a decorative outer frame, so each can serve a different purpose. For example, a foamboard panel can use a rear subframe for support while keeping its edges visible in a frameless display.
What are art subframes made from?
Aluminium is one material used for art subframes. It is described as light and durable, making it an option for mounted prints that need a rear hanging structure. Subframes are chosen to suit the artwork’s backing, such as foamboard, Dibond or reverse acrylic. The backing and intended display help determine a suitable support arrangement.
How do you choose the right subframe size and depth?
Choose a subframe that fits the artwork’s backing and supports its dimensions without an uneven overhang. Consider the depth in relation to the wall clearance and floating effect you want. Mounted prints larger than 1 metre may require an aluminium sub-frame hanging system for greater stability. The hanging hardware also needs to suit the piece and its position.