
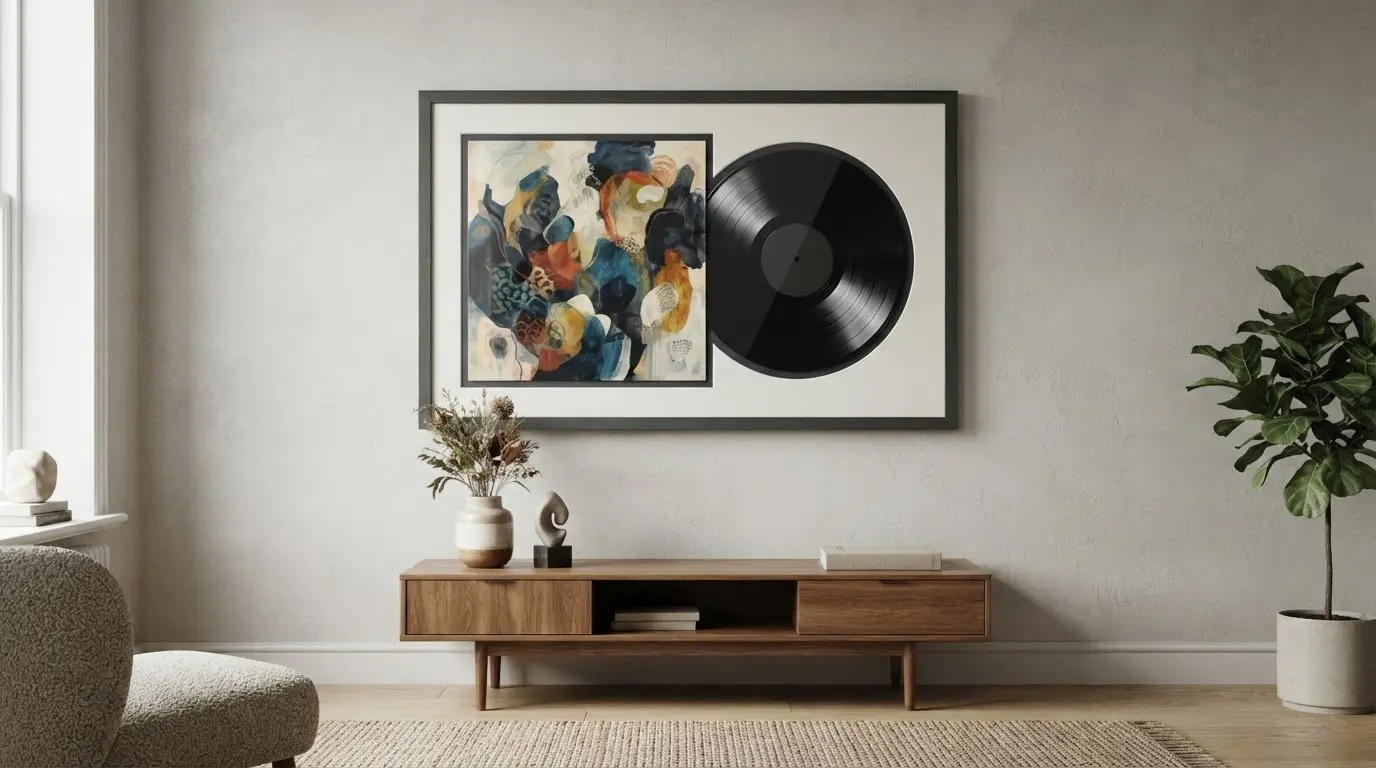
To frame a vinyl record cover for display, choose an overlap frame with a protective sleeve for the cover and a separate slot for the record. Place the cover in its sleeve, position the vinyl in its slot, and use acid-free backing and matting, keeping adhesive away from both items. Check the frame’s internal dimensions against the sleeve and record before assembling it.
A favourite album can bring back a time, place or sound, so it’s worth taking care with its presentation. The right frame displays the cover and record together while supporting both. Measuring carefully helps prevent a cramped or insecure fit.
This guide explains how to frame a vinyl record cover, what to look for in an overlap frame and how to use acid-free materials. You’ll also learn which dimensions to check before choosing a frame, so you can plan a display that gives the album artwork the attention it deserves.
Key Takeaways
- Choose a frame and mount colour that complement the album artwork without drawing attention away from it.
- An overlap frame lets the sleeve and record share the display, with each held in its own place.
- Acid-free backing and matting help create a suitable barrier between the display materials and your album.
- Measure the record, sleeve and available wall space before choosing a frame; bespoke framing can help when a standard size won’t suit.
How do I frame a vinyl record?
To frame a record and its sleeve, choose a frame with a cover sleeve and a separate slot for the vinyl. Slide the album cover into its protective sleeve, then position the record in its designated slot. This overlap layout displays both pieces together and keeps them in place. It suits a favourite album when the artwork and disc matter equally.
Choose a frame and mount colour that complement the cover’s palette. A black frame can give colourful artwork a crisp edge, while a pale mount can contrast with a dark sleeve. For a restrained look, choose a mount colour already present in the artwork. Check that the mount opening leaves the title, artist name and key image visible.
- Lay out the sleeve and record on a clean, flat surface.
- Place the sleeve in its holder and the vinyl in its slot.
- Fit the backing and frame, keeping adhesive away from both items.
- Check the cover and disc sit straight before securing the frame.
For wall mounting, use the frame’s fitted hanging hardware and choose fixings suited to the wall surface. Position the frame away from direct sunlight and damp areas. A level helps keep the album square, especially when the cover has strong horizontal or vertical lines.
The cost of custom vinyl record framing in the UK depends on the frame dimensions, materials, glazing and whether it holds the sleeve alone or the sleeve and record together. These choices determine the finished specification, so compare them when planning your budget.
Some DIY record frames use UV-protective acrylic to help protect against sun damage and fading. This is a specific feature of that acrylic, not one to assume of every glass or acrylic front. Choose glazing based on the protection and appearance you want for your display.
Record and sleeve overlap frames
An overlap frame displays an album sleeve and vinyl record side by side. The sleeve sits in a protective pocket, while a separate slot holds the disc. This arrangement keeps the artwork visible without hiding the record. It works especially well when the label, coloured vinyl or familiar grooves are part of the story you want the display to tell.
Before assembly, decide which side of the sleeve should face out. For a gatefold album, open the cover and consider displaying both panels, provided the frame is designed for that format. One listed gatefold frame measures 12.5 inches wide by 25 inches long. That example shows why a gatefold needs a different layout from a standard single-cover display.
Keep the sleeve and record centred in their own openings. Place the cover in its protective sleeve first, then slide the vinyl into its designated slot. Check that the disc sits securely and doesn’t obscure the sleeve’s title or artwork. If the frame includes a mount, check that its opening shows the whole cover, including details near the edges.
Plan the composition before closing the frame. Arrange the cover and disc on a clean surface, then check their alignment from above. Placing the record beside the sleeve creates a balanced look; positioning it above or below may suit a taller format. Follow the frame’s assembly order and keep adhesive away from the sleeve and vinyl.
For an album-led display, choose a frame that accommodates both pieces rather than forcing them into an unsuitable opening. Browse artwork in the online gallery for visual ideas, then use the same care to plan how your own record and sleeve will sit together.
Acid-free backing and matting
Use acid-free backing and matting between the album cover, record and frame. Conservation-grade boards provide support without adhesive touching the sleeve or vinyl. In a display showing both pieces, keep the record in its slot and the album cover in its sleeve. Don’t stick either directly to the backing.
Acid-free describes the material used for the backing and mount. It doesn’t mean every frame component is suitable for direct contact with a record. Check each layer, including the mount, backing board and any pocket holding the sleeve. Some DIY vinyl record frames use conservation-grade backing and matting.
Prepare the layers on a clean, flat surface, keeping the frame components in assembly order. Place the backing board first, then position the mat so its opening frames the picture without covering important lettering. Put the sleeved cover in its holder and the vinyl in its slot. Keep adhesive away from both throughout.
- Choose backing and matting described as acid-free and conservation-grade.
- Use a sleeve to hold the album cover, rather than fixing it to the mount.
- Keep the record in its designated slot, with no adhesive touching the disc.
- Check that the mat opening doesn’t hide the album title or artwork.
Before closing the frame, inspect the layout from the front. Look for trapped corners, folds in the sleeve or a record sitting at an angle. If the backing shifts during assembly, reopen the frame and reposition the layers rather than forcing the cover into place. A straight, supported arrangement presents the sleeve and disc neatly together.
For a display of the cover alone, the same principle applies: keep the album cover in its sleeve, with acid-free matting and backing behind it. In a record-and-sleeve frame, check that both display areas are supported and free from adhesive contact.
Checking frame dimensions
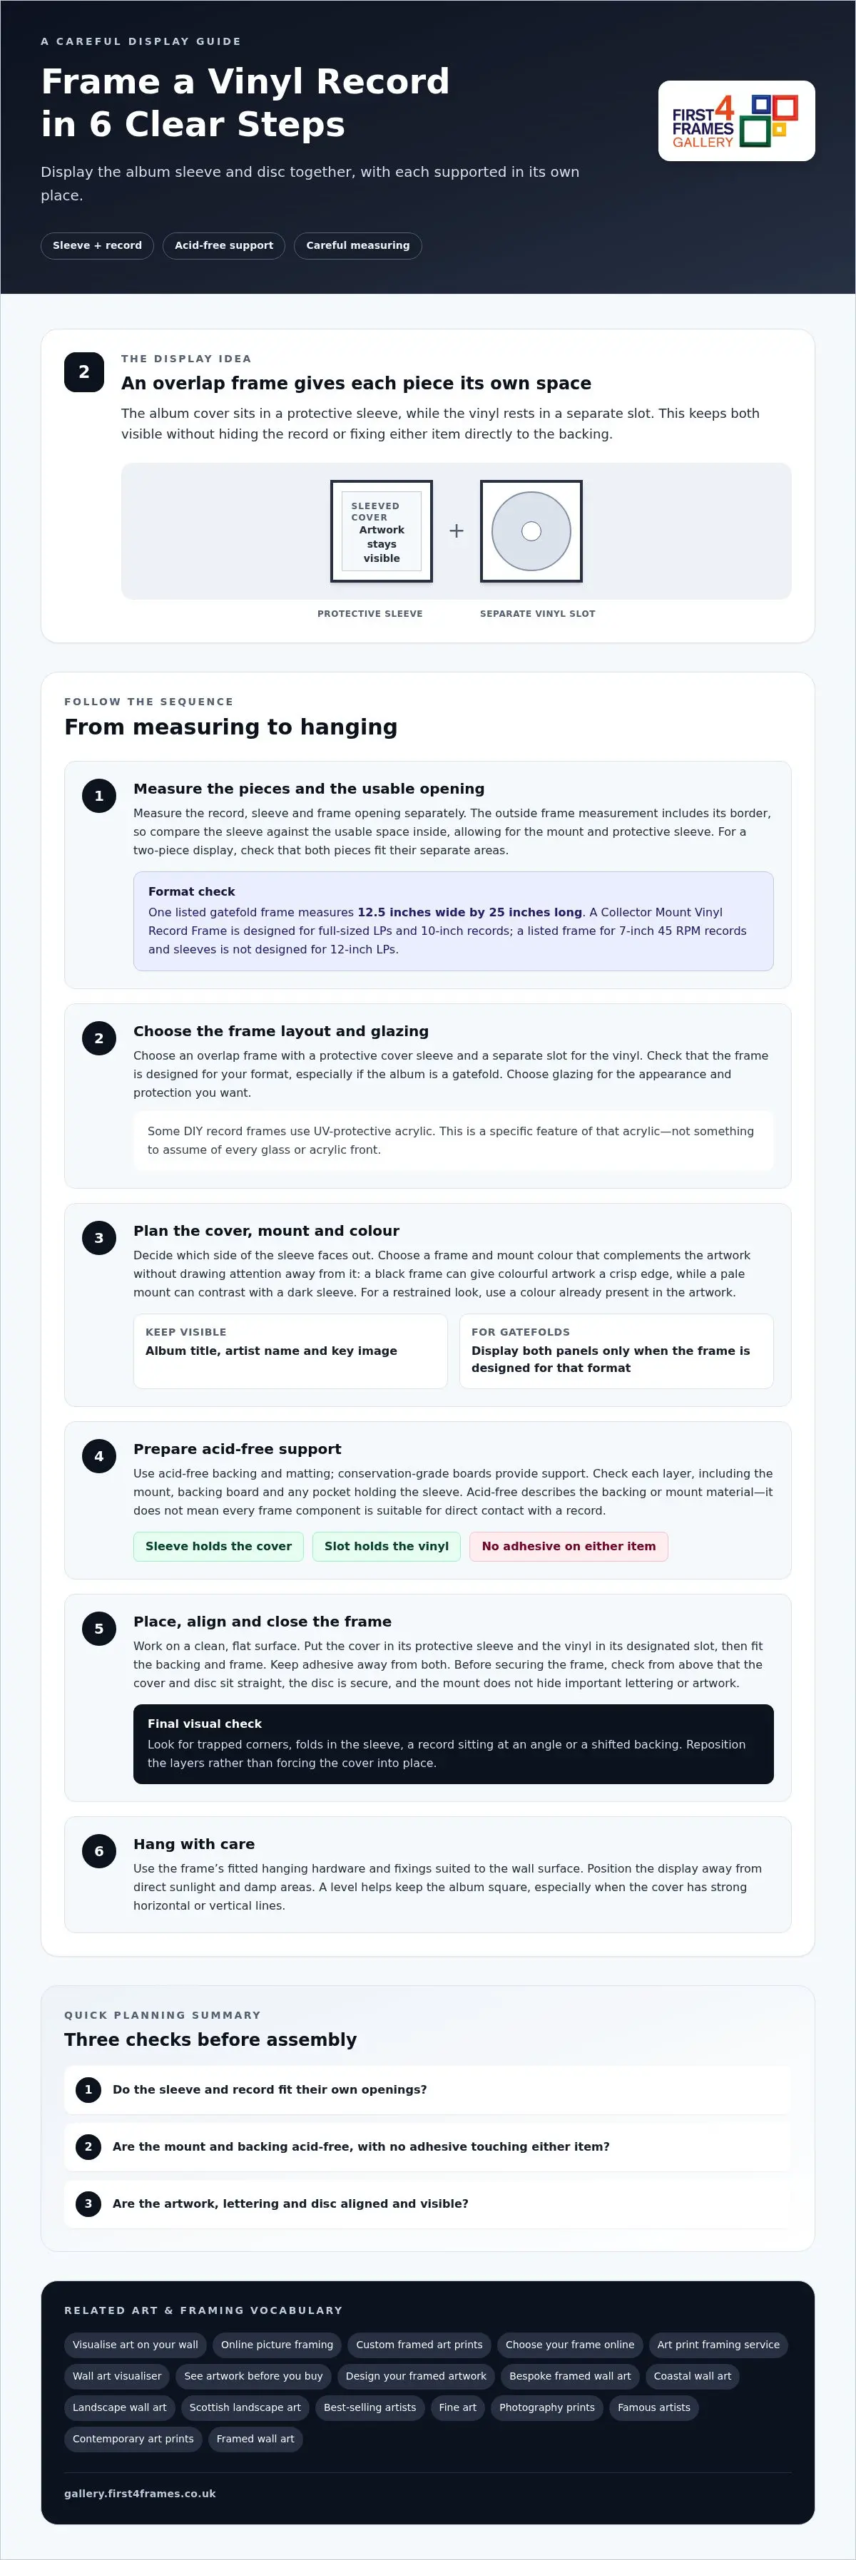
Measure the record, sleeve and frame opening separately before choosing a size. The frame’s outside measurement includes its border, so it doesn’t show how much space is available inside. Compare the sleeve’s width and height with the usable opening, allowing room for any mount and protective sleeve. For a record-and-sleeve display, check that both pieces fit their separate areas.
Format matters. A gatefold album opens wider than a single sleeve, and one listed Gatefold Album Frame measures 12.5 inches wide by 25 inches long. A Collector Mount Vinyl Record Frame is designed for full-sized LPs and 10-inch records. By contrast, a listed frame for 7-inch 45 RPM records and sleeves isn’t designed for 12-inch LPs.
Some frames use metric measurements, so compare like with like. A listed black-gloss double vinyl LP frame measures 72L x 40W cm and is for 12-inch vinyl. That overall size describes the frame, not necessarily its internal opening. Check the maker’s stated fit and compare it with your actual sleeve and record before buying.
- Measure the sleeve across its widest points, including any gatefold panels.
- Measure the record diameter and note whether the frame holds one disc or more.
- Check the frame’s internal opening and each display area, not only its outer dimensions.
- Allow for the mount, sleeve and backing so they don’t crowd the artwork.
Finally, consider the wall space. Hold a paper template matching the frame’s outer dimensions against the intended spot, then check its proportions beside nearby furniture. For a double LP layout, the 72L x 40W cm example will occupy a different shape from a single-cover frame. If a standard opening won’t suit your album, browse framed artwork for display ideas and consider a frame made to fit the sleeve and record together.
First4Frames Gallery: Ready-to-Hang Framed Art
First4Frames Gallery offers Custom Picture Framing for an album display and Ready-to-Hang Framed Art for a wider room scheme. Browse Giclée Fine Art Prints, including Scottish landscape art and contemporary art prints, to find pieces that sit comfortably alongside your collection. Online picture framing makes it easy to choose your frame online and design framed artwork that feels personal.
Explore the gallery to browse artwork and picture it on your wall. Whether you’re drawn to coastal or landscape prints, or bespoke framed art, consider how each piece will work alongside your record display.
Visit First4Frames Gallery to explore artwork and framing options.
Give your record a place in your story
A framed album can be the starting point for a more personal wall display. Build around its colours, the memories attached to its music or other pieces that make the room feel distinctly yours. Knowing how to frame a vinyl record cover gives you a thoughtful way to bring that connection into view.
For a record that needs a tailored presentation, First4Frames Gallery offers Custom Picture Framing. Its Ready-to-Hang Framed Art and Giclée Fine Art Prints can also help you shape a wider display around your collection. Choose pieces that complement the album without competing with its character.
Explore the gallery and find inspiration for your wall, then take the next step towards a display that feels like yours. Your favourite album deserves to be seen.
Frequently Asked Questions
How do I frame a vinyl record cover step by step?
Start by choosing a frame designed for the sleeve-and-record arrangement you want. Check that the cover and disc fit their separate display areas, then place the cover in its sleeve. Position the vinyl in its slot, arrange the backing and mount, and inspect the layout before closing the frame. Keep the title visible and don’t force anything into place.
What frame size fits a 12-inch vinyl record sleeve in the UK?
A frame for a 12-inch LP needs an opening that fits the actual sleeve and record layout, not just a 12-inch label. Measure the sleeve and compare it with the frame’s internal display area. One listed black-gloss double vinyl LP frame measures 72L x 40W cm and is designed for 12-inch vinyl, but that outer measurement doesn’t establish its internal opening.
What are the best frames for displaying a vinyl record and sleeve?
An overlap frame is a practical choice for displaying a sleeve and disc together. Look for a dedicated sleeve holder and separate record slot, so each has its own space. For example, a gatefold album needs a wider arrangement than a single cover. Acid-free backing and matting, with no adhesive touching the album, are useful material choices.
How can I frame a vinyl record without damaging the cover?
Keep the album cover inside a sleeve and don’t attach it directly to the frame or mount. Choose an opening that accommodates the sleeve without bending its corners. During assembly, support the cover on a flat surface and reposition it if it catches or creases. Keep adhesive away from the sleeve and record, and don’t force either into a tight space.
How do I mount a vinyl record and cover in a frame?
Use a frame with separate spaces for the sleeved cover and vinyl. Lay the frame components on a flat surface, place the cover in its sleeve holder and position the record in its slot. Check that both sit straight and the mount doesn’t obscure important artwork. Once assembled, use the frame’s fitted hanging hardware and choose wall fixings suited to the surface.
Do vinyl record frames need acid-free backing and archival materials?
Acid-free backing and matting are sensible choices for displaying a record and sleeve, particularly if you want to avoid adhesive contact. Some DIY vinyl record frames use conservation-grade boards. Check the materials in each layer, including the mount and backing, and keep the sleeve and disc in their holders rather than fixing them directly to the board.