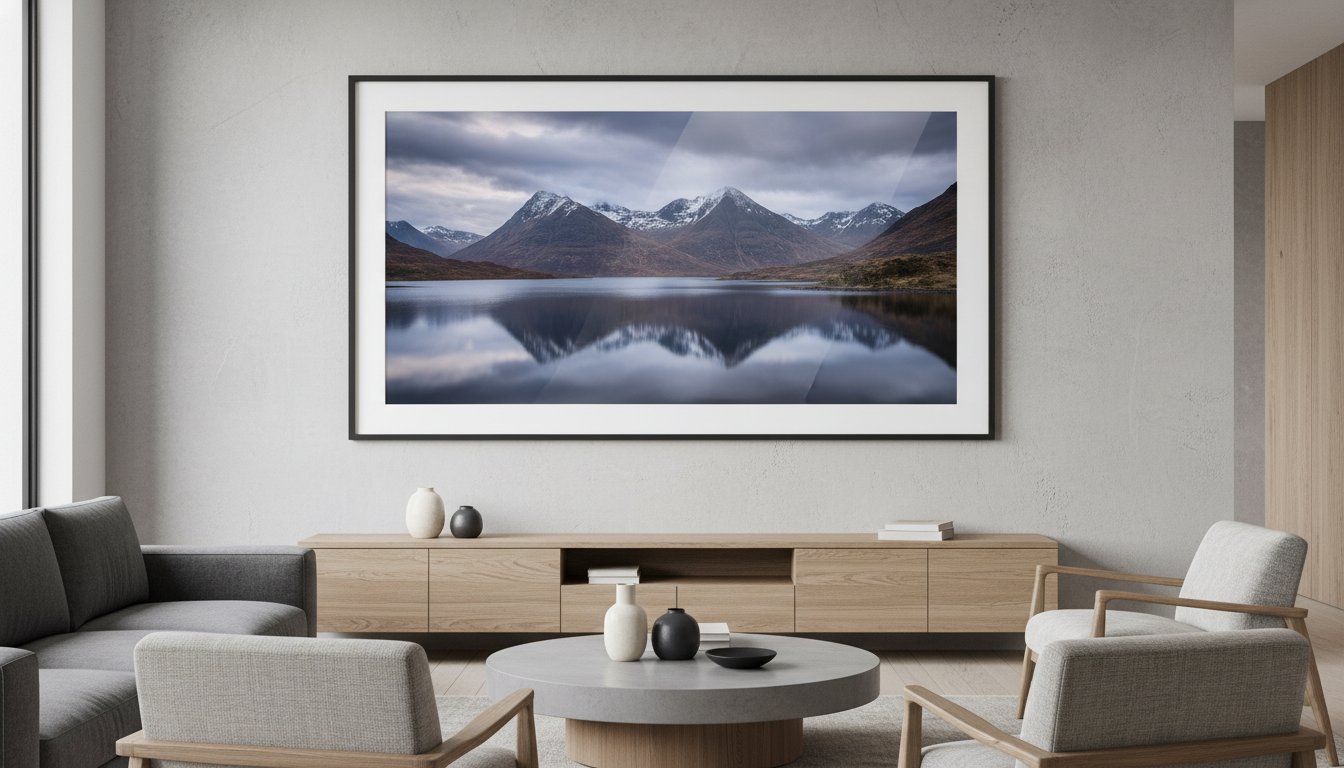
That spectacular panoramic photo captures a moment too grand for a standard frame. Whether it’s a breathtaking landscape or a cherished family gathering, the thought of cropping its edges or leaving it rolled up in a tube is simply heartbreaking. Many people feel that bespoke framing for panoramic photos is a complex and costly puzzle, leaving their beautiful memories hidden away. But what if transforming your unique print into a stunning work of art was a simple, rewarding, and accessible journey?
Welcome to your ultimate guide. Here, we demystify the entire process, from measurement to mounting. We’ll show you how to select the perfect bespoke frame that honours every inch of your image, exploring styles that enhance its unique dimensions. You’ll learn how different mounts and glazing can elevate the final look, and gain the confidence to protect and display your treasured memory flawlessly. Let’s embark on this creative journey and give your panorama the beautiful presentation it truly deserves.
Why Panoramic Photos Need a Bespoke Framing Approach
Panoramic images possess a unique, cinematic quality that draws the viewer in, capturing breathtaking landscapes and expansive cityscapes with spectacular detail. Their elongated format tells a grander story than a standard photograph ever could. However, this very characteristic that makes them so special also presents a significant challenge when it comes to display. Simply put, the off-the-shelf frames found in high street shops are not designed for their unique dimensions.
To truly appreciate the craftsmanship involved in professionally mounting these wide-format prints, this video offers a fantastic insight:
A perfect presentation demands a perfect fit, and for that, bespoke framing is the only professional solution. A custom-made frame does more than just contain your photograph; it protects your investment and elevates the image into a true piece of fine art, becoming the perfect bridge between the artwork and your room’s décor.
The Aspect Ratio Challenge
The core of the problem lies in the aspect ratio-the relationship between an image’s width and its height. Standard photos typically use ratios like 3:2 or 4:3. In contrast, the art of panoramic photography creates images with much wider aspect ratios, often 2:1, 3:1, or even more extreme. This fundamental mismatch means a standard frame will either leave awkward, unsightly gaps around the print or, worse, force you to crop the image, compromising the very essence of the shot.
The Risks of a Poor Fit or Cropping
Attempting to use an ill-fitting frame introduces several risks that can devalue your beautiful photograph. When you are forced to crop a panoramic image, you are fundamentally altering the artist’s vision. Key elements of the composition can be lost, destroying the balance and narrative of the scene. Furthermore, a print crammed into the wrong size frame looks unprofessional and can even suffer physical damage like creasing or tearing. The right approach to framing for panoramic photos ensures the entire, breathtaking view is preserved exactly as intended, with premium craftsmanship that honours the image.
Choosing the Perfect Frame Style for Your Panorama
Your panoramic photograph is a spectacular statement piece, and its frame should be its perfect partner. The goal is to choose a style that complements the image and elevates its presence without overpowering it. Think of the frame not as a mere border, but as a bridge connecting the art to your living space. The unique, elongated dimensions of a panorama mean that the considerations for framing for panoramic photos are slightly different from standard prints.
Frame Profile: Finding the Right Balance
With panoramic photos, the profile-or thickness-of the frame moulding plays a crucial role. We generally advise using simpler, cleaner profiles. A thin frame enhances the sense of width and space, drawing the eye along the length of the image and amplifying its expansive feel. For very large or heavy prints, a slightly thicker, more robust frame may be needed for structural support, but the visual aim should remain understated elegance.
Material Matters: Wood, Metal, and Modern Finishes
The frame’s material should echo the mood of your photograph. Matching the material to the subject creates a beautiful, cohesive look that feels intentional and professionally curated. Choosing premium, acid-free materials is also crucial for protecting your print long-term, a key principle in professional conservation framing practices.
- Natural Wood Frames: Perfect for sweeping landscapes and rustic scenes. An oak or ash frame can pick up on the organic textures within a nature shot.
- Metal Frames: Sleek black, silver, or brushed aluminium frames are ideal for modern cityscapes, architectural shots, and black and white photography. Their sharp, clean lines complement urban geometry.
- Ornate or Coloured Finishes: While less common for panoramas, a decorative or brightly coloured frame can work for specific abstract pieces or to create a bold, artistic statement.
Colour Theory: Connecting Frame, Photo, and Decor
The colour of your frame is the final piece of the puzzle. A wonderful technique is to select a frame in a subtle, secondary colour that appears within the photograph itself-perhaps a deep grey from the clouds or a warm tone from a brick building. This creates a seamless transition from the image to the frame. Ultimately, effective framing for panoramic photos also considers your room’s decor. When in doubt, a simple black or white frame offers a timeless, classic choice that allows the artwork itself to take centre stage.
The Crucial Role of Mounts in Panoramic Framing
A picture mount is far more than just a decorative border; it’s an essential component that performs the heavy lifting in your frame. When it comes to framing for panoramic photos, its role is even more critical. The mount serves two vital purposes: it creates visual breathing space that draws the eye into the expansive scene, and it provides a protective barrier, preventing your precious print from coming into direct contact with the glazing. This separation is crucial for preventing moisture damage and ensuring the longevity of your artwork.
Without a mount, a long, thin panoramic print can feel cramped and constricted, almost like looking through a letterbox. A well-proportioned mount gives the image the space it deserves, transforming it into a spectacular centrepiece. For ultimate protection, we insist on using only conservation-grade, acid-free mountboard, which guarantees your photo will not yellow or degrade over time.
Perfect Proportions for Panoramic Mounts
The unique dimensions of a panoramic photograph demand a bespoke approach to mounting. Unlike standard frames, the borders need careful consideration to achieve visual harmony. We recommend a technique called ‘bottom-weighting’, where the bottom border of the mount is made slightly wider than the top and sides. This subtle adjustment provides a visual anchor, preventing the artwork from feeling as though it’s sinking in the frame. It’s also vital to avoid making the side borders too narrow, as this can make the image feel squashed and diminish its expansive impact.
Choosing Your Mount Colour
The colour of your mount can dramatically alter the mood and focus of your panoramic print. The choice you make is a key part of the creative process:
- Classic & Timeless: Off-whites, ivories, and light creams are the go-to choice for a reason. They provide a clean, neutral space that allows the colours and details of your photograph to take centre stage without distraction.
- Dramatic & Moody: For a more contemporary or dramatic effect, consider a darker mount. A deep charcoal or even black can make the colours in your photo appear more vibrant and saturated, creating a powerful, atmospheric look.
- Depth & Detail: A double mount adds a layer of professional sophistication. By placing a second mount with a very thin border of a complementary or accent colour beneath the main mount, you can add beautiful depth and a subtle, bespoke finish.
The ‘Float Mount’ Alternative
For a truly modern and striking presentation, consider the ‘float mount’. In this premium technique, the print is expertly mounted onto a hidden, smaller board, raising it from the backing. This creates a beautiful shadow gap and makes your panoramic photo appear to float weightlessly inside the frame. This 3D effect is perfect for showcasing high-quality fine art prints, especially those with textured paper, adding a level of artistry that is simply breathtaking.
Choosing the right mount is a crucial step in creating the perfect custom framing for panoramic photos. If you need guidance, our experienced team is always here to help. Ask our experts about the best mounting for your photo.
How to Measure and Prepare Your Photo for Framing
Before the journey of creating your frame can begin, a little preparation ensures a perfect result. At First4Frames Gallery, we believe true craftsmanship starts with precision. Adopting the classic ‘measure twice, cut once’ philosophy is the secret to bespoke framing for panoramic photos that fits flawlessly and looks spectacular. These simple steps will help you prepare your print with the care and attention it deserves, turning a beautiful image into a breathtaking centrepiece.
A Simple Step-by-Step Measurement Guide
To create a frame that acts as the perfect bridge between your art and your room, accurate measurements are essential. Follow these professional tips for a perfect fit every time.
- Prepare Your Space: Lay your panoramic print on a large, clean, and completely flat surface to avoid any damage or inaccurate readings.
- Use the Right Tool: A rigid steel tape measure will give you the most accurate dimensions. Avoid fabric or flexible tape measures as they can stretch and lead to errors.
- Measure the Image Area: Carefully measure the exact width and height of the printed image itself, not the full paper size. This ensures the mount or frame edge will align perfectly with your artwork.
- Double-Check for Consistency: Measure both the width and height in at least two different places to check for any slight variations in the print’s dimensions.
Choosing the Right Glazing: Glass vs. Acrylic
The glazing is more than just a cover; it’s a protective shield for your art. For large panoramic prints, the choice between traditional glass and modern acrylic (often known as Perspex) is an important one that impacts both safety and display quality.
Glass offers exceptional clarity and is highly scratch-resistant. However, it is heavier and can shatter, which can be a concern for very large frames. Acrylic, on the other hand, is significantly lighter and shatter-resistant, making it a safer and often more practical choice for oversized pieces.
For ultimate preservation, we highly recommend choosing a glazing with UV protection to prevent the beautiful colours in your photograph from fading over time. For rooms with significant natural light, an anti-reflective option will minimise glare and ensure your image is always the star of the show.
Handling Your Print Like a Professional
A fine art panoramic print is a delicate piece. Handling it correctly is crucial to avoid any accidental damage before it’s safely housed in its bespoke frame.
- Clean Hands are Key: Always wash and dry your hands thoroughly before touching your print. For best practice, wear clean cotton gloves to prevent natural oils from your skin leaving fingerprints.
- Stay Flat or Loosely Rolled: Keep the print stored flat or, if necessary, loosely rolled in the tube it arrived in.
- Never, Ever Fold: This is the most important rule. A fold or hard crease will create a permanent and visible line in the image that cannot be removed.
Creative Ideas for Displaying Your Framed Panorama
You’ve chosen a spectacular image and selected the perfect bespoke frame. Now for the final, exciting step: displaying your masterpiece. Where you hang your panoramic art has a tremendous impact on its relationship with your space. The right placement can transform a room, turning a beautiful print into a breathtaking focal point. Here are some professional ideas to inspire you.
The Classic Statement Piece
The most popular way to display a panoramic photo is as a commanding statement piece. Placed above a key piece of furniture, it anchors the room and draws the eye. To achieve a professional, balanced look, follow these simple design rules:
- Height: Hang the frame so the centre of the image is at average eye level, which is typically around 145cm (57 inches) from the floor.
- Width: Ensure your framed piece is at least two-thirds the width of the furniture it hangs above, such as a sofa, headboard, or console table. This creates a pleasing visual connection.
Perfect for Awkward Spaces
The unique dimensions of panoramic prints make them a perfect solution for those tricky, often-neglected areas of a home or office. Their long, narrow format is ideally suited for bringing life to hallways, where a standard frame might feel cramped. Consider placing one on the wall along a staircase, above a wide doorway, or within a shallow alcove to add depth and spectacular visual interest where you least expect it.
The Triptych: Splitting Your Panorama
For a truly modern and high-impact display, consider dividing a single panoramic image across three separate, perfectly matched frames. This triptych arrangement transforms your photo into a contemporary art installation. This technique works best for expansive landscapes or cityscapes that don’t rely on a single, central subject, allowing the viewer’s eye to travel across the panels. It’s a sophisticated approach to framing for panoramic photos that adds rhythm and architectural flair to any wall. For more inspiration, explore our online gallery.
The triptych approach is also beautifully suited to modern, frameless presentations. For instance, in Norway, a popular choice for creating high-impact wall art is to fremkalle bilder på lerret, which creates a striking, gallery-wrapped look without a traditional frame.
A Note on Secure Hanging: Due to their length and potential weight, professionally framed panoramas require careful hanging. We recommend using two D-rings, spaced about a quarter of the way in from each end of the frame, rather than a single central point. This distributes the weight evenly and ensures the frame remains level and secure. Always use a spirit level for a perfect finish.
Bring Your Vista to Life with the Perfect Frame
Your spectacular panoramic photo captures a moment, a memory, or a breathtaking view unlike any other. As we’ve explored, giving it the display it deserves means moving beyond standard sizes. The right mount, a perfectly proportioned frame, and a style that bridges your art with your décor are crucial. The art of framing for panoramic photos is about precision, protection, and presentation.
At First 4 Frames, we believe your view deserves a bespoke showcase. With over 20 years of expert craftsmanship, we use only high-quality, conservation-grade materials to guarantee a perfect fit, every time. We are passionate about transforming your photo into a stunning centrepiece that will be cherished for years to come. Don’t let that magnificent shot wait any longer to take pride of place in your home.
Have a panoramic photo ready for its moment? Get a bespoke framing quote today.
Frequently Asked Questions About Framing Panoramic Photos
How much does custom framing for panoramic photos cost?
The cost for bespoke framing for panoramic photos varies depending on your chosen size, moulding, and glazing options. For a smaller panoramic, you might expect to pay around £80-£120. For larger, more spectacular pieces using premium materials like solid oak and anti-reflective glass, the price can range from £200 to £400 or more. We provide a clear, itemised quote upfront, ensuring there are no surprises and you get the perfect frame for your beautiful artwork.
Can you frame a panoramic photo taken on an iPhone?
Absolutely! Modern smartphones capture stunning high-resolution panoramas perfect for framing. The key is the image quality. Before printing, we recommend checking the photo’s resolution to ensure it will look crisp and clear at your desired size. We can advise on the maximum print dimensions to guarantee your cherished memory is transformed into a beautiful piece of wall art without losing any detail. It’s a wonderful way to give your digital photos a physical presence.
What is the best way to hang a long and heavy panoramic frame securely?
For a long and heavy panoramic frame, security is paramount. We always recommend using two fixing points, spaced about a third of the way in from each end of the frame. This distributes the weight evenly and prevents tilting. For plasterboard walls, heavy-duty fixings like strap hangers paired with appropriate wall plugs are essential. Whenever possible, securing the fixings directly into wall studs will provide the strongest and most reliable support for your spectacular artwork.
Should a panoramic photo always have a mount?
While not strictly essential, we highly recommend a mount for most panoramic photos. A mount provides visual “breathing space,” drawing the eye into the image and preventing it from feeling cramped within the frame. It also serves a practical purpose by keeping the photo from touching the glass, which protects it over time. A mount acts as the perfect bridge between the artwork and the frame, creating a truly professional, gallery-quality finish for your piece.
What is the largest size panoramic photo you can frame?
Our bespoke service allows us to create exceptionally large frames to make a real statement. We can professionally frame panoramic photos up to approximately 240cm (around 94 inches) on the longest side. The main constraints are typically the maximum sizes of the materials we use, such as the glazing and mountboard. We take immense pride in our craftsmanship, ensuring that even the largest pieces are structurally sound and beautifully finished, ready to become the centrepiece of any room.
How long does it take to get a panoramic photo custom framed?
We understand you’re excited to display your new artwork. Our typical turnaround time for custom framing is between 7 to 10 working days. This allows our expert team the time to give your piece the care and attention it deserves, from cutting the bespoke frame to final assembly. If you have a specific deadline, please let us know. We always aim to provide a hassle-free and speedy service without ever compromising on our premium quality craftsmanship.