
Posted on

Creating a Family History Gallery Wall: A Professional Guide (2026)

Creating a Family History Gallery Wall: A Professional Guide (2026)

What if the most valuable masterpiece in your home isn’t a signed print, but the fragile 1924 wedding portrait currently tucked away in a shoebox? You likely feel that your family’s heritage deserves a place of honor, yet the process of creating a family history gallery wall often feels overwhelming. It’s natural to worry about damaging original documents or feel frustrated when trying to match a sepia-toned heirloom with a modern color photograph. We believe that a frame does the heavy lifting in this relationship, acting as the essential bridge between your home’s decor and your unique history.

This guide will show you how to transform your heritage into a stunning, archival-quality display using expert curation and framing techniques. You’ll discover how to embrace the 2026 “Everyday Exhibits” trend to create a relaxed, eclectic layout that works perfectly in long hallways or staircases. We’ll share professional secrets on archival protection, explaining why museum-grade materials are vital to prevent the fading that ruins standard frames. From utilizing 600 DPI high-resolution printing to selecting bespoke frames that unify different eras, you’ll gain the confidence to build a beautiful gallery that tells your story for generations to come.

Key Takeaways

  • Learn how to curate a compelling visual narrative by mixing diverse media like black and white portraits, marriage certificates, and military medals.
  • Understand the critical role of acid-free mounts and museum-grade materials in preventing the yellowing and degradation of your most fragile family documents.
  • Master practical layout techniques like the “Staircase Strategy” when creating a family history gallery wall to ensure a seamless flow in transit spaces.
  • Discover how bespoke framing acts as a bridge, unifying disparate eras of photography with your contemporary home decor.
  • Gain access to expert sourcing for rare prints and custom UK framing options that aren’t available in standard online inventories.

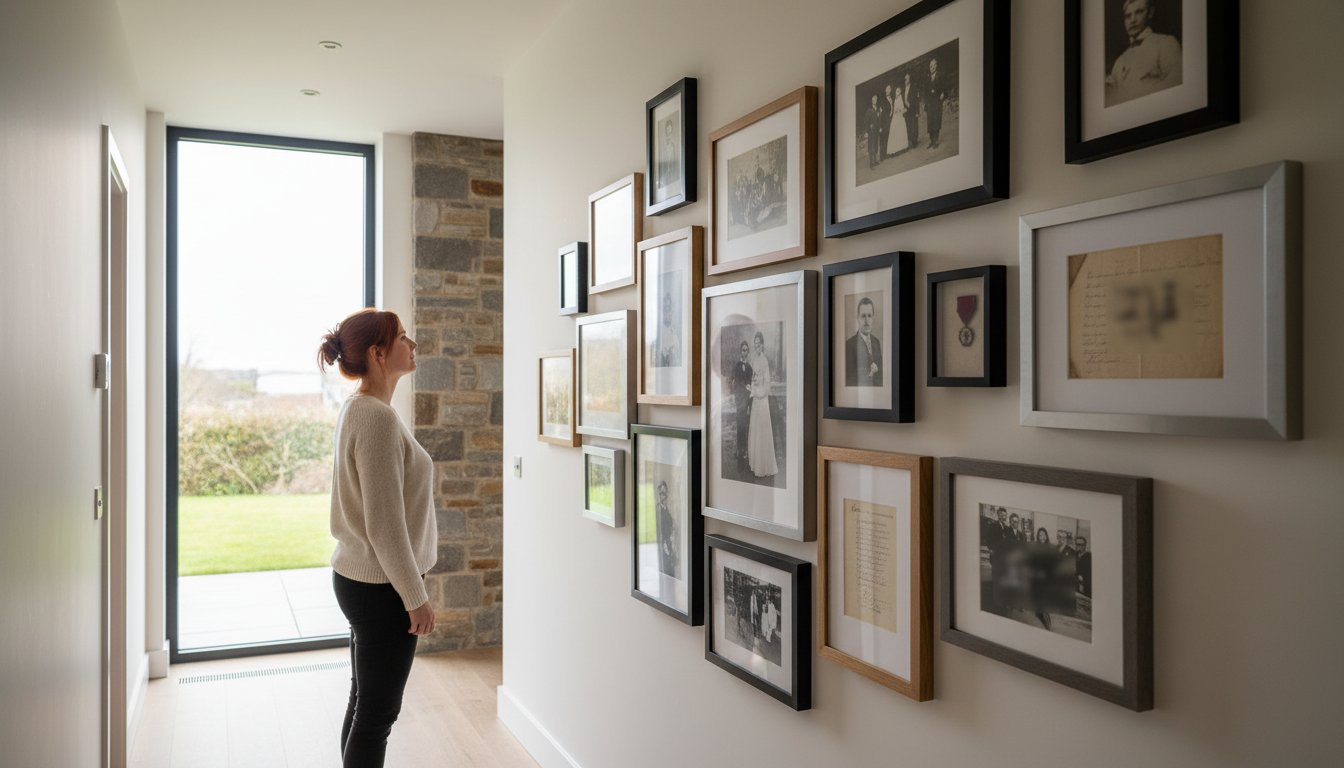
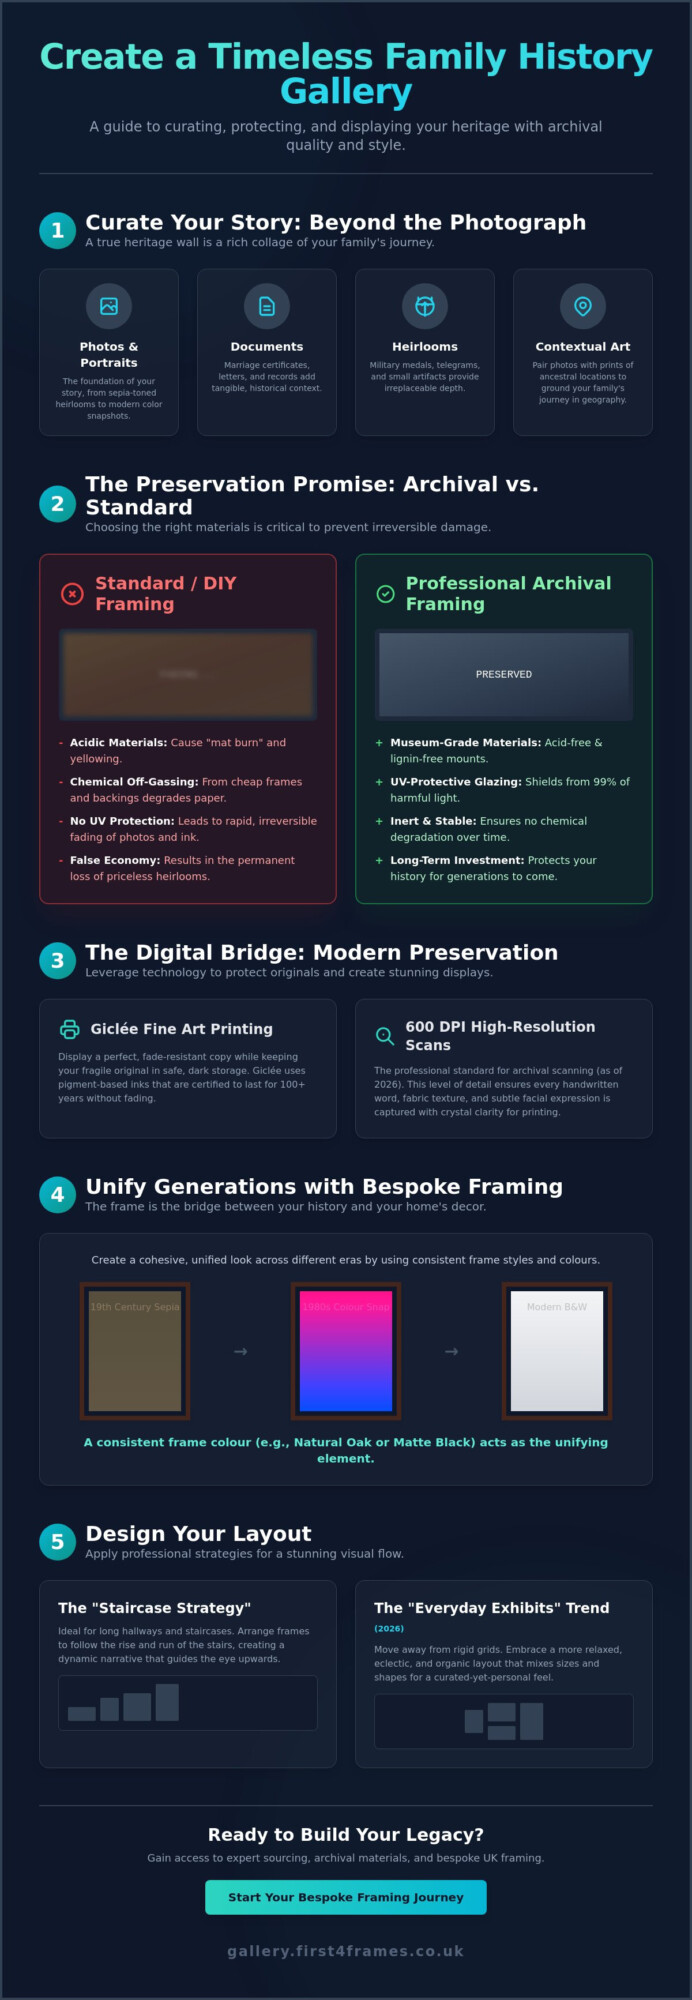
When you begin creating a family history gallery wall, you are essentially acting as a curator for your own private museum. A heritage wall is a curated display of genealogy and fine art that serves as a visual narrative of your lineage. While photographs are the foundation, a truly spectacular display incorporates a diverse range of media to provide depth. Think of the history of collage, where overlapping textures and varied artifacts like military medals, telegrams, and baptismal records come together to tell a multi-dimensional story.

To better understand how to select and balance these different elements, watch this helpful video:

Beyond Photos: Documents and Heirlooms

Handwritten letters and official certificates offer a tangible connection to the past that a digital scan simply cannot replicate. However, these organic materials are incredibly sensitive to environmental factors. We utilize bespoke photo frames that go beyond aesthetics, providing the structural support and UV shielding necessary to prevent brittle paper from crumbling. At First4Frames Gallery, we prioritize the longevity of these heirlooms, ensuring that your great-grandparents’ handwriting remains legible for your own grandchildren to see.

Adding Artistic Context with Scottish Prints

Context is what transforms a collection of faces into a history of a place. By pairing your portraits with Giclée prints of ancestral locations, such as the rugged Scottish Highlands or specific landmarks in Falkirk, you ground your family’s journey in geography. You might pair a 1940s portrait with a vibrant landscape by Jolomo or a local scene by Margaret Evans to add a splash of colour and artistic flair. If a particular village or landmark is missing from our online shop, First4Frames Gallery can source specific prints upon request to ensure your heritage wall is complete and bespoke.

Protection Meets Style: Choosing Bespoke Frames and Materials

Choosing the right materials is the most critical step when creating a family history gallery wall. While some DIY guides suggest using spray-painted thrift store frames, these often contain acidic chemicals that cause irreversible damage through off-gassing. We prioritize archival protection by using acid-free and lignin-free mat boards. According to a May 2, 2026 report by Galerie Prints, using non-archival frames is a false economy that leads to the rapid degradation of heirlooms. By choosing professional materials, the frame becomes a beautiful bridge between your room décor and your history.

Unifying Disparate Eras with Framing

Trying to match a 19th-century sepia portrait with a 1980s color snap can be challenging. We recommend using consistent frame colours, such as a matte black or a warm natural oak, to unify 100 years of history. For those planning a structured grid, selecting standard photo picture sizes ensures a clean, professional finish. As a one-stop-shop for UK framing, we can provide almost any bespoke option, even if it’s not currently listed on our website.

The Role of Giclée Printing in Preservation

To keep your originals safe, we recommend Giclée fine art prints for display. Unlike standard digital prints, Giclée uses pigment-based inks that will not fade over time. Research from January 4, 2026, confirms that the standard for high-quality photo printing has shifted to 600 DPI resolution. This ensures every detail of a vintage scan remains crisp and clear. This process allows you to keep the fragile original in a dark, safe environment while enjoying an identical copy on your wall. You can explore our collection of fine art prints to find the perfect companion pieces for your family photos.
Creating a Family History Gallery Wall: A Professional Guide (2026)

Designing Your Layout: From Hallways to Feature Walls

Layout is the architecture of your story. Before you reach for the hammer and nails, we suggest laying your entire collection out on the floor to visualize the rhythm of the pieces. This step is essential when creating a family history gallery wall because it allows you to see how disparate frame sizes interact. You can anchor the display with a large central family tree print or a statement landscape, then build outward with smaller, detailed portraits. This balance prevents the wall from feeling cluttered or lopsided.

UK homes often present unique architectural challenges, particularly narrow Victorian hallways and steep staircases. For these spaces, we recommend the “Staircase Strategy.” Align the bottom edge of your frames with the rise of your stairs, maintaining a consistent distance from the steps. This creates a natural flow that guides the eye upward. If you’re unsure about which frames will fit your specific space, view our gallery for layout inspiration and see how our bespoke frames can be tailored to any dimension.

Grid vs. Organic Layouts

A formal grid layout offers a clean, modern look that works beautifully in a dining room or study. It requires precision and identical frame sizes to succeed. Conversely, an organic “salon-style” hang is perfect for long hallways and eclectic collections. This style allows you to add new pieces over time without disrupting the entire arrangement. It embraces the “Everyday Exhibits” trend of 2026, focusing on a collected-over-time aesthetic rather than rigid symmetry.

Technical Tips for a Perfect Hang

  • The Eye-Level Rule: Aim to have the center of your gallery roughly 57 to 60 inches from the floor. This is the standard height used in professional galleries to ensure comfort for the viewer.
  • Template Planning: Trace your frames onto brown paper and stick them to the wall with low-tack tape. This lets you finalize the arrangement without leaving marks or unnecessary holes.

Whether you choose local collection at our workshop or our reliable shipping service, we ensure your professionally framed pieces arrive ready for their new home. Our team can even source specific prints that aren’t in our current inventory to help complete your vision. You can trust our expertise, as evidenced by our consistent five-star reviews on Trustpilot and Google, to make the process hassle-free.

Bringing it to Life: Professional Framing and Sourcing

Execution is where your vision becomes a permanent household landmark. At First4Frames Gallery, we’ve established ourselves as a premier online art gallery by offering high-quality framed prints at competitive prices. While the previous steps focused on curation and layout, professional framing is the final investment that secures your family’s legacy. We don’t just provide a border; we offer a bespoke service that ensures your history is preserved behind museum-grade materials. Our commitment to craftsmanship means we can provide almost any framing option available in the UK, even those not currently featured on our website.

Our “three-step” process makes creating a family history gallery wall straightforward and hassle-free. First, browse our extensive online collection or bring your unique heirlooms to us. Second, select the perfect bespoke frames and mounts to suit your decor. Third, place your order for ready-to-hang art that arrives at your door. We provide reliable shipping across the UK and offer a local collection service at our Falkirk workshop for those who prefer a personal touch. We encourage local customers to visit us for a consultation to see our materials firsthand.

Bespoke Sourcing for Your Story

A narrative often requires a specific piece of art to bridge the gap between different generations. If you’re missing a visual link to a particular Scottish town or landscape, we can source rare prints from specific artists upon request to complete your wall’s story. Our art in the frame resource is an invaluable tool for anyone looking to blend fine art with their genealogy. This flexibility ensures that your gallery wall isn’t limited by what’s currently in stock but is instead limited only by your imagination.

Trust and Quality Assurance

We believe in a transparent, trust-based relationship with every customer we serve. With over 20 years of expertise, we take direct involvement in every stage of the framing and sourcing process. Don’t just take our word for it; we encourage you to check our reviews on Trustpilot, Google, and Yell to see our commitment to service. If you’re ready to start creating a family history gallery wall that combines professional quality with a personal touch, contact our expert team today to discuss your bespoke project.

Secure Your Story for the Future

Building a heritage display is a journey that connects your past with your present home. By implementing the layout strategies and archival protections we’ve discussed, you ensure that your lineage is displayed with the respect it deserves. Whether you’re creating a family history gallery wall in a sunlit living room or a narrow hallway, the right combination of bespoke materials will keep your memories vibrant. It’s about more than just aesthetics; it’s about making sure these stories don’t fade into obscurity.

At First4Frames Gallery, we bring over 20 years of bespoke framing expertise to every project, providing high-quality Giclée prints and archival mounts that stand the test of time. Based in Falkirk and proudly serving the wider UK, we’re dedicated to making fine art and professional framing accessible to everyone. You can start building your family gallery wall with First4Frames Gallery today. We invite you to check our five-star reviews on Google and Yell to see how we’ve helped others turn their family history into a spectacular visual legacy.

Frequently Asked Questions

How do I protect old family photos from fading on a gallery wall?

You protect old family photos by using museum-grade UV-filtering glass or acrylic. This specialized glazing blocks 99% of harmful ultraviolet rays that cause irreversible fading. We also recommend hanging your display away from direct sunlight. Since we’ve been a trusted professional for over 20 years, we ensure every bespoke frame we craft provides this essential archival protection. This investment in quality ensures your prints don’t turn into ghosts of the past.

What is the best layout for a family history wall in a narrow hallway?

The best layout for a narrow hallway is a horizontal line or a low-profile staggered arrangement. In tight spaces, choose frames with a depth of less than 20mm to prevent them from being knocked by passers-by. This ensures the wall remains a beautiful bridge to your past without obstructing the path. Our Falkirk workshop can help you select the perfect low-profile materials for your specific architectural needs, even if they aren’t currently listed online.

Can I mix different frame styles on one gallery wall?

What should I include in a family history wall besides photos?

You should include physical artifacts like military medals, birth certificates, and vintage maps alongside your photographs. These items add texture and depth to your lineage story. If you’re missing a piece of the puzzle, we can source specific Giclée prints of ancestral locations to fill the gaps. Our artisan team specializes in bespoke framing for these three-dimensional objects to ensure they are displayed safely and professionally.

How do I hang a gallery wall without damaging my walls?

You can hang your gallery wall without damage by using heavy-duty adhesive strips or a traditional picture rail system. Professional-grade adhesive strips can support frames weighing up to 7.2kg, which is ideal for most standard photo sizes. Always check the weight of your professionally framed art before selection. This method allows you to experiment with your layout without leaving permanent marks on your plaster or wallpaper during the installation process.
Posted on

Custom Multi-Aperture Photo Frames: The Ultimate Design Guide

Custom Multi-Aperture Photo Frames: The Ultimate Design Guide

Your most cherished memories deserve more than a digital folder, but the thought of arranging them can be daunting. Will they look cluttered? What if the measurements are wrong? Designing the perfect gallery wall often feels so complex that many of us never start. But what if you could bypass the complexity and create a stunning, professional display with ease? With multi-aperture photo frames custom-designed for your story, you can transform a collection of moments into a single, beautiful work of art.

Forget the guesswork and the fear of a messy result. This is your ultimate design guide to creating a bespoke frame that is uniquely yours. We’ll walk you through every simple step, from choosing a spectacular layout that tells your story to selecting the perfect mount and frame colours with confidence. Prepare to turn your precious photos into a spectacular, professionally crafted centrepiece for your home.

What is a Custom Multi-Aperture Frame (And Why You Need One)

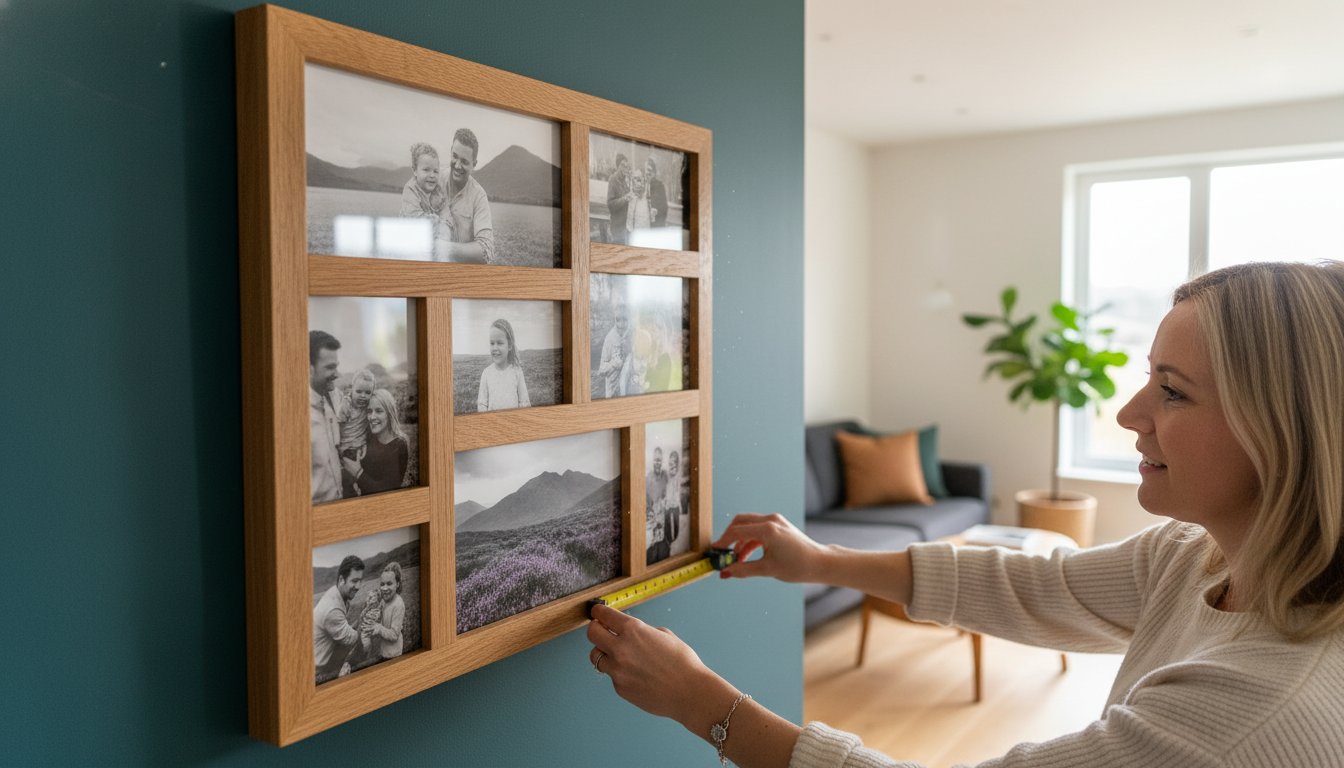
A multi-aperture frame is more than just a way to display photos; it’s a canvas for your memories. Unlike a standard frame that holds a single image, a multi-aperture design uses one beautiful frame to house a collection of pictures, each visible through its own window, or ‘aperture’. This transforms scattered snapshots into a cohesive visual story, creating a powerful, curated display that a series of individual frames simply cannot match. It’s the perfect solution for showcasing family milestones, a spectacular travel series, or the highlights of a special event like a wedding.

To see how these elements come together, this short video provides a great visual example:

Beyond the Single Photo: The Art of Visual Storytelling

The true magic of a multi-aperture frame lies in its narrative power. By grouping photos, you can tell a story at a glance-a baby’s first year, from newborn to first steps; a holiday adventure, from cityscapes to sunsets; or a collection of your favourite family portraits through the years. It’s also a spectacular way to display a collection of small art prints or cherished postcards. This makes it an incredibly thoughtful and personalised gift, capturing a shared history in one beautifully crafted piece.

Custom Bespoke vs. Off-the-Shelf: A Quality Comparison

While off-the-shelf multi-photo frames are available, they often come with limitations. You’re restricted to standard photo sizes and fixed, uninspired layouts. With multi-aperture photo frames custom made by artisans, the possibilities are endless. You choose the exact dimensions for each photo, design a unique layout, and select from premium materials. This bespoke approach ensures not only a perfect fit for your images and décor but also superior quality and longevity, protecting your precious memories for years to come.

The Anatomy of a Multi-Aperture Frame

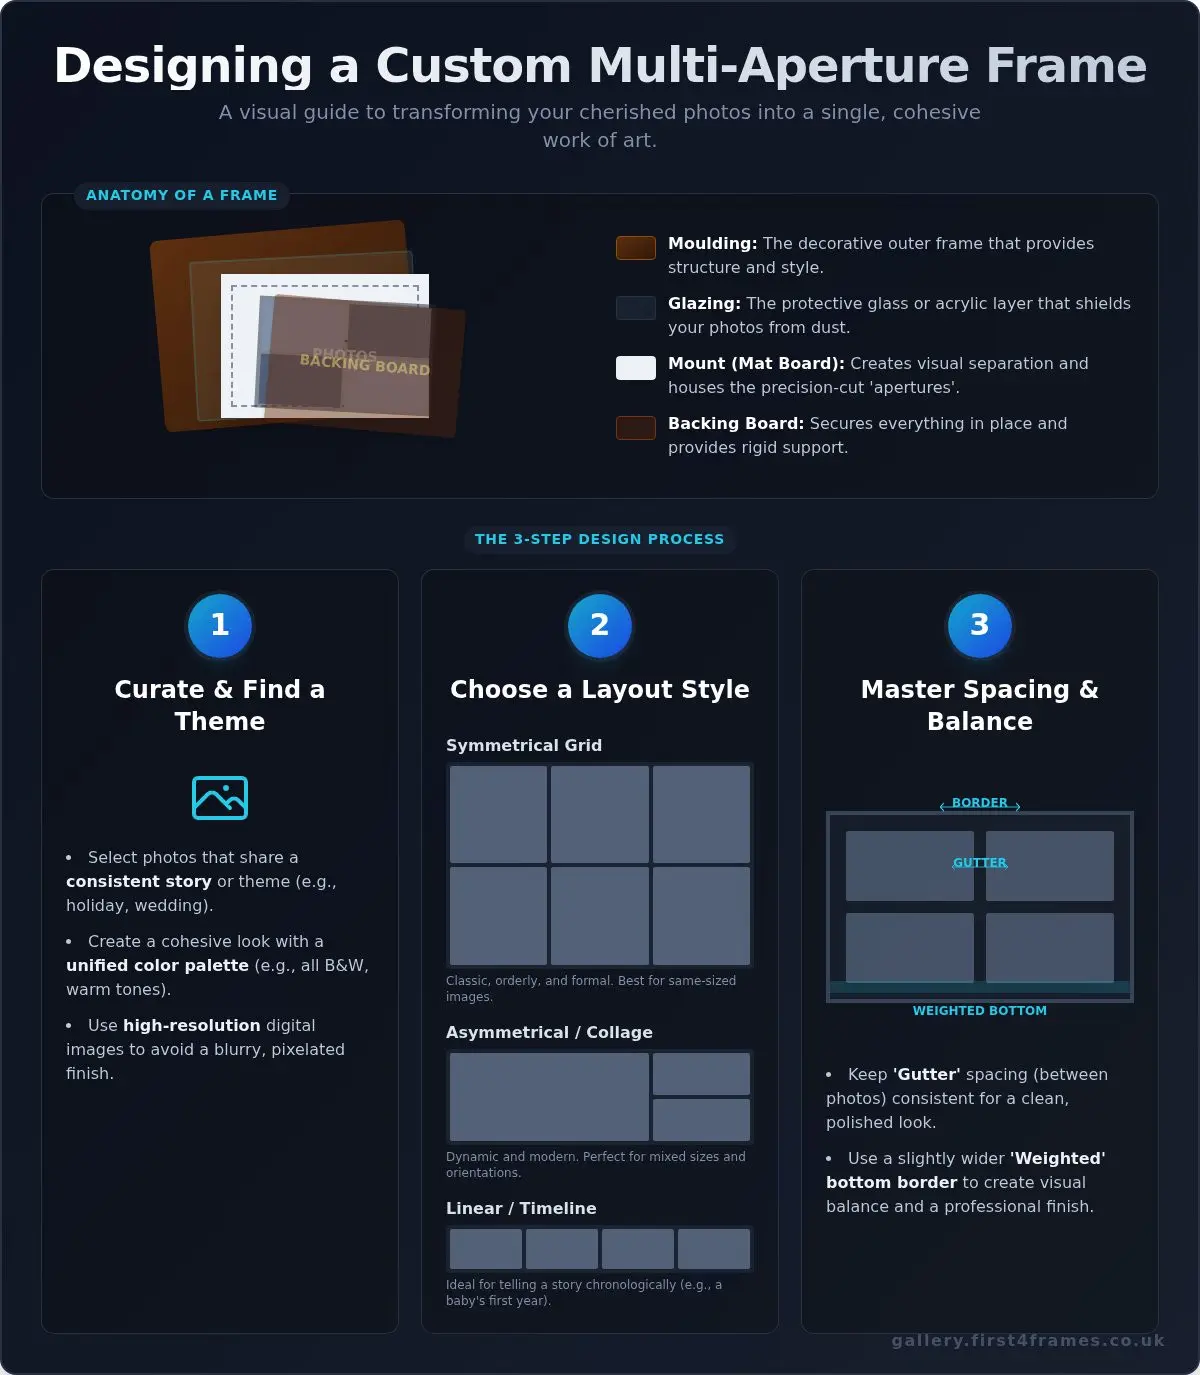
Understanding the components helps appreciate the craftsmanship involved. Every professional picture frame consists of several key elements working in harmony. The moulding is the outer frame, the glazing is the protective glass or acrylic, and the backing board secures everything in place. The star of this design, however, is the mount (or mat board). This is where we precision-cut the ‘apertures’-the individual windows that showcase each of your photos, creating a clean, professional, and unified display.

Designing Your Layout: A Step-by-Step Guide to Visual Storytelling

A beautiful display begins long before the hammer meets the nail. The secret to a spectacular result lies in a clear plan. Far from being intimidating, designing the layout for your multi-aperture photo frames custom made for your space is a rewarding creative process. This guide demystifies the steps, helping you transform a collection of individual photos into a single, harmonious piece of art that tells your unique story with balance and a professional finish.

Step 1: Curate Your Photos & Find a Theme

The first step is to choose your story. Select a group of photos that share a consistent theme, whether it’s a family holiday, your wedding day, or a series of architectural shots. Consider a unified colour palette for a cohesive look. You might choose all black and white images for a timeless, classic feel, or photos with similar warm or cool tones. Most importantly, ensure you are using high-resolution digital images. This prevents a blurry or pixelated finish, honouring your memories with the clarity they deserve. Choosing your best photos means you’ll want to protect them for years to come, which is why we always recommend using archival-quality materials for mounts and glazing.

Step 2: Choosing a Layout Style

Once you have your photos, it’s time to arrange them. Think about the overall feeling you want to convey. A quick sketch on paper can help you visualise the final piece before you commit. Common layout styles include:

  • Symmetrical Grid: Classic, orderly, and perfect for displaying images of the same size and orientation. This creates a clean, formal balance.
  • Asymmetrical/Collage: A more dynamic and informal style that works beautifully with a mix of photo sizes and orientations. It adds energy and a modern touch.
  • Linear/Timeline: Ideal for telling a story chronologically, such as a baby’s first year or the key moments from an event.

Step 3: Mastering Spacing & Balance

The final touch of craftsmanship comes from mastering the space around your photos. In professional framing, we consider two key areas. The ‘border’ is the space between the outer edges of your photos and the frame itself. The ‘gutter’ is the space between each individual photo aperture. For a clean, polished look, always keep the gutter spacing consistent. A popular design technique is to use a ‘weighted’ bottom border, making the mount slightly wider at the bottom. This adds visual weight and prevents the composition from feeling like it’s falling, creating a perfectly balanced, gallery-worthy display for your multi-aperture photo frames custom design.

Selecting Materials: A Framer’s Guide to Mounts, Mouldings & Glazing

Once you’ve perfected the layout of your photos, the next step is where true craftsmanship comes to the forefront. Selecting the right materials is the bridge between your artwork and your décor; it’s the process that transforms a good design into an exceptional, gallery-quality piece. At First4Frames, we use only premium, hand-selected materials to ensure your frame is not only beautiful but also built to last, protecting your cherished memories for years to come.

The Picture Mount: Your Artwork’s Breathing Room

A picture mount, or matboard, serves two vital purposes. Visually, it provides “breathing room,” creating a clean separation between your photos and the frame, which helps each image stand out. Functionally, it keeps the photos from touching the glazing, protecting them from potential moisture damage. You can choose from crisp whites to make colours pop, subtle creams for a softer, classic feel, or even bold colours for a dramatic statement. For ultimate protection, we use conservation-grade, acid-free boards, which follow professional preservation matting and framing guidelines to prevent yellowing and fading. Consider a double mount for an added layer of depth and sophistication.

Choosing Your Frame Moulding: Style & Substance

The moulding is the body of your frame, defining its character and style. The choice should complement both your photographs and your home’s interior. Our bespoke service offers a wide range of high-quality, durable options:

  • Classic Wood: From warm oak to rich walnut, wooden frames are perfect for traditional, rustic, or Scandinavian-inspired décor.
  • Sleek Aluminium: With clean lines and a contemporary finish, metal frames are ideal for modern, minimalist, or industrial spaces.
  • Ornate Styles: Swept or decorative mouldings add a touch of timeless elegance, perfect for formal portraits or classic art collections.

The width and profile of the moulding also play a significant role. A slim profile offers a subtle, modern look, while a wider, more substantial frame makes a bold statement. The perfect moulding transforms your collection of photos into a cohesive piece of art, which is why our multi-aperture photo frames custom-designed service focuses so heavily on this detail.

Selecting the Right Glazing (Glass)

Glazing is your photos’ first line of defence against the elements. While often overlooked, choosing the right glass is a crucial investment in preservation. We offer several premium options:

  • Standard Float Glass: A high-quality, clear glass that provides excellent clarity for most environments.
  • Anti-Glare Glass: This diffused glass is expertly treated to scatter reflections, making it perfect for brightly lit rooms or spaces with direct light sources.
  • UV-Protective Glass: Essential for irreplaceable photos or artwork, this glazing blocks up to 99% of harmful ultraviolet rays, the primary cause of fading.

Investing in superior glazing ensures your memories remain as vibrant as the day they were captured. Explore our online gallery to see how these beautiful materials come together in our finished frames.

An infographic titled Designing a Custom Multi-Aperture Frame explains custom multi-aperture photo frames’ anatomy and a 3-step process: curating a theme, choosing a layout, and mastering spacing and balance, with diagrams and tips for each step.

A custom multi-photo frame is more than just a display; it’s a canvas for your stories. The beauty of multi-aperture photo frames custom-designed for you is their ability to tell a complete narrative in a single, elegant piece. To spark your imagination, we’ve gathered some of our favourite ideas to show you just how versatile these beautiful frames can be.

The Family Timeline

Chart the beautiful journey of your family by combining cornerstone moments into one display. Imagine a wedding photo, a first baby picture, and a recent family portrait flowing together. A linear or stepped layout beautifully illustrates this progression through time. We recommend a classic, premium wood frame, like oak or walnut, to lend a warm, timeless feel that honours these precious memories.

The Travel Chronicle

Don’t let your incredible travel photos stay hidden on a hard drive. Group together a collection of shots from a single spectacular holiday or a series of global adventures. A dynamic, overlapping collage-style layout captures the energy and excitement of your travels. Pair these vibrant images with a simple, slim black or white frame to make the colours truly pop, creating a stunning visual diary on your wall.

Baby’s First Year

Celebrate every milestone with a frame dedicated to your baby’s first twelve months. This is a truly cherished keepsake, perfect for a nursery or as a heartfelt gift for grandparents. A clean, symmetrical grid with twelve apertures provides a wonderfully organised look. For a gentle aesthetic, consider a soft off-white mount paired with a light, natural wood or a simple painted white frame.

For many of us, pets are cherished family members, and their story is one worth telling. From their first days at home to their senior years, a multi-aperture frame is a beautiful way to showcase their journey. Capturing these happy moments goes hand-in-hand with providing the best care, including premium nutrition to keep them healthy and vibrant for every photo. For example, pet owners are increasingly turning to services that provide fresh, human-grade meals, like those offered by dogfood.com.my, to support a long and happy life.

The Pet’s Story

Artistic & Themed Collections

Multi-aperture frames are also a perfect way to create a gallery wall in miniature. Showcase a personal photography project, such as a series of black-and-white architectural shots, dramatic local landscapes, or botanical close-ups. You can even use a frame to display a collection of small prints from a favourite artist. The right presentation turns individual images into a single, cohesive work of art. Have an idea? Let our experts help you bring it to life.

Bring Your Story to Life with a Bespoke Frame

You’ve journeyed through the art of visual storytelling, from designing a compelling layout to selecting the perfect materials for your project. A custom multi-aperture frame is more than just a display; it’s a personal gallery that narrates your unique story. With multi-aperture photo frames custom-designed by you, every detail-from the mount to the moulding-contributes to a beautiful, cohesive narrative that celebrates your cherished moments.

Ready to turn your vision into a beautifully crafted reality? With over 20 years of professional framing experience, our team brings your ideas to life. Every piece is meticulously handcrafted in our Falkirk, Scotland workshop using only the highest quality conservation materials, ensuring your memories are preserved perfectly. Let us help you create something truly special.

Start designing your bespoke frame with our experts today! Let’s create a spectacular centrepiece for your home that you will treasure for years to come.

Frequently Asked Questions

How much does a custom multi-aperture frame cost?

The final cost of a bespoke frame is wonderfully unique, just like your photos. Pricing depends on the overall size, your choice of premium frame moulding, the number of photo apertures, and the type of glazing selected. A smaller, simple design may start from around £50, while larger, more intricate pieces can range upwards of £200. Our online design tool provides a clear, instant quote as you build, ensuring complete transparency with no surprises.

How do I measure my photos accurately for a custom frame?

For a perfect, professional fit, measure the exact height and width of each individual photo you want to display. It’s important not to include any white borders in your measurements. When you input these dimensions into our online designer, our system automatically calculates a small overlap for the mount. This ensures your photos are held securely behind the aperture windows, creating that flawless, gallery-quality finish you’ll love.

What is the turnaround time for a bespoke multi-aperture frame?

We pride ourselves on our blend of meticulous craftsmanship and speedy service. From the moment you place your order, our skilled team in our UK workshop will craft and dispatch your frame within 5-7 working days. Once it leaves our hands, our trusted courier service typically delivers within 1-2 working days. We’ll notify you as soon as your beautiful new frame is on its way to you.

Can you frame my existing photos, or do I need to order prints from you?

We offer a flexible service designed around your convenience. You are more than welcome to post your treasured photographs to us for professional mounting and framing. For a complete one-stop-shop experience, you can also upload your digital files directly. We will then produce spectacular fine art Giclée prints and frame them to your exact specifications, delivering a finished piece that is ready to hang and admire.

What’s the maximum number of photos I can have in one frame?

The beauty of a custom design is its flexibility! While there is no strict maximum, the number of photos is guided by the overall frame size and the need to maintain a visually pleasing, balanced composition. Our online tool is perfect for exploring layouts, but for highly complex multi-aperture photo frames custom designed with a large number of images, we recommend contacting our friendly team. We can provide expert guidance to help create your perfect piece.

How do I clean and care for my new framed piece?

Caring for your new artwork is simple. To clean the glazing, lightly spray a high-quality glass cleaner onto a soft, lint-free microfibre cloth and gently wipe the surface-never spray directly onto the frame. The frame moulding itself should only require a light dusting with a dry cloth. Avoid using abrasive materials or harsh chemical cleaners, as this will protect the premium finish and ensure your memories look beautiful for years to come.