Posted on

Framing a Cross-Stitch or Needlepoint: The Professional Guide to Preservation

Framing a Cross-Stitch or Needlepoint: The Professional Guide to Preservation

A single acidic backing board can quietly ruin a hundred hours of meticulous handiwork in under 60 months. It’s a common worry for many stitchers that a masterpiece will lose its tension or fade under the harsh glare of sunlight once it leaves the embroidery hoop. We know you’ve invested incredible patience into your craft, and the thought of a framing error causing permanent damage is genuinely stressful. You deserve a result that stays as crisp and vibrant as the day you finished it. This professional guide to framing a cross-stitch or needlepoint reveals the secrets to achieving a perfectly taut, centered finish that won’t sag over time. At First 4 Frames, we’ve spent over 20 years as a trusted artisan partner, earning top-tier ratings on Trustpilot for our bespoke craftsmanship. You’ll discover how to select UV-protective glass and choose a frame that acts as a beautiful bridge between your artwork and your room’s decor. We will cover everything from museum-grade mounting to the final aesthetic touches that turn your needlework into a lasting heirloom.

Key Takeaways

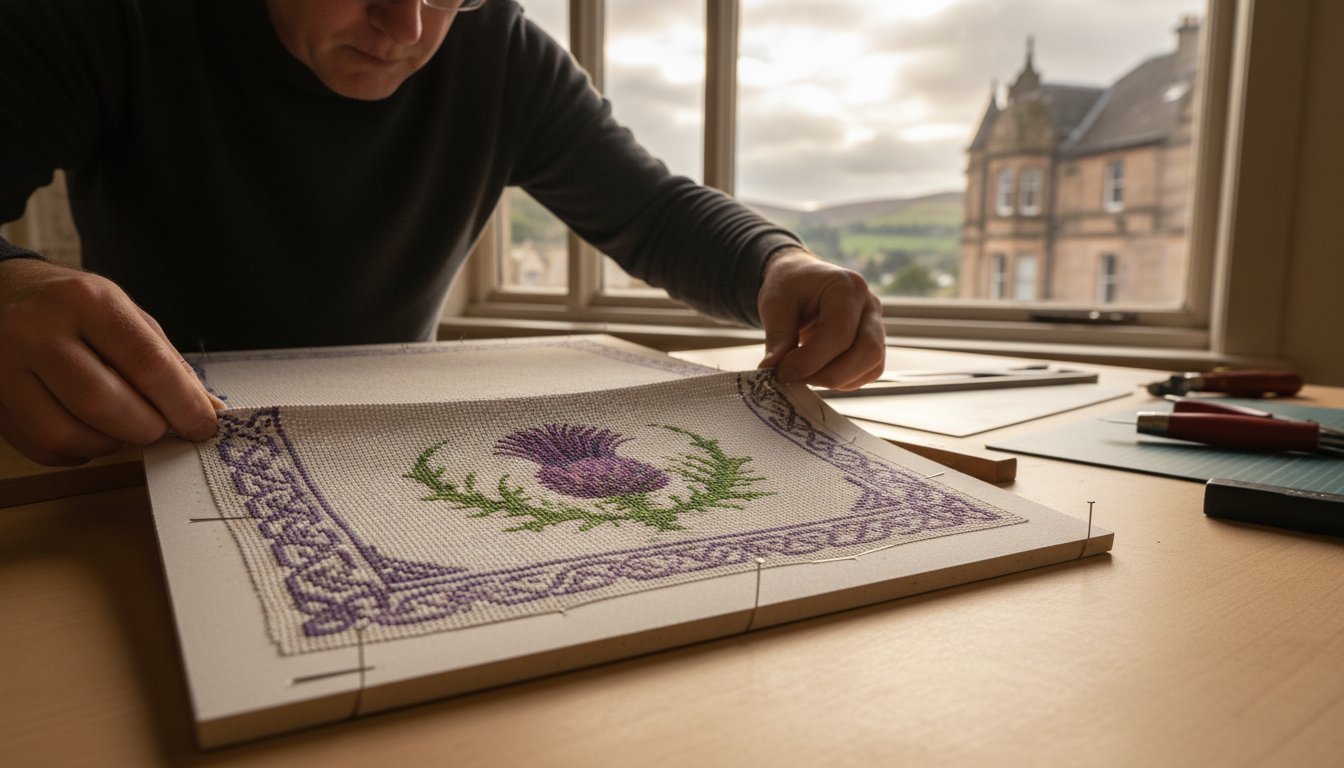
  • Learn why professional “blocking” is the essential first step to square up your fabric and ensure a perfectly straight, professional finish.
  • Discover the gold-standard mounting techniques, from archival lacing to stainless steel pinning, that preserve your needlework for generations.
  • Explore how our signature “bridge” metaphor helps you choose the perfect materials for framing a cross-stitch or needlepoint to match your room’s personality.
  • Understand how to safeguard your delicate threads from environmental damage using acid-free mounts and specialist protective glass.
  • See why our customers trust our bespoke service for their most valuable heirlooms, supported by our top-rated expertise on Google and Trustpilot.

Why Framing a Cross-Stitch Requires a Specialist Approach

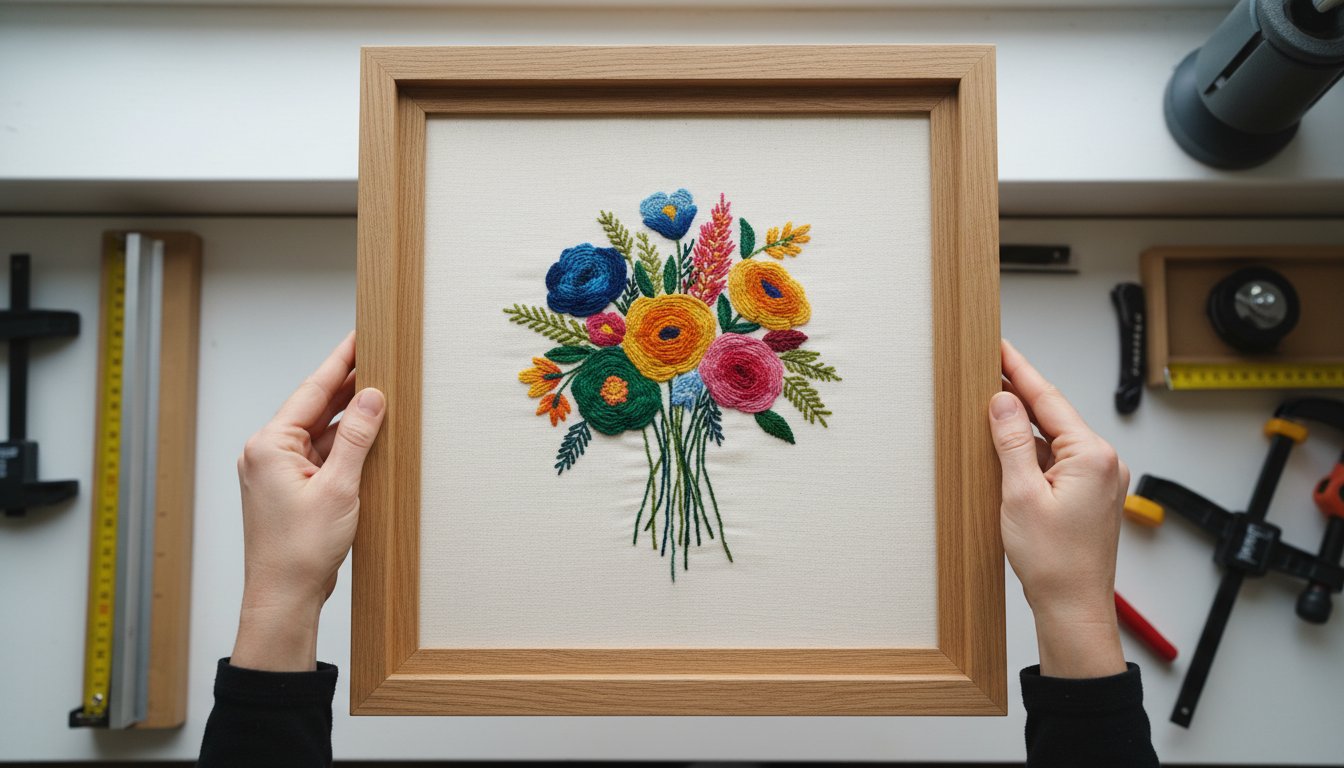
You’ve likely spent 100 or more hours meticulously completing your latest project. It’s more than just thread on fabric; it’s a piece of personal history. However, framing a cross-stitch or needlepoint requires a completely different technical skill set than framing a paper print. Textiles are organic materials that react to humidity and physical tension. Cross-stitch and other needlework techniques create internal pull that can warp the fabric over time if not correctly managed by a specialist.

To better understand this concept, watch this helpful video:

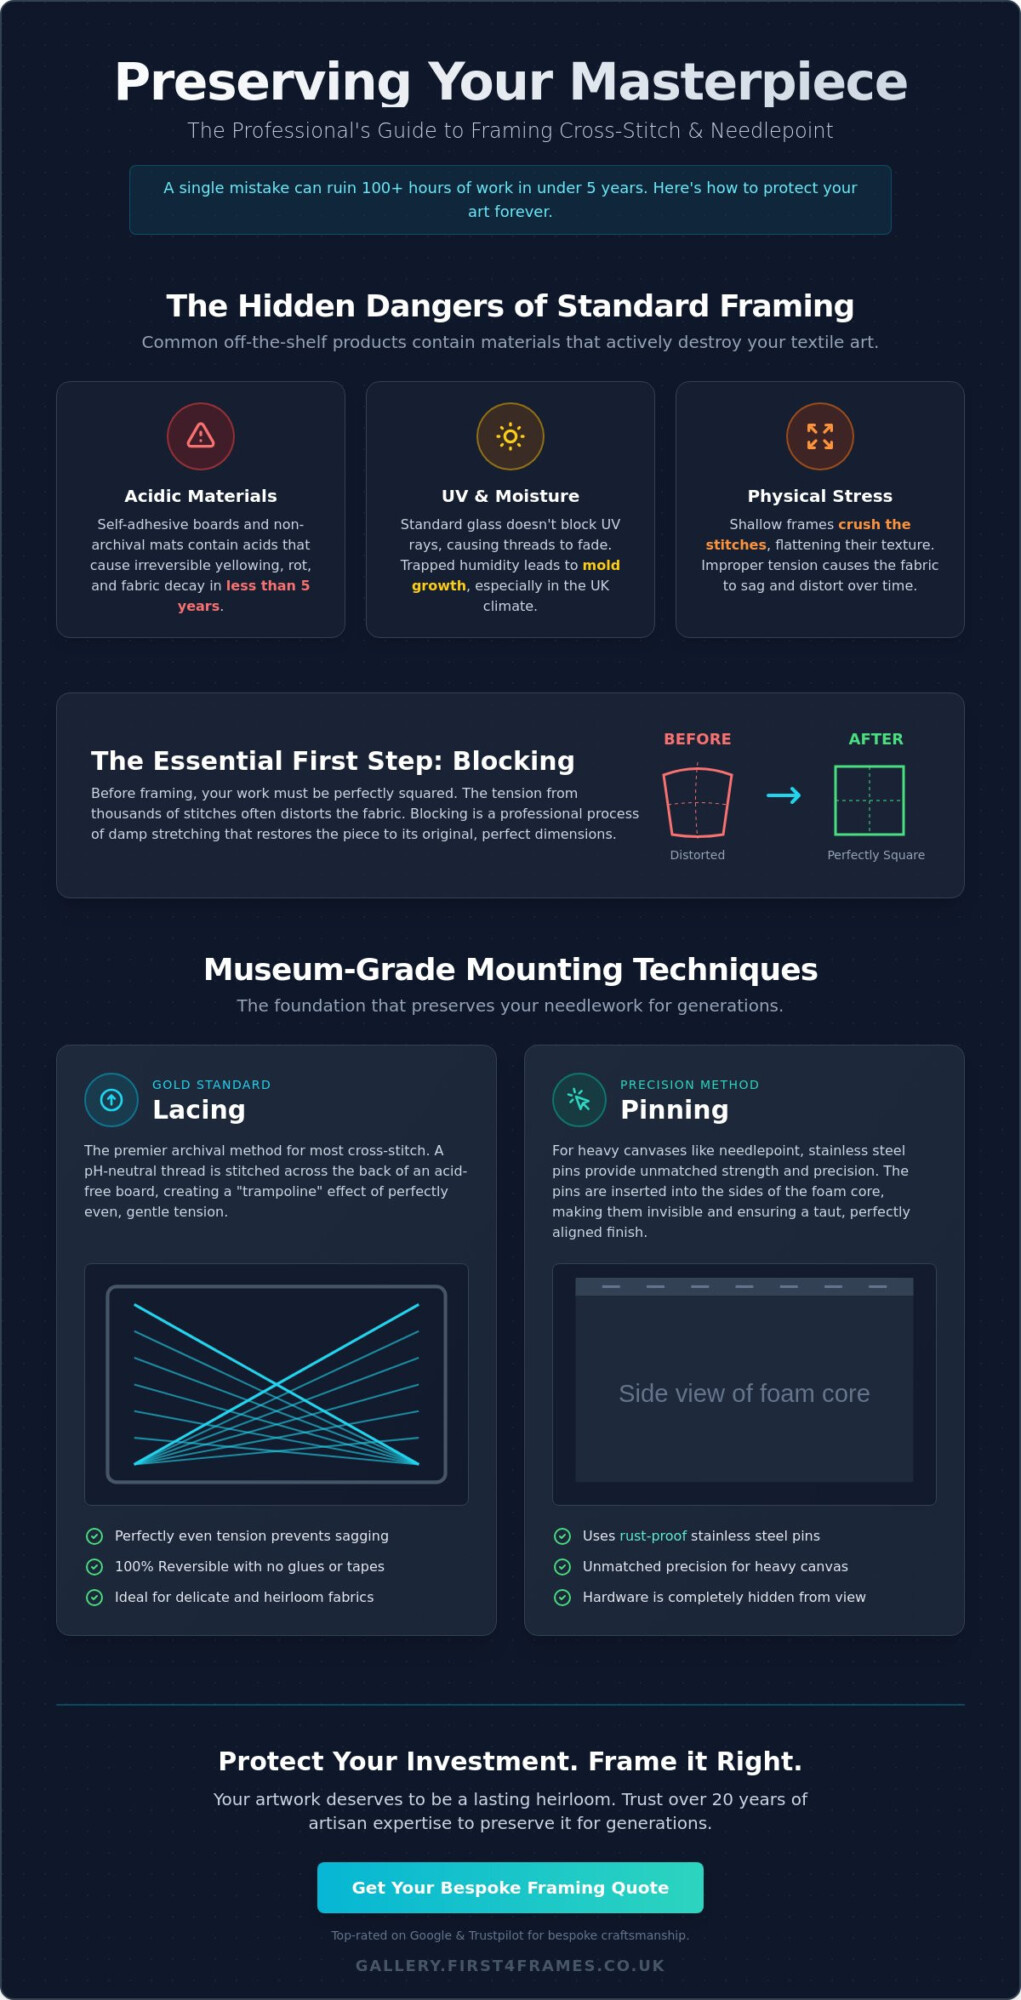
Professional framing involves “blocking,” which is the process of squaring up a piece that has become distorted through the repetitive tension of stitching. At First 4 Frames, we’ve spent over 20 years perfecting this delicate balance. We avoid “sticky” self-adhesive boards because they contain harmful acids. These chemicals eventually cause hand-dyed silks and wools to yellow and rot. We also ensure there’s sufficient “breathing room” between the glass and the fabric. This gap prevents moisture from being trapped against the fibres, which is a leading cause of mould growth in the UK’s climate.

The Danger of the ‘Quick Fix’

Standard off-the-shelf frames are rarely deep enough for needlework. When you force a textile into a shallow frame, the glass crushes the texture of your stitches, flattening the beautiful “loft” of the wool or silk. Using non-archival materials can ruin a piece in less than a decade. Our customers trust our high ratings on Google and Trustpilot because we use only premium, acid-free mounts that protect your work for a lifetime.

Identifying a Distorted Piece

Before you consider framing a cross-stitch or needlepoint, check if the canvas is “out of square.” Lay your work on a flat, gridded surface. If the corners don’t hit 90 degrees, it needs professional damp stretching. This involves carefully hydrating the fibres and pinned stretching to restore the original dimensions without snapping the delicate threads. It’s a precise task that transforms a skewed canvas back into a perfect rectangle ready for a bespoke frame.

Mounting Techniques: Lacing vs. Pinning

The longevity of your work depends entirely on the foundation. We use 5mm acid-free foam core as the base for every textile project to ensure no harmful chemicals leach into your embroidery over time. Our experts pay close attention to the fabric grain; if the weave isn’t perfectly square with the edges of the board, the final result will look skewed once it’s inside the frame. This precision is why our customers trust us with their most delicate pieces.

Why We Use Lacing for Fine Work

Lacing is the gold standard for framing a cross-stitch or needlepoint. We use pH-neutral thread to create a series of interlocking stitches across the back of the board. This method provides consistent, gentle tension that prevents the fabric from sagging during changes in UK humidity. Because it doesn’t involve glues or tapes, it’s 100% reversible. Professionals often refer to these archival mounting techniques to ensure the textile can be removed for cleaning or conservation decades from now without any damage to the fibers.

The Precision of Stainless Steel Pins

For heavy canvases like needlepoint, stainless steel pinning offers unmatched precision. We use specialized “lace pins” made from high-grade stainless steel to prevent rust spots. Standard pins can corrode in humid environments, leaving permanent orange stains on your work. Our team uses a technique where we insert the pins horizontally into the side of the foam core. This hides the hardware completely and allows us to pull the heavy canvas taut. It ensures every row of your stitching remains perfectly straight and aligned with the frame edge.

Our team at First4frames has spent over 20 years perfecting these methods. This commitment to quality has earned us excellent ratings on Google and Trustpilot from collectors across the country. If you’re looking for inspiration for your next project, you can browse our featured artists to see how professional mounting elevates the finished look of fine art textiles.

Framing a Cross-Stitch or Needlepoint: The Professional Guide to Preservation

Designing the Perfect Bridge: Frames, Mats, and Glass

At First4Frames, we view a frame as a bridge. It’s the vital connection between your hand-stitched masterpiece and your home’s unique personality. When you’re framing a cross-stitch or needlepoint, this bridge does the heavy lifting by pulling the viewer into the intricate details of your work while anchoring the piece within its surroundings.

A mount isn’t just for show. It creates a necessary air gap between the fabric and the glass. Without this space, moisture can get trapped, leading to mould or permanent “glazing” of the threads. Experts at the Canadian Conservation Institute highlight these risks in their guide on Conservation Framing of Embroideries. Furthermore, needlepoint canvas is often 1mm to 2mm thick; you’ll need a frame with a deep rebate to house the mounting board, the textile, the mount, and the glass comfortably.

Selecting the Right Mount and Frame

A double mount adds immediate depth to your project. It creates a subtle shadow line that draws the eye toward the centre of the stitching. You can match the frame style to the era of your pattern. Whether you’re

Professional Framing vs. DIY: Protecting Your Investment

Deciding between a home project and professional help often comes down to the emotional or financial value of the piece. While a small, casual design might look fine in a standard hoop, framing a cross-stitch or needlepoint that represents months of labour requires a specialist’s touch. You’ve invested significant time and money into every single stitch. Risking that effort on a DIY attempt can lead to permanent damage like fabric distortion or acidic staining from low-quality backing boards.

Expertly framing a cross-stitch or needlepoint ensures the tension is perfectly even. This prevents the sagging effect often seen in home-framed works over time. Our professional service provides a “one-stop-shop” experience where 20 years of expertise meets premium materials designed to last a lifetime.

When to Call the Professionals

Heirlooms and large-scale tapestries are the most vulnerable to damage if handled incorrectly. If your work includes 3D embellishments like heavy beads, metallic threads, or delicate ribbons, a standard off-the-shelf frame won’t provide the necessary depth. You need a bespoke solution to keep the glass from crushing your hard work. For those looking for local expertise, you can contact First4Frames for a specialist consultation at our Falkirk workshop. We act as a bridge between your room décor and the artwork, ensuring the final result looks spectacular.

The First4Frames Quality Guarantee

We’ve spent over two decades refining our craft as a trusted artisan partner for textile artists. We source only the best materials, using acid-free mounting to prevent the yellowing that ruins fine art. This commitment to quality is why we maintain top-tier ratings on both Google and Trustpilot. We don’t just frame; we preserve your legacy. If you’re looking for inspiration on colour palettes or mounting styles, browse our online gallery to see how we elevate different artistic styles. For complex textile projects, our bespoke framing services provide the total peace of mind that your investment is safe for future generations.

Preserve the Legacy of Your Hand-Stitched Art

Your needlework represents hundreds of hours of focused dedication. Protecting that creative effort requires more than a standard shop-bought frame; it needs a specialist approach. By choosing professional lacing over damaging pinning and selecting high-quality UV-protective glass, you ensure your work won’t fade or sag as the years pass. We view the frame as the vital bridge between your home’s decor and your artistic achievement, pulling the viewer into the intricate details of your craft.

At First 4 Frames, we’ve spent over 20 years perfecting the delicate art of textile and memorabilia preservation. Our status as a top-rated service on Trustpilot and Google comes from a genuine passion for craftsmanship. When you’re considering framing a cross-stitch or needlepoint, our expert team provides the premium care your investment deserves. We’re a dedicated one-stop-shop that makes fine art preservation straightforward and accessible for every stitcher in the UK. Our expertise ensures your personal projects receive the same premium treatment as the professional artwork featured in our online gallery.

Request a bespoke framing quote for your needlework today

We look forward to helping you transform your latest project into a spectacular piece of wall art that lasts for generations.

Frequently Asked Questions

Can I frame a cross-stitch without glass?

You can frame your work without glass, but it’s not recommended if you want to protect your masterpiece from dust and atmospheric pollutants. Glass acts as a vital barrier that prevents oils and grime from settling into the delicate threads over time. When framing a cross-stitch or needlepoint, we suggest using UV-protective glazing to ensure the vibrant colours don’t fade. This professional touch keeps your artwork looking spectacular for decades.

Should I wash my needlework before framing it?

You should almost always wash your completed needlework to remove natural oils and invisible salts left by your hands during the stitching process. These residues can cause the fabric to yellow or develop spots after 12 months if they aren’t properly cleaned. Use a gentle, pH-neutral detergent and lukewarm water to soak the piece. This simple step ensures your work is pristine before it undergoes our bespoke framing process at first4frames.co.uk.

How do I get the wrinkles out of my cross-stitch?

The best way to remove stubborn wrinkles is to iron your work face down on a plush, clean white towel while the fabric is still damp. This method protects the texture of your stitches while the steam relaxes the base fibres for a smooth finish. If you’re hesitant to iron delicate threads, our team provides professional stretching services. We use our 20 years of expertise to ensure every piece is perfectly flat before it’s professionally framed.

What is the best way to centre my needlepoint in a frame?

Centring is best achieved by stretching the fabric over an acid-free foam board using stainless steel pins or archival lacing. This technique ensures the design is perfectly square and taut, acting as a bridge between your room décor and the artwork. When framing a cross-stitch or needlepoint, our artisans use precise measurements to align the design perfectly. This meticulous attention to detail is why we’ve earned a 4.9-star rating on Google and Trustpilot.

How much does it cost to have a needlepoint professionally framed?

Professional framing costs vary based on the project size and the premium materials you choose, such as specialist mounts or non-reflective glass. A bespoke frame for a 15cm square piece will require a different investment than a large-scale tapestry. For a clear idea of our quality and styles, you can browse the artists featured at gallery.first4frames.co.uk. Our transparent service ensures you receive a high-quality, handcrafted product that offers excellent value for your cherished art.

Posted on

How to Frame Embroidered Work: A Professional Guide

How to Frame Embroidered Work: A Professional Guide

You’ve poured hours of dedicated stitching into a beautiful piece of embroidery, a true testament to your skill and patience. Now comes the final, often daunting, step: displaying your creation. The fear of a single wrinkle ruining the fabric, uncertainty over which materials will protect your delicate threads, or finding that a standard frame just isn’t deep enough can be paralysing. But what if you could approach this final stage with complete confidence? The process of framing embroidered work should be a celebration of your craftsmanship, not a source of stress.

This professional guide is designed to empower you. We will walk you through every crucial step, from preparing and mounting your fabric for a perfectly taut finish to selecting the ideal bespoke frame and glazing that will enhance your art. Embark on this final part of your creative journey with us, and learn how to achieve a flawless, spectacular finish that protects your treasured piece for years to come. Let’s turn your hard work into a perfectly presented masterpiece.

Key Takeaways

  • Understand that embroidery is a delicate textile art; a proper frame is essential to protect your beautiful work from dust, UV light, and damage.
  • Achieving a flawless, professional finish begins long before the frame; discover the crucial preparation steps for your fabric.
  • Master the two core DIY methods for mounting to achieve the perfect, drum-tight tension essential for professionally framing embroidered work.
  • Learn how to select the right frame, mount, and glazing that not only protects your piece but also perfectly complements your art and your home’s décor.

Why Your Embroidered Work Deserves a Proper Frame

You’ve poured hours of passion and patience into your embroidery, creating a beautiful and tactile piece of textile art. Each stitch tells a story of dedication and creativity. But once the final thread is tied, how do you give your creation the spectacular showcase it deserves? This is where the art of framing embroidered work comes in. It’s about so much more than just hanging it on the wall; it’s about celebrating its texture and preserving its beauty for generations to come.

Unlike a flat print, your needlework has depth, dimension, and delicate materials that require specialist care. A proper frame serves two crucial purposes: presentation and preservation.

To see how a piece can be transformed, watch this helpful video on preparing embroidery for a frame:

While many stitchers display their finished work in the hoop it was made in, this method offers little protection from the elements. The essential embroidery hoops and frames are tools designed to keep fabric taut during creation, not to shield your art from long-term dangers like dust, UV light, and accidental damage. A bespoke frame acts as both a shield and a stage, enhancing the vibrant colours and intricate textures of your threadwork while ensuring its longevity.

Protecting the Stitches: The Dangers of a Standard Photo Frame

A standard, off-the-shelf photo frame might seem like a quick solution, but it can cause irreversible harm to textile art. Here’s why:

  • Flattened Threads: The glass often presses directly against the stitches, crushing the delicate threads and ruining their beautiful, raised texture over time.
  • Trapped Moisture: Without proper spacing, there is no airflow between the glass and the fabric. This can trap ambient moisture, creating a risk of mildew or mould growth.
  • Acid Damage: Standard backing boards are typically made from materials containing acid, which can leach into your fabric, causing it to yellow and degrade.

DIY vs. Professional Framing: Making the Right Choice

For smaller, fun projects, a DIY approach can be a rewarding experience. However, for a piece that holds significant value—whether it’s a complex design, a family heirloom, or a commissioned work—professional framing is the wisest investment, much like seeking out a specialist for luxury watch repair UK is for a treasured timepiece. A professional framer uses archival, acid-free materials and specialised techniques to mount the fabric perfectly without causing damage. We create the necessary space between the glass and the artwork, ensuring your piece is both beautifully presented and properly preserved. If you have a special piece you want to protect forever, let our experts help. Get a quote for your bespoke framing project.

Step 1: Preparing Your Embroidery for its Frame

Before your beautiful embroidery can take pride of place on your wall, it requires careful and thoughtful preparation. This foundational stage is the most critical part of the process; it protects the hours you’ve poured into your craft and is the secret to achieving a professional, gallery-quality finish. Rushing this step can lead to puckering, distortion, or visible blemishes under the glass. Taking the time here ensures your artwork remains pristine for years to come.

To begin, gather the right tools for the job. Having these on hand will make the entire process smoother and more precise:

  • A mild, pH-neutral soap (if washing is needed)
  • Two clean, light-coloured towels
  • An iron and a pressing cloth
  • A ruler or measuring tape
  • Sharp fabric scissors or a rotary cutter and mat
  • Acid-free mounting board

Always handle your fabric with clean hands to avoid transferring oils to the threads or cloth. Before you begin cleaning or mounting, perform a final inspection. Check for any missed stitches or loose threads on the front and trim any stray threads from the back to prevent them from showing through the fabric. For successful stretching later, ensure you have left a generous border of at least 5-7cm (2-3 inches) of spare fabric around your stitched area.

Cleaning and Pressing Your Finished Piece

If your piece needs cleaning, gently hand-wash it in a basin of cool water with a small amount of mild soap. Submerge the piece, let it soak for 15 minutes, and then rinse thoroughly with cool, clean water. Most premium threads like DMC and Anchor are colourfast, but if you’ve used hand-dyed or vintage threads, test a small corner first to check for colour bleed. To dry, roll the piece between two clean towels and press gently to remove excess water. Never wring it out. The most important part of framing embroidered work is the pressing: place the embroidery face down on a thick, clean towel and press from the back with a warm iron. This technique irons the fabric flat without crushing your beautiful stitches.

Squaring the Fabric for a Perfect Mount

A perfectly square piece of fabric is the foundation for a flawless mount. If the fabric’s grain is not aligned, your design can appear warped or skewed once stretched within the straight lines of the frame. To square it up, find the straight grain of your fabric. On Aida or evenweave linen, you can achieve this by gently pulling a single thread from the fabric about 2-3cm from your desired edge. This creates a perfect, straight line to follow. Using a rotary cutter or sharp scissors, carefully trim along this line on all four sides, ensuring your borders are even and your corners are perfect right angles.

An infographic titled “From Hoop to Home: The Professional Guide to Framing Your Embroidery”, detailing the benefits of professional framing, risks of DIY, a 3-step framing guide, and a comparison between DIY and professional framing.

Step 2: Mounting Your Embroidery Like a Pro (The DIY Method)

Once your embroidery is clean and pressed, the next step is mounting. This is where you give your beautiful needlework the support it needs to look its best inside the frame. The goal is to achieve a perfectly smooth, drum-tight tension across the entire piece, without any waves or puckers. Before you begin, you’ll need a backing board. We strongly recommend an acid-free foam core or conservation board. Simply measure the inside of your frame’s opening and cut the board to that exact size. Then, lay your ironed embroidery face-up on the board and centre it perfectly, leaving an even border of excess fabric on all sides.

The Lacing Technique for Ultimate Control

Considered the gold standard by museum conservators, lacing is the traditional, archival method for mounting textiles. It creates perfectly even tension and is completely reversible, causing no damage to your fabric. It’s like creating a corset for your artwork.

  • Start with a long piece of strong, neutral-coloured thread (like a heavy-duty sewing or upholstery thread).
  • Fold one edge of your excess fabric over the back of the board.
  • Begin stitching from the centre of one side to the centre of the opposite side, pulling the thread taut like a shoelace.
  • Work your way outwards towards the corners, placing stitches about 1-2cm apart. Repeat for the other two sides.

This meticulous approach is a key part of professional framing embroidered work, ensuring your art is preserved for decades.

The Pinning Technique for a Quicker Alternative

If you’re short on time, pinning is a faster and still effective method. The key is to use high-quality, rustproof stainless steel pins. Regular pins can rust over time from moisture in the air, leaving unsightly stains on your precious work. Simply fold the fabric over the edge of the board and secure it by pushing pins directly into the edge of the foam core, not through the back. Start from the centre of each side and work outwards, placing pins every couple of centimetres and pulling the fabric taut as you go. Pay special attention to creating neat, folded corners.

Common Mounting Mistakes to Avoid

Getting the mounting right is crucial for a beautiful, long-lasting display. Avoid these common pitfalls that can unfortunately damage your work over time:

  • Never use glue or tape. Adhesives can seep through the fabric, causing permanent stains and becoming brittle and acidic over time.
  • Avoid improper tension. Too loose, and your fabric will look wavy; too tight, and you can distort the stitches and the fabric’s weave.
  • Don’t skip the acid-free materials. Standard cardboard contains acids that will leach into your fabric, causing it to yellow and deteriorate. Protecting your art is paramount.

Taking the time to mount your piece with care will make all the difference in the final result. For inspiration on how a perfectly mounted piece looks, explore the bespoke creations in our gallery.

Step 3: Choosing the Right Frame, Mount, and Glazing

With your embroidery perfectly prepared, the final step is selecting the components that will protect and showcase your craftsmanship. A frame is more than just a border; it’s a complete system where the moulding, mount, and glazing work in harmony to elevate your art. The goal is to create a beautiful, cohesive piece that feels at home in your space. The sheer number of options can feel daunting, but understanding each element makes the process a joy. Overwhelmed by choice? Our experts can help you design the perfect frame.

Selecting the Perfect Frame Moulding

The frame itself is the bridge between your artwork and your room’s décor. The style should complement the embroidery without overpowering it. Consider the overall feel:

  • Style: A rustic, natural wood frame might be perfect for a botanical piece, while a sleek, black frame could suit a modern, geometric design. Ornate frames can add a touch of classic elegance to traditional samplers.
  • Colour: A fantastic professional tip is to match the frame colour to a secondary or accent colour within your embroidery. This pulls the whole piece together beautifully.
  • Depth: Textile art has texture and dimension. A frame must be deep enough to accommodate the fabric, backing board, and a spacer. A ‘box frame’ is often an ideal solution for ensuring nothing gets compressed.

The Role of Mounts and Spacers

A mount (also known as a mat board) provides visual breathing room, drawing the viewer’s eye inward towards your stitching. But for embroidery, its most critical partner is the spacer. A spacer is a thin fillet that sits discreetly inside the frame, creating a crucial air gap between your embroidery and the glazing. This prevents your delicate stitches from being flattened and reduces the risk of moisture transfer or mould. For added depth and a truly bespoke look, consider a double mount, using a sliver of a secondary colour to accent your work.

Glazing Options: Protecting Your Work from UV Rays

The final protective layer is the glazing. While standard glass is an option, the time and effort you’ve invested in your embroidery deserve premium protection. When it comes to the complex process of framing embroidered work, choosing the right glazing is essential to prevent irreversible damage from sunlight.

  • UV-Protective Glass: This is our top recommendation. It blocks up to 99% of harmful UV rays, which are the primary cause of thread colours fading over time.
  • Anti-Reflective Glass: For crystal-clear viewing without distracting reflections, this ‘invisible’ glass makes it feel like there is nothing between you and the artwork.
  • Acrylic (Perspex): A lightweight and shatter-resistant alternative to glass, it’s a safer option for large pieces or for homes with children and pets. UV-protective and anti-reflective versions are also available.

The Final Stitch: Perfecting Your Framed Embroidery

You’ve poured hours of passion and patience into every stitch, and now you have the knowledge to give your beautiful embroidery the final, spectacular presentation it warrants. From carefully preparing and mounting your fabric to selecting the perfect frame and glazing, you’re equipped to turn your textile art into a lasting treasure. While the DIY approach to framing embroidered work can be incredibly rewarding, sometimes a piece is so special it calls for a master’s touch.

For those irreplaceable pieces, or when you simply want the peace of mind that comes with a guaranteed flawless finish, consider our expert service. Our passionate team brings over 20 years of bespoke framing experience to every project, offering expert advice on design and preservation. We use only premium, conservation-grade, acid-free materials to ensure your needlework is not only beautifully displayed but also protected for generations to come.

Entrust your treasured embroidery to our experts. Explore our bespoke framing service.

Whether you embark on the DIY journey or partner with our artisans, we hope you feel inspired to display your beautiful creations with pride.

Frequently Asked Questions

How much does it cost to get embroidery professionally framed?

In the UK, the cost for professionally framing embroidery typically ranges from £50 to over £200. The final price depends on several factors: the size of your piece, the style of frame moulding you select, the type of glazing (such as UV-protective or anti-reflective glass), and whether a bespoke mount is required. A smaller piece with a standard frame will be at the lower end, while larger works with premium materials represent a greater investment in preserving your art.

Can I frame my embroidery in a deep hoop instead of a square frame?

You certainly can! Displaying your work in its hoop offers a charming and modern aesthetic that celebrates the craft itself. However, for long-term preservation, a traditional frame is superior. A bespoke frame with professional glazing protects your delicate stitches from dust, humidity, and damaging UV light. While a hoop is a lovely display method, a full frame is the best choice for turning your embroidery into a lasting piece of fine art.

How do I stop the glass from squashing my stitches?

The secret is to create a gap between the artwork and the glass. This is best achieved by using either a mount (mat board) or spacers. A mount provides a decorative border that also serves to lift the glass away from the fabric surface. Alternatively, small, hidden plastic or wood fillets called spacers can be fitted into the frame’s recess to hold the glass off the embroidery. This prevents flattening, friction damage, and protects the beautiful texture of your work.

What is the best type of backing board to use for mounting embroidery?

For the ultimate protection of your work, always use an acid-free foam core or a conservation-grade mounting board. These premium materials are chemically stable, meaning they won’t yellow or degrade your fabric and threads over time. It is crucial to avoid standard cardboard or wood backings, as their acidic nature can leach into your art, causing irreversible discolouration and damage. An acid-free board is a cornerstone of quality craftsmanship.

How do I prevent the fabric from puckering or wrinkling inside the frame?

Achieving a perfectly smooth, taut finish requires careful mounting. The fabric should be stretched evenly over an acid-free backing board before it goes into the frame. The most effective professional method is lacing, where the excess fabric is stitched together across the back, pulling it tight like a corset. This creates even tension from all sides. Careful, patient stretching is the key to ensuring your artwork looks flawless and professionally finished.

Should I use a mount (mat board) for my framed embroidery?

Yes, we highly recommend it. A mount serves two vital purposes when framing embroidered work. Aesthetically, it creates visual breathing space, drawing the viewer’s eye towards your beautiful stitching. Functionally, and most importantly, it separates the embroidery from the glass, preventing your stitches from being flattened and allowing air to circulate. A mount elevates the final presentation, giving your piece the gallery-quality finish it truly deserves.