
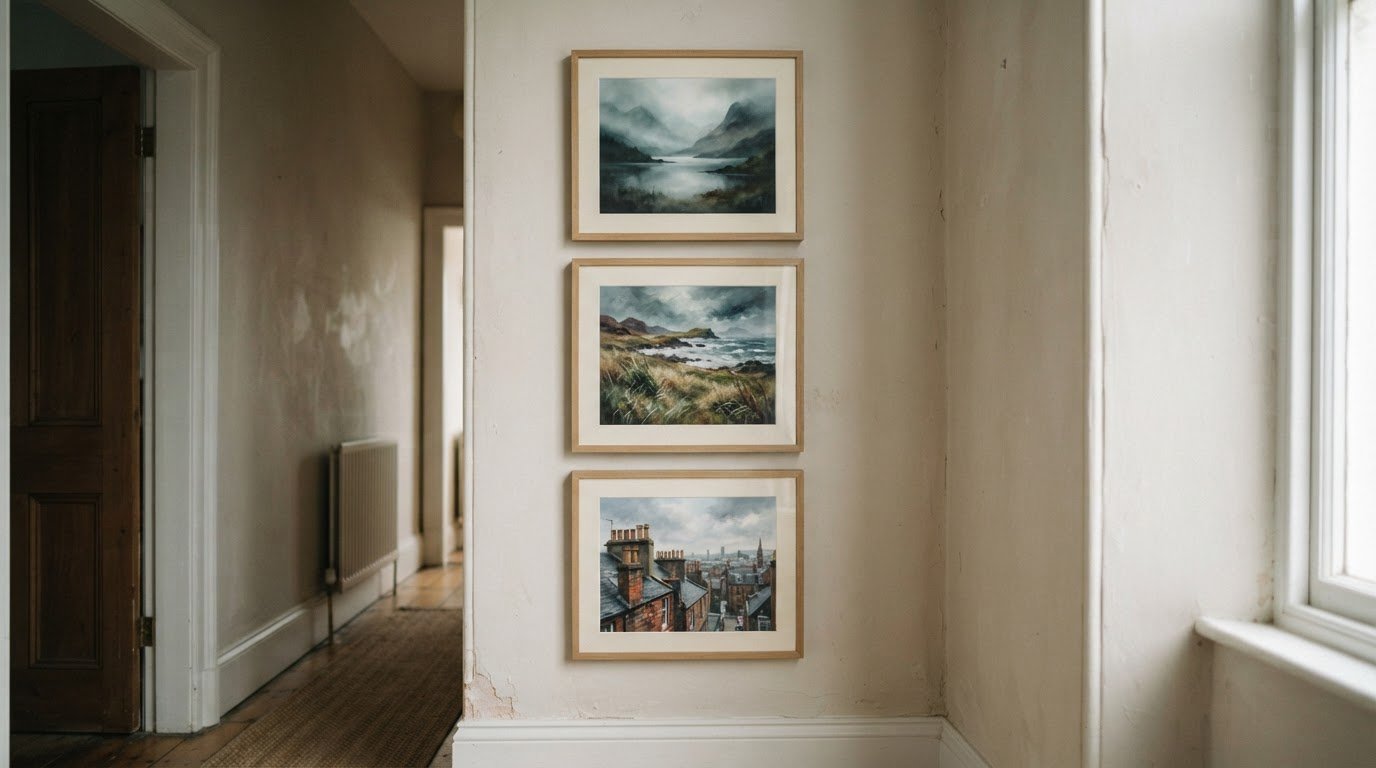
The best way to arrange frames on a narrow wall is usually a vertical stack in a tall, slim space, or a single horizontal row in a narrow corridor. A vertical display can hold three or four pieces, or continue towards the ceiling. Leave about 2 inches between frames in a stack, or 2 to 3 inches in a row.
A narrow wall can be tricky to fill without making it feel crowded, so plan the layout before making holes. Place full-size paper templates where you want each frame, then adjust the spacing and alignment until the composition feels balanced.
This guide shows you how to map out a layout, choose between a row, a mixed-size arrangement and a vertical stack, and keep the gaps intentional. You’ll also learn how to make a small wall feel considered rather than squeezed, giving your chosen art room to make an impression.
Key Takeaways
- Match the layout to the wall’s proportions: a row can suit a corridor, while a vertical arrangement makes use of a tall, narrow space.
- Use painter’s tape to keep gaps consistent when arranging frames of different sizes.
- Test how a mixed-size composition looks before settling on the positions and balance of each piece.
- Explore bespoke framing when you want artwork and frame choices to work together as a finished display.
How do you plan a gallery wall layout without making holes?
Plan the composition before marking the wall. Full-size paper templates let you test frame placement, height and spacing while leaving the wall untouched.
-
Match the layout to the wall
Measure the available wall area, then sketch a layout that follows its proportions. A narrow wall usually suits a vertical arrangement or a slim row better than a broad, sprawling grid. As a guide, let the gallery wall occupy roughly one-third to two-thirds of the wall space. Cut paper templates at a 1:1 scale, arrange them on the floor, then tape them up to assess the overall shape.
-
Select frame sizes, styles, and colours
Choose frame sizes to suit the pictures you want to display, then use paper outlines to compare their visual weight. For example, place one larger picture beside smaller photos and check that the arrangement fits the wall’s width. Limit frame finishes to two or three complementary colours, spread evenly across the display. This gives a mixed-size gallery wall cohesion without making every frame identical.
-
Choose the gallery wall height
Mark the intended centre of the arrangement and consider how it relates to nearby furniture and the room’s sightlines. Above a sofa, console table or dresser, use the furniture as an anchor rather than placing frames too high. One example for a gallery wall above furniture is to make the first mark 5 inches above it. Tape up the templates and check their height from the usual viewing position.
-
Decide how many frames to hang
Choose a frame count that fills the planned shape without crowding its edges. A 3-by-3 grid gives you an example with 9 frames, while fewer, larger pictures can create a calmer display on a slim wall. Trace each outline, including its frame edge, and move the templates until the overall placement feels balanced. Use a pencil to mark the final positions only after reviewing the full arrangement.
Single-row gallery layouts for narrow corridors
A straight row keeps artwork aligned along a narrow hallway without making the passage feel crowded. Plan its direction in relation to how the corridor connects with adjoining rooms.
-
Plan a single-row corridor display
Arrange frames in a horizontal line to suit the long, narrow shape of a corridor. Leave 2 to 3 inches between pieces, then use a laser level to keep the line straight. For a relaxed feel, vary the frame sizes slightly while keeping their centres aligned. Before settling the placement, look from both ends of the hallway and check that the prints don’t interrupt doors or switches.
-
Adapt the display to hallways and stairs
Follow the natural movement through the space. In a level hallway, keep the row horizontal; beside a staircase, arrange the artwork to rise with the steps. Use paper outlines to see how the display looks from both the landing and the foot of the stairs. If the hallway opens towards a living room, consider how the artwork and colours relate to that room.
-
Position the gallery at eye level
Centre a horizontal row around 57-60 inches from the floor, then stand back to assess its height. That measurement gives you a starting point, not a reason to ignore the room: a low ceiling, nearby furniture or a staircase can change how the placement reads. Check the display while walking through the corridor, since the artwork should feel comfortable from the usual viewing path.
- Connect adjoining spaces with a shared colour, subject or frame finish rather than matching every piece. For example, a coastal print in the hallway can echo a colour in the living room without repeating the same image. If you prefer a looser gallery, vary frame sizes and let the arrangement follow the available wall shape, while keeping its overall direction clear. Browse artwork for a hallway display to consider which prints suit your route through the home.
What is the best way to arrange different sized picture frames?
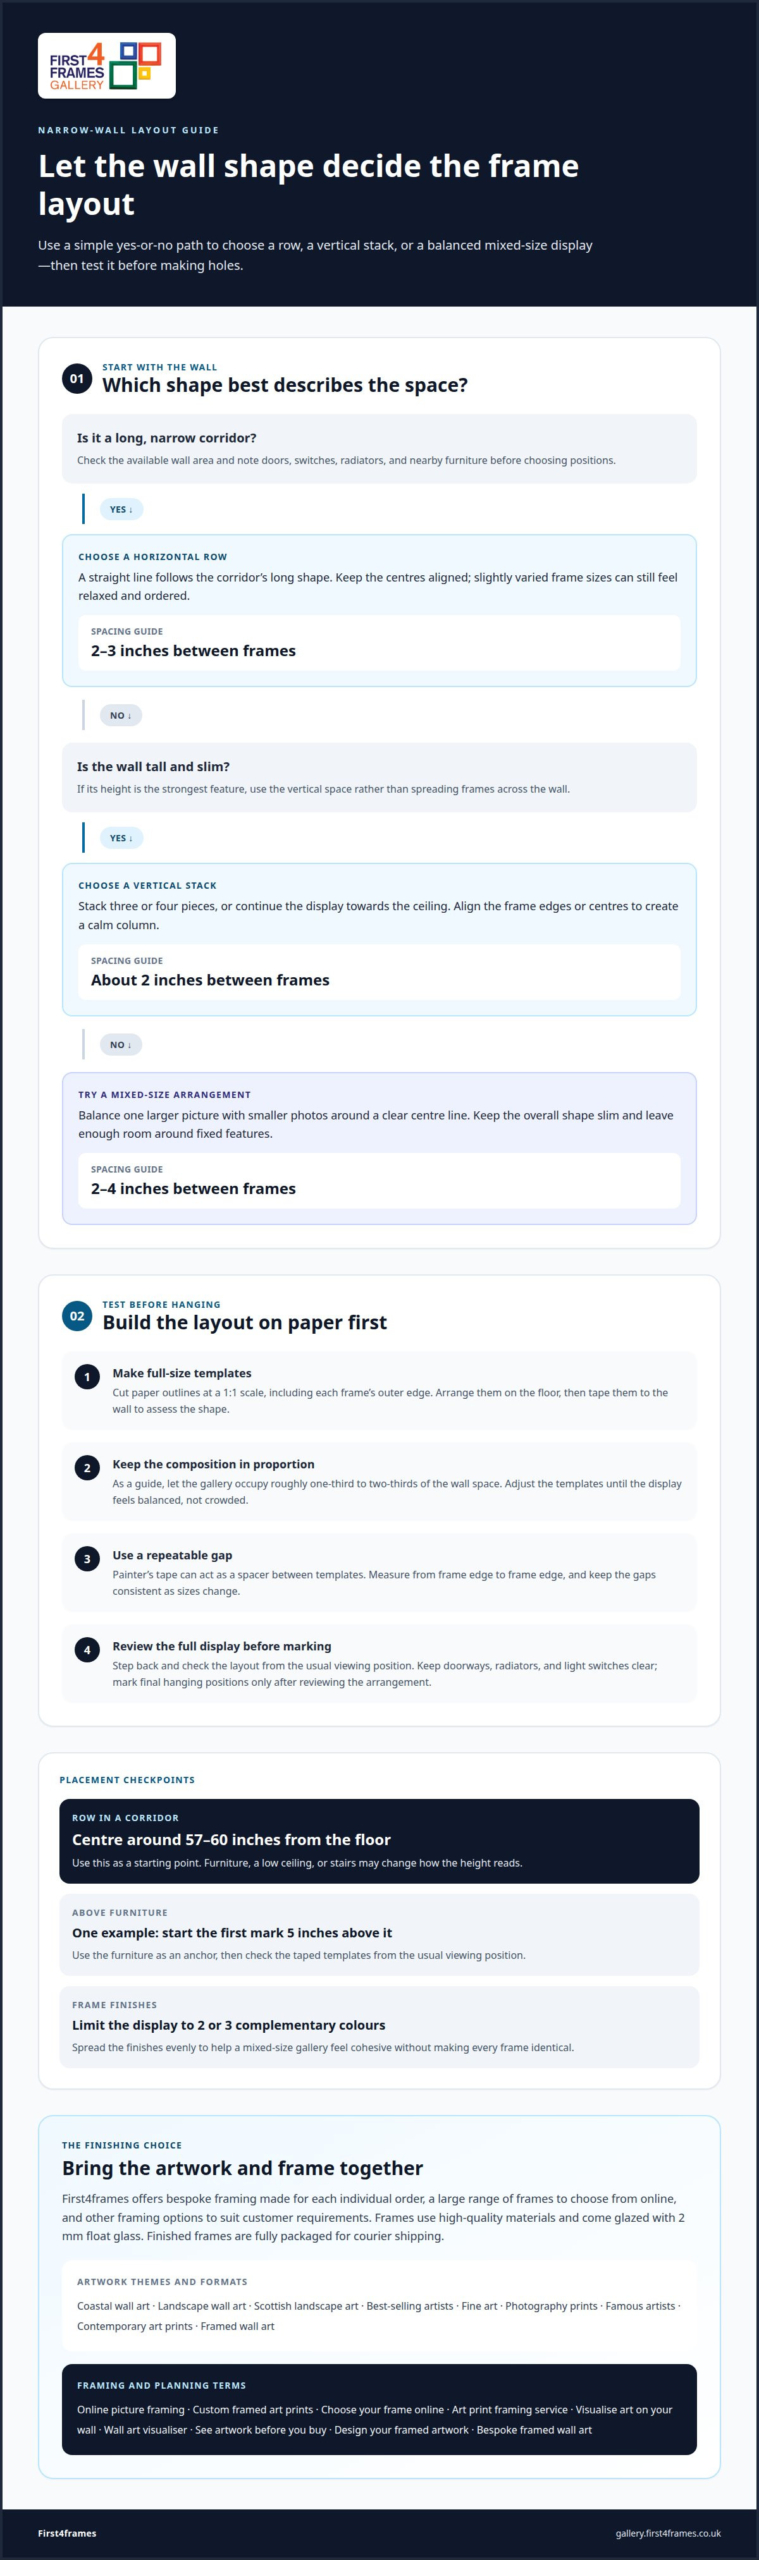
On a narrow wall, use a vertical stack or a slim row, then balance frame sizes around a clear centre line. Leave 2 to 4 inches between frames, adjusting the composition to suit the wall.
Treat a doorway, radiator or light switch as a boundary. Arrange frames beside or above it, leaving access clear and avoiding a cramped display.
-
Mark frame spacing with painter’s tape
Cut painter’s tape to the gap you want and place it between the paper frame templates. This creates a repeatable guide as you adjust the display’s visual rhythm. For example, use the same tape width between each pair of frames, even where sizes change. Step back to check the spacing from across the room before marking hanging positions.
-
Set spacing for a vertical display
Stack frames from the bottom upwards, keeping their edges or centre line aligned. For a vertical display of three photo frames, leave about 2 inches between each frame. If sizes vary, align the centres to create a calm column, or align one edge for a more structured look. Place the paper templates first, then check that the top and bottom pieces fit the available wall height.
-
Keep gaps consistent and even
Measure between the outer edges of each frame, not between the pictures inside them. A gap of 2 to 4 inches usually works well; keep it consistent across horizontal and vertical spaces. In a relaxed arrangement, even spacing still helps different sizes feel connected. Use a ruler or a tape spacer at every gap, then view the display from your usual position to spot uneven distances.
-
Arrange frames around fixed features
Mark the outline of a doorway, radiator or light switch on your layout before placing frames. Treat it as a boundary, then group pictures to one side or arrange them evenly above it. Keep the gallery’s visual centre clear of switches, and don’t let a frame overlap the doorway’s edge. Test the layout with paper templates to make sure the display feels deliberate.
Vertical frame stacks for tall, narrow walls
For a tall, narrow wall, a vertical stack usually uses the space more effectively than a horizontal row. A stack can hold 3 or 4 pieces, or continue towards the ceiling.
-
Build a vertical frame stack
Measure the usable wall space from the furniture or skirting board to the ceiling, then map the stack with paper templates. Place the largest picture near the centre, balancing it with smaller pieces above or below. Keep the column’s centre line consistent and check that the top frame doesn’t look isolated near the ceiling. View the full stack from the doorway before planning the hanging points.
-
Choose between a vertical stack and a row
Match the layout to the wall’s shape and the surrounding space. Choose a vertical stack for a tall, slim area, such as the wall beside a doorway. A single row suits a long hallway where the wall extends sideways. If the wall has enough height and width for either option, compare paper outlines and choose the arrangement that leaves the clearest visual space.
- Measure each frame’s outer dimensions and hanging point before marking the wall. The frame edges determine the space the full stack needs, while the hanging hardware determines where each fixing sits. Transfer both measurements to the templates so the frame edges, not the fixings, are evenly spaced. This prevents a straight centre line from concealing uneven gaps.
- Let the artwork guide the order of the pieces. For example, a portrait photograph can anchor the centre, while smaller landscape prints lead the eye upwards or downwards. Keep frame finishes consistent if the subjects vary, or use a shared colour to connect different styles. Before hanging, step back and check that the stack reads as one composition rather than separate pictures competing for attention.
Explore artwork for a vertical display and consider how each image will relate to its neighbours before choosing the final order.
First4Frames Gallery: Ready-to-Hang Framed Art
First4Frames Gallery offers Ready-to-Hang Framed Art, Custom Picture Framing and Giclée Fine Art Prints. Explore online picture framing to choose your frame online and create custom framed art prints or bespoke framed wall art. Consider how fine art, contemporary art prints, coastal wall art, landscape wall art or Scottish landscape art might suit your display.
As you browse, consider the artwork and framing together. Whether you’re drawn to well-known artists, popular artists or photography prints, picture the art on your wall before you buy. A wall art visualiser can help you plan the arrangement, while professional framing can bring your chosen pieces together as ready-to-hang wall art.
Visit First4Frames Gallery online to explore the artwork and framing options.
Let your wall tell a story
A narrow wall can be more than a space to fill. Treat it as a small composition with a clear point of view: choose artwork that reflects a mood, memory or subject you want to live with. Finding the best way to arrange frames on a narrow wall starts with deciding what you want the space to express, then choosing pieces that feel connected without competing for attention.
Before hanging anything, consider how the display will look with the room’s colours and furnishings. A quiet series of prints can create a gentle rhythm in a hallway, while a striking central image can give a slim wall a confident focal point. Choose pieces that feel personal and give the finished arrangement room to become part of your home.
Explore the artwork and framing options at First4Frames Gallery to find pieces that suit your space and style. Browse the gallery and take the next step towards a display that feels distinctly yours.
Frequently Asked Questions
How do you space multiple frames on a wall?
Measure the gap between each frame’s outer edges, using the same reference point throughout. In a mixed-size display, compare the spaces between frames rather than between the picture contents, since mounts can make those gaps look different. Lay out paper shapes first and view them from the room entrance to spot any frame that feels detached from the group.
Should all frames on a gallery wall be the same colour?
No. Frames can have different finishes if the overall display still feels connected. Create a visual link by repeating one finish on the largest pieces or matching frame tones to colours in the artwork. For example, black frames can anchor a few lighter wood frames. Spread each finish across the arrangement instead of clustering matching frames in one corner.
What if my frames have 2 hooks, one on each side, instead of one in the centre?
Measure between the hooks and transfer that distance to the wall, keeping the frame’s centre aligned with your planned position. For hooks 12 inches apart, mark the fixing points 6 inches either side of the centre. Check both marks with a level before hanging, so the frame sits straight and its weight rests evenly on both fixings.
What frame layouts work best on a narrow wall?
The best way to arrange frames on a narrow wall is to match the layout to its shape: choose a vertical stack for a tall, slim space or a single row along a corridor. A mixed-size arrangement can also work if its overall outline stays narrow, such as one larger picture beside smaller pieces. Account for nearby doors and switches when mapping the usable space.
How much spacing should there be between picture frames?
A gap of 2 to 4 inches between frame edges is a useful starting point for many displays. Keep the distance consistent across the arrangement, including between larger and smaller frames. If the artwork has wide mounts, judge the frame edges rather than the visible image area. A paper spacer cut to your preferred gap makes repeated measurements easier.
How high should picture frames be hung in the UK?
For a horizontal row, centre the arrangement around 57-60 inches from the floor, then assess it from the usual viewing position. For the best way to arrange frames on a narrow wall, measure to the centre of the complete display, not the top edge of the first frame. In a stairwell, test the height with paper templates first.