That sweeping, empty wall alongside your staircase holds so much promise, yet it can be a source of genuine hesitation. The fear of a misplaced nail, the puzzle of achieving perfect balance on an incline, or the challenge of curating a collection that feels both personal and polished can often lead to creative paralysis. But what if you could transform that daunting space into a spectacular ascent of art and memories? This professional guide is designed to show you exactly how to build a gallery wall on a staircase with the confidence and flair of a seasoned curator.
Drawing on our passion for premium craftsmanship and fine art, we will walk you through the entire creative process. From selecting beautiful, professionally framed pieces from our First4Frames Gallery to mastering a layout that works with sloped walls, we’ll demystify the angles and measurements. By the end, you’ll have all the expertise you need to create a perfectly balanced, bespoke gallery that not only provides a ‘wow-factor’ entrance but tells your unique story with every step you take.
Key Takeaways
Learn the professional ‘stair line’ rule to measure and plan your layout, ensuring every piece is hung at the perfect eye-level for a flawless ascent.
Discover how to curate a cohesive, gallery-quality collection by building a theme around spectacular Scottish artists, available from the First4Frames Gallery.
Master our step-by-step instructions on how to build a gallery wall on a staircase, using simple paper templates to design your layout without making a single mistake.
Understand how to achieve a premium finish with bespoke framing, and see how our simple, hassle-free process makes it easy to bring your vision to life.
Why the Staircase is the Ultimate Canvas for Your Art Collection
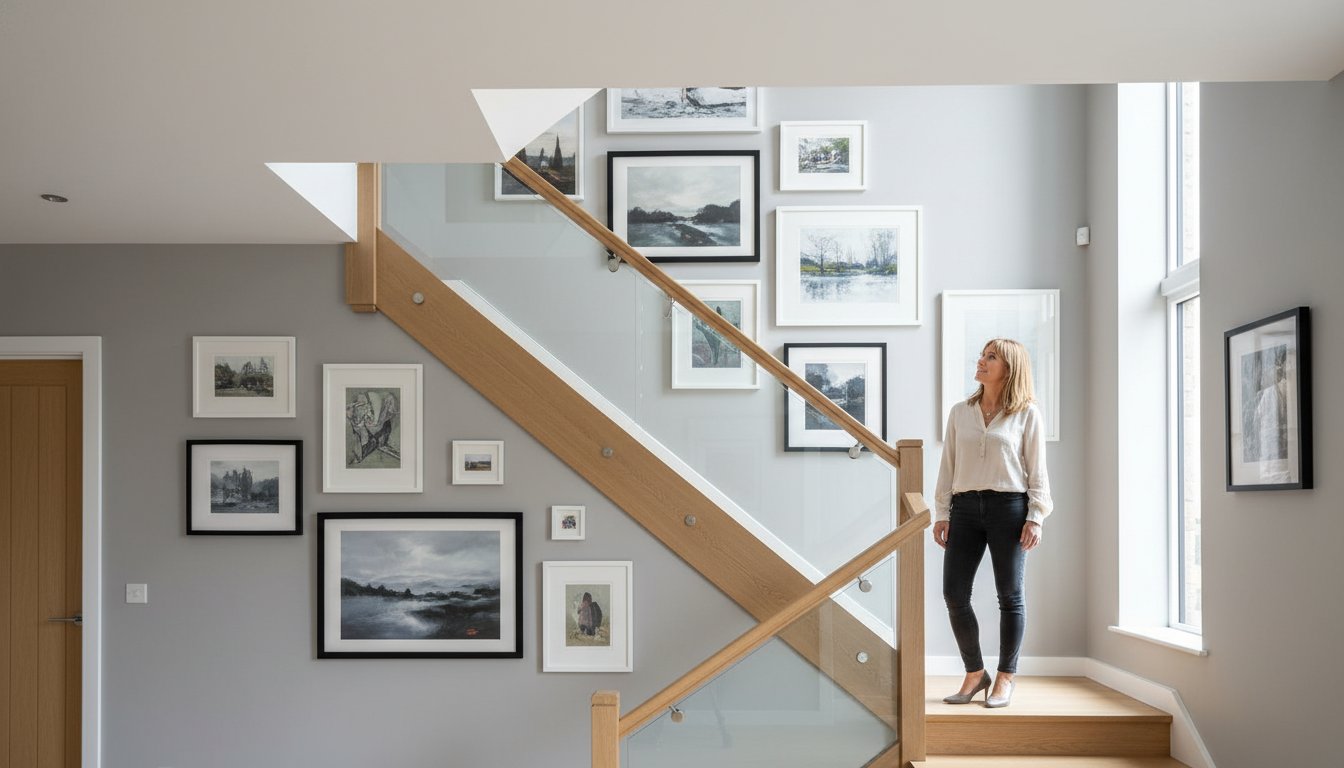
Often overlooked, the staircase is one of the most dynamic, high-traffic areas in any home. It’s more than just a functional space; it’s a transitional gallery that connects floors and sets the decorative tone. As interior trends for 2026 lean towards ‘maximalist’ hallways and curated ascents, there has never been a better time to transform this blank canvas. Learning how to build a gallery wall on a staircase allows you to infuse your home with personality, creating a spectacular visual journey from the moment someone steps inside.
For a visual guide on getting started, this video offers some excellent practical tips:
Embarking on this project is made simple with the First4Frames Gallery, your one-stop-shop for beautiful fine art and bespoke framing. We believe the perfect frame acts as a ‘bridge’ between your chosen artwork and your home’s decor. It’s an essential element that harmonises the piece with its surroundings, ensuring it complements your existing interior design principles and creates a cohesive, professionally curated look.
First4Frames: Over 20 Years of Craftsmanship
Based in Falkirk and serving the entire UK, First4Frames brings over two decades of passion and expertise to every project. Our excellent customer ratings reflect our commitment to a hassle-free, speedy service and the use of only premium materials. This dedication is crucial for preserving the spectacular quality of our Giclée prints. Professional framing not only enhances the artwork’s beauty but also protects your investment, ensuring its vibrant colours will not fade over time.
The Emotional Connection of a Staircase Gallery
A well-curated staircase gallery does more than just decorate a wall; it tells a story. As you move between floors, the art ‘pulls you into the picture’, creating an immersive journey of discovery for family and guests. This powerful emotional connection can also be used to stage and finish commercial or residential properties, adding a layer of sophistication and narrative that makes a space truly memorable. It transforms a simple ascent into a meaningful experience.
The ‘Stair Line’ Rule: Measuring and Planning Your Layout
A staircase isn’t a flat wall; it’s a journey. This dynamic space requires a different approach to design, where careful planning is the secret to a spectacular result. This is where we move from inspiration to action, using a simple professional rule to ensure your gallery flows beautifully with the architecture of your home. The key to understanding how to build a gallery wall on a staircase is to work with the angle, not against it.
Forget a standard horizontal eye-level. On stairs, your viewpoint is constantly changing. The professional approach is to create an ‘imaginary stair line’-a diagonal guide that mirrors the ascent of your steps. A trusted rule of thumb is to measure 145cm to 155cm up from the nose of each step. The centre of your artwork, or the central line of your entire arrangement, should follow this guide. This creates a display that is perfectly viewed whether you are going up or down.
Consider the natural pause points, like a landing or a turn in the stairs. These are perfect spots for a larger, statement piece from our gallery to act as a focal point. Also, be mindful of high-traffic ‘knock zones’ and handrails. Ensure your frames are placed high enough to avoid being knocked by shoulders or bags-a practical consideration for preserving your beautiful art and our premium frames.
Measuring for Success
To find your ‘stair line’, use a pencil to lightly mark the wall at 150cm above every third or fourth step, then connect these dots with painter’s tape. Your largest pieces should anchor the display, positioned centrally along this line. When ordering our bespoke picture frames, measure your artwork precisely. Remember to account for the mount and the width of the frame profile itself to ensure a perfect, professional fit. For a more detailed walkthrough, many design guides on how to create a gallery wall offer excellent visual tips for this stage.
Visualizing the Ascent
Before a single nail is hammered, map out your entire vision. Use paper cutouts or painter’s tape to represent each frame, allowing you to experiment with spacing and composition. This step is crucial for creating a flawless layout without regret. Consider the visual weight; placing darker or larger frames towards the bottom can create a grounded feel, but a balanced mix often feels more dynamic and personal.
We believe in making the process a pleasure, which is why we break it down into three simple steps:
Browse: Embark on a journey of discovery through the First4Frames gallery to select fine art prints that tell your story.
Measure: Apply the ‘stair line’ rule and use paper templates to perfect your layout on the wall.
Order: With your plan in place, confidently order your prints and the premium, bespoke frames that will bring them to life.
Curating Your Collection: Featuring Scottish Artists and Bespoke Frames
A random assortment of pictures can quickly look cluttered. A curated theme, however, transforms your staircase into a professional exhibition. Choosing a cohesive style or artist is a fundamental step when you’re learning how to build a gallery wall on a staircase. Our online gallery provides the perfect starting point, featuring spectacular works from renowned Scottish artists that bring a sense of place and purpose to your collection.
Bring a vibrant splash of the Scottish Highlands to your hallway with the electrifying colours of John Lowrie Morrison (Jolomo), whose landscapes are full of life and energy. For a more sophisticated and cinematic mood, consider the iconic appeal of Jack Vettriano prints. His evocative, narrative scenes add a layer of mystery and elegance to your daily ascent.
The true magic happens when you mix these professional prints with your own personal photographs. A stunning print of a Scottish loch can sit beautifully next to a cherished family holiday photo. For more creative inspiration on blending different pieces, you can find a wealth of staircase gallery wall ideas that explore this very concept. This personal touch is key to creating a gallery that truly reflects you.
Imagine capturing the vibrant energy from a unique trip; for example, you could explore Reykjavik Pub Crawl and turn those memories into captivating photos that tell a story of fun and adventure right in your home.
The Power of Giclée Prints
Giclée prints are far more than just copies; they are museum-quality reproductions perfect for home galleries. Using archival inks on premium fine art paper, this process creates a print that is virtually identical to the original and is guaranteed not to fade over time. When you select a piece from our gallery, you are investing in lasting quality, which can then be perfectly protected with our bespoke framing service, a testament to our excellent customer ratings.
Selecting the Right Frame Style
The frame is the essential bridge connecting your artwork to your home’s decor. Our bespoke picture framing service lets you choose the perfect finish-from warm woods that echo your banister to sleek metals for a modern touch. Using a mount (the border inside the frame) also creates valuable breathing space, giving each piece distinction while maintaining a cohesive look. This attention to detail is central to how to build a gallery wall on a staircase with a flawless, professional finish.
Step-by-Step Execution: From Paper Templates to the Final Hammer
With your collection curated and your layout planned, it’s time to bring your vision to life. This is the most rewarding stage, where careful preparation transforms into a spectacular, personal feature in your home. The key to a flawless installation is precision and patience, ensuring every piece hangs perfectly and securely.
The Template Method
Before you even think about reaching for a hammer, embrace the power of paper. Trace each of your frames onto brown paper or newspaper and cut them out. Using painter’s tape, arrange these templates on the wall, starting from the bottom step and working your way up. This risk-free approach is fundamental to learning how to build a gallery wall on a staircase, as it allows you to visualise the flow and make adjustments without creating unnecessary holes. Pay close attention to spacing-aim for a consistent 5-8cm gap between each frame to create a cohesive, balanced look.
Hanging and Safety
Working on stairs requires a focus on safety. Always use a sturdy, appropriate ladder, ideally with a levelling tool, and have someone assist you. When it comes to hanging, the weight and quality of your frames dictate the hardware. The premium, bespoke frames that protect beautiful fine art prints from our gallery require more than a simple nail; they demand professional-grade hooks to ensure they remain secure for years to come.
This is where the First4Frames ‘one-stop-shop’ advantage truly shines. When you select a stunning piece from artists like Dan Hobday or Bella Pieroni, it arrives not just as a print, but as a perfectly, professionally framed work of art, complete with the correct high-quality hanging hardware. This removes all the guesswork, allowing you to hang with confidence. For final adjustments, use a spirit level on top of each frame and a small piece of Blu Tack behind the bottom corners to prevent shifting and keep everything perfectly aligned.
Elevating Your Display with First4Frames Bespoke Services
You’ve planned your layout and chosen your pieces; now it’s time for the final, transformative step. A professionally crafted frame is the heavy lifter in your room’s relationship with art-it’s the bridge between your décor and the image, creating a spectacular, cohesive finish. At First4Frames, we make this process seamless with our three core services: our Gallery featuring curated Scottish art, our bespoke Framing service for your own treasures, and our convenient Print-and-Frame option.
Bringing your vision to life is a simple, hassle-free experience with our trusted three-step process. First, browse our extensive collection of frames and art. Second, customise your selection with the perfect mount and finish. Finally, place your order and let our expert artisans handle the rest, delivering a gallery-ready piece directly to your door.
Custom Framing for Your Own Treasures
The most personal gallery walls feature your own memories-photographs, heirlooms, or children’s drawings. Our bespoke framing service is designed to preserve these irreplaceable items. We source only the finest materials, from conservation-grade mounts to premium wood mouldings, ensuring your art is protected and beautifully presented. Unlike a standard shop-bought frame, a bespoke piece is a work of craftsmanship, built to perfectly complement your art and last a lifetime.
Commercial and Large-Scale Projects
For property developers, interior designers, and estate agents, a well-curated gallery wall can transform a space from a house into a home. We offer expert curation services, helping you finish commercial and residential properties with high-quality Scottish art that adds character and value. If you’re looking for guidance on how to build a gallery wall on a staircase for a show home or a large-scale project, contact us for a bespoke quote and discover how we can help you make a lasting impression.
For designers looking at other high-impact updates, revitalizing kitchen and bathroom cabinetry is another key strategy. Even if you’re not in Colorado, the work of specialists like Cabinet Painting Denver provides a great example of how this can elevate a property’s appeal.
Embark on a journey of artistic discovery with a team passionate about quality and craftsmanship. We invite you to visit our Falkirk gallery to see our work first-hand or browse our curated collections online to find the perfect piece for your home.
Bring Your Staircase Gallery to Life
You are now equipped with the professional techniques to transform your home’s most-travelled path into a stunning visual journey. By mastering the crucial ‘stair line’ rule for a flawless layout and using paper templates for precision, you have the blueprint for success. Curating a personal collection, perhaps with beautiful pieces from Scottish artists, is the final creative touch that makes the space uniquely yours.
This guide has shown that knowing how to build a gallery wall on a staircase is about more than just hanging frames-it’s about telling your story. At First4Frames, we live and breathe this passion. With over 20 years of bespoke framing expertise, backed by excellent customer ratings on Google and Facebook, we are specialists in providing premium, professionally framed art from iconic Scottish artists like Jolomo and Vettriano.
A good rule of thumb is to hang your artwork so the centre of each piece is approximately 150-160cm (about 5 feet) vertically up from the stair tread directly below it. This ensures the art remains at a comfortable eye level as you move up or down the stairs. For a large statement piece from our gallery on a landing, centre it at a standard eye level of 145cm from the floor for maximum impact.
Should all the frames on a staircase gallery wall match?
Not at all! A mix of different frame styles, colours, and materials can create a wonderfully personal and eclectic look. The key is to find a unifying element, such as a consistent colour within the artwork or a common mat colour, to tie everything together. Alternatively, a matched set of frames, created with our bespoke framing service, offers a more formal, cohesive, and beautifully polished aesthetic for your collection.
Where do I start hanging a gallery wall on a staircase?
Always begin with your largest or most important piece of art, often called the “anchor piece.” This might be a spectacular print from the First4Frames gallery that you want to be the focal point. Place this piece in a central location, perhaps over a landing or in the middle of the longest wall section. From there, you can build the rest of your arrangement outwards, balancing smaller frames around it to create a harmonious flow.
How do I calculate the angle of the stairs for my gallery wall?
You don’t need complex maths to find the perfect angle. The simplest method is to use a long piece of string and some painter’s tape. Secure the string at the bottom of your wall and stretch it to the top, running it parallel to the slope of your banister or the nosing of the steps. This string creates the ideal guideline. You can then align the centres of your frames along this line for a professional, stepped layout.
Can I mix large and small frames on a staircase?
Absolutely! A dynamic gallery wall thrives on variety. Mixing large statement pieces with smaller, more intimate frames creates visual interest and rhythm, preventing the display from looking flat or monotonous. Imagine pairing a large, vibrant artwork from our gallery with smaller family photos you’ve had framed through our print-and-frame service. This contrast adds depth and tells a richer, more personal story on your walls, which is essential when learning how to build a gallery wall on a staircase.
How do I prevent frames from being knocked off the wall in a narrow staircase?
In a high-traffic area like a narrow staircase, security is paramount. We recommend using two D-rings and hooks for each frame rather than a single hook, as this prevents it from shifting or tilting. For extra stability, place a small amount of museum putty or a reusable adhesive tack at the bottom corners of the frame. This ensures your beautiful, professionally framed pieces stay securely and perfectly in place, protecting your investment.
What is the best type of glass for staircase art to avoid glare?
If your staircase receives a lot of natural light or is brightly lit, anti-reflective glass is a worthwhile investment. This premium glazing minimises reflections and glare, ensuring the artwork’s true colours and intricate details are perfectly visible from any angle. At First 4 Frames, our bespoke framing service offers specialist glazing options, because we believe the quality of the glass is just as important as the craftsmanship of the frame itself.
Is it better to buy ready-to-hang art or get custom framing for a gallery wall?
This truly depends on your creative vision. Our ready-to-hang art from the First4Frames gallery offers a convenient, expertly curated solution where the frame is already perfectly matched to the artwork. Custom framing, on the other hand, gives you complete control to create a truly bespoke look for your own photos or prints. Our print-and-frame service provides the best of both, combining beautiful art with a custom frame in one simple, hassle-free process.
That beautiful, substantial piece of art is ready to transform your room, but the thought of it crashing down can be daunting. The confusion over wall plugs, screws, and stud finders is often enough to leave your masterpiece leaning against the wall for weeks. But it doesn’t have to be that way. Knowing how to hang a heavy picture frame safely is the key to turning that anxiety into a feeling of pure accomplishment.
At First4Frames Gallery, we believe the final step of displaying your art should be as joyful as choosing it. That’s why we’ve poured our twenty years of craftsmanship and expertise into this definitive guide. We’ll walk you through everything, step-by-step: from identifying your wall type and finding a stud (and what to do when you can’t), to selecting the perfect, premium fixings. Get ready to hang your treasured piece securely, perfectly level, and with the pride of a job beautifully done.
Before You Begin: Assess Your Frame and Wall
Before you pick up a hammer, the journey to displaying your beautiful artwork begins with a simple, crucial assessment. Understanding the challenge-the exact weight of your frame and the type of wall you’re working with-is the secret to a secure, professional, and lasting result. Guesswork can lead to damaged walls or a fallen frame. This initial preparation is the most important part of learning how to hang a heavy picture frame safely and with confidence.
For a visual guide on the fundamentals, this video provides an excellent overview:
How to Weigh Your Picture Frame Accurately
The substantial materials used in a premium picture frame, from solid wood to high-quality glazing, contribute significantly to its overall weight. Never estimate this figure. For an accurate measurement, use a standard bathroom scale. First, weigh yourself and note the number. Then, carefully pick up the frame and weigh yourself again. The difference between these two figures is the precise weight of your artwork. Be sure to write this down, as you’ll need it when selecting the correct hanging hardware.
Identifying Your Wall Type: The Knock Test and Beyond
The type of wall you have is the single most critical factor in choosing the right fixings. The simplest way to start is with the ‘knock test’. Give the wall a firm rap with your knuckle and listen to the sound:
Plasterboard (Drywall): Produces a hollow sound. This is the most common internal wall type in modern UK homes.
Masonry (Brick or Concrete): You’ll hear a solid, dull thud. These are typically external or load-bearing walls.
Plaster & Lath: Common in older properties, this can sound uneven and slightly hollow between the wooden laths.
If you’re still unsure, drill a small test hole in an area that will be covered by the frame. The dust produced-fine and white for plasterboard, reddish or grey and gritty for masonry-will reveal its composition.
Gathering Your Essential Tools
Having the right tools on hand makes the job smoother and safer. Before you start, gather the following essentials:
Tape measure
Pencil
Spirit level
Stud finder (essential for plasterboard walls)
Drill with the correct drill bits for your wall type
Safety goggles, especially when drilling into masonry
Choosing the Right Hardware: A Framer’s Guide
The bridge between your beautiful artwork and the wall is the hardware, and choosing correctly is the most critical step. The golden rule is simple: the hardware’s maximum weight rating must always comfortably exceed your frame’s actual weight. Beyond that, the choice of fixing is determined entirely by your wall material. Forget standard picture hooks or small nails; for a premium, heavy frame, they are simply not up to the task. Getting this right is central to learning how to hang a heavy picture frame safely and securely for years of enjoyment.
For Plasterboard (Drywall) Walls
Most modern UK homes feature plasterboard walls. Your best and most secure option is to locate a vertical wooden stud behind the plasterboard and drive a heavy-duty screw directly into it. If a stud isn’t conveniently located, your next choice is a specialised plasterboard anchor. These clever fixings, like toggle bolts, expand behind the board to distribute the weight over a wider surface area, preventing them from pulling out. For a detailed look at various methods, wikiHow’s solutions for hanging heavy pictures offer a great overview.
Anchor Type
Typical Weight Limit (per fixing)
Strap Toggles
20kg – 45kg
Toggle Bolts
15kg – 25kg
Heavy-Duty Self-Drill Anchors
10kg – 20kg
Always check the manufacturer’s specific weight rating on the packaging before purchase.
For Masonry (Brick or Concrete) Walls
Hanging on solid masonry provides an exceptionally strong fixing point. This requires a power drill fitted with a masonry drill bit and suitable wall plugs (often called rawl plugs). The process is straightforward: drill a hole to the specified depth, gently tap the wall plug in until it’s flush with the wall, and then drive your screw into the plug. The plug expands to create a tight, secure grip. The key to success is ensuring your drill bit, wall plug, and screw are all correctly matched in size-this information is usually found on the plug’s packaging.
Picture Wire vs. D-Rings: The Professional’s Choice
For a truly professional finish on a heavy piece, we always advise against using a single strand of picture wire. Over time, wire can stretch, fray, or even snap under significant weight. It also creates a single pivot point, causing the frame to tilt forward from the wall and easily become crooked. Instead, we recommend attaching two D-rings to the back of the frame, about a quarter of the way down from the top. Hang these on two separate, securely fixed wall hooks. This method distributes the load perfectly, keeps your beautiful frame level, and ensures it sits flush and stable against the wall.
The Step-by-Step Hanging Process
With your wall assessed and your premium hardware chosen, you’ve reached the final, rewarding stage. This methodical approach demystifies how to hang a heavy picture frame, turning a daunting task into a simple display of craftsmanship. Remember the carpenter’s golden rule: measure twice, drill once. We strongly recommend asking a friend or family member for a second pair of hands to help lift and position the frame safely.
Following these steps will ensure your beautiful artwork is not only secure but also perfectly positioned to become the focal point of your room.
Step 1: Determine the Perfect Position
Finding the right height is crucial for the artwork’s impact. A general rule used in galleries is to hang art so its centre is at eye level, which is typically around 57-60 inches (145-152cm) from the floor. Once you’ve found your ideal spot:
Use a pencil to make a very light mark on the wall where the top centre of the frame will be.
Turn the frame over and measure the distance from the top edge down to the hanging points (the centre of the D-rings).
Transfer this measurement down from your top-edge mark on the wall. This new mark (or two marks, for two D-rings) is where you will drill.
Step 2: Install Your Wall Fixings
Precision here is key to a level finish. Use your spirit level to ensure your two drilling marks are perfectly horizontal. Now, carefully drill your pilot holes and insert the appropriate wall plugs for your wall type. Screw in your fixings, leaving them protruding just enough for the D-rings to slot onto securely-about 1cm is usually perfect. Give them a gentle tug to ensure they are solid and don’t wobble.
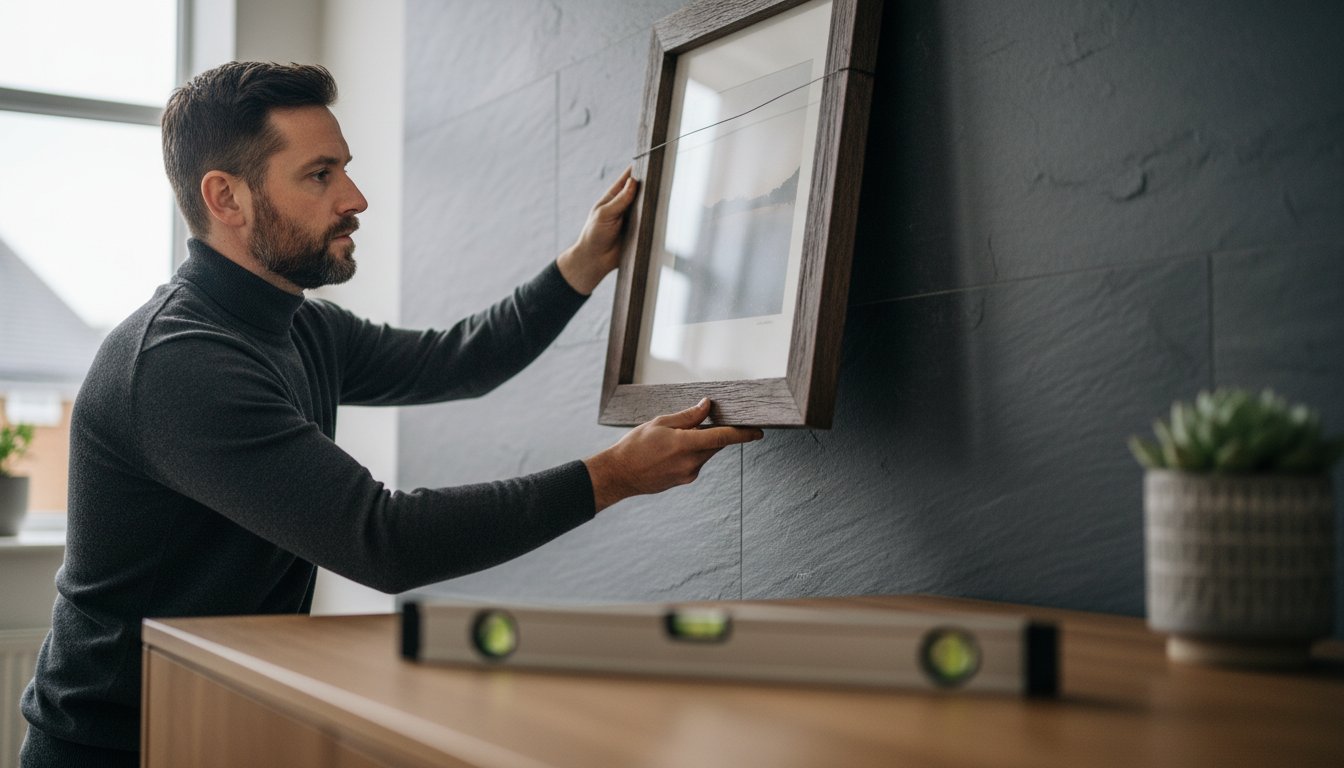
Step 3: Hang and Level Your Artwork
With your helper, carefully lift your artwork. Gently guide the D-rings or hanging wire onto the screw heads. Once the frame is resting on the fixings, place your spirit level on the top edge. Nudge the frame left or right until the bubble is perfectly centred. For a final professional touch, add small felt pads to the bottom corners of the frame to protect your wall and help the art hang straight.
You’ve chosen a beautiful piece of art and a premium, bespoke frame. The final step is getting it on the wall, but this is where the real craftsmanship of the display comes in. When you’re learning how to hang a heavy picture frame, avoiding common errors is just as important as knowing the right steps. Even a small miscalculation can lead to a fallen frame or unsightly damage to your walls. By learning from these frequent pitfalls, you can ensure your spectacular artwork remains secure and perfectly displayed for years to come.
Using a Single Nail or the Wrong Hook
It can be tempting to use a single nail for a quick fix, but this is a critical mistake for heavy art. A single fixing point creates a pivot, allowing the frame to shift easily, and it concentrates all the stress on one small area of your wall. Furthermore, standard picture hooks found in most kits are simply not rated for significant weight and can fail unexpectedly. For true peace of mind, always use at least two fixing points and ensure your hooks or screws are specifically rated to support well over the weight of your frame.
Ignoring Wall Studs
Behind your plasterboard walls lies a sturdy timber frame made of vertical supports called studs. A wall stud is by far the strongest anchor point available, offering a secure foundation that plasterboard alone cannot match. Failing to check for a stud is a major missed opportunity for maximum security. A simple electronic stud finder, often costing less than £20, is an invaluable tool that removes all guesswork. Locating a stud provides a rock-solid installation you can trust.
Skipping the Spirit Level
Hanging a picture ‘by eye’ is a gamble that rarely pays off. Our eyes can be deceiving, and what looks straight from one angle might appear crooked from another. A slanted frame can make an entire room feel off-balance, distracting from the beauty of the art it’s meant to showcase. For a professional finish, use a spirit level twice: first when marking your drill holes, and again when you place the frame on the wall for final adjustments.
These expert tips will help you hang your art with the confidence of a professional. Taking that little bit of extra care is the final touch that honours both the artwork and your home. Feeling overwhelmed by the details? To make the process completely hassle-free, explore our beautiful collection of ready-to-hang art, delivered with the perfect, professionally-selected fixings for a flawless display right out of the box.
Hang Your Masterpiece with Confidence
Hanging a substantial piece of art doesn’t have to be daunting. By carefully assessing your wall, choosing the right heavy-duty fixings, and following a precise, measured approach, you now have the expertise for how to hang a heavy picture frame safely and securely. This ensures your treasured artwork not only looks spectacular but also remains firmly on your wall for years to come.
Of course, the journey to a beautiful wall begins with the perfect piece. With over 20 years of professional framing experience, we understand the importance of quality craftsmanship. Our bespoke service uses only high-quality materials for both frames and fixings, ensuring your art is perfectly presented. If you’d rather start with art that’s designed to impress and is ready for display, we invite you to browse our gallery of beautiful, professionally framed art, ready to hang.
With the right knowledge and the perfect piece, you’re ready to transform your space. Happy hanging!
Frequently Asked Questions
How much weight can a plasterboard wall hold without a stud?
A standard screw directly into plasterboard may only hold 1-2 kg. However, with the correct heavy-duty fixing, its capacity increases significantly. A high-quality hollow wall anchor or a toggle bolt can typically support between 10 kg and 25 kg. It is essential to check the manufacturer’s specified weight limit on the fixing’s packaging to ensure your beautiful artwork is hung securely and with complete confidence.
What is the best height to hang a large picture frame?
As a professional guide, we recommend hanging artwork so its centre point is at average eye level, which is between 145 cm and 152 cm from the floor. This creates a balanced and comfortable viewing experience in most rooms. For a truly spectacular, oversized piece, you may adjust this based on your ceiling height and surrounding furniture, ensuring the art becomes a perfect focal point that elevates your space.
Can I use adhesive hooks or strips for a heavy frame?
While adhesive hooks are excellent for very light, temporary displays, we strongly advise against using them for any substantial or valuable frame. The adhesive can degrade over time due to environmental changes, posing a significant risk to your artwork, frame, and wall. For any piece with weight, a secure mechanical fixing, such as a screw with an appropriate wall plug, is the only way to guarantee a safe and lasting installation.
How do I hang a heavy mirror? Is it the same process?
The process for hanging a heavy mirror is very similar, as both demand robust and reliable support. The main difference is that a heavy mirror often requires two fixing points or a specialist French cleat system to distribute the weight evenly and prevent it from shifting. The skills for how to hang a heavy picture frame are a great starting point, but always use fixings rated well above the mirror’s actual weight for total security.
What should I do if my wall starts to crack around the hook?
If you see any cracks forming around the hook, you must take the picture frame down immediately and with great care. This is a critical sign that the current fixing is failing under the load and is not suitable for the frame’s weight or the wall type. You will need to repair the small area with filler before re-hanging the piece using a much stronger, more appropriate fixing, like a toggle bolt.
Do I need a professional to hang a very heavy piece of art?
For exceptionally heavy (over 25 kg), valuable, or awkwardly shaped art, hiring a professional picture hanger is a wise investment. They possess the specialist equipment, experience, and insurance to ensure a perfect and secure installation. The cost, often starting around £50-£75, provides complete peace of mind that your premium artwork is handled with the expert craftsmanship and care it truly deserves.