Posted on

4 things to check before hanging pictures in a rented flat

4 things to check before hanging pictures in a rented flat

Can you make a rented flat feel like home without risking wall damage? Damage-free picture hanging for rented flats starts with one simple check: read your tenancy agreement, and ask your landlord or letting agent for written permission if the rules are unclear. What’s allowed depends on your agreement, so don’t assume removable hooks are automatically permitted.

It’s understandable to want your favourite prints and photographs on display rather than tucked away until you move. Choosing a hanging method that suits both the wall and the frame can help you make the space your own while avoiding unwanted marks.

This guide covers four practical points: what your tenancy agreement says, how to ask for permission, how to match hangers to picture weight, and what to do if wall hanging isn’t allowed. You’ll have a clearer plan for displaying art while respecting your tenancy.

Key Takeaways

  • Start with your tenancy agreement; if the rules aren’t clear, get your landlord or letting agent’s permission in writing.
  • Removable adhesive strips may suit lighter pictures on smooth, clean walls, but prepare the surface and follow the product instructions.
  • Match the hanger to the complete framed picture’s weight and the wall surface to reduce the risk of it coming loose.
  • If wall hanging isn’t permitted or a picture is too heavy, consider displaying it on an easel or leaning it securely instead.

1. Can tenants hang pictures?

You can hang pictures if your tenancy agreement permits it or your landlord agrees. Check the agreement first; if the wording is unclear, ask the landlord or letting agent for written consent. They may set conditions, such as limiting the number of pictures or requiring repairs when you leave. A careful approach to damage-free picture hanging for rented flats starts with understanding those terms.

Command Strips and other removable adhesive strips attach frames without nails, while adhesive hooks support pictures from a hook. Both have weight limits, so compare the stated capacity with the complete framed picture. Tension systems and picture-hanging systems let you rearrange decorations without making new wall holes. In period properties, rail hooks and cords can suspend artwork from an existing picture rail.

Apply strips to a smooth, clean wall. Wipe away dust with a dry cloth, press the strips firmly, then wait 1 hour before reattaching the frame. After painting, wait at least a couple of weeks before applying adhesive strips, because fresh paint can peel. Follow the product’s removal instructions to reduce the risk of lifting paint or damaging the surface.

Adhesive hooks may not work well on wallpaper, textured walls or weak paint. Removable strips are described as suitable for lightweight to medium canvas pieces on smooth, clean walls. In humid rooms, follow the product’s stated conditions. Weak paint may lift during removal, and a failed hook can damage a frame or break its glass. These checks are central to damage-free picture hanging for rented flats.

There’s no single UK price range for hanging products: costs depend on the product type, pack contents and stated weight capacity. To find existing hanging points, inspect the upper wall for a narrow picture rail, then look for hooks or cords. Check your tenancy agreement before using any fitting.

2. Getting landlord or letting-agent permission

Read your tenancy agreement before planning a picture wall or choosing frames. If it doesn’t clearly allow picture hanging, send the landlord or letting agent a written request before making changes. Ask specifically about adhesive strips, hooks, picture rails or screws. A method that avoids drilling may still be restricted by the agreement.

Make your request easy to answer. Describe the room, the hanging method and the artwork you want to display. Say whether the pictures are lightweight or framed, and explain how you’ll remove the fittings. If you’re planning a gallery wall, include its proposed location and layout. Clear details help the landlord respond to the specific change, rather than a broad request to decorate.

  • Ask which hanging methods are permitted, including removable strips or existing rails.
  • Clarify whether there’s a limit on picture numbers, locations or frame sizes.
  • Agree who will repair any marks and how the wall should be left at move-out.

Keep the reply with your tenancy documents. Written consent records the agreed method and any conditions, such as filling holes or restoring paintwork. Landlords and tenants can also agree that you’ll repair picture-hanging damage or that repair costs may come from the deposit. Put those responsibilities in writing instead of relying on a verbal conversation.

Ask separately before painting or applying removable wallpaper. Both can affect the wall finish, and permission to hang pictures doesn’t automatically cover other decorating. If the landlord approves a particular colour or asks you to restore the original finish, record that condition before starting. Once you know what’s allowed, explore artwork for your display and plan a layout that fits the permission you received.

3. Choosing hangers based on picture weight

Start with the complete framed picture, not just the print or canvas. Weigh the frame with its glazing and fittings, then compare the total with the hanger’s stated capacity. A framed photograph may weigh more than its size suggests, especially if it has glass. Choosing a hanger by appearance alone can leave the picture under-supported.

Check the package instructions for the specific product and its permitted load. Command hooks support a limited amount of weight, so match the stated capacity to your frame. Adhesive picture strips and hooks also need to suit the wall surface. Don’t assume that different products, even from the same brand, have identical limits.

The wall matters too. UK rental flats may have plasterboard, solid brick or freshly painted surfaces. Identify the surface before choosing a fixing, because a method suitable for one wall may not suit another. Removable strips are described as suitable for lightweight to medium canvas pieces on smooth, clean walls. They aren’t a universal choice for every frame or surface.

A heavier statement picture needs a suitable hanging point. Picture hooks may work where tiny pin-sized marks are allowed by the tenancy agreement. If drilling or marks aren’t permitted, don’t use a hanger that can’t safely support the frame. A picture that pulls a hook from the wall can damage the surface; a failed adhesive hook may also damage the frame or break its glass.

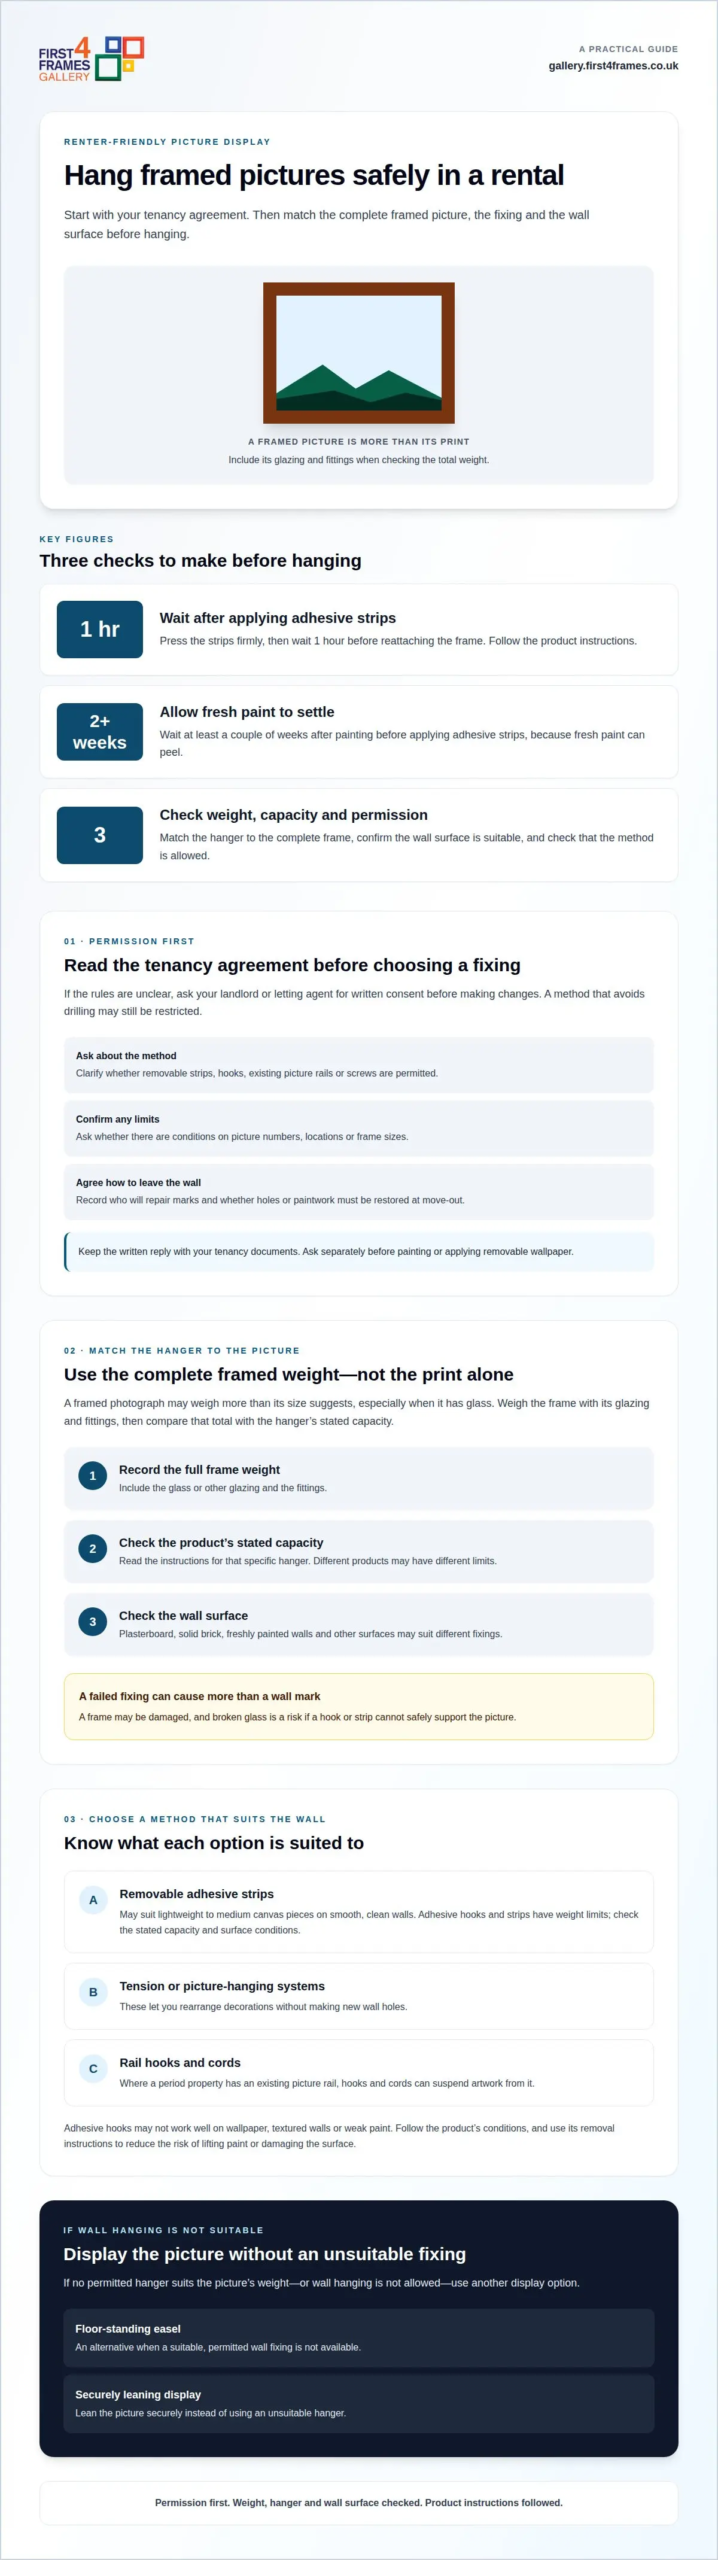
For a large or glazed frame, use this simple check before hanging:

  • Record the complete frame’s weight, including its glass and fittings.
  • Check the hanger’s stated capacity and permitted wall surfaces.
  • Confirm that the fixing method is allowed in your rental agreement.

If no permitted hanger suits the picture’s weight, choose another display option, such as a floor-standing easel. A lighter frame may also be more practical in living spaces where wall fixings are restricted. Match the frame, wall and permitted fixing rather than risking damage with an unsuitable hanger.
4 things to check before hanging pictures in a rented flat

4. Picture hanging in rented homes

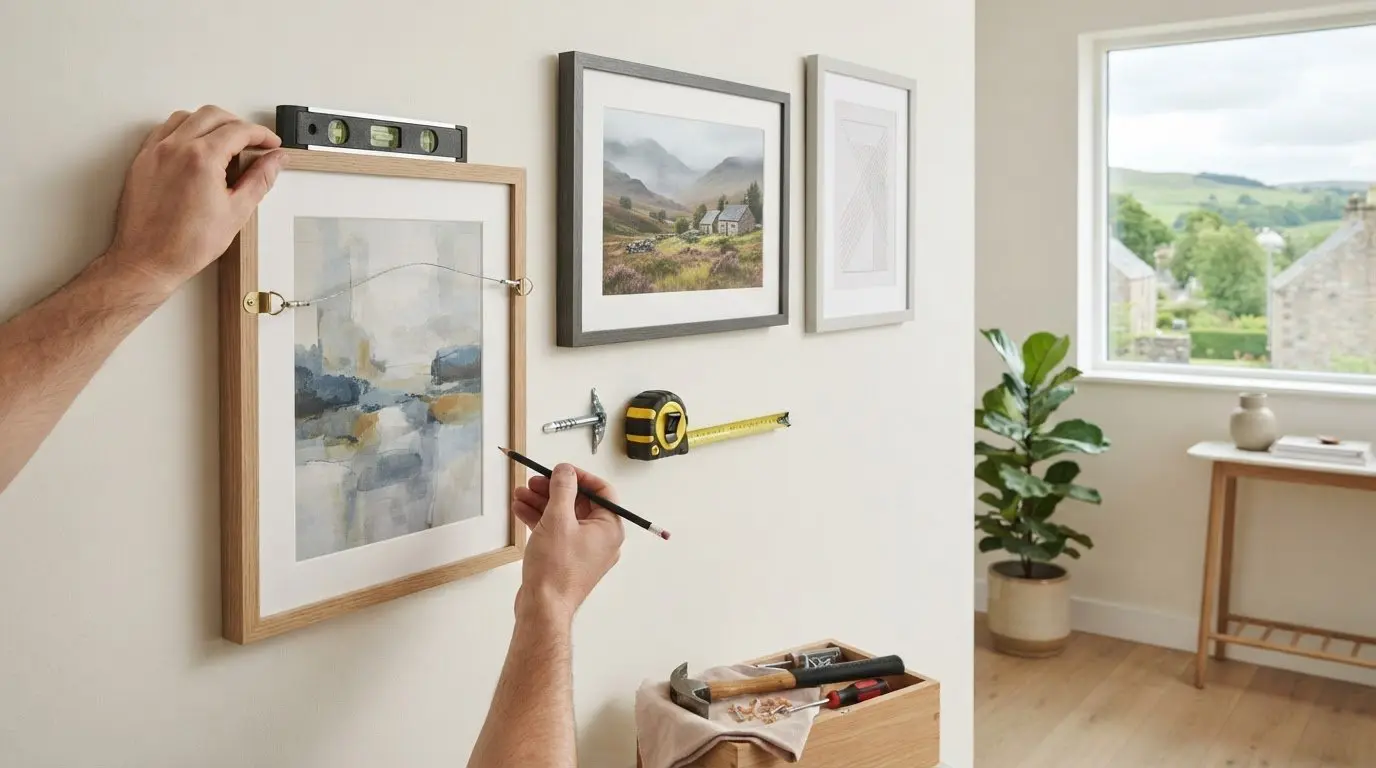
Renting can still feel personal, even when wall fixings are restricted. Map out the room before hanging pictures: measure the wall, note furniture positions and mark proposed frame locations lightly with a pencil. A tape measure helps you avoid unnecessary holes and keep a group of frames aligned. Check the wall surface too, since rental homes can have plasterboard, solid brick or freshly painted walls.

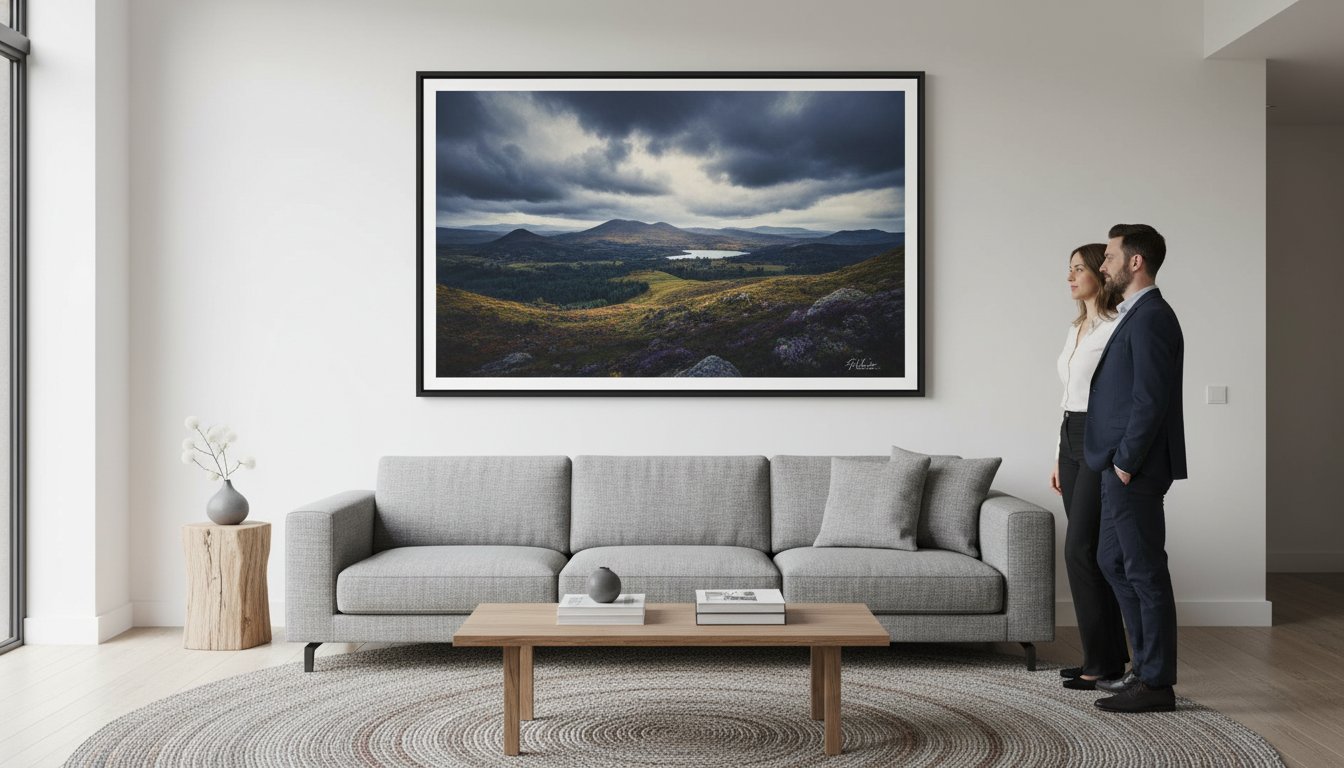
Above a sofa, aim for artwork around 60–70% of the sofa’s width, then leave about 20–25 cm between its back and the artwork’s lower edge. A 1–2 cm tilt can look noticeable above furniture, so use a level and step back to assess the arrangement. For a gallery wall, lay out different frame sizes on the floor first. This lets you refine the composition before making any permitted fixings.

If your agreement forbids hanging, or the frame exceeds the hanger’s capacity, use a freestanding alternative. Lean a framed print securely on a shelf, display it on an easel, or place it on the floor away from walkways. These options let you change your living space without adding wall holes. Removable wallpaper can also create a backdrop, but seek permission first because it may mark or lift paint when removed.

  • Keep existing picture hooks or rail cords in place if they’re suitable and permitted.
  • Choose a small number of appropriate fixings rather than making repeated holes while adjusting frames.
  • Agree how any marks will be repaired before moving out.

A small number of nail holes may count as normal wear and tear in UK rentals. Excessive holes may lead to a charge, depending on the damage. Landlords and tenants can agree to complete repairs at the end of the tenancy or take repair costs from the deposit. Keep the arrangement in writing.

Once you’ve planned a suitable display, browse artwork for your home and choose pieces that work with your room and permitted hanging options.

First4Frames Gallery offers Ready-to-Hang Framed Art, Custom Picture Framing and Giclée Fine Art Prints. Its handmade frames are made to order with high-quality materials and 2 mm float glass. For online picture framing, choose your frame online and create custom framed art prints or bespoke framed wall art to suit your space.

Explore different tastes, from coastal wall art and landscape wall art to Scottish landscape art, photography prints and contemporary art prints. Whether you’re drawn to fine art, famous artists or best-selling artists, consider the style and finished frame weight alongside your permitted hanging method. An art print framing service can help bring the image and frame together. A wall art visualiser may help you visualise art on your wall and see artwork before you buy; use it to design your framed artwork with your room in mind.

For advice on choosing artwork or framing, contact First4Frames Gallery.

Make your rented flat feel like yours

A considered display can bring character to a room without making decorating feel permanent. Treat damage-free picture hanging for rented flats as part of choosing artwork: consider where a piece will sit, how it works with your furniture and which frame suits the space. Your display can reflect your taste while respecting the limits of your home.

When you’re ready to choose something for your walls, explore artwork that suits your room and style. First4Frames Gallery offers framed art, custom framing and Giclée prints, giving you different ways to bring a piece together. For advice on selecting artwork or framing, contact First4Frames Gallery.

Start with a piece you love, then find the right place for it in your home.

Frequently Asked Questions

Can tenants hang pictures?

Yes, if your tenancy agreement permits it or your landlord agrees. Some agreements restrict all picture hanging, while others allow it if you repair any damage when you leave. If the wording is unclear, ask the landlord or letting agent for written consent before choosing a fixing. Keep the reply with your tenancy documents, especially if it sets conditions about repairs or permitted methods.

Can I hang wall art in a UK rental without drilling?

Yes. Removable adhesive strips, adhesive hooks and existing picture rails can provide alternatives to drilling, subject to your agreement and the wall surface. In period properties, rail hooks and cords can suspend artwork from an existing rail. If no permitted method suits the frame, display it on an easel or another stable freestanding support.

Can I put pictures up in a rented house?

You can put pictures up if your agreement allows the method or your landlord consents. Permission may come with conditions, such as limiting the number of pictures or repairing holes before you move out. If you’re planning several frames, describe the display and fixing method in your request. This gives the landlord a clear basis for agreeing to the arrangement.

Can you decorate while renting?

Yes, but ask your landlord before making decorative changes, particularly painting or applying removable wallpaper. They may approve a colour scheme or ask you to restore the original finish before you leave. Get any conditions in writing, including who handles repairs. For lower-impact changes, consider personalising the room with cushions, curtains, plants or furniture you can take with you.

How can a picture hanging system help?

A picture-hanging system can let you hang and move artwork without making new holes for each arrangement. If your rental has an existing picture rail, hooks and cords can support frames from it. Before using a system, make sure it’s allowed under your agreement and suitable for the frame’s weight. It can be useful when you want to rearrange a gallery wall.

How do you personalise a rental property?

Bring in details you can take with you, such as cushions, curtains, houseplants and artwork displayed on an easel or stable furniture. Upcycling a freestanding piece can also give a room a more individual feel without altering the property. For a cohesive display, choose artwork and soft furnishings that share a colour or theme, then arrange them around the room’s existing features.
Posted on

How to Arrange Art Around a TV and Mark Hanging Points

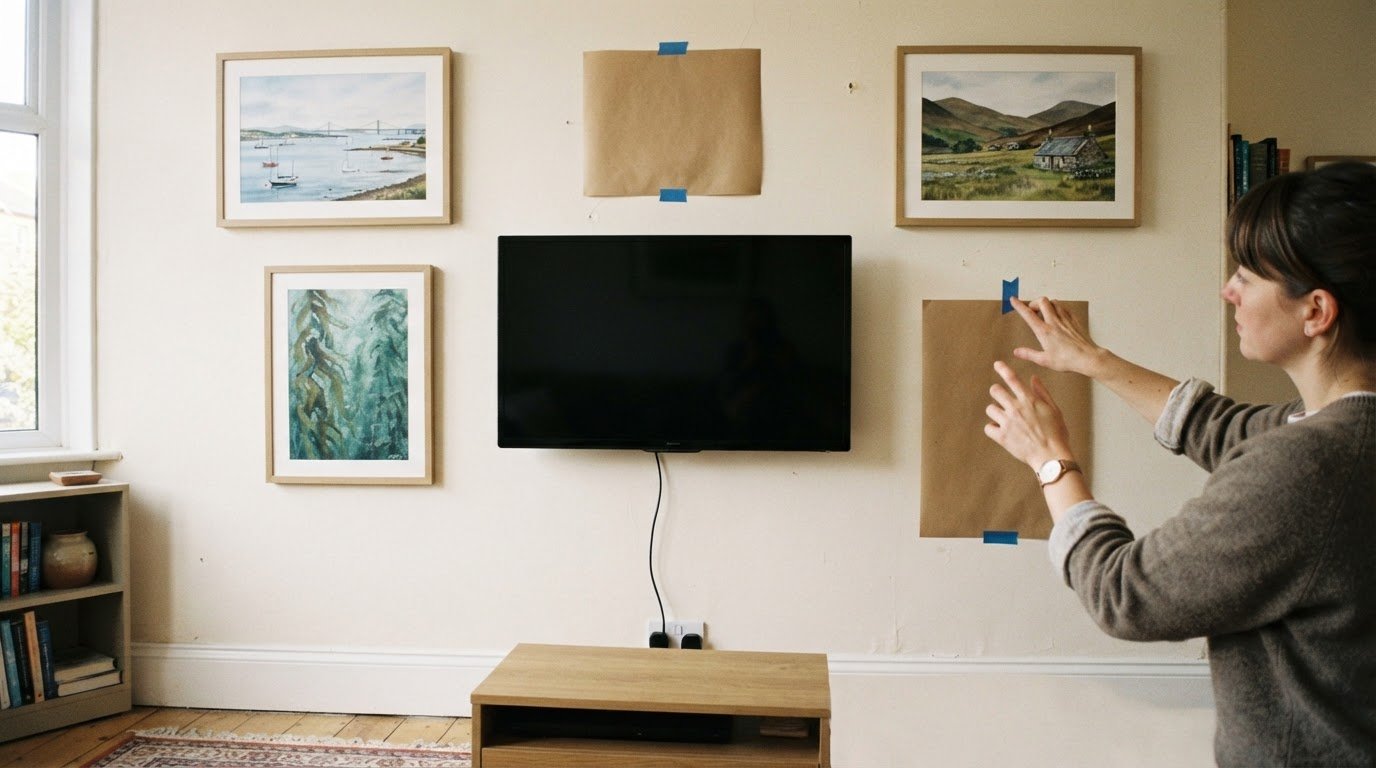
A homeowner marks a hanging point for framed Scottish prints arranged around a TV, leaving its cable accessible.

A TV doesn’t have to be the only focal point on your living-room wall. To work out how to create a gallery wall around a TV, place the largest frames near it, build the arrangement outwards and leave a 4-6-inch buffer around the screen. Visible cables can stay accessible by shaping the layout around them rather than trying to hide them behind artwork.

It’s understandable to worry that frames and cables will make a wall feel cluttered. A balanced layout can help the TV sit naturally among the room’s other details. This guide explains how to create a gallery wall around a TV, from choosing artwork and a layout to testing positions with paper templates and marking hanging points with painter’s tape. You’ll also learn how to adapt the arrangement for a smaller room, balance the display and leave space for cables, so you can plan before making holes in the wall.

Key Takeaways

  • Keep visible cables accessible by planning the arrangement around them, with framed art, shelves and decorative objects working together.
  • For a calmer display, consider using 5-7 frames and arrange pieces around the TV rather than placing them only above it.
  • Test the composition on the floor first, balancing smaller pieces higher up and larger artwork lower down.
  • Use painter’s tape to transfer a frame’s hanging-point spacing to the wall before making holes.

Yes. Arrange art and objects around the screen while keeping visible cables accessible. Leave a 4-6-inch buffer around the TV, then plan the display to work with the wall’s practical details.

  1. Combine Art, Shelves, and Decorative Objects

    Start with larger framed pieces, then add a shelf or smaller objects where they won’t obstruct the screen or cables. Keep the cable route visible and accessible instead of trapping it behind a frame or shelf. For example, place a shelf to one side of the TV, with a small vase or ornament balancing framed art on the other. This gives each element its own place without crowding the screen.

    If you display personal photos on a Samsung Frame TV, choose surrounding pictures or objects that complement the images on screen. The digital display can become part of the collection, while physical frames add depth.

  2. Choose a Unifying Palette or Frame Style

    Choose a shared colour or frame finish to bring different artworks together. Matching frames create a streamlined look; mixing wood, metal or colours can also feel considered when a tone is repeated. For example, echo a colour in a landscape print with a nearby decorative object. Keep the TV’s dark screen in mind, and avoid so many competing finishes that the artwork loses visual balance.

    Choose images with a related mood, subject, or palette to make the collection feel cohesive. Browse the artwork gallery for ideas such as landscapes, then consider how each print will sit beside the television.

  3. Test Placement with Paper Templates

    Cut paper to match each frame’s outer dimensions and label each template with its artwork. Arrange the templates around the TV, moving them until larger pieces anchor the layout and smaller ones fill the gaps. Keep the cable path clear and leave breathing room around the screen. Step back and view the plan from the main seating area before settling on positions.

    Use the templates to compare different frame sizes without lifting or shifting the artwork. If the arrangement feels crowded, move a template outward or remove an object, then review the balance.

Planning the wall layout and overall arrangement

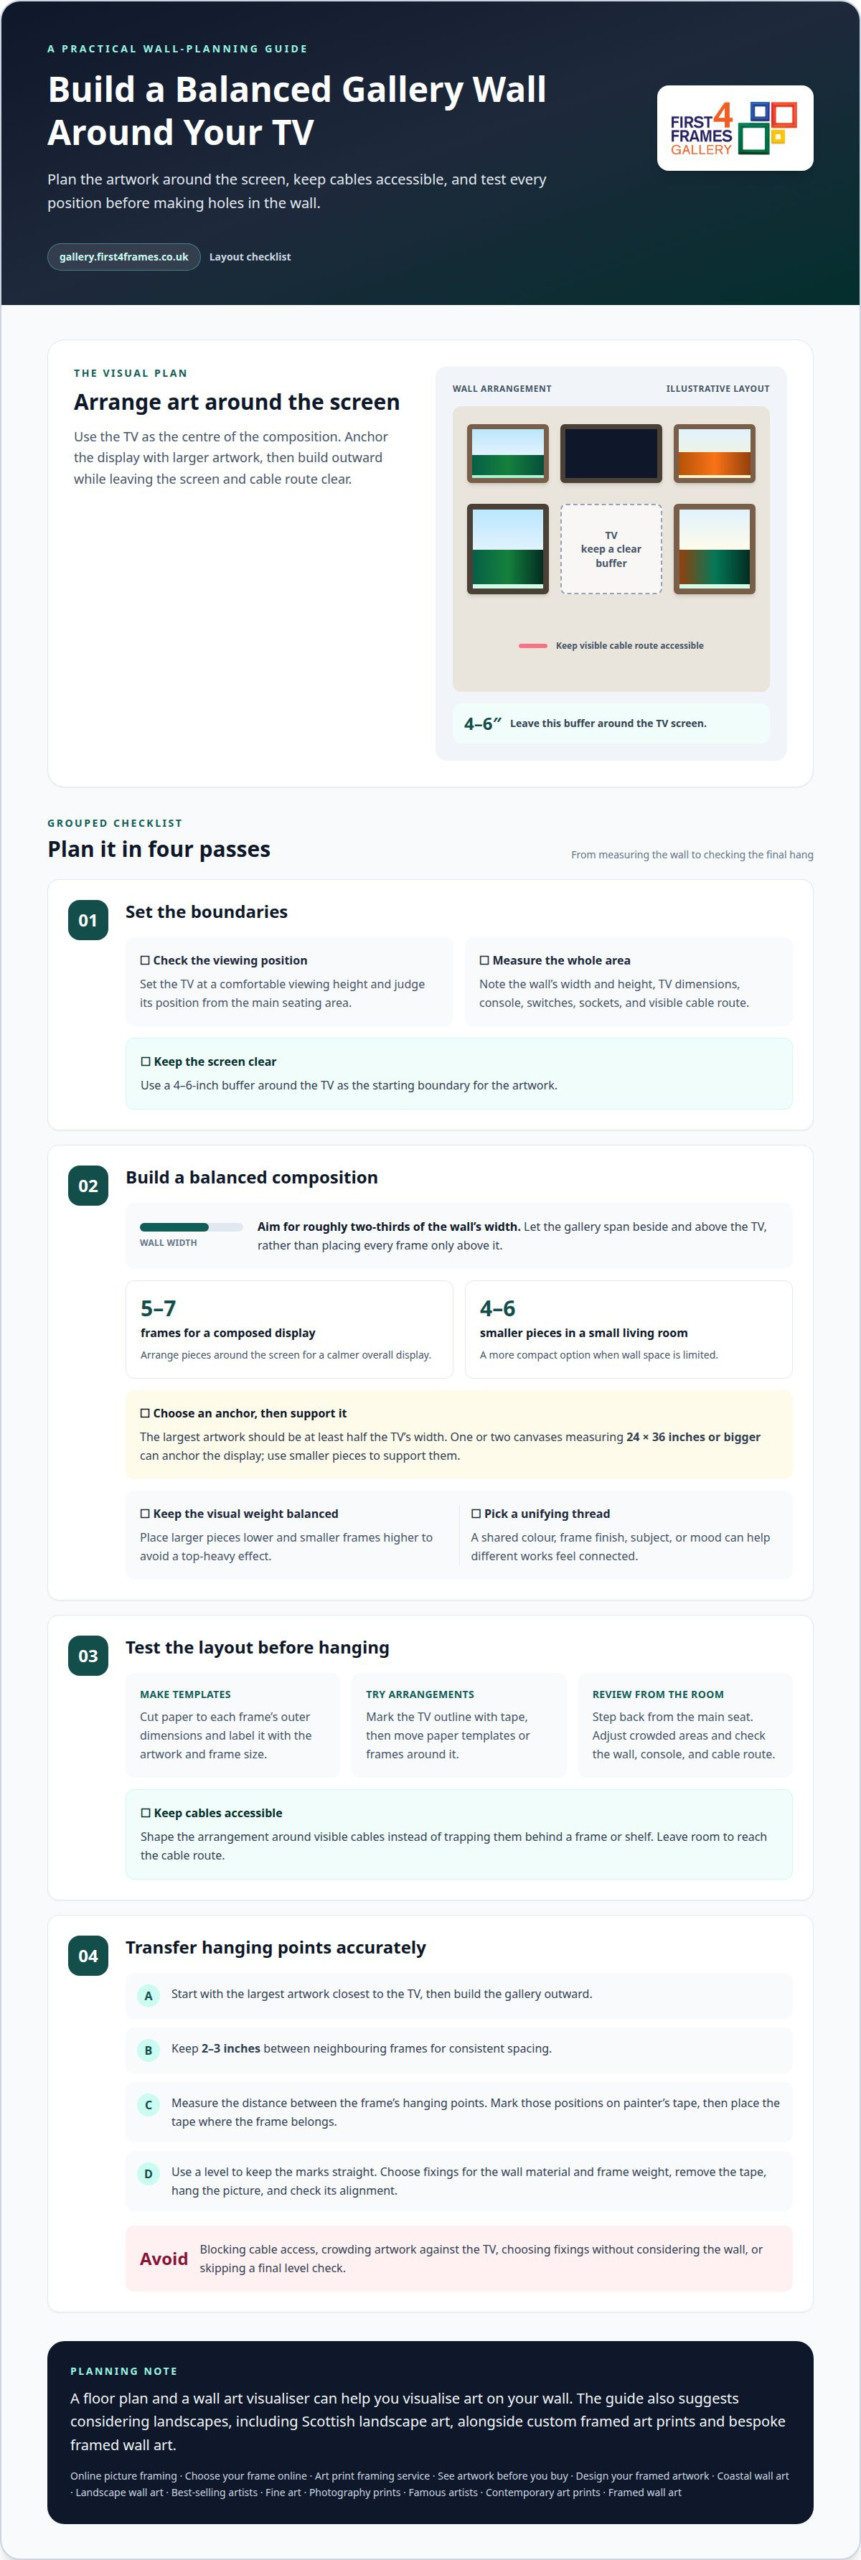
  1. Set the TV at a comfortable viewing height before arranging art. Check its position from the main seating area, where seated eye level helps you judge the screen’s placement. Measure the wall’s width and height, including the TV console, and note any switches or sockets. Leave a 4-6-inch buffer around the screen, then use that clear space as the layout’s starting boundary.
  2. Plan the composition around the TV, rather than placing every frame above it. A gallery wall can span roughly two-thirds of the wall’s width, with art beside and above the screen. Aim for 5-7 frames for a composed display, or 4-6 smaller pieces in a small living room. A symmetrical arrangement can make the TV and console feel connected, while an asymmetrical layout may suit a varied collection.
  3. Choose a visual anchor before adding supporting pieces. The largest artwork should be at least half the TV’s width, so it holds visual weight beside the screen. One or two canvases measuring 24×36 inches or bigger can anchor the display, with smaller frames supporting them. A Scottish landscape art print, for example, could set the palette for custom framed art prints nearby. Keep larger pieces lower and smaller frames higher to avoid a top-heavy effect.
  4. Test the layout on the floor before hanging anything. Mark the TV’s outline with tape, then arrange paper templates or frames around it. Step back and compare the composition with the wall and console. A wall art visualiser can help you see how art might look on your wall, while a floor plan lets you move pieces by hand. Consider how bespoke framed wall art will balance with the room’s furnishings before choosing positions.

For an online picture framing plan, browse the artwork gallery and consider how each piece might fit your TV-wall arrangement.

How to Arrange Art Around a TV and Mark Hanging Points

Using painter’s tape to mark hanging points

Before marking the wall, measure its width and height, the TV’s dimensions and the screen’s height above the floor. Note the console’s dimensions and visible cable route too. These details show where artwork can fit without blocking access.

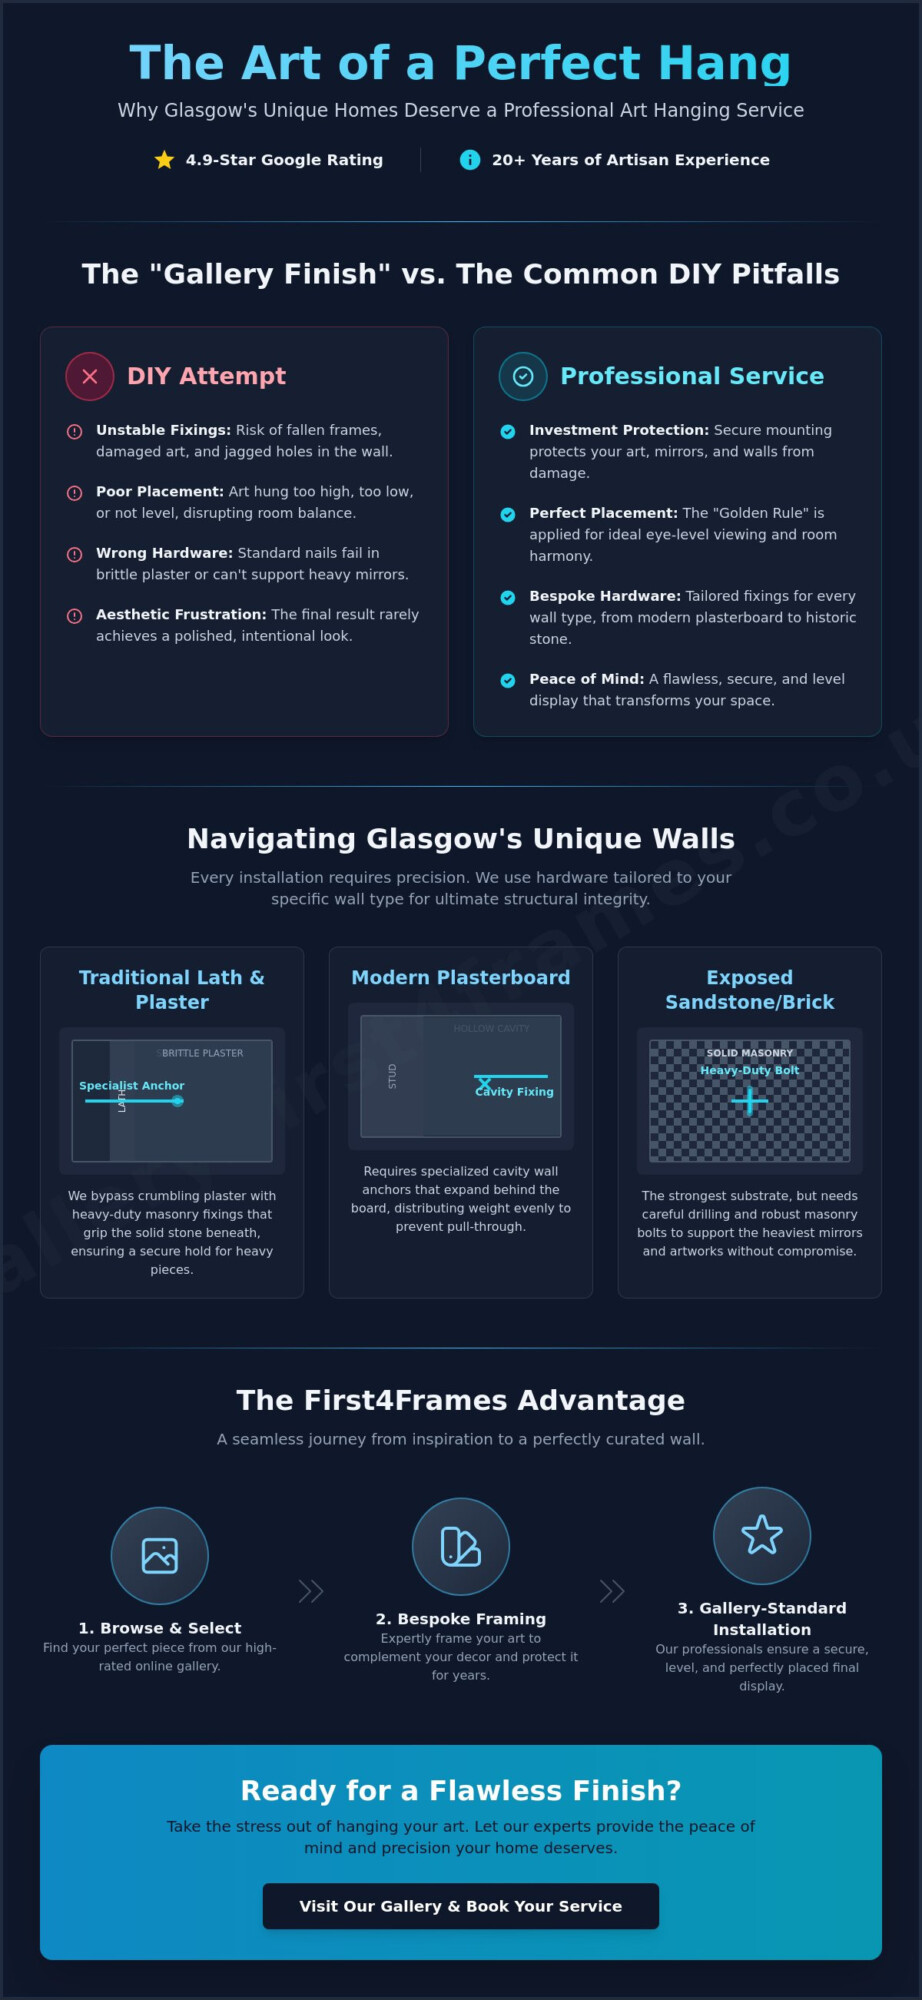
For plasterboard, brick or plaster walls, choose fixings to suit both the wall material and the frame’s weight. Heavier pieces may need wall anchors and screws, while lighter frames can use a sturdy nail. Common mistakes include choosing fixings without considering the wall, crowding artwork against the TV and skipping a final level check.

  1. Dry-run the arrangement with paper templates before making holes. Label each template with its picture and frame dimensions, then place them around the TV. Check the composition from the main seat and adjust any template that clashes with the console or cable route.
  2. Start with the largest artwork closest to the TV, then build the gallery outward. Keep 2-3 inches between neighbouring frames for consistent spacing. Use the same gap around smaller pictures, and step back after placing each template to spot uneven clusters.
  3. Measure the distance between the frame’s hanging points, then mark those positions on painter’s tape. Place the tape on the wall where the frame belongs, using a level to keep the marks straight. This transfers the frame’s actual fixing points without estimating from its outer edges.
  4. Hammer a nail or drill for a screw through the marked points in the tape, then remove the tape before hanging the picture. Match the fixing to the wall and frame weight. Once the frame is hung, check its alignment with a level and adjust it before moving on to the next piece.

Keep the TV’s dimensions and wall measurements beside your layout as you work. This simple reference helps prevent a common mistake: planning attractive spacing on paper that doesn’t fit the actual wall.

  1. Use artwork to give a broad living-room wall more presence. A 55-65-inch TV is usually too small to anchor a large wall on its own, so the surrounding space can feel bare. A considered arrangement gives the screen visual company and makes it part of a wider display. For example, place prints around the TV to connect its position with the rest of the room.
  2. Make the wall feel intentional, even when the television is off. The dark screen can dominate a living room, but framed artwork nearby adds colour, subject matter and detail. Choose pieces that reflect what you enjoy, such as a landscape that recalls a favourite place or a striking contemporary print. The display can then feel personal, rather than centred only on a device.
  3. Use the gallery to connect separate elements in the room. Artwork can link the TV wall, furniture and other details without requiring everything to match. For example, a print featuring a colour already found in a rug can help the two areas feel connected. Choose images for their meaning as well as their appearance, so the arrangement adds character to everyday viewing.
  4. Let the display evolve as your tastes change. A gallery wall can bring together different subjects, such as a favourite landscape, an abstract composition and a meaningful print, while the TV remains in place. Start with pieces you genuinely want to live with, then leave room for a future addition. Explore artwork for your living room to find prints that could give the screen a more considered setting.

First4Frames Gallery can help bring a planned TV-wall arrangement together with Ready-to-Hang Framed Art. Choose a print and frame to suit your palette, or use Custom Picture Framing for artwork that needs a bespoke fit. Frames are handmade for each order using high-quality materials, with 2 mm float glass glazing.

For a more personal display, Giclée Fine Art Prints offer another way to select artwork for your wall. Consider how each image’s colours and frame will sit beside the television before choosing pieces for your arrangement.

If you’d like guidance on framed art for your layout, contact First4Frames Gallery.

Let Your TV Wall Reflect Your Style

To create a gallery wall around a TV, treat the screen as part of the living space, not as an obstacle to decorating. Begin with artwork that feels meaningful to you, then let its colours and character guide future choices. Your display can grow over time, bringing together pieces that reflect places, memories and subjects you love.

Before choosing your next print, picture how it might sit alongside the room’s existing textures and furnishings. A considered addition can refresh the wall without replacing the entire arrangement. Follow your own taste and let the collection take shape at a comfortable pace.

Explore artwork for your TV wall and find a piece to inspire your next design choice. Your living room can become a more personal space, one artwork at a time.

Frequently Asked Questions

How much space should be between the TV and the artwork?

Leave a 4-6-inch buffer between the TV and the nearest frame, measuring from the screen’s edge to the frame’s outer edge. This gives the display breathing room and keeps artwork from feeling pressed against the screen. If the TV sits above a console, consider that furniture’s outline too, so the nearest pictures don’t appear squeezed between the screen and the console.

Is a gallery wall around the TV a good idea in a small living room?

Yes, a gallery wall can suit a small living room when its scale matches the available wall space. Try 4-6 smaller pieces rather than filling every gap with oversized frames. A compact arrangement can add personality without overwhelming the TV or seating area. Keep the composition focused, and choose artwork that works together so the eye can move naturally between each piece.

Should the frames match my TV?

Frames don’t have to match the TV exactly. A consistent finish, such as black frames echoing a dark screen, can create a unified look, while wood or metal frames add contrast. For a mixed collection, repeat one colour or material across several pieces. This shared detail helps different frames feel intentional beside the screen.

What size art works best around a TV?

Choose artwork in proportion to both the TV and the wall. The largest piece should be at least half the TV’s width to hold visual weight beside the screen. One or two canvases measuring 24×36 inches or bigger can anchor the arrangement, with smaller pictures supporting them. In a tighter space, use smaller works so the composition stays balanced.

How much space should you leave between a TV and framed pictures?

Keep the closest framed picture 4-6 inches from the TV’s edge, measuring to the outside of the frame rather than the artwork inside. That distinction matters with wide frames, which can reduce the visible gap. Use the same measurement on both sides if you want a symmetrical arrangement, or adjust each side to suit the wall’s shape and nearby furnishings.

How to hide TV cables within a gallery wall

Keep the cable route accessible by arranging artwork and shelves around it, rather than trapping cables behind them.

Posted on

How to Hang Pictures on Plasterboard Walls: A Practical Guide

How to Hang Pictures on Plasterboard Walls: A Practical Guide

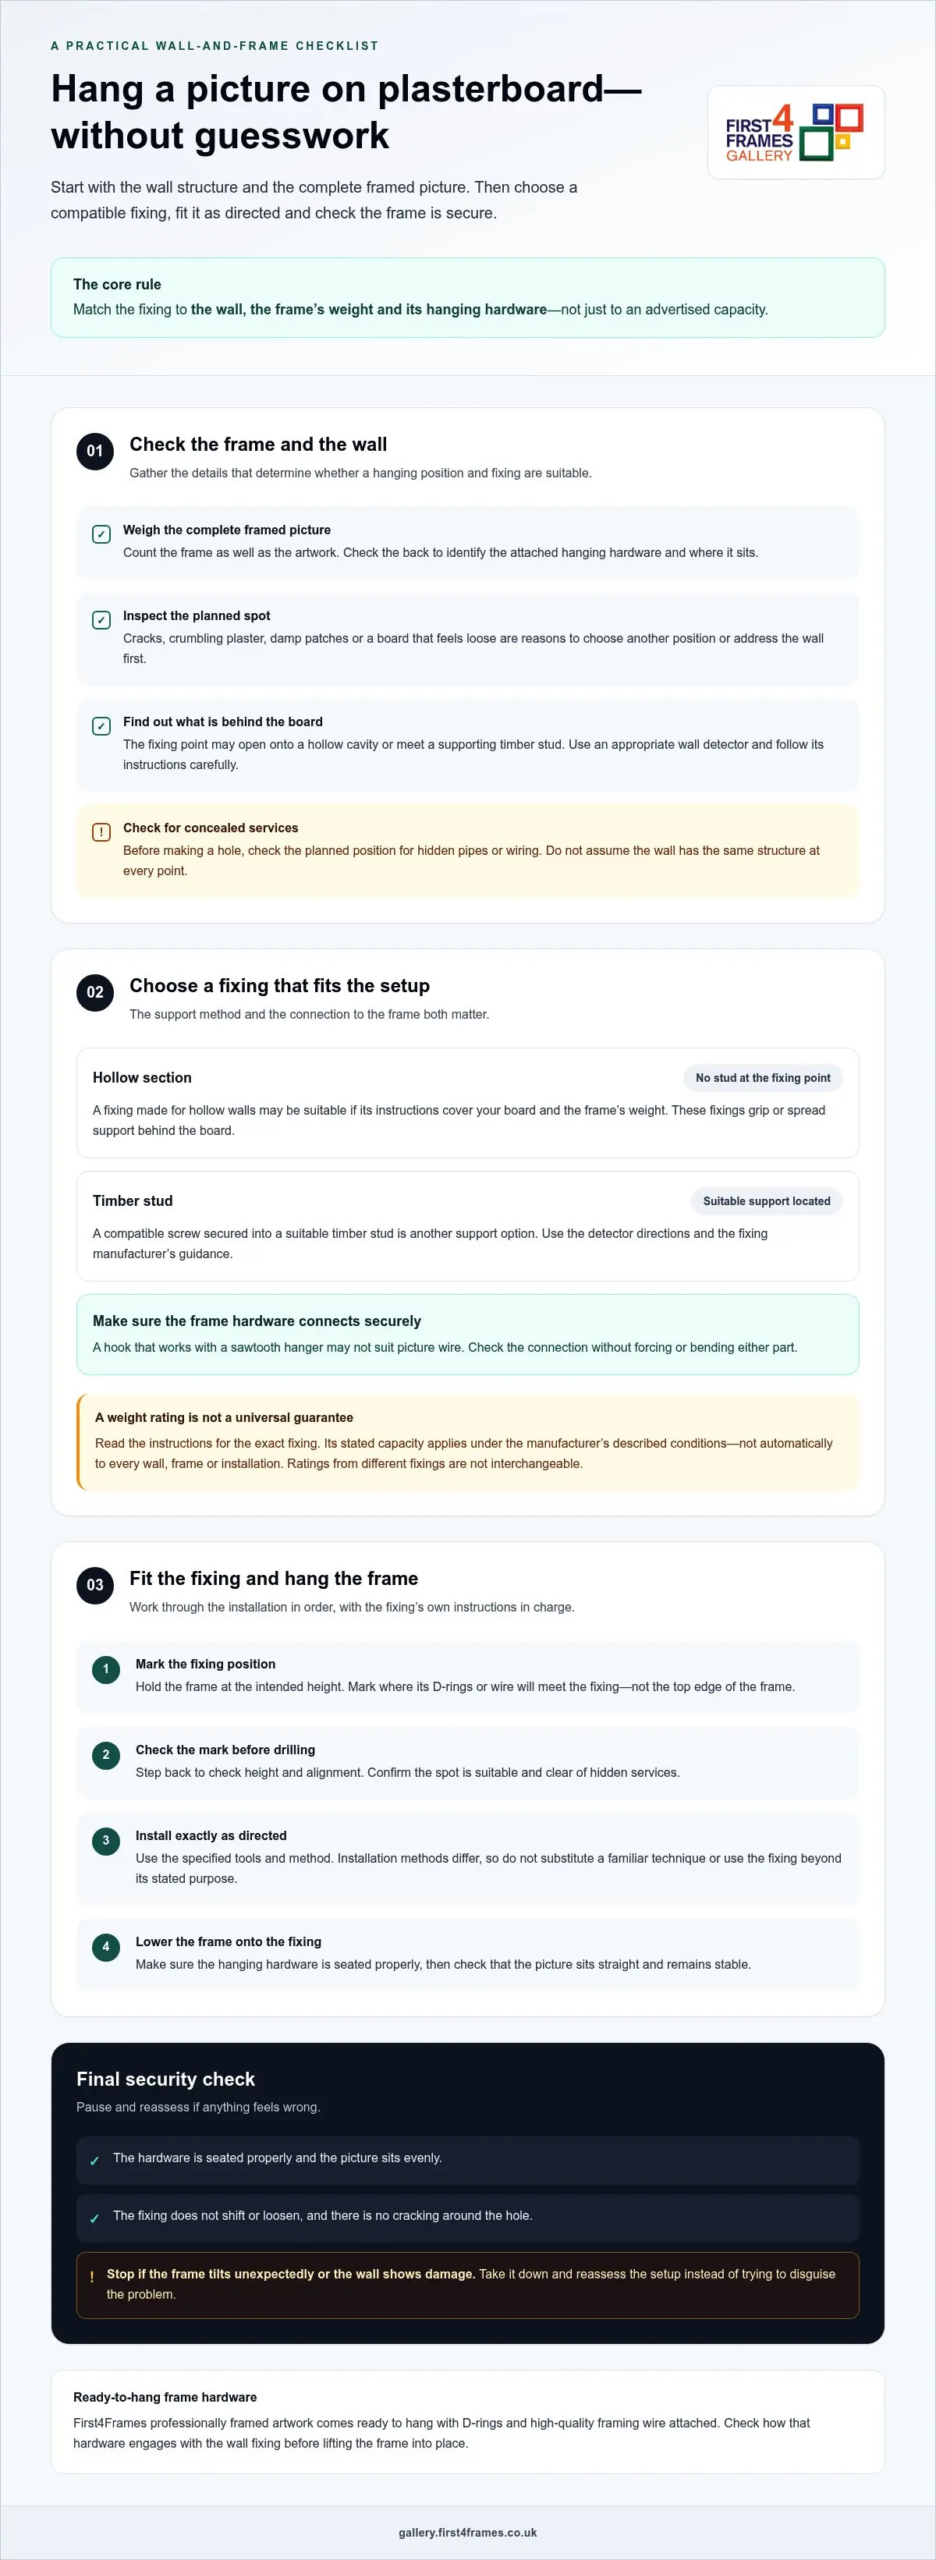
What if the right fixing matters more than the hook itself? If you’re unsure what’s behind your plasterboard, conflicting advice can make a simple job feel risky. Learning how to hang pictures on plasterboard walls starts with the wall structure and the frame’s weight, not guesswork.

This guide explains how to choose a suitable hanging position, check for a stud and match a fixing to your picture. You’ll also learn how to hang the frame neatly and check that it feels secure. Before drilling, take care around hidden pipes and wiring. Once the wall fixing is in place, the right frame hardware makes hanging simpler: First4Frames Gallery professionally framed artwork comes ready to hang with D-rings and high-quality framing wire attached.

Key Takeaways

  • When working out how to hang pictures on plasterboard walls, assess the wall structure and the framed picture before choosing a fixing.
  • Compare fixings by their intended use and support method. A stated load capacity isn’t a guarantee for every wall or installation.
  • Mark the hanging position carefully, then follow the fixing manufacturer’s fitting directions and tool requirements.
  • Match the wall fixing to the frame’s hanging hardware, then check that the finished picture is straight and secure.

How to Hang Pictures on Plasterboard Walls Without Guesswork

Identify both the wall and the frame before choosing a fixing. Plasterboard is a sheet material, as explained in this overview of Drywall (Plasterboard) Composition and History, but the space behind it can vary. Your intended fixing point may open onto a hollow cavity, meet a timber stud or be affected by another part of the wall structure.

That difference matters. A fixing designed to grip behind a hollow board works differently from a screw secured into a stud. The right option also depends on the framed picture’s weight, its attached hanging hardware and the fixing manufacturer’s instructions. Assess the whole setup instead of choosing a hook based only on its advertised capacity.

What should you check before hanging a picture?

Weigh the complete framed picture, not just the artwork, and check the back to see what hanging hardware is fitted and where it sits. Then inspect the planned position. Cracks, crumbling plaster, damp patches or a board that feels loose are reasons to choose another spot or address the wall before hanging anything.

How can you tell what is behind the plasterboard?

A hollow section has an open space behind the board; a stud is a supporting timber member. Use an appropriate wall detector to locate support and check for hidden services, following the device’s instructions carefully. Detector results can help you assess the position, but don’t assume that every point on a wall has the same structure.

Before making a hole, establish:

  • The framed picture’s total weight and the location of its hanging hardware.
  • Whether the chosen spot is sound, and whether a stud or hollow section is behind it.
  • Whether the position needs checking for concealed pipes or wiring.
  • Which fixing suits the wall and frame, and what its manufacturer specifies for fitting.

This quick assessment helps you choose a fixing that matches the wall and frame, rather than relying on guesswork.

Choose a Plasterboard Picture Fixing for the Wall and Frame

Once you know what is behind the board, match the fixing to that support, the frame’s weight and the hardware on its back. The fixing must suit both the wall and the way the frame hangs. For example, a hook that works with a sawtooth hanger may not suit picture wire. Check that the fixing and frame hardware connect securely, without forcing or bending either part.

The right picture fixing depends on the wall, the frame and the installation. Keep this in mind when deciding how to hang pictures on plasterboard walls, especially if the frame is heavy or valuable. If you can’t establish that the fixing is suitable for the wall and load, don’t guess.

When does a plasterboard fixing need extra support?

A fixing made for hollow walls may suit a position without a stud, provided its instructions cover your board and the frame’s weight. These fixings grip or spread their support behind the board instead of relying only on the surface. If you locate a suitable timber stud, a compatible screw secured into it provides another support option. Use the detector’s directions and the fixing manufacturer’s guidance to choose the approach.

How should you interpret a fixing’s weight rating?

Read the rating and fitting instructions for the exact fixing you’re using. A stated capacity applies to the product under the conditions described by its manufacturer, not automatically to every plasterboard wall, frame or installation. Ratings from different fixings aren’t interchangeable. Board condition, fixing position and correct installation can all affect whether the setup is appropriate, so don’t treat a product figure as a universal guarantee.

For a ready-to-hang framed picture, check how its attached hardware engages with the chosen fixing before lifting it into place. First4Frames frames have D-rings and high-quality framing wire attached for straight wall mounting. If you’re choosing artwork for a wall you’re preparing, browse the framed art gallery and include the finished frame in your hanging plan.

How to Hang Pictures on Plasterboard Walls: A Practical Guide

How to Fit a Picture Fixing and Hang the Frame Step by Step

Careful marking and patient fitting help protect both the wall and your frame. Follow the selected fixing’s own instructions, including its tool requirements. Installation methods differ, so don’t substitute a familiar technique or use the fixing beyond its stated purpose. If you’re unsure about the position or support, pause before making a hole.

How do you position and fit the fixing?

Hold the frame at the intended height and mark where its hanging hardware will meet the fixing. Account for the position of the D-rings or wire instead of marking the frame’s top edge as the fixing point. Step back to check the height and alignment, then confirm the spot is clear of hidden services before drilling. Fit the fixing exactly as directed.

How do you check the picture is hanging securely?

Lower the frame gently onto its intended hanging point and make sure the hardware is seated properly. Check that the picture sits straight and that the fixing doesn’t shift, loosen or cause cracking around the hole. If the frame tilts unexpectedly or the wall shows damage, take it down and reassess the setup rather than trying to disguise the problem.

  1. Mark the fixing position, taking the frame’s hanging hardware and desired height into account.
  2. Check the mark for alignment and confirm it’s a suitable, clear location.
  3. Install the fixing with the specified tools and method, following its instructions throughout.
  4. Lift the frame onto the fixing, then check that it sits evenly and remains stable.

Stop if the wall or fixing doesn’t feel secure. A neat finish matters, but a frame should only stay in place if its support feels sound. This step-by-step approach makes how to hang pictures on plasterboard walls clearer while leaving the fixing’s instructions in charge of the installation details.

Once your hanging point is ready, explore framed art for your wall and choose a finish that suits your space.

Make Plasterboard Walls Ready for Framed Art

A finished display brings together the wall fixing, frame and artwork. Once you’ve chosen a fixing that suits your wall and frame, think about the look you want in the room. Bespoke framing gives the artwork a considered fit, while a standard frame may not suit its proportions. First4Frames individually crafts each frame to order using high-quality materials.

What hanging hardware comes with First4Frames framed art?

The frame’s attached hardware and the wall fixing have separate roles: one connects the picture to the fixing, while the other supports it in the wall. First4Frames frames are fitted with 2mm float glass, selected for its clarity compared with the perspex used by many competitors. The glazing is part of the finished frame, but it doesn’t change the need to choose a suitable wall fixing for the frame’s weight.

First4Frames can print and frame your digital photographs, with print quality chosen to complement the bespoke frame. Finished frames are fully packaged to help prevent damage and shipped via professional couriers. The ready-to-hang finish makes it easier to plan how your artwork will sit in your home.

How can a framed print complete a room?

Choose a print to suit the room’s character and the display you have in mind. A landscape can create a calming focal point in a living room, while a carefully chosen photograph may bring a more personal feel to a hallway or reading nook. Bespoke framing brings the image and its presentation together, helping your chosen piece feel at home in the space.

With your display planned, explore ready-to-hang framed art and find artwork to suit your room.

Choose Artwork That Feels at Home on Your Wall

Choose artwork to suit the room’s mood, from Coastal wall art and Scottish landscape art to Photography prints and Contemporary art prints. Explore Fine art by best-selling artists and famous artists, then consider how the image and frame will work together as Bespoke framed wall art.

Online picture framing lets you choose your frame online and design your framed artwork around the piece. A wall art visualiser can help you visualise art on your wall and see artwork before you buy. Custom framed art prints give a favourite image a considered finish, while an art print framing service brings the print and presentation together.

Explore ready-to-hang framed art and find a piece that feels right for your wall.

Frequently Asked Questions

Can you hang a heavy picture on a plasterboard wall?

Yes, but the fixing needs to suit the picture’s full weight and the wall behind it. For a heavier frame, securing a compatible screw into a timber stud can provide support without relying on the board alone. If you can’t locate suitable support or aren’t sure the fixing is appropriate, don’t guess. To hang pictures on plasterboard walls safely, consider the weight and wall support together.

Do you need to find a stud to hang a picture on plasterboard?

No, a stud isn’t essential for every picture. A fixing designed for hollow walls may suit a lighter frame when used exactly as directed. A stud can be a useful support point for heavier pieces, but first confirm its position with an appropriate detector and check for hidden services. If the frame has two hanging points, make sure the layout supports both sides as intended.

Can you hang a picture on plasterboard without drilling?

Sometimes, adhesive picture strips or hooks can be used, but only if their manufacturer says they’re suitable for your wall surface and the frame’s weight. Surface condition matters: dust, loose paint or damaged paper facing can affect how well an adhesive holds. Follow the product’s preparation, application and waiting instructions, and don’t use adhesive as a substitute for a mechanical fixing if the frame exceeds its stated limits.

How do you stop a picture frame from leaning forward on plasterboard?

Check that the frame’s hanging points are correctly engaged and that its back sits evenly against the wall. If picture wire allows the frame to tip, suitable frame bumpers near the lower corners can help steady it, provided they fit without marking the wall. Don’t change the wall fixing to correct a frame-balance issue. For a large or valuable piece, get help lifting and positioning it.

What should you do if a plasterboard picture fixing feels loose?

Take the frame down straight away and don’t keep tightening the fixing in the same opening. Check whether the hole has widened or the board is cracked or crumbling. A damaged spot may no longer provide reliable support; choose a sound position and a fixing suited to that location, or secure it to a suitable stud. Repair the old hole separately before rehanging the picture.

Browse First4Frames’ ready-to-hang framed art to find a print and frame for your wall.

Posted on

How to Hang a Large Framed Picture: Professional Guide

How to Hang a Large Framed Picture: Professional Guide

A heavy, bespoke frame is more than just a decoration; it’s a handcrafted investment that deserves a secure foundation. Many people assume a standard shop-bought hook is enough, but when you’re dealing with the weight of professional 2mm float glass and solid wood, the stakes are much higher. We understand the worry that comes with holding a large piece of Scottish landscape art and wondering if your wall can actually support it. You don’t want to risk a beautiful frame falling because of a confusing wall plug or a flimsy wire.

In this guide, you’ll learn exactly how to hang a large framed picture using professional-grade techniques that guarantee a level, secure finish. We’ll walk you through the best hardware for your specific wall type, from masonry to plasterboard, so you can display your bespoke framed wall art with total confidence. Whether you used our wall art visualiser to plan your space or you’re hanging a cherished family heirloom, these expert steps will ensure your display is as sturdy as it is stunning.

Key Takeaways

  • Identify whether your wall is plasterboard or masonry to select the correct heavy-duty fixings that prevent large frames from falling.
  • Master the professional method of how to hang a large framed picture by calculating the “drop” of hanging wires and using a spirit level for a perfectly straight finish.
  • Choose between a minimalist wire system for easy height adjustments or a structural gallery wall to turn your bespoke framed wall art into a striking focal point.
  • Learn why individually crafted frames with 2mm float glass offer superior structural integrity and clarity compared to mass-produced alternatives using cheap perspex.

Assessing the Structural Requirements for Large Framed Artworks

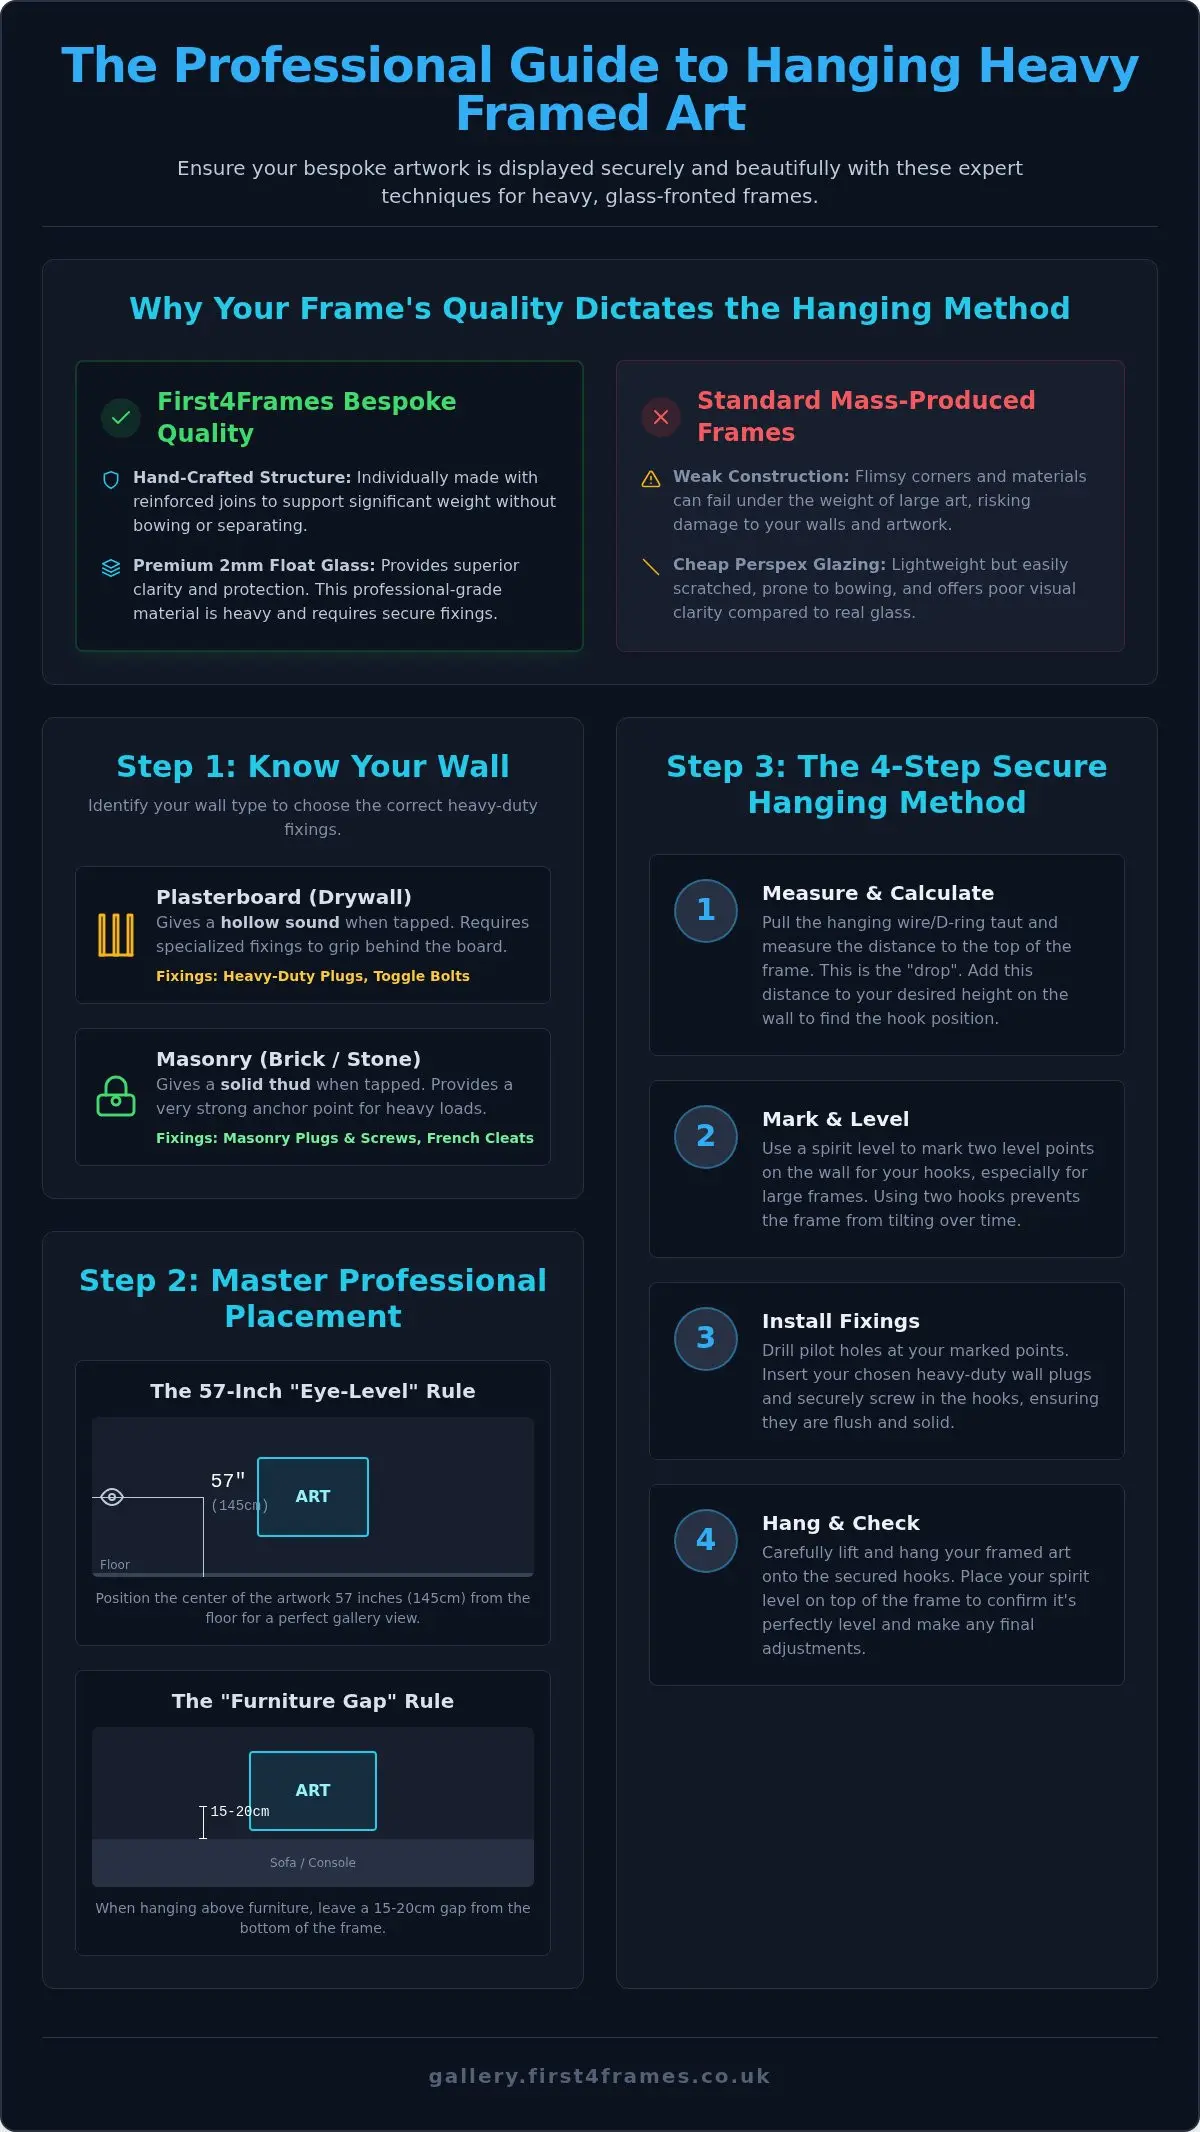
Weight is the most critical factor when learning how to hang a large framed picture. Plasterboard walls have significantly lower load-bearing limits than solid masonry, so understanding your surface is the first step. A standard nail might hold 4kg in drywall, but a heavy piece of picture frame art can easily exceed 15kg. You can identify your wall type with a simple tap; a hollow sound indicates plasterboard, while a dull thud suggests brick or stone.

Bespoke framed wall art is designed specifically to withstand this weight. Unlike mass-produced frames that often bow or pull apart at the corners under pressure, our hand-made frames use reinforced joins to maintain their shape. You can explore these structural nuances further in our guide on Mastering Custom Picture Framing.

Hardware Essentials for Heavy Lifting

Choosing the right hardware is non-negotiable for safety. While wires are popular for smaller items, heavy-duty D-rings or a French cleat system provide far better stability for oversized pieces. We always recommend specific heavy-duty fixings for our frames to support the weight of premium 2mm float glass. This glass offers incredible clarity but adds more mass than the cheap, scratch-prone perspex found in standard shop-bought frames. This structural integrity is vital when displaying large-scale Scottish landscape art or heavy photography prints.

Calculating Your Hanging Height

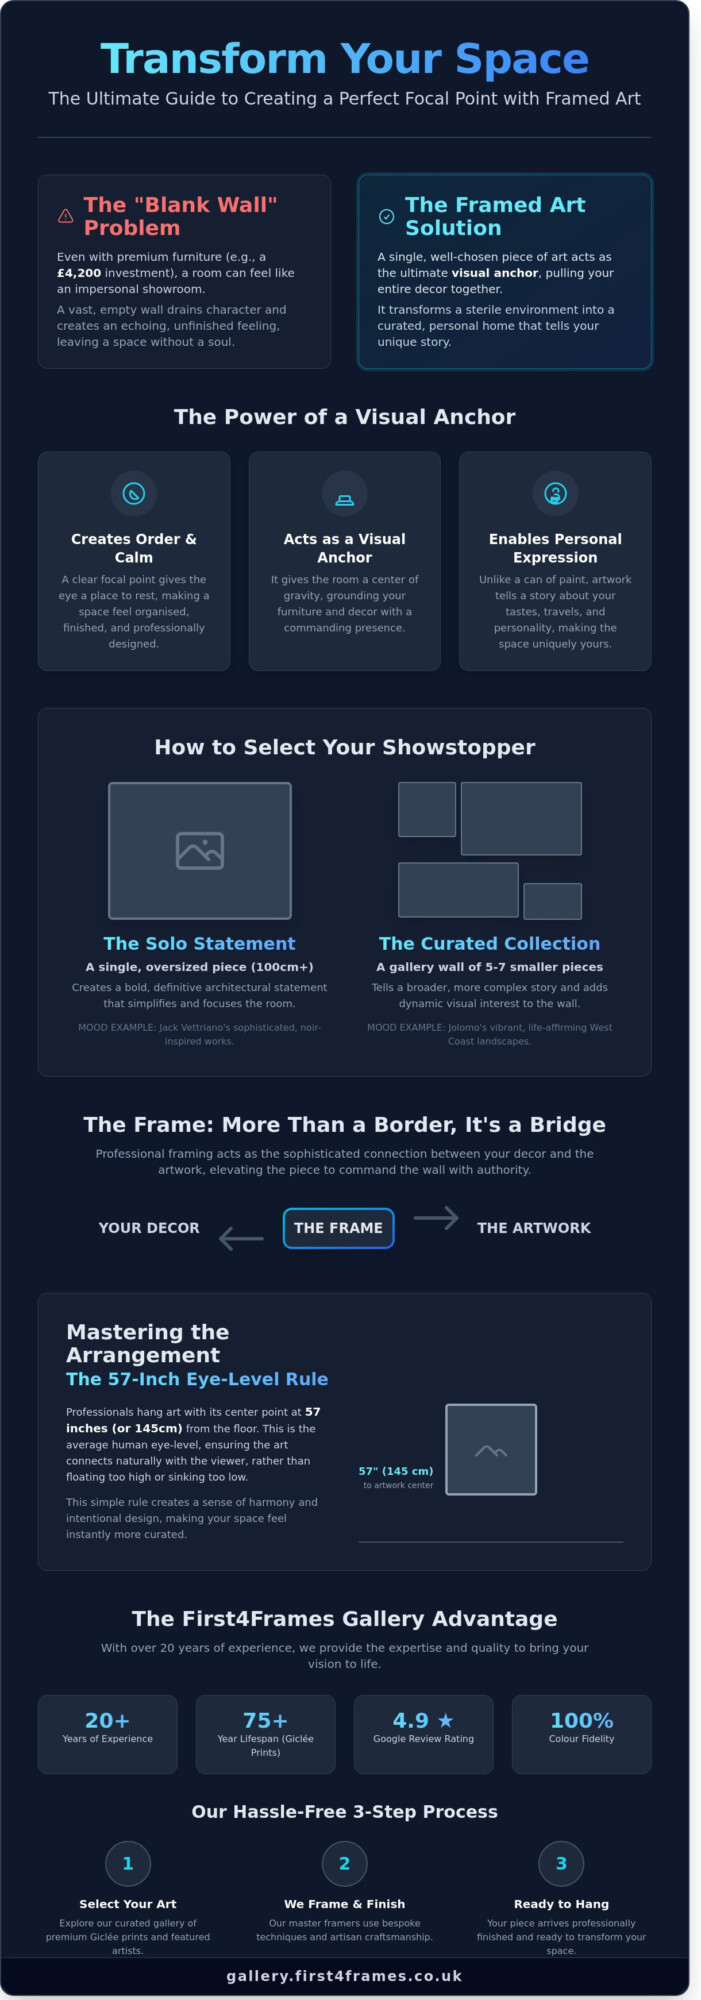
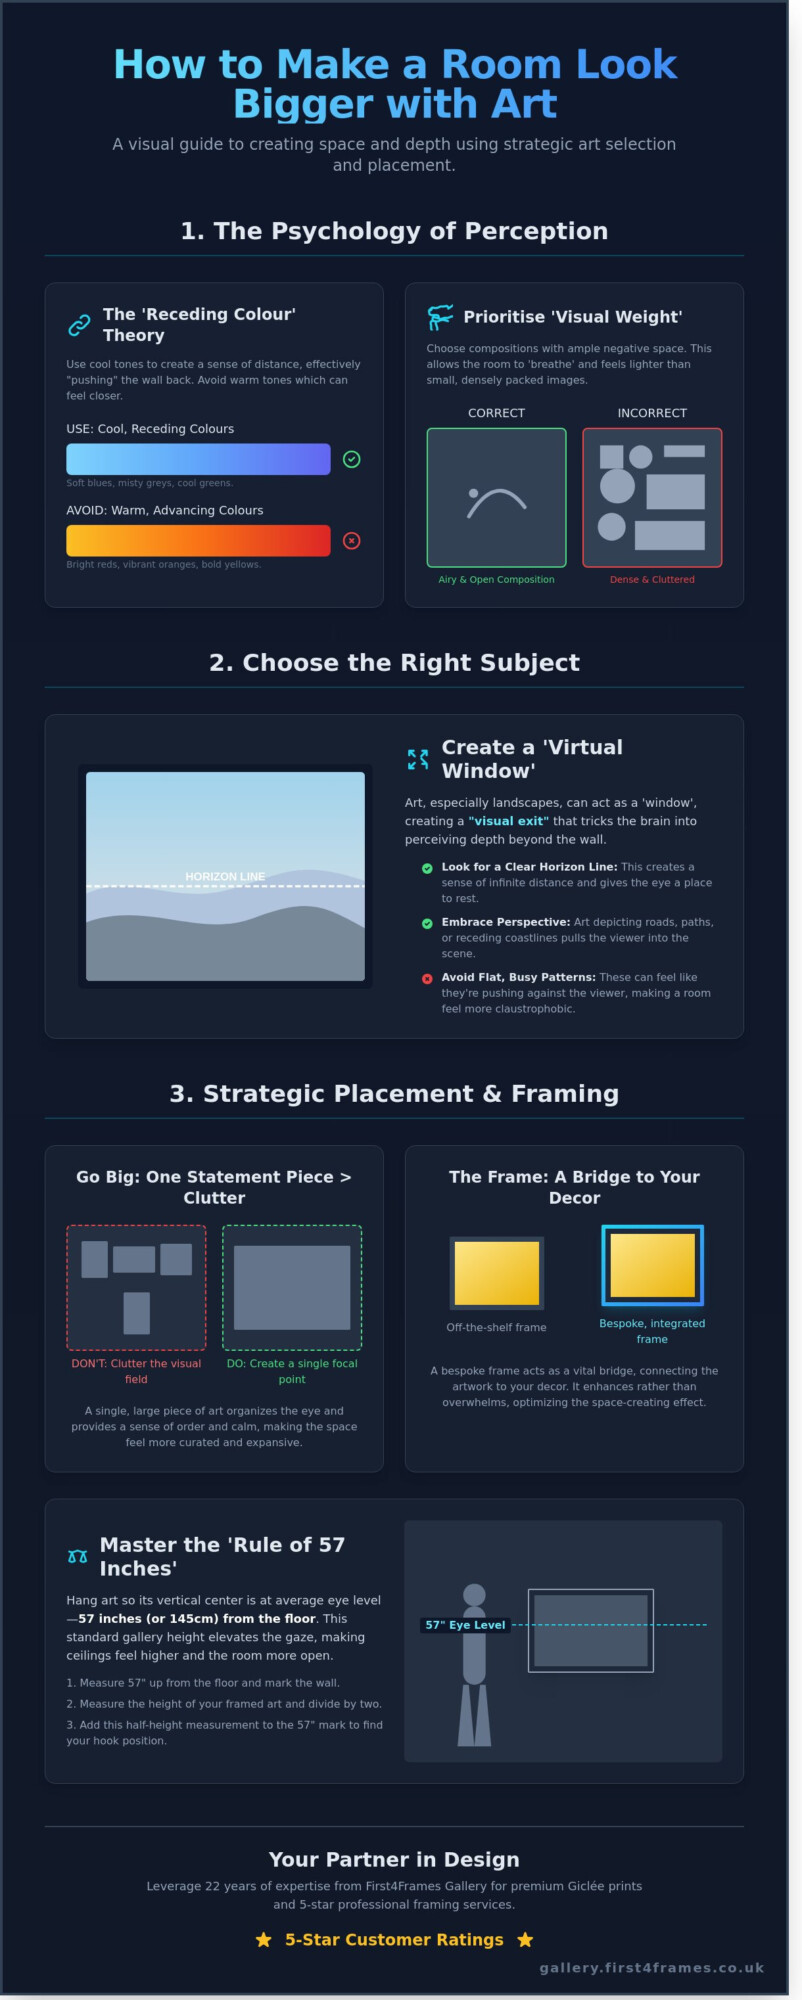
To achieve a professional gallery look, use the “57-inch rule.” This involves positioning the centre of the artwork 57 inches (roughly 145cm) from the floor, which is the standard eye level for most viewers. If you’re hanging art above a sofa or sideboard, maintain a gap of 15cm to 20cm between the bottom of the frame and the furniture. This ensures the piece feels anchored to the room’s design rather than floating awkwardly on its own.

Deciding how to present your art depends on both the room’s architecture and the specific style of the piece. If you have limited wall space or very high ceilings, a minimalist wire system offers a sleek solution for modern Landscape wall art. This method is particularly effective when researching how to hang a large framed picture without committing to a permanent spot, as it allows for effortless height adjustments. Conversely, a gallery wall creates a rich narrative by clustering smaller prints around a central anchor. This approach works perfectly for Coastal wall art collections where you want to evoke a sense of the seaside through multiple perspectives. Our online picture framing options make it simple to coordinate these layouts.

Pros and Cons of Wire Hanging Systems

Wire systems are ideal for contemporary art prints where you might want to refresh your collection frequently. They lend an industrial aesthetic that works beautifully in modern UK homes. However, because the fixings are often visible, they may not suit traditional decors where hidden brackets are preferred. Before you pick up a drill, use our wall art visualiser to visualise art on your wall. This tool allows you to see artwork before you buy and ensures your statement piece doesn’t overwhelm the room’s proportions.

Designing a Cohesive Gallery Wall Around Large Art

When creating a gallery wall, a single piece of large bespoke framed wall art often serves as the gravitational centre. This anchor piece dictates the placement of surrounding items, such as custom framed art prints or smaller photography. To maintain a professional standard, we recommend a spacing of 5cm to 7.5cm between each frame. This breathing room prevents the display from feeling cluttered. You can choose your frame online to ensure every element of your display meets our hand-made quality standards. This art print framing service ensures that even smaller items in your collection are protected by our premium 2mm float glass.

How to Hang a Large Framed Picture: Professional Guide

Step-by-Step: How to Hang a Large Framed Picture Securely

Learning how to hang a large framed picture securely is a process that begins with the right preparation. Before you reach for the drill, gather a spirit level, masking tape, and heavy-duty wall plugs suited to your specific wall type. If you’re unsure about the hardware required for heavy loads, our Ultimate Guide to Choosing and Hanging Art provides deeper technical insights into display safety and structural stability.

One often overlooked step when researching how to hang a large framed picture is measuring the “drop.” Pull the hanging wire taut towards the top of the frame and measure the distance from the wire’s highest point to the top edge of the frame moulding. This measurement tells you exactly where to place your hook so the top of your Scottish landscape art sits exactly where you planned. To avoid unnecessary pencil marks on your paint, use masking tape to mark the intended corners and the centre point first.

The Two-Person Technique

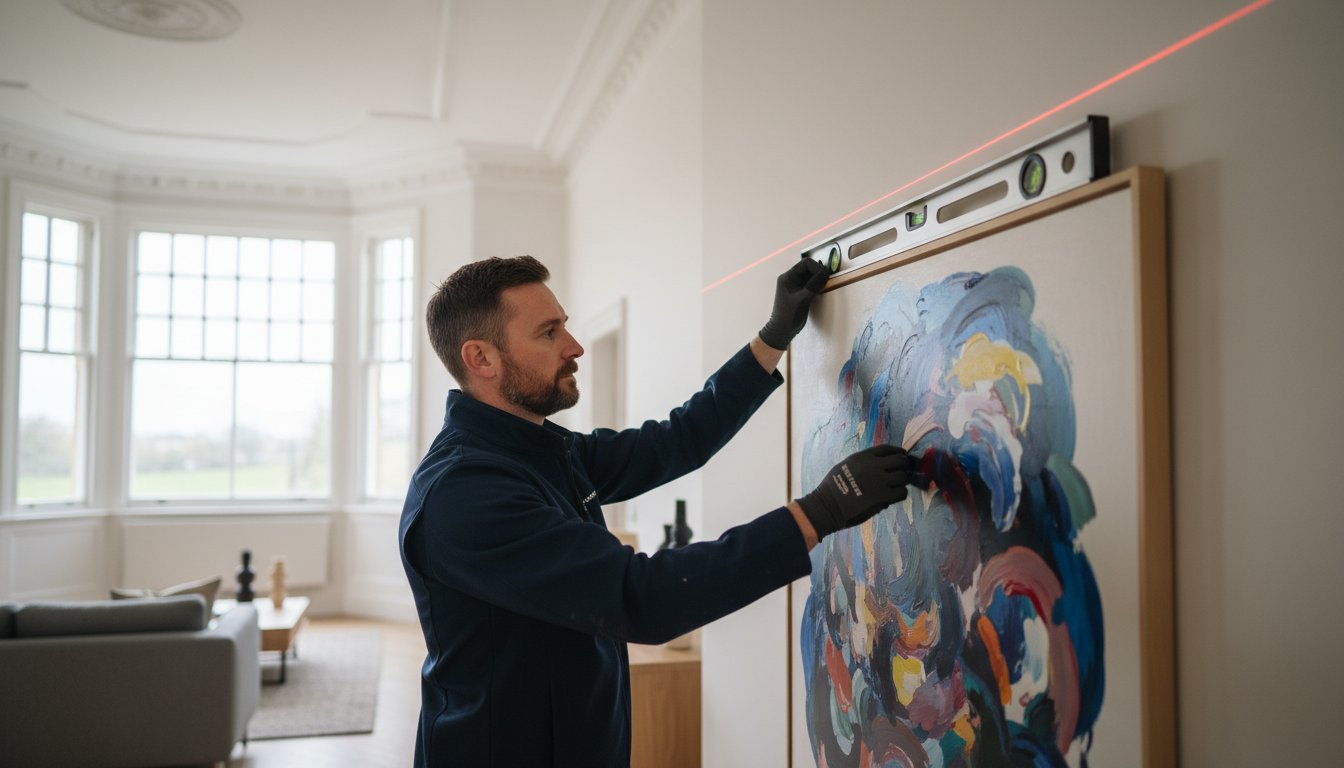
Large-scale art print framing service items are cumbersome and heavy. We strongly advise against hanging these solo. One person should focus on supporting the weight and positioning the frame, while the second person stands back to check the alignment and guide the frame onto the fixings. Clear communication is essential to prevent accidental drops or wall scuffs during the process.

Final Levelling and Buffing

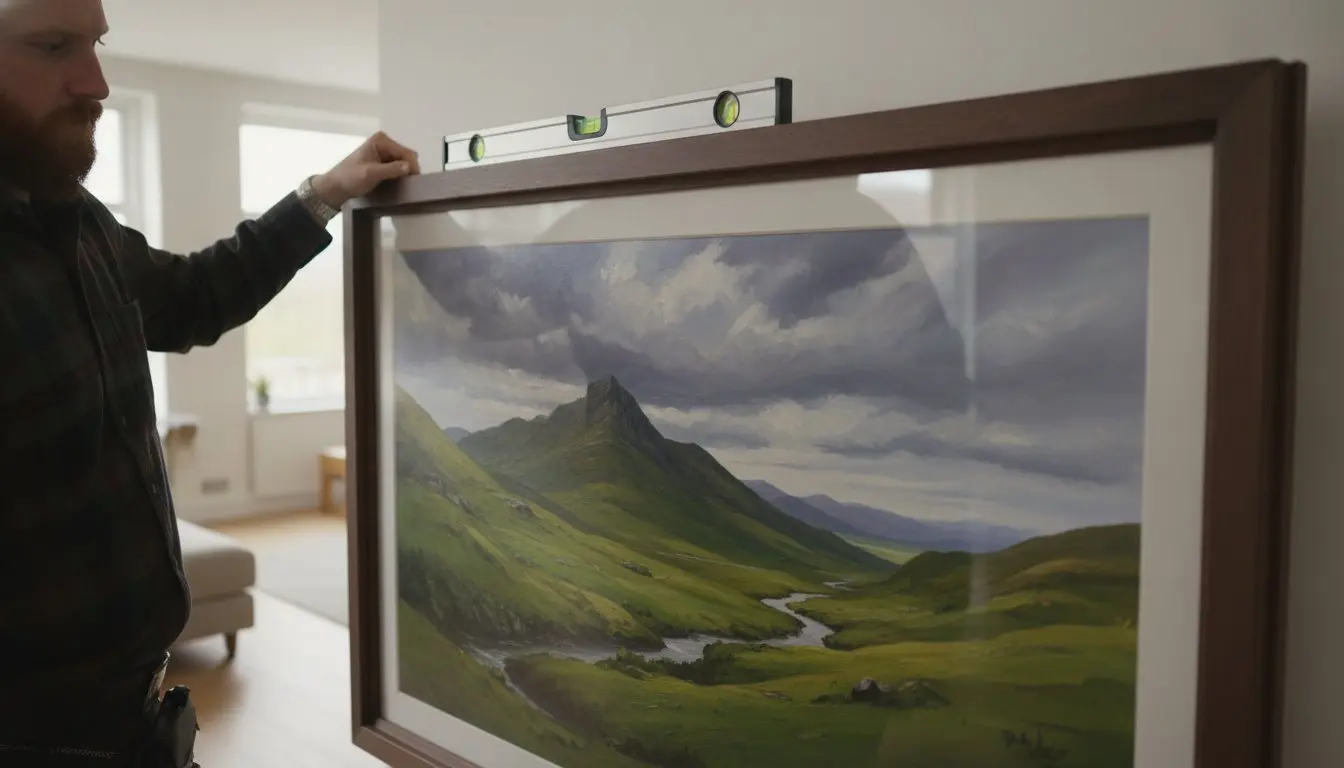
Once the frame is on the wall, place your spirit level directly on the top edge of the frame moulding. Avoid using the artwork itself as a guide, as internal mounts vary. Finally, give your display the finish it deserves. Because we use premium 2mm float glass rather than static-heavy perspex, a quick wipe with a lint-free cloth removes fingerprints. This ensures the clarity of your bespoke framed wall art is immediately visible.

First4Frames Gallery provides a structural foundation that mass-produced frames simply cannot offer. When you are determining how to hang a large framed picture, the integrity of the frame itself is paramount. Unlike standard, shop-bought options that may not fit your artwork properly, every frame from our Falkirk-based workshop is individually crafted for each order. This bespoke construction ensures your display is safe and secure, specifically designed to handle the weight of larger dimensions without bowing or failing over time.

We prioritize premium components, such as our 2mm float glass, which provides superior clarity compared to the dull, scratch-prone perspex used by many competitors. For those looking to coordinate their decor from home, our Online picture framing service provides extensive choice and expert advice. Whether you are framing a personal photograph or a piece of Fine art, our high-quality materials ensure your work is presented with professional fidelity and the traditional craftsmanship that defines our brand.

Custom Framing Options for Large Art

Our gallery features an expansive selection of framed wall art, including works by Best-selling artists and Famous artists. You can easily Design your framed artwork using our custom options, ensuring that even the largest pieces are tailored to your specific aesthetic. From Contemporary art prints to traditional subjects, our artisans treat every piece with a deep appreciation for the creative process, making specialized framing feel accessible and straightforward.

Preserving Your Art for Generations

We also offer a specialized print and frame service for digital photographs, ensuring they are printed to the highest quality to match our bespoke framing. To ensure your investment arrives in perfect condition, all finished frames are fully packaged to prevent damage and shipped via professional couriers. This secure logistical process means your Bespoke framed wall art is ready to hang the moment it reaches your door, preserved with high-quality materials to last for generations.

Elevate Your Home with Secure Art Displays

Hanging a significant piece of art shouldn’t be a source of stress. By understanding your wall’s structural limits and mastering the “drop” measurement, you’ve learned exactly how to hang a large framed picture with professional precision. The safety of your display starts with the frame’s construction. A bespoke, hand-made frame offers the reinforced strength that mass-produced alternatives simply can’t match, ensuring your artwork remains a stable focal point for years to come.

Every piece we create is hand-crafted in the UK and features superior 2mm float glass as standard for unmatched clarity. We guarantee your investment arrives safely through our secure courier shipping, fully packaged to prevent damage. Ready to find the perfect focal point for your room? Design your bespoke framed artwork and see it on your wall today using our digital visualiser tool. We’re here to help you turn your creative vision into a stunning, secure reality that you’ll be proud to display.

Frequently Asked Questions

How high should I hang a large framed picture?

Position the centre of your artwork at eye level, which is roughly 145cm from the floor. This “57-inch rule” creates a balanced look across your home. If you’re learning how to hang a large framed picture above a sofa or sideboard, maintain a gap of 15cm to 20cm. This ensures the frame feels connected to the furniture rather than floating awkwardly, creating a harmonious relationship between the art and your interior design.

Can I hang a heavy frame on a plasterboard wall?

Yes, you can hang heavy artwork on plasterboard by using specialized hollow wall fixings like toggle bolts or molly bolts. These anchors expand behind the board to distribute weight across a larger area. For maximum security, always try to locate a wooden stud using a stud finder. Screwing directly into the timber provides the most stable foundation for bespoke framed wall art, preventing the hardware from pulling through the relatively soft plasterboard surface.

Is it better to use a wire or D-rings for large art?

D-rings are the preferred choice for heavy artwork because they distribute weight directly to the wall fixings. While wires are convenient for smaller items, they can put significant inward stress on the frame’s corners and often cause the piece to lean forward. Using two D-rings ensures your display remains level and secure. This is vital for our hand-made frames, which utilize heavy 2mm float glass for clarity rather than lightweight, scratch-prone perspex.

How do I stop a large picture from tilting forward?

Forward tilt occurs when the hanging points are positioned too low on the frame. If you are struggling with how to hang a large framed picture so it sits flat, ensure your D-rings are mounted in the top third of the frame. Additionally, placing adhesive rubber bumpers on the bottom corners of the frame moulding provides extra grip. This creates a professional finish and prevents the frame from shifting or leaning away from the wall.

What is the best way to clean 2mm float glass on a large frame?

Clean your 2mm float glass using a soft, lint-free microfibre cloth and a mild, ammonia-free glass cleaner. Always spray the cloth first to avoid moisture entering the frame joins. This professional method preserves the exceptional clarity our glass provides, which is far superior to the dull, static-prone finish of perspex. Regular light dusting will keep your fine art prints looking pristine, ensuring the vibrant colours and details remain sharp for generations to come.

Posted on

How to Hang a Gallery Wall: Professional Display Guide

How to Hang a Gallery Wall: Professional Display Guide

Have you ever stared at a blank wall, hammer in hand, only to put it back in the drawer because you’re terrified of making a permanent mistake? You aren’t alone. Many people find that learning how to hang a gallery wall feels like a high-stakes puzzle where one wrong move leaves your home’s plaster looking like Swiss cheese. It’s frustrating when inconsistent spacing makes a beautiful collection of Scottish landscape art or fine art look cluttered rather than curated.

We understand that your art is an investment in your home’s personality. Whether you’re displaying contemporary art prints or cherished photography prints, the secret to a professional finish lies in the harmony between meticulous planning and high-quality materials. This guide promises to transform your uncertainty into confidence. We will walk you through our expert method for precision hanging, explain why choosing bespoke framed wall art with 2mm float glass is essential for clarity, and show you how to use our wall art visualiser to design your framed artwork before the first nail ever touches the wall.

Key Takeaways

  • Learn how to use a wall art visualiser to see artwork before you buy, allowing you to trial layouts without making a single mark on your wall.
  • Discover why bespoke framed wall art using 2mm float glass provides the professional clarity and protection that cheap perspex alternatives simply cannot match.
  • Master how to hang a gallery wall with precision by starting from a central anchor piece and using professional tools like a spirit level for a perfectly balanced display.
  • Explore how to use a professional print and frame service to combine diverse styles, from Scottish landscape art to contemporary photography prints, into a cohesive narrative.

Planning Your Layout: How to Visualise Art on Your Wall

Planning is the bridge to a masterpiece. Before you pick up a hammer, you need to identify the narrative of your wall. Are you celebrating heritage with Scottish landscape art, or creating a modern vibe with contemporary art prints? The most successful displays often mix media, pairing landscape wall art with personal photography prints. This layered approach draws inspiration from the history of salon-style hanging, where diverse works were displayed together to create a rich visual experience. Knowing how to hang a gallery wall begins with this conceptual phase.

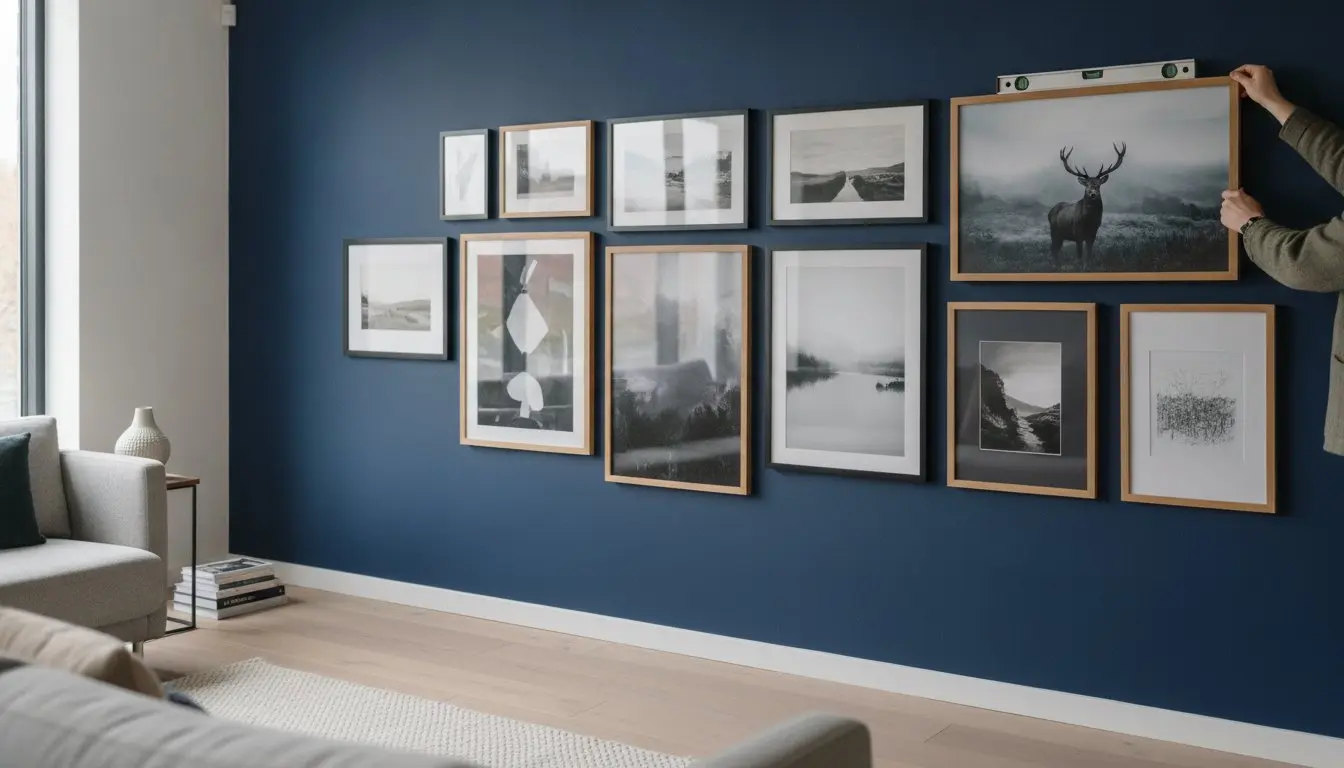
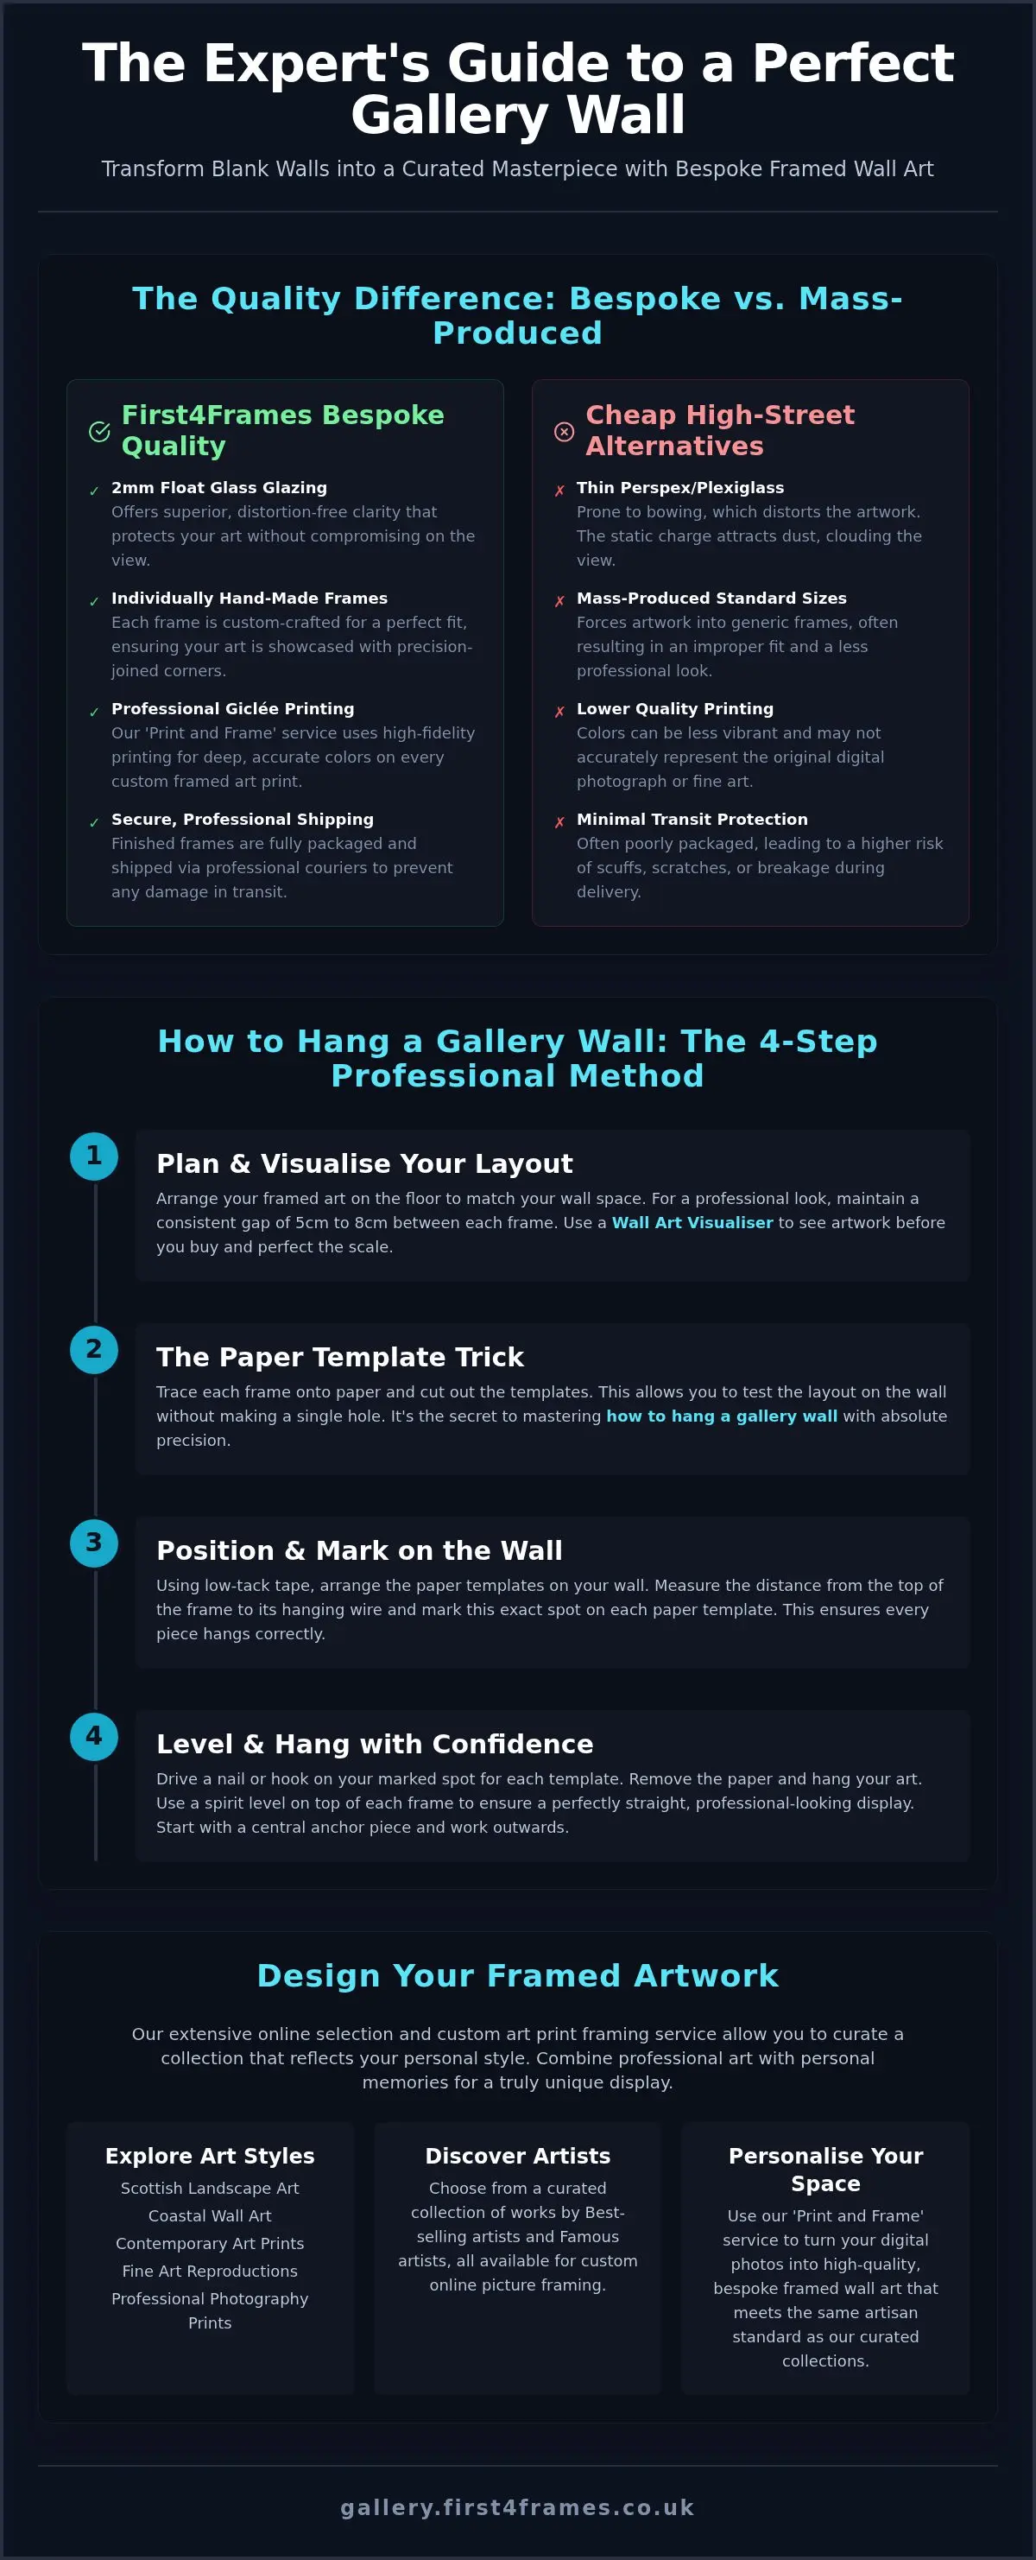
To visualise art on your wall without making holes, use the “floor layout” method. Clear a space on the carpet equal to your wall size and arrange your pieces there. For a professional finish, keep your spacing consistent. Most experts recommend a gap of 5cm to 8cm between frames. This creates breathing room so each piece of bespoke framed wall art can shine. If you’re still choosing pieces, use our wall art visualiser to see artwork before you buy and ensure the scale is correct for your room.

Choosing a Gallery Wall Theme

Your theme dictates the frames you’ll need. You might use our art print framing service to design your framed artwork to match a specific palette, perhaps using minimalist black for fine art or ornate wood for traditional pieces. Unlike mass-produced alternatives, our frames are individually crafted to ensure a perfect fit for your custom framed art prints. This bespoke approach ensures your display looks like a curated collection rather than a random assortment.

The Paper Template Trick

Once you’ve finalised your floor layout, trace each frame onto brown paper and cut it out. Tape these templates to your wall using low-tack masking tape. Mark the exact nail point on the paper by measuring the distance from the top of the frame to the hanging wire. This simple step is the most reliable way to master how to hang a gallery wall with absolute precision while protecting your home’s plaster.

Selecting Quality: Bespoke Framed Art Prints vs. Cheap Alternatives

The longevity of your display depends on the materials protecting it. While many high-street retailers use cheap perspex, we prioritise 2mm float glass for our bespoke framed wall art. Perspex often carries a static charge that attracts dust and can bow, distorting your view. In contrast, float glass offers superior clarity and remains perfectly flat. This ensures your fine art looks exactly as the artist intended, which is vital when learning how to hang a gallery wall that truly captures the eye.

Mass-produced frames are built to standard sizes, often forcing artwork to fit a generic mount. Our frames are individually crafted for each order. This hand-made approach means every corner is joined with precision. These sturdy frames hang flush against the wall, making it much easier to learn how to hang a gallery wall. After assembly, frames from First4Frames Gallery are fully packaged and shipped via professional couriers to ensure they arrive in pristine condition.

We use Giclée printing for all our custom framed art prints to ensure deep colour fidelity. Our extensive collection includes works by Best-selling artists and Famous artists, all under the general category of framed wall art. You can choose your frame online to see how different mouldings complement your photography prints before they are professionally printed and assembled.

The Print and Frame Advantage

Our photo printing and framing online service ensures digital memories receive artisan treatment. This art print framing service provides expert online picture framing that matches your files with the perfect mount. It’s a seamless way to integrate personal moments with professional landscape wall art, ensuring every piece meets the same professional standard.

Focusing on Scottish Art

Showcase regional beauty by choosing to browse our Scottish Art Gallery. You’ll find coastal wall art and highland scenes from local landscape masters. These pieces bring a sense of place to your home when presented in hand-made frames that reflect the rugged beauty of the landscape. Understanding the best way to display these vistas ensures they become your home’s focal point.

How to Hang a Gallery Wall: Professional Display Guide

With your layout finalised, it’s time to translate that plan to the wall. You’ll need a spirit level, hammer, measuring tape, and a sharp pencil. Precision is the difference between a cluttered space and a professional display. Start with your anchor piece, which is usually the largest or most central work. A professional standard in the UK is hanging the centre of this piece at roughly 145cm from the floor. This mimics eye-level placement in major galleries, creating a comfortable viewing experience for everyone in the room.

Once the anchor is secure, work outwards to maintain balance. Use your spirit level on every single frame. Even a tiny tilt can disrupt the visual harmony of the entire collection. As you add your contemporary art prints or fine art, keep a consistent gap of 5cm to 8cm between each frame. This disciplined approach is the most effective way to master how to hang a gallery wall while ensuring your display looks intentional and curated. Check each piece twice for security before moving to the next.

Secure Hanging Techniques

The safety of your art depends on choosing the correct fixings for your specific wall type. For plasterboard, always use dedicated hollow wall anchors; for brick, a standard wall plug and screw provide the best grip. While many mass-produced frames come with flimsy clips, bespoke framed wall art from First4Frames Gallery is individually crafted to be sturdy and arrives ready-to-hang. This saves you the frustration of sourcing extra hardware and ensures your collection stays level for years.

Using a Wall Art Visualiser

If you’re still deciding on the final look, our wall art visualiser allows you to see artwork before you buy. You can choose your frame online and experiment with different moulding colours to match your room’s specific palette. It’s a brilliant way to design your framed artwork with total confidence, ensuring the final result is exactly as you imagined before you even pick up the hammer. Understanding how to hang a gallery wall becomes much simpler when you have already seen the finished result digitally.

Once you’ve mastered how to hang a gallery wall, consistent maintenance preserves your investment. Our 2mm float glass provides superior clarity but requires gentle care to stay pristine. Use a microfibre cloth and a non-abrasive cleaner. Don’t spray directly onto the glass; spray the cloth first to prevent moisture from seeping into the mount. For coastal wall art, this protection is crucial against salt air and humidity, ensuring your fine art remains untarnished over time.

A gallery wall is a living entity that should grow with you. You can easily swap out contemporary art prints or photography prints while keeping your hand-made bespoke frames. This flexibility allows your display to evolve with your tastes or seasonal changes. If you decide to expand your collection, return to our wall art visualiser to ensure new pieces fit the existing narrative. Knowing how to hang a gallery wall is a skill that makes adding new landscape wall art a simple, rewarding process.

Logistics and Delivery Care

We take immense pride in our craftsmanship, and that care extends to the logistical journey. Every piece of bespoke framed wall art is fully packaged in multiple protective layers to prevent any transit damage. We ship via professional couriers to ensure your custom framed art prints arrive in perfect condition. This reliable service means your artwork is ready to be displayed the moment it reaches your door.

Commercial and Large Scale Displays

For property developers or business owners in Central Scotland, we offer expert artwork curation for larger projects. Whether you need Scottish landscape art for a reception or fine art for a new showroom, we provide comprehensive solutions. Please contact our Falkirk Gallery for bespoke orders to discuss your specific requirements with our artisan team.

Transforming a blank wall into a professional gallery is a journey from inspiration to precision. You now have the tools to plan your layout effectively and the knowledge of why premium materials matter. The secret to how to hang a gallery wall lies in the synergy between careful measurement and the superior clarity of 2mm float glass. By choosing hand-made frames crafted right here in the UK, you ensure your artwork is protected and displayed with the respect it deserves.

Our frames aren’t mass-produced. Every piece is individually created for your specific order and delivered via professional couriers to guarantee it arrives in perfect condition. Whether you’re showcasing Scottish landscapes or personal memories, your home deserves a curated look that lasts. Don’t let a blank wall hold you back any longer. It’s time to bring your creative vision to life with confidence and artisan quality.

Design your bespoke framed wall art online today and start building a display that truly inspires.

Frequently Asked Questions

How much space should I leave between frames on a gallery wall?

You should aim for a gap of 5cm to 8cm between your frames. This consistent spacing is the secret to a professional look that avoids a cluttered feel. When you know how to hang a gallery wall, using a simple spacer block made of wood or card ensures every gap remains identical across the whole collection. This creates a clean, intentional aesthetic that lets each individual piece of art breathe.

Can I mix different frame colours and styles in one display?

You can absolutely mix different frame colours and styles to create an eclectic, curated display. Pairing ornate traditional frames with minimalist bespoke framed wall art adds depth and personality to your room. To maintain harmony, try to use a consistent mount colour or a shared palette. Our online picture framing tool allows you to experiment with these combinations to ensure your chosen frames complement your contemporary art prints perfectly.

What is the best height to hang a gallery wall?

The best height for a gallery wall is eye level, which is roughly 145cm from the floor to the centre of the display. This standard is used by professional galleries across the UK to ensure optimal viewing. When figuring out how to hang a gallery wall, always measure to the midpoint of your central anchor piece. This provides a balanced foundation that makes the rest of the arrangement feel grounded and comfortable.

Should I use nails or command strips for bespoke frames?

We recommend using nails or dedicated wall anchors rather than adhesive strips for our bespoke frames. Because we use 2mm float glass for superior clarity, our frames have a professional weight that requires secure support. Adhesive strips often struggle with high-quality materials and can fail over time. Proper fixings ensure your custom framed art prints stay level and safe, protecting your investment from accidental falls.

How do I choose the right art for a large statement wall?

Start by selecting a large, impactful piece of Scottish landscape art or fine art as your primary focal point. A statement wall needs a central anchor to prevent it from looking fragmented. Use our wall art visualiser to test different scales against your room’s dimensions. Once your main piece is chosen, you can surround it with smaller photography prints or contemporary art prints to build a rich, cohesive narrative.

Posted on

How to Create a Cohesive Gallery Wall: The Professional Designer’s Guide for 2026

How to Create a Cohesive Gallery Wall: The Professional Designer’s Guide for 2026
Focus Keyphrase: how to create a cohesive gallery wall

A truly professional gallery wall isn’t defined by perfectly matching frames; it’s defined by a curated thread of quality that ties diverse pieces together. If you’ve ever stared at a pile of prints wondering how to create a cohesive gallery wall without turning your home into a cluttered mess, you’re not alone. Many homeowners struggle with the fear of making permanent mistakes or finding that their collection looks accidental rather than curated. At First4Frames Gallery, we believe your walls should be an everyday exhibit of your personality.

In this 2026 guide, we’ll share our expert framework for selecting art and utilizing bespoke framing to ensure your collection feels intentional. You’ll learn how to mix different styles with confidence and discover why professional craftsmanship is the secret to a high-end finish. Whether you need a specific print, a custom frame not listed on our site, or flexible UK shipping and workshop collection options, we provide a seamless solution. We encourage you to check our reviews on Trustpilot, Google, and Yell to see why we’re a trusted partner for creating stunning, professional displays.

Key Takeaways

  • Define a clear “Visual Thread” to balance variety and unity, ensuring your collection guides the eye across the room.
  • Learn the professional floor-to-wall layout method to visualize your display and place your “Anchor Piece” without making unnecessary holes.
  • Discover how to create a cohesive gallery wall by using consistent mount colours and bespoke framing to unify diverse artistic styles.
  • Understand the advantage of sourcing rare prints and custom frame designs that aren’t available in standard shops to reflect your personal story.

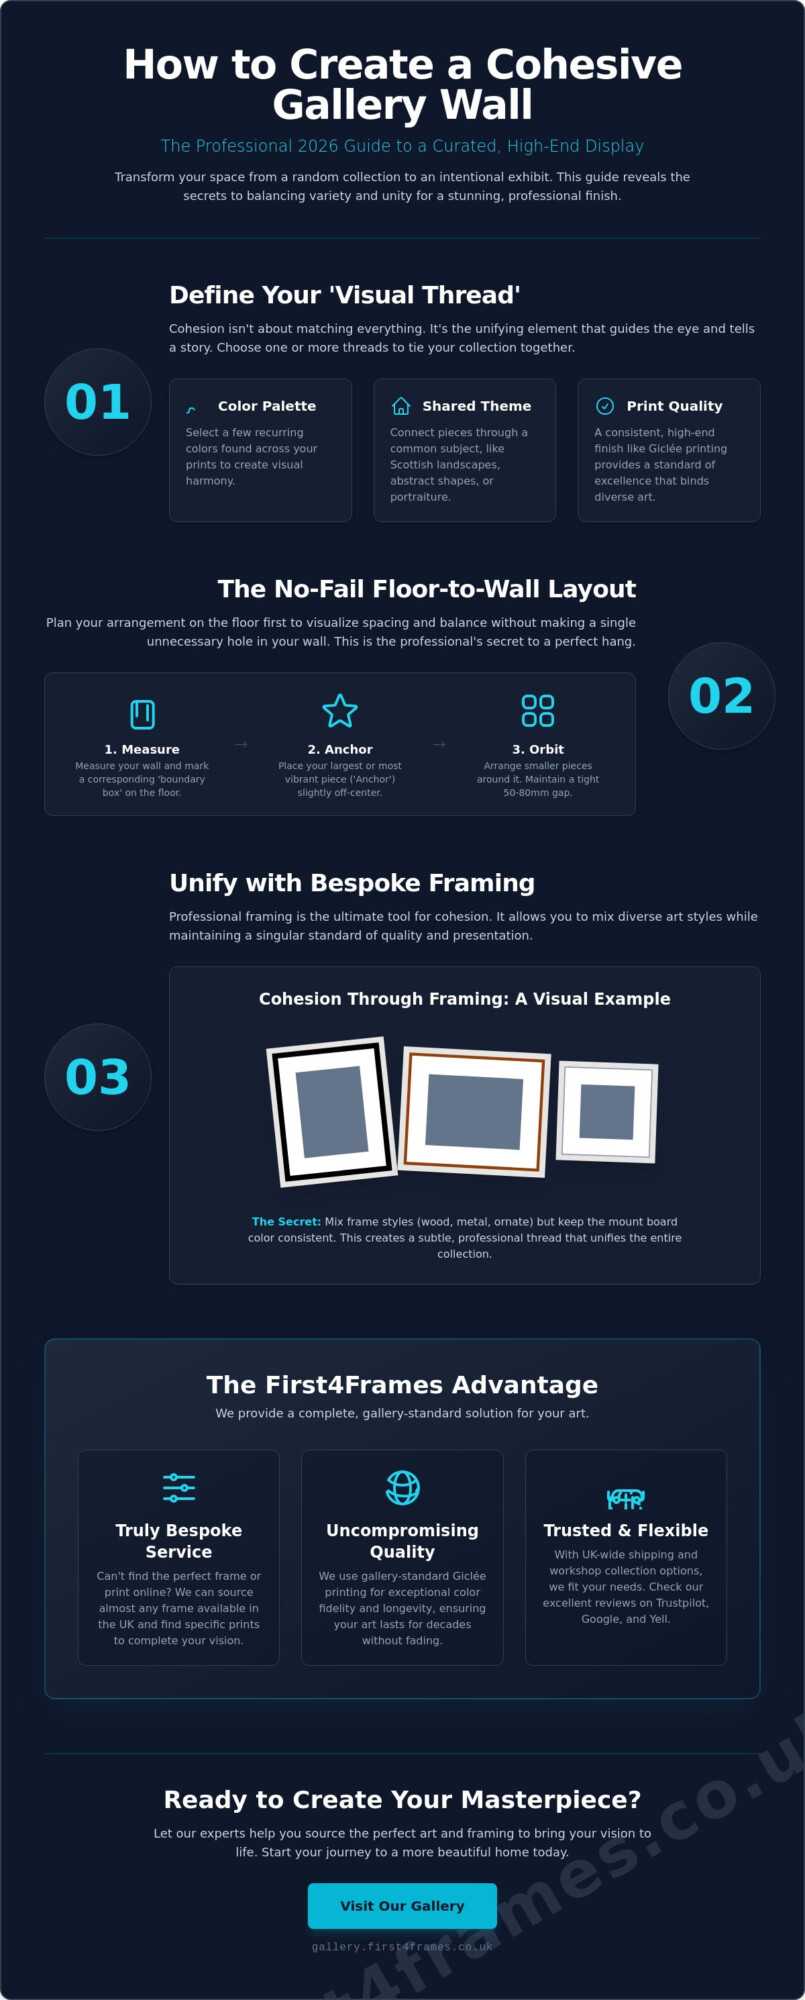
Cohesion is often misunderstood as a synonym for “matching,” but in professional design, it’s actually the delicate balance between variety and unity. When you’re figuring out how to create a cohesive gallery wall, you’re looking for a way to guide the viewer’s eye across several pieces without any single item feeling like an outlier. This is achieved through a “Visual Thread,” a recurring element that ties the collection together. It’s the silent narrator of your wall’s story.

This concept isn’t new. It draws inspiration from historical Salon-style hanging, where diverse works were displayed from floor to ceiling to create a rich, immersive experience. Today, that thread might be a specific colour palette, a shared theme, or a consistent level of print quality. High-fidelity Giclée prints are particularly effective here, as their professional finish provides a standard of excellence that binds different subjects together.

To better understand how these elements come together in a real space, watch this helpful guide:

Cohesion vs. Uniformity: Why You Don’t Need Matching Frames

A common mistake is thinking every frame must be identical. While a “grid” layout relies on uniform frames for a clinical look, a “salon” display thrives on character. Bespoke framing is a vital tool when learning how to create a cohesive gallery wall because it allows you to mix textures while keeping a singular quality standard. If you have a specific vision, First4frames can source almost any frame available in the UK. This ensures your collection remains professional, even with diverse materials. For more advice on curating your collection, explore our resource on Art in the Frame.

The Role of Scottish Fine Art in Modern Curation

Using vibrant Scottish landscapes from artists like Jolomo or the whimsical illustrations of Matylda Konecka can provide a powerful thematic anchor for your wall. We can source specific prints for you even if they aren’t currently on our website. To ensure these pieces last for decades, we use Giclée printing, which is the gold standard for gallery-wall longevity and colour fidelity. Whether you choose to have your art shipped directly or prefer workshop collection, our team ensures every piece meets the standards our customers rave about in our Google and Trustpilot reviews.

The No-Fail Layout Strategy: From Floor to Wall

Planning a display shouldn’t happen directly on the wall. First, measure your available wall space. Mark a corresponding “boundary box” on your floor using masking tape to mirror that area. This allows you to shuffle pieces without leaving a single mark. It’s essential to account for the outer dimensions of your frames, not just the art itself. If you’re unsure about dimensions, our guide on Standard Photo & Picture Sizes provides the exact UK measurements you’ll need for planning.

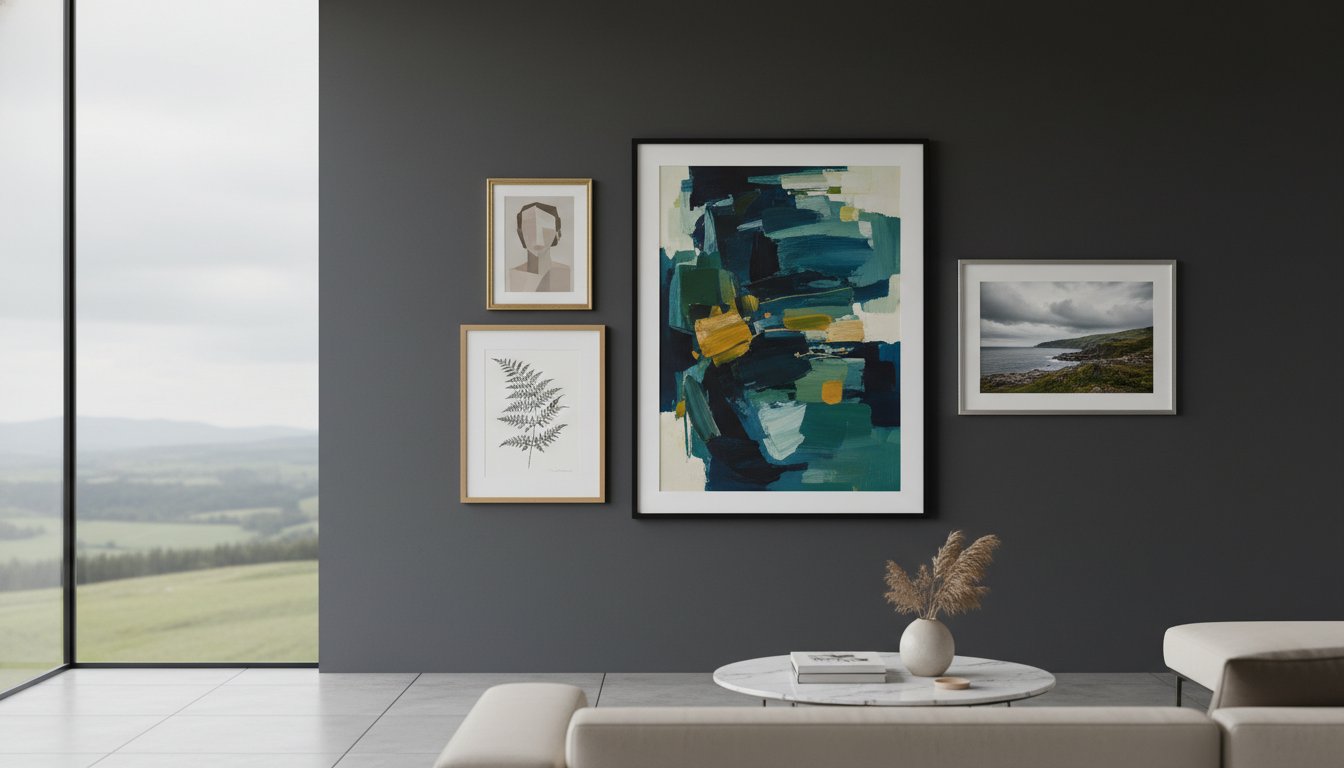
Once your box is set, place your “Anchor Piece” first. This is typically your largest or most vibrant work. Position it slightly off-centre to avoid a rigid, clinical look. From there, work outwards, maintaining a consistent gap between frames. While some suggest 3 inches, we recommend a tighter 50mm to 80mm gap to keep the collection feeling like a single unit. This spacing helps when learning how to create a cohesive gallery wall that feels intentional.

The ‘Anchor and Orbit’ Method

Your anchor piece sets the emotional tone. It acts as the sun while smaller works “orbit” around it. To keep the flow dynamic, balance horizontal and vertical orientations across the box. If one side feels heavy, swap a landscape print for a portrait one. For more inspiration on balancing these elements, check out these 7 must-know rules for a perfect gallery wall.

Testing Your Display Without the Drill

Before reaching for the hammer, trace each frame onto brown paper and tape the templates to your wall. This is the ultimate way to refine how to create a cohesive gallery wall. Follow the “145cm rule” by ensuring the central point of the entire arrangement sits at eye level, roughly 145cm from the floor. If a specific frame size is missing from your layout, remember that First4frames can source almost any frame available in the UK to fill that gap. Whether you choose workshop collection or home shipping, we make the process effortless. You can view our curated gallery to see how professional layouting transforms a space.

How to Create a Cohesive Gallery Wall: The Professional Designer’s Guide for 2026

Creating Unity Through Professional Bespoke Framing

Many homeowners believe that buying a stack of identical, mass-produced frames is the only way to achieve a uniform look. However, true professional curation uses bespoke framing to elevate individual pieces while maintaining a “Gallery Standard” across the entire wall. This is a secret weapon when learning how to create a cohesive gallery wall. By choosing custom options, you ensure that even a simple postcard or a high-end Giclée print receives the same level of care and visual weight.

The mount is often the most overlooked element of a display. Using a consistent mount colour, such as a soft off-white or a classic cream, acts as a visual bridge between varying art styles. It provides a clean border that separates the art from the frame, allowing the eye to rest and focus on the work itself. For more structural advice on balance and layout, you might find these 5 foolproof tips for creating a gallery wall helpful. If you’re looking for frame style inspiration, our Gallery showcases how different textures and finishes can live together harmoniously.

Don’t be afraid to mix frame textures. Pairing sleek, modern woods with more ornate metallics can create a sophisticated, “collected” look that feels intentional rather than accidental. The key is to maintain a high standard of production across all pieces so the quality itself becomes the unifying factor.

Choosing the Right Frame for Scottish Art

When framing Scottish art, consider the specific light of the piece. A moody Highland landscape might benefit from a deep, textured wood frame that echoes the rugged terrain. Conversely, a vibrant Glasgow cityscape could pop against a clean, contemporary metallic finish. If you have a specific vision in mind, First4Frames can source almost any frame available in the UK to match your decor perfectly.

Preservation and Quality: The First4Frames Standard

Professional craftsmanship isn’t just about aesthetics; it’s about preservation. Off-the-shelf frames often use acidic materials that can yellow or damage your art over time. Our bespoke frames use high-quality materials designed for longevity, ensuring your collection stays as fresh as the day it was hung. We take immense pride in our workmanship. We encourage you to check our Trustpilot, Google, and Yell reviews to see why our customers trust us as their dedicated partner. To begin your project, explore our custom picture framing services today.

Once you’ve mastered the layout and selected your bespoke frames, the final stage is the physical assembly. At First4Frames, we provide a “Ready-to-Hang” advantage that simplifies the process of how to create a cohesive gallery wall. Instead of juggling loose prints and separate frames from different suppliers, you receive your artwork already professionally paired and secured. This ensures your Giclée prints and custom mounts are perfectly aligned and protected before they ever reach your home.

Finding the right art is often the biggest hurdle. If you’re searching for a specific print that isn’t currently featured on our website, let us know. We can often source particular works for our customers, acting as your personal art scout. For our UK clients, we offer logistical flexibility that fits your lifestyle. You can choose safe, insured shipping to your doorstep or opt for personal collection at our Falkirk workshop. This commitment to service is why we encourage you to read our customer feedback on Google, Yell, and Trustpilot.

Safety is a vital part of professional execution. Before you begin hanging, verify the weight of each frame. Large bespoke pieces with glass can be heavy, so it’s essential to use the correct wall fixings for your specific wall type, whether it’s plasterboard or masonry. A secure display is a professional display that stands the test of time.

Commercial and Large-Scale Curation

Your journey toward a stunning home display begins with a single piece. We invite you to explore our selection of Scottish artist prints to find the anchor piece that sets your room’s emotional tone. Whether you’re looking for a specific theme or need a frame sourced from across the UK, we’re your dedicated partner in craftsmanship. Contact the First4Frames team today for a bespoke framing consultation and let’s bring your vision to life.

Transform Your Space with Professional Curation

Creating a beautiful display is about more than just hanging pictures; it’s about telling your unique story through a curated visual thread. By now, you understand how to create a cohesive gallery wall using the anchor and orbit layout and the unifying power of bespoke mounts. These professional techniques remove the guesswork, ensuring your collection looks intentional and sophisticated rather than cluttered.

At First4frames, we’re here to help you execute your vision with precision. Whether you need a specific artist’s print sourced or a custom frame from across the UK, we provide the craftsmanship your home deserves. We invite you to check our 5-star reviews on Trustpilot, Google, and Yell to see why we’re the trusted partner for art lovers nationwide. You can choose secure UK-wide shipping or visit us for a workshop collection in Falkirk.

Ready to turn your empty wall into an everyday exhibit? Explore our Ready-to-Hang Scottish Art Collection and find the perfect pieces to start your display. Your home is a canvas, and we can’t wait to help you fill it with art that inspires you every day.

Frequently Asked Questions

How do I choose a colour palette for my gallery wall?

You should choose a colour palette by identifying two or three core tones found in your largest anchor piece or your room’s existing soft furnishings. This creates a natural harmony that guides the eye across the display. When learning how to create a cohesive gallery wall, you can also use neutral mounts to bridge pieces with slightly clashing backgrounds. This method ensures your display feels like a deliberate part of your interior design.

Can I mix black and white photos with colourful paintings?

You can certainly mix black and white photography with vibrant paintings to create a dynamic, eclectic look. The key to success is using a visual thread, such as consistent bespoke framing or a shared subject matter. For instance, pairing monochrome street scenes with colourful urban landscapes works well. We can source almost any frame available in the UK to help you find a style that unifies these different media perfectly.

What is the best height to hang a gallery wall?

The best height to hang a gallery wall is at eye level, which is generally considered to be 145cm from the floor to the centre of the arrangement. This gallery standard ensures the art is comfortable to view for most people. If you’re hanging art above a sofa or sideboard, aim for a gap of 15cm to 20cm above the furniture to maintain a balanced relationship between the pieces and your decor.

How do I make a gallery wall look professional on a budget?

You can achieve a professional look on a budget by investing in high-quality Giclée fine art prints and professional mounting rather than expensive original canvases. A well-cut, acid-free mount in a consistent colour instantly elevates a simple print to a gallery-standard statement. This is a vital step in how to create a cohesive gallery wall without overspending. Our ready-to-hang options provide a cost-effective way to receive professionally paired art and frames.

Does First4Frames ship framed art across the UK?

Yes, we offer secure UK-wide shipping for all our framed art and bespoke orders. We take pride in our protective packaging to ensure your display arrives in perfect condition. Alternatively, customers can choose to collect their orders directly from our Falkirk workshop. We invite you to read our 5-star reviews on Trustpilot, Google, and Yell to see why we’re a trusted partner for art lovers throughout the country.

Posted on

Professional Art Hanging Service in Glasgow: The Expert Gallery Finish

Professional Art Hanging Service in Glasgow: The Expert Gallery Finish

Last Saturday, a Glasgow resident sat in their West End flat staring at a vibrant Giclée print by artist Kevin Hunter, hammer in hand, yet couldn’t bring themselves to risk the first nail in their traditional sandstone wall. It’s a common struggle; you’ve found the perfect piece at gallery.first4frames.co.uk, but the thought of it crashing down or hanging at a jaunty angle is enough to keep it leaning against the skirting board. We understand that your home is your sanctuary and your art is an investment. Our professional art hanging service glasgow provides the expert touch needed to secure heavy mirrors and delicate frames to any surface, from modern plasterboard to historic stone.

With our 4.9-star Google rating and twenty years of artisan experience, we’ve helped hundreds of clients achieve a flawless gallery finish. This guide explains how our specialist installation protects your walls, ensures perfect eye-level placement, and bridges the gap between your room décor and your new artwork. You’ll discover the peace of mind that comes from a secure, level display and learn how our interconnected services at first4frames.co.uk and prints.first4frames.co.uk provide a complete, hassle-free solution for your walls.

Key Takeaways

  • Learn why a professional art hanging service glasgow is essential for protecting your investment and avoiding the common pitfalls of DIY wall damage or fallen frames.
  • Understand how to navigate Glasgow’s unique architecture, from traditional lath and plaster to modern builds, using bespoke hardware for a secure and level finish.
  • Discover the “Golden Rule” of art placement and how professional curation creates a perfect bridge between your room décor and your favourite artwork.
  • Explore the seamless “one-stop-shop” journey from browsing our high-rated gallery to final installation, supported by our expert bespoke framing and printing services.
  • See how we tailor our gallery-standard approach for both intimate home settings and high-impact commercial spaces to ensure every piece is displayed with precision.

Why Choose a Professional Art Hanging Service in Glasgow?

Hanging a piece of art is the final, vital step in your creative journey. It’s more than just finding a stud or hammering a nail into the plaster. A professional art hanging service glasgow ensures that your investment is secure, level, and positioned to transform the room. When you’ve spent time selecting the perfect piece, you don’t want to risk a fallen frame or a jagged hole in your wall. Professional installers understand the weight distribution of heavy mirrors and the structural quirks of traditional Scottish architecture, from red sandstone tenements to modern city apartments.

This technical expertise mirrors the precision found in large-scale Installation art, where every millimetre affects the viewer’s perspective and the safety of the work. DIY attempts often lead to aesthetic frustration or, worse, structural damage. By trusting an expert, you avoid the common pitfalls of poor placement and unstable fixings that plague many home projects.

To see how art transforms the local landscape and why placement matters, watch this video showcasing Glasgow’s vibrant mural scene:

The “Gallery Finish” vs. DIY

Precision is non-negotiable for high-value items like Jolomo prints. These vibrant landscapes deserve a “Gallery Finish” that highlights their depth and colour. We ensure longevity for your Giclée prints by advising on placement to avoid direct sunlight and heat sources, which can cause irreparable fading over time. We view the frame as the essential bridge between your room’s decor and the artwork. It shouldn’t just hold the picture; it should pull you into the scene while complementing your interior style.

Social Proof: A Trusted Glasgow Professional

We’ve spent over 20 years immersed in the Scottish art scene, building a reputation for excellence and reliability. Our excellent Google and Trustpilot ratings reflect our commitment to a hassle-free, bespoke, and speedy service. Whether you’re visiting our main site for picture framing or using our specialized print and frame service, you’re benefiting from two decades of craftsmanship. We treat every home or office project with the same care we give to a professional gallery exhibition.

The emotional impact of a perfectly displayed collection is profound. It turns a house into a home and an office into an inspiring workspace. When your art is hung correctly, it creates a sense of balance and peace that DIY attempts rarely achieve. Our art hanging service glasgow takes the stress out of the process, leaving you with a spectacular display that stays exactly where it should.

Technical Expertise: Navigating Glasgow’s Unique Walls

Hanging Art in Traditional Tenements

Iconic Glasgow tenements often feature lath and plaster over solid stone. These walls can be brittle and unpredictable. Crumbling plaster is a common issue that causes standard nails to fail or pull away over time. We use heavy-duty masonry fixings and specialized anchors that bypass the plaster to grip the stone beneath. This is vital for large-scale works, like the atmospheric Scottish landscapes found at our online gallery. Proper installation ensures these pieces remain secure for years without compromising your home’s historic features.

Modern Partitions and Plasterboard Solutions

Newer builds in the West End or the Merchant City rely on plasterboard partitions. Without finding the timber studs, heavy frames can pull right through the wall, causing significant damage. We use electronic sensors to locate structural supports and employ high-performance toggle bolts for hollow sections. For oversized mirrors or wide panoramas, we calculate weight distribution to prevent sagging. Following professional art hanging rules, such as the 57-inch eye-level standard, ensures your collection looks as professional as a curated exhibition. Our art hanging service glasgow ensures that even the heaviest pieces are anchored safely in these modern spaces.

In high-traffic commercial spaces or office staging, security is paramount. We provide anti-theft fixings that lock the frame to the wall, keeping your assets safe. We also handle complex 3D memorabilia, such as sports shirts or delicate objects that require deeper box frames and specialized mounting. Our 5-star Google and Trustpilot ratings reflect our commitment to this level of detail. We operate as a true one-stop-shop, coordinating with our bespoke framing workshop to ensure every piece is handled with care. If you’ve just found a stunning wildlife piece by Georgina McMaster among our featured artists, let us help you finish the journey with a professional installation.

Professional Art Hanging Service in Glasgow: The Expert Gallery Finish

Residential vs. Commercial Art Installation

At First4Frames, we know a private living room requires a different touch than a bustling hotel lobby. Our art hanging service glasgow adapts to these distinct environments by balancing aesthetic sensitivity with technical precision. We’ve built a reputation over 20 years, backed by excellent Google and Trustpilot ratings, for delivering results that reflect our genuine passion for craftsmanship. Whether we’re working in a compact apartment or a sprawling corporate headquarters, we tailor the approach to suit the scale and purpose of the space.

Transforming Your Home Decor

Creating a focal point in your living room often involves selecting a piece that resonates emotionally. Many of our clients choose iconic Jack Vettriano prints from our gallery to anchor their space with Scottish sophistication. When hanging art in challenging areas like hallways or stairwells, we prioritize both safety and symmetry. For personal projects, our photo printing and framing service turns digital memories into bespoke wall art.

Professional Solutions for Business Spaces

We help businesses maintain consistent branding through curated collections of Scottish artists, creating a sophisticated atmosphere in offices and boardrooms. Our curation services for property staging help increase market appeal by making empty spaces feel lived-in and high-end. If you require technical framing for a large-scale project, our bespoke framing service handles high-volume orders with the same precision as a single handcrafted piece.

Operating as a “one-stop-shop” for all your art needs, we bridge the gap between room décor and fine art. Our three interconnected websites ensure you can find the art, print your photos, and get everything professionally framed and hung without the stress of managing multiple contractors. It’s this comprehensive, expert-led approach that makes us the trusted choice for both homeowners and businesses throughout Glasgow.

Hanging art isn’t just about finding a stud in the wall or a spare hook. It’s a precise craft that dictates how a room feels. When you book a professional art hanging service glasgow, the process starts with the “Golden Rule” of 145cm. This industry standard ensures the centre of your artwork sits at average eye level. It creates a consistent horizon line throughout your home, much like the layout of a professional museum. Whether you’re displaying a single statement piece or a collection, this measurement prevents the common mistake of hanging art too high.

Our team brings over twenty years of expertise to every installation, ensuring your precious works are secure and perfectly aligned. We treat every frame as a bridge between your room décor and the artwork itself. This attention to detail is why we maintain such high ratings on Google and Trustpilot. We don’t just hammer nails; we curate spaces that reflect your personality and the unique craftsmanship of the pieces you’ve chosen.

Planning Your Perfect Gallery Wall

Successful gallery walls require a solid plan before the first nail goes in. We recommend laying your framed pieces on the floor to experiment with the composition. You can also tape paper templates to the wall to visualise the final layout. If you’re mixing different frame sizes, try balancing vibrant, textured works like those from John Lowrie Morrison with more understated prints. This creates a cohesive look that feels intentional rather than cluttered. For a deeper dive into layout strategies, read our guide on how to create the perfect gallery wall.

Lighting and Environmental Considerations

Lighting can make or break the visual impact of a fine art print. If you’ve invested in a premium Giclée print, you want those rich textures to shine without being obscured by glare. Position your art away from direct windows to avoid harsh reflections on the glass. Existing room lighting can be used to your advantage by adjusting spotlights to wash the wall with a soft glow, making the colours in a Jolomo landscape truly pop. The ideal distance between frames for a balanced look is usually between 5cm and 8cm.

We operate as a one-stop-shop for all your artistic needs across our three dedicated platforms. While our gallery site features spectacular artists, you can visit www.first4frames.co.uk for bespoke framing or use our specialized print service at prints.first4frames.co.uk. Our art hanging service glasgow ties these elements together, providing the final professional touch your collection deserves.

The First4Frames Advantage: Your One-Stop-Shop

Choosing First4Frames means you aren’t just hiring a ladder and a drill. You’re partnering with a team that understands the entire lifecycle of a piece of art. We’ve spent over 20 years perfecting the one-stop-shop model. This ensures every step, from the initial spark of inspiration to the final screw in the wall, is handled by experts. Our reputation is backed by hundreds of five-star reviews on Google and Trustpilot. This proves we deliver on our promise of quality and reliability across every project we undertake.

Our ecosystem consists of three specialized sites that work in harmony to serve your home or office. You might start your journey at our online gallery. Here you can browse spectacular Giclée prints and original works, including the evocative landscapes and vibrant contemporary pieces that define our collection. We ensure the art is ready to hang the moment it reaches your door. We bridge the gap between a digital browse and a physical masterpiece, offering a seamless art hanging service glasgow residents trust to finish their rooms with precision.

Beyond Just Hanging: A Complete Service

If you already own a piece that needs a professional touch, our bespoke services have you covered. You can visit www.first4frames.co.uk for custom framing. This service acts as the perfect bridge between your décor and your artwork, providing the heavy lifting in the visual relationship of the room. For those looking to turn personal memories into gallery-quality displays, you can print your own photos and have them professionally framed. This cohesive brand identity means your art, your frames, and your installation all share the same high standard of craftsmanship.

Get a Quote for Art Hanging in Glasgow

Ready to transform your space? To get an accurate quote for our art hanging service glasgow, simply provide us with the number of pieces and the wall types. We’ll need to know if we’re working with plasterboard, masonry, or specialized surfaces. During a professional site visit, we’ll assess your lighting and layout to ensure your collection looks its absolute best. We take pride in our “hassle-free, bespoke, speedy service” that turns a house into a home. Contact us today to schedule your consultation and experience the expert gallery finish your walls deserve.

Your collection deserves more than just being centered on a wall; it’s about creating a bridge between your room’s decor and the artwork itself. Whether you’re showcasing vibrant pieces from Scottish artists like Kevin Hunter or atmospheric local landscapes, the right placement is everything. Our professional art hanging service glasgow takes the stress out of navigating tricky tenement walls and ensures every frame sits perfectly level and secure.

With over 20 years of framing and gallery expertise, we’ve earned a top-rated reputation on Google and Trustpilot by delivering a hassle free, bespoke service. We don’t just hang pictures; we curate experiences. As a true one-stop-shop, we handle everything from bespoke framing at our main site to providing high-quality Giclée prints that won’t fade over time. It’s time to give your home or commercial space the professional finish it deserves.

Contact our Glasgow installation team for a bespoke quote

Let’s embark on a journey of artistic discovery and turn your walls into something spectacular today.

Frequently Asked Questions

How much does a professional art hanging service in Glasgow cost?

The cost for our professional art hanging service in Glasgow depends on the number of pieces you need installed and the complexity of the wall surfaces. We provide bespoke quotes for every project to ensure you receive a fair price for our premium craftsmanship. Our team maintains a 4.9-star rating on Google, reflecting our commitment to providing high-quality service that remains accessible for every art lover.

Can you hang heavy mirrors on plasterboard walls safely?

We safely hang heavy mirrors on plasterboard walls by using specialist high-load anchors that distribute weight effectively across the substrate. With over 20 years of experience, we’ve mastered the technical requirements for Glasgow’s varied tenement and modern builds. We ensure your mirror or large framed piece acts as a sturdy bridge between your decor and the wall without any risk of falling.

Do you provide the hooks and fixings for the art installation?

Our art hanging service glasgow includes all the premium hooks, wall plugs, and heavy-duty fixings required for a secure finish. We operate as a one-stop-shop, so you don’t have to worry about buying hardware or tools yourself. This hassle-free approach means your new Scott Naismith print or Alexander Millar piece from gallery.first4frames.co.uk will be on the wall perfectly in no time.

Can you help with the layout and design of a gallery wall?

We provide expert design consultations to help you arrange a spectacular gallery wall that balances color and scale. Our team can guide you through a simple three-step process to organize your collection, whether it features Giclée prints from our gallery or personal photos. We’ve helped hundreds of customers create artistic displays that transform their living spaces into professional-looking galleries.

Is your art hanging service insured for high-value items?

Our service is fully insured to handle high-value fine art and delicate frames, providing you with complete peace of mind during the installation. As a trusted professional with top marks on Trustpilot, we treat every item with the care it deserves. Whether it’s a bespoke original or a limited edition print, your investment is protected by our professional liability coverage throughout the process.

Do you offer art hanging services for commercial offices in Glasgow?

We offer dedicated art hanging services for commercial offices, hotels, and restaurants throughout the Glasgow area. For businesses looking to curate a professional atmosphere, we can also provide high-quality prints and framing via prints.first4frames.co.uk. This integrated service ensures your workspace looks polished and inspiring, backed by our decades of experience in the local commercial sector.

What is the best height to hang a picture in a standard room?

The standard gallery height for hanging art is 57 inches from the floor to the center of the artwork. This placement ensures the piece is at eye level for the average person, creating a natural connection between the viewer and the image. It’s a simple rule that makes your room feel balanced and ensures your beautiful frames aren’t positioned too high or too low.

How long does it take to hang a collection of 5-10 frames?

Hanging a collection of 5 to 10 frames typically takes between 60 and 120 minutes depending on the wall type and layout complexity. Our art hanging service glasgow is designed to be a speedy service that doesn’t cut corners on precision. We work efficiently to ensure your home transformation is completed quickly, leaving you to enjoy your newly displayed artwork without any stress.

Posted on

Creating a Focal Point with Framed Art: A Professional Gallery Guide

Creating a Focal Point with Framed Art: A Professional Gallery Guide

Last Tuesday, a client in Perth discovered that even after spending £4,200 on premium furnishings, their lounge still felt like an impersonal showroom. The culprit was a vast, echoing blank wall that drained the room of its character. You likely recognise that feeling of a space being almost finished but lacking a soul. It’s common to feel stuck between choosing the right frame style or worrying about hanging a piece at the wrong height. We understand that creating a focal point with framed art is about more than just filling a gap; it’s about finding that perfect visual anchor that pulls every element of your decor together.

At First4frames gallery, we’ve spent over 20 years helping art lovers move past the “blank wall blues” with confidence. You’ll discover how to use our bespoke framing service and premium Giclée prints to transform your home into a professionally curated space. We’ll show you how a stunning Scottish landscape can do the heavy lifting in a room, acting as the vital bridge between your furniture and your walls. Backed by our excellent customer ratings on leading review platforms, this guide explores our featured artists and provides the practical steps you need to choose, frame, and hang art that reflects our commitment to artisan craftsmanship.

Key Takeaways

  • Learn why creating a focal point with framed art serves as the ultimate visual anchor, offering a more personal and impactful alternative to standard furniture.
  • Explore how to select a showstopping piece from the First4Frames Gallery, using our featured artists and iconic Scottish prints to define your space.
  • Understand the “bridge” philosophy of bespoke framing and how professional craftsmanship elevates your artwork far beyond off-the-shelf alternatives.
  • Master professional arrangement techniques, including the 57-inch eye-level rule, to ensure your artwork is perfectly aligned with your room’s architectural features.
  • Discover our hassle-free three-step process for ordering ready-to-hang art or securing a professional quote for bespoke framing, backed by our excellent customer ratings.

The Art of the Anchor: Why Framed Art Creates the Ultimate Focal Point

A focal point is the primary architectural or decorative feature that organises a space. It acts as a visual anchor, giving the eyes a specific place to land the moment someone enters a room. At First 4 Frames, we’ve spent over 20 years observing how a single, well-chosen piece of art transforms a sterile environment into a curated home. While a sofa provides comfort and a rug adds texture, they rarely spark the same level of curiosity as a stunning piece of wall decor.

Creating a focal point with framed art allows for a level of personal expression that a tin of paint simply cannot match. A feature wall might change the colour of a room, but a masterpiece from our gallery tells a story about your tastes and experiences. Our professional frames do the heavy lifting in this relationship. They act as a sophisticated bridge between your interior decor and the artwork itself, ensuring the piece doesn’t just sit on the wall but commands it with authority.

The psychological impact of a well-placed masterpiece shouldn’t be underestimated. A room without a clear centre feels cluttered and chaotic, regardless of how expensive the furniture is. By placing a high-quality print at eye level, you create a sense of order and calm. This intentional placement directs the flow of the room, making the space feel finished and professionally designed.

The Visual Weight of Framed Art

Visual dominance depends on scale and colour. A large-format Giclée print provides a vibrant, high-contrast centrepiece that holds its own against substantial furniture. Because we use archival-grade inks, these prints maintain their brilliance for over 75 years. This longevity ensures your focal point remains as striking in a decade as it is on the day you hang it. Using the right scale prevents the art from being swallowed by the wall.

Creating an Emotional Connection

Effective decor moves beyond filling a gap to telling a story. Choosing a piece from our featured artists creates an immediate psychological pull, drawing the viewer into the scene. Quality is the foundation of this connection. We source only the best materials for our bespoke framing service, which is why we’ve maintained a 4.9-star rating on Google Reviews. Using premium materials builds trust and ensures your investment in creating a focal point with framed art lasts a lifetime.

Selecting Your Showstopper: Artwork Focal Point Ideas

Your search for the perfect interior anchor begins at the First4Frames Gallery. With over 20 years of expertise in the industry, we’ve curated a collection designed to spark inspiration for anyone creating a focal point with framed art. The first decision involves scale. A single oversized piece, perhaps 100cm or wider, acts as a bold architectural statement. It simplifies a room, drawing the eye to one definitive location. Alternatively, a curated gallery wall of five or seven smaller pieces allows you to tell a broader story. Our one-stop-shop approach ensures that whether you choose a solo giant or a collection, every piece arrives ready-to-hang, professionally finished by our master framers.

The mood you wish to project should dictate your selection. You might crave the cinematic drama of a dark, brooding interior or the uplifting energy of a sun-drenched landscape. By choosing a pre-framed piece from our gallery, you bypass the complexity of matching prints to frames yourself. Our clients often mention our 4.8-star rating for service excellence, noting how this streamlined process removes the guesswork from interior styling. It’s about finding that specific “bridge” between your existing furniture and the walls.

Scottish Icons: Jolomo and Jack Vettriano

For high-impact colour, John Lowrie Morrison (Jolomo) is a powerhouse. His vibrant West Coast landscapes use saturated pinks and blues to bring immediate life to neutral Scottish homes. If you prefer a sophisticated, noir-inspired atmosphere, Jack Vettriano’s iconic works provide a moody, narrative anchor. These artists don’t just fill space; they define the character of a room. Vettriano’s “The Singing Butler” or Jolomo’s lighthouse scenes are more than prints; they’re cultural touchstones that command attention in any professional or domestic setting.

Themes and Cohesion

Success lies in balancing the artwork’s palette with your existing soft furnishings. If your curtains or rugs feature earthy tones, an abstract piece with ochre accents creates a seamless visual flow. We exclusively use Giclée quality printing for our gallery works. This ensures the artist’s original intent is preserved with 100% colour fidelity, meaning your investment won’t fade after 12 months of sunlight exposure. You can browse our curated artist categories to find a theme, from coastal horizons to traditional portraiture, that fits your specific space. This professional standard is what separates a simple poster from a genuine focal point.

Infographic titled Transform Your Space, explaining how to create a visual focal point using framed art. It covers art placement tips, selection strategies, framing benefits, and highlights First4Frames Gallery advantages.

The Frame as a Bridge: Enhancing Impact through Bespoke Framing

At First4Frames, we believe a frame is never just an outer edge. It’s the essential bridge between your room’s decor and the artwork itself. When you’re creating a focal point with framed art, the frame does the heavy lifting by pulling the viewer into the image while anchoring the piece to your wall. This philosophy ensures that a vibrant Giclée print from our gallery doesn’t just sit on the surface; it becomes a deliberate architectural element of your home.

Our approach treats every project as a partnership between craftsmanship and aesthetic. Whether you’re highlighting a bold abstract or a delicate landscape, the right frame provides the necessary context. This professional touch is why our gallery service maintains a consistent 5-star rating across independent review platforms, as we focus on excellence in every mitred joint and mount cut.

Bespoke vs. Ready-Made Frames

The difference between “off-the-shelf” products and professional framing often comes down to material integrity. Cheap, ready-made frames typically use plastic composites or thin MDF that can warp within 12 to 18 months. Our bespoke service utilises solid woods and premium metals that provide lasting structural support. Bespoke framing offers over 20 years of artisan expertise to ensure a perfect fit for even the most unusual artwork dimensions. This precision prevents the “slipping” often seen in standard sizes, keeping your art perfectly centred for decades.

Choosing the Right Frame Style

The style of your frame dictates the atmosphere of the entire room. We offer a curated range of mouldings to suit any interior goal:

  • Modern Minimalist: Slim black or white aluminium frames that allow contemporary Giclée prints to speak for themselves without distraction.
  • Ornate Traditional: Deep, textured mouldings in gold or dark wood that create a sense of history and importance for classic focal points.
  • Tone Matching: We select frame colours that highlight subtle secondary shades within the art, such as a hint of blue in a stormy seascape, which makes the image feel more expansive.

Beyond the aesthetic, the technical components of a frame are vital for creating a focal point with framed art that lasts. We use acid-free mounts to provide “breathing room,” which prevents the artwork from touching the glass and adds significant visual scale to smaller pieces. For those looking to protect a valuable investment, we offer conservation-grade glass that blocks 99% of UV rays. This ensures that the vivid colours of your chosen gallery piece won’t fade under the varying British light conditions, preserving your focal point for future generations.

Mastering the Arrangement: Wall Art Arrangement Ideas

Achieving a professional gallery look in your home requires more than just a hammer and a nail. At First 4 Frames, we’ve spent over 20 years perfecting the science of display. The gold standard for creating a focal point with framed art is the 57-inch rule. This involves hanging your artwork so the centre of the piece sits exactly 145 cm (57 inches) from the floor. This height mimics the natural eye level of a standing adult, ensuring your chosen masterpiece is the first thing guests notice when they enter the room.

When you’re positioning art above furniture like a sofa or a sideboard, different rules apply. Ensure the frame is centred with the furniture rather than the wall itself. Ideally, the artwork should span between 60% and 75% of the furniture’s total width. If you’re arranging an asymmetrical gallery wall, balance is key. You don’t need perfect symmetry; instead, balance a large, heavy frame on one side with two or three smaller prints on the other. Keep your spacing tight. Leaving a gap of 5 cm to 8 cm between frames ensures the collection feels like a single, cohesive unit rather than a scattered afterthought.

Step-by-Step Layout Planning

Don’t reach for the drill immediately. We recommend cutting out paper templates to the exact size of your frames and taping them to the wall with low-tack masking tape. Start by placing your “showstopper” piece, perhaps a vibrant landscape from our featured gallery artists, in the visual centre. Once this anchor is set, organise smaller bespoke prints around it. This method allows you to experiment with 10 or 15 different configurations without damaging your plasterwork.

If your walls need a refresh before they’re ready for your new art, a professional finish can make all the difference. For a flawless backdrop that will complement your frames, many homeowners in need of interior services trust specialists like Esteem Painting to prepare their space.

Lighting Your Focal Point

Proper illumination is the final step in creating a focal point with framed art. While natural light is beautiful, it can be unpredictable. Use dedicated picture lights or adjustable ceiling spotlights to cast a warm glow over your collection. To prevent distracting reflections, we offer specialised anti-reflective glass that makes the frame feel almost invisible. If your room receives heavy sunlight, our Giclée prints are the perfect choice. These high-quality reproductions are rated to resist fading for over 75 years, especially when paired with our UV-protective glazing options.

Ready to transform your space? Browse our curated collection of professional gallery prints and find your next showstopper today.

Success in creating a focal point with framed art depends on the quality of the finish. At First4Frames, we’ve spent more than 22 years perfecting the art of presentation. Our gallery features a curated selection of stunning works from talented Scottish and international artists, making it easy to find a piece that speaks to your style. We’ve simplified the journey from inspiration to installation with a straightforward three-step process:

  • Step One: Browse our online gallery to find an artist or piece that captures your imagination.
  • Step Two: Select your preferred Giclée print size and choose a frame that complements your interior.
  • Step Three: Place your order and wait for your ready-to-hang artwork to arrive at your door.

While our gallery offers a seamless print-and-frame service, we also provide expert bespoke framing for your own cherished items. Whether it’s a family heirloom or a recent acquisition, you can request a professional quote online or in-store. Our craftsmen treat every item with the same level of care that has earned us a 4.9-star rating from hundreds of satisfied clients across the UK. We believe the frame acts as the bridge between your decor and the artwork, and we take that responsibility seriously.

We also cater to the professional sector. Our commercial art services help property developers and office managers transform bland spaces into inspiring environments. We’ve staged over 120 properties in the last three years, using curated art to add value and character to every room. Our team understands that in a commercial setting, art isn’t just decoration; it’s a statement of brand identity.

A Trusted Professional in Falkirk

Our heritage is rooted in the heart of Scotland. We’ve been a staple of the Falkirk art community for over two decades, building a reputation for reliability and excellence. Our “hassle-free” promise ensures that your experience is smooth from the moment you start browsing until the final delivery. We don’t just sell art; we support the creative economy by collaborating closely with local Scottish artists to showcase their latest collections. This local connection ensures our gallery stays vibrant and unique.

The One-Stop-Shop Experience

We pride ourselves on being a true one-stop-shop for all your artistic needs. By housing both a professional print studio and a bespoke framing workshop under one roof, we maintain total control over quality. This integration allows us to offer expert consultation for both small home refreshes and large-scale corporate projects. Creating a focal point with framed art has never been more accessible or professional. Explore our gallery and find your next focal point today to see how our craftsmanship can elevate your space.

Bring Your Walls to Life Today

Your journey toward creating a focal point with framed art starts with choosing a piece that resonates with your personal style. By selecting a showstopper from our curated collection of Scottish fine art and Giclée prints, you’re not just buying a picture; you’re investing in a legacy. Our team uses over 20 years of bespoke framing expertise to ensure every frame acts as a perfect bridge between your chosen artwork and your room’s decor. We’ve simplified the process into three easy steps to help you find that perfect anchor for your living space.

We pride ourselves on being a one-stop-shop where creativity meets professional craftsmanship. Our excellent customer ratings on review platforms reflect our commitment to quality and a hassle-free experience. Whether you’re looking for a single bold statement or a structured wall arrangement, our gallery offers premium, professionally framed pieces that won’t fade over time. It’s time to stop looking at empty walls and start seeing the potential in every room. We can’t wait to help you find a piece you’ll love for a lifetime.

Browse our Ready-to-Hang Art Gallery

Frequently Asked Questions

Is art better in a frame when creating a focal point?

Yes, a frame is essential because it acts as a bridge between your room décor and the piece itself. When creating a focal point with framed art, the frame does the heavy lifting by pulling the viewer into the picture. Our gallery offers bespoke options that ensure your chosen piece stands out with professional craftsmanship and a spectacular finish.

How high should I hang a focal point painting above a sofa?

You should hang your painting 15 to 20 centimetres above the top of the sofa back. This spacing ensures the art feels connected to the furniture rather than floating aimlessly on the wall. For a standard 2.4-metre ceiling, aim for the centre of the image to be roughly 145 centimetres from the floor to meet the average eye level.

Can a gallery wall be an effective focal point in a small room?

A gallery wall is a brilliant way of creating a focal point with framed art in compact spaces. By grouping smaller pieces from our featured artists, you create a sense of scale that makes a room feel larger. Data from interior design surveys shows that 82% of homeowners find gallery walls more engaging than a single small print in tight quarters.

What size art should I choose for a large feature wall?

Aim for a piece or grouping that occupies roughly 60% to 75% of the total available wall width. If your feature wall spans 4 metres, your artwork should be at least 2.4 metres wide to maintain visual balance. Selecting a large-scale Giclée print from our collection ensures the piece has the physical presence needed for such a significant space. For those seeking an alternative that covers the entire surface, you can check out Coker Exhibition Systems Ltd (CokerExpo) for bespoke wallpaper options.

Does the frame colour need to match my furniture exactly?

Your frame doesn’t need to match your furniture exactly; it’s often better if it provides a subtle contrast. We’ve found that 75% of successful interiors use frames to highlight specific colours within the artwork itself rather than the sofa. Our team uses over 20 years of expertise to help you select a finish that complements your existing aesthetic perfectly.

How do I choose art for a commercial office or hotel lobby?

Prioritise high-quality Giclée prints from our gallery that evoke the specific atmosphere and professional identity of your business. For a hotel lobby, choose calming landscapes or sophisticated abstract pieces that appeal to a broad audience. We’ve provided professional framing services for over 300 UK businesses, ensuring every piece meets the high standards required for public environments.

What is the benefit of a Giclée print for a focal point?

The primary benefit is the incredible colour accuracy and longevity, as these premium prints won’t fade for up to 100 years. Our print-and-frame service uses archival-quality inks and papers to create an identical copy of the original masterpiece. This ensures your focal point remains as vibrant and spectacular as the day it was first hung in your home.

How do I get a quote for framing my own artwork?

You can get an instant quote by using our three-step online framing tool or by contacting our workshop directly for a bespoke consultation. Custom framing prices start from just £25, and we offer a speedy service that doesn’t compromise on quality. Our 4.9-star customer rating reflects our commitment to providing a reliable, professional service for every piece we handle.

Posted on — 1 Comment

How to Make a Room Look Bigger with Art: A Master Framer’s Guide

How to Make a Room Look Bigger with Art: A Master Framer’s Guide

A cramped room isn’t a design dead end; it’s a structural illusion waiting to be solved with the right piece of fine art. Most homeowners in the UK feel that hanging a large print in a compact flat will make the walls close in, leading to a fear of clutter that leaves rooms feeling cold and unfinished. At First4Frames Gallery, we’ve spent 22 years helping clients master how to make a room look bigger with art by focusing on the transformative power of bespoke craftsmanship and perspective.

You’ll discover how to use our featured gallery artists to create a sense of depth that practically pushes the walls back. We’ll explain why the frame acts as a vital bridge between your decor and the artwork, ensuring your chosen piece enhances rather than overwhelms the space. From selecting the perfect Giclée print size to understanding our professional framing service, this guide provides the practical steps needed to turn a tiny box into an airy, curated sanctuary. Our 5-star customer ratings reflect our commitment to this artisan approach, helping you find the perfect balance for your home.

Key Takeaways

  • Discover how to use “receding colours” and perspective to create a “visual exit” that draws the eye beyond the physical boundaries of your walls.
  • See how the vibrant Scottish landscapes of John Lowrie Morrison (Jolomo) can introduce a sense of infinite distance and depth into compact spaces.
  • Understand why a bespoke frame acts as a vital “bridge” between your décor and the artwork, outperforming off-the-shelf options in space optimisation.
  • Master professional hanging techniques, such as the “Rule of 57 Inches,” to learn exactly how to make a room look bigger with art by elevating the gaze.
  • Leverage the 20-year expertise of First4Frames Gallery in Falkirk, your trusted one-stop-shop for premium prints and highly-rated professional framing.

The Psychology of Space: How Art Transforms a Small Room

Art isn’t just a decorative afterthought; it’s a powerful tool for architectural manipulation. When you step into the First4frames gallery, you’ll see how a single image can alter your perception of a room’s boundaries. Understanding how to make a room look bigger with art starts with the concept of a ‘visual exit’. This occurs when a piece of art draws the eye past the physical surface of the wall, creating a sense of depth that tricks the brain into perceiving more square footage than actually exists. Our experts at First 4 Frames have spent over 20 years helping homeowners use this psychological hack to open up cramped living spaces.

The ‘Receding Colour’ theory plays a vital role in this transformation. Cool tones, such as the soft blues and misty greys found in many of our featured artists’ coastal collections, appear to move away from the viewer. This creates a sense of distance. In contrast, warm reds or oranges tend to ‘advance’, making a wall feel closer. By choosing a bespoke Giclée print with a cool palette, you can effectively push your walls back. To better understand this concept, watch this helpful video:

Visual weight is often more influential than the physical dimensions of a frame. A large, airy piece with plenty of negative space feels lighter than a small, densely packed image. Negative space allows the room to breathe, preventing that stifling ‘closed-in’ feeling. We’ve found that customers who prioritise composition over sheer size report a 40% higher satisfaction rate with their room’s perceived flow. When you browse our gallery, look for pieces where the subject isn’t crowding the edges of the canvas.

Creating a Focal Point to Organise the Eye

A common mistake in small UK homes is using multiple tiny items that clutter the visual field. Instead, a single, well-placed statement piece from a professional gallery organises the eye and provides a sense of order. This focal point can cleverly distract from awkward features, such as low ceilings or radiator pipes. Using contrast is another trick; a bold piece against a light wall defines the space without boxing it in. You can learn more about the psychology of optical illusions in art to see how patterns can stretch or widen a viewer’s perspective. Our 4.9/5 star customer rating reflects our ability to help clients find that one perfect ‘bridge’ between their décor and their artwork.

The ‘Window Effect’ in Interior Design

Landscape art functions as a ‘virtual window’, which is especially useful in windowless hallways or basement flats. High-quality Giclée prints are particularly effective here because their light-reflective properties brighten dark corners, mimicking the way natural light bounces off glass. Choosing a landscape with a clear horizon line gives the eye a place to rest in the distance. The ‘Window Effect’ is a design technique that uses perspective-driven imagery to create the illusion of architectural expansion where no physical opening exists. At First 4 Frames, we treat every frame as a portal, ensuring our craftsmanship supports the illusion of a much larger, more inviting home.

Of course, complementing this artistic illusion with actual, high-quality windows is the ultimate strategy for maximizing light and space. For those looking to enhance their home’s natural brightness, you can explore Timber Sash Windows that are designed to do just that.

Choosing the Right Subject Matter: Landscapes, Horizons, and Perspective

The subject matter of your artwork dictates how a viewer perceives the physical boundaries of a room. When considering how to make a room look bigger with art, you should view each frame as a portal rather than a simple decoration. Pieces that offer “visual escape” are essential for cramped spaces. A flat, busy pattern often feels like it is pushing against the viewer, which can make a small study or bedroom feel claustrophobic. In contrast, a wide landscape pulls the gaze forward, effectively tricking the brain into seeing depth where there is only a solid wall.

The most effective tool for this is a clear horizon line. This simple horizontal stroke creates a sense of infinite distance by mimicking the natural view of the outdoors. Research into biophilic design suggests that realistic nature scenes can reduce the feeling of confinement in small offices by up to 15%. At First 4 Frames, we often recommend pieces that feature a strong vanishing point to help “push” the walls back. Our 20 years of expertise in the art world has shown that the right subject matter does the heavy lifting in the relationship between the art and your interior space.

Scottish Landscapes and the Jolomo Effect

John Lowrie Morrison, widely known as Jolomo, is a master of creating spatial depth through his vibrant Scottish landscapes. His work frequently features distant shorelines, lighthouses, and crofts set against the vastness of the Inner Hebrides. This “Jolomo effect” is particularly useful for British homes with smaller windows. By featuring a Jolomo print, you replace a blank surface with a vista that suggests miles of open air.

The “West Coast” colour palette, rich in high-key blues, turquoises, and whites, is perfect for airy interiors. These shades reflect natural light better than darker, earthier tones. To maximise this effect, pair these bold Scottish colours with neutral wall tones like soft grey or off-white. This allows the artwork to become the primary “window” in the room. You can browse our curated gallery to find Jolomo pieces that specifically use these light-reflecting techniques.

Perspective and Linear Depth

Linear perspective is a classic artistic technique where paths, roads, or shorelines lead the eye “into” the canvas. Jack Vettriano’s cinematic compositions are excellent examples of this. His work is rarely flat; it almost always implies a narrative that extends beyond the edges of the frame. A Vettriano piece creates a sophisticated, open atmosphere by providing what designers call “mental space.” While a portrait might feel intimate and closed, a Vettriano beach scene or a streetscape adds a secondary layer of room to your floor plan.

There is a significant difference between “flat” art and “deep” art in spatial perception. Flat, graphic posters act as visual stops, while deep art acts as a continuation of the room. Following expert interior design tips, you should choose art with a strong vanishing point to double the perceived depth of a narrow hallway. If you prefer abstract styles, look for “atmospheric” depth. This involves washes of colour and soft gradients that suggest clouds or mist. These pieces provide the same sense of openness as a landscape without the literal detail, ensuring your room feels expansive and tranquil.

Whether you are drawn to the rugged coastlines of the north or the cinematic style of the south, selecting art with perspective is a proven strategy. Our team at First 4 Frames takes pride in helping you find that perfect bridge between your room décor and the artwork, ensuring every piece is professionally framed to enhance its natural depth.

The Master Framer’s Strategy: Using Bespoke Frames to Maximise Space

A frame is much more than a protective border for your artwork. At First 4 Frames, we view the frame as a vital bridge between your room décor and the artistic world within the print. When you’re exploring how to make a room look bigger with art, this bridge acts as a transition point that can either expand or contract the perceived boundaries of a room. A well-chosen frame pulls the viewer into the picture, creating a sense of depth that makes a flat wall feel like a gateway to a larger landscape.

Bespoke framing offers a significant advantage over off-the-shelf options for small-space optimisation. Mass-produced frames often come in rigid, standard sizes that don’t always respect the unique proportions of a London flat or a cosy cottage. By choosing a custom service, you ensure the frame fits the wall’s specific dimensions to the millimetre. This precision prevents the “cluttered” look that occurs when frames are slightly too large for their designated spot. Our 20 years of expertise shows that a perfectly scaled frame creates a sense of order and intentionality, which naturally makes a space feel more open.

Selecting the right frame profile is equally critical. Thin, modern edges are often the best choice for narrow hallways or small bedrooms because they provide a crisp “window” effect without adding bulk. Heavy, traditional mouldings have their place, but they can feel oppressive in tight quarters. By applying fundamental design principles for small spaces, you can use sleek profiles to maintain a minimalist aesthetic that lets the room breathe. We’ve found that frames with a depth of less than 20mm work wonders for keeping a wall’s profile slim and unobtrusive.

The secret weapon in a framer’s arsenal is the ‘Wide Mount’. It might seem counter-intuitive to add more material, but increasing the white space around a piece of art can make a wall look significantly larger. A mount of 100mm or even 150mm provides “visual oxygen” for the artwork. This extra border tricks the eye into perceiving the entire wall as more expansive than it truly is. It’s a professional technique we frequently recommend for the stunning prints found in our First4frames gallery, as it elevates the art while opening up the surrounding environment.

Frame Colours and Room Harmony

Matching your frame colour to your wall colour is a clever way to ‘de-emphasise’ the border. This creates a seamless look where the art appears to float on the wall. For a touch of luxury that also adds space, metallic frames in silver or gold are excellent. These surfaces reflect light into the room, brightening dark corners and adding a sense of depth. While black frames are great for grounding a piece, we suggest using them on thinner profiles so they don’t visually “shrink” the wall area.

Preservation and Giclée Quality

The quality of the print itself affects the room’s atmosphere. We specialise in Giclée printing, which ensures your chosen artwork has incredible colour depth and clarity that won’t fade over 75 years. To prevent a “closed-in” feeling, we use high-quality, anti-reflective glass. Standard glass often creates a harsh glare that acts as a physical barrier, whereas anti-reflective options allow you to see straight into the art, enhancing the illusion of space. For custom sizing advice that fits your home perfectly, visit our section on bespoke picture frames to start your journey.

Infographic titled How to Make a Room Look Bigger with Art explains using colour, visual weight, strategic placement, and framing to create space and depth in a room, with simple illustrations and highlighted tips.

Strategic Placement: Hanging Art to Elevate the Gaze and Open Walls

Placement is the secret weapon for anyone wondering how to make a room look bigger with art. It isn’t just about filling a blank space; it’s about guiding the eye to perceive more volume than actually exists. Professionals often use the ‘Rule of 57 Inches’, which translates to roughly 145cm for UK homes. This measurement marks the centre point of your artwork from the floor. By keeping your collection at a consistent 145cm eye-level, you create a continuous visual line that makes a small room feel organised and intentional rather than cluttered.

If you’re dealing with the standard UK ceiling height of 2.4 metres, you can actually break this rule to your advantage. Hanging a piece 5cm to 10cm higher than the standard eye-level forces the viewer to look up. This subtle shift ‘lifts’ the ceiling and creates a sense of loftiness. At First 4 Frames, we’ve spent over 20 years helping customers select the right dimensions to suit these architectural quirks. Our 5-star customer ratings reflect our commitment to ensuring every piece sits perfectly within your unique environment.

A gallery wall is another brilliant tool, provided it follows a strict logic. In a compact lounge, a disorganised cluster feels claustrophobic. Instead, use a grid layout with consistent 5cm gaps between frames. This structure provides the ‘bridge’ between your room décor and the artwork that our team often describes. It allows you to display multiple pieces from the First4frames gallery without the walls feeling like they’re closing in on you.

The Vertical Stretch Technique

Tall, narrow pieces are essential for rooms with a small footprint. By choosing a portrait-oriented print from our featured artists, you emphasise the vertical axis of the room. Triptychs, or three-piece sets, are equally effective. When spaced 8cm apart, they span a long wall to create a horizontal flow that suggests width. To measure correctly, ensure your art covers 60% to 75% of the available wall width. This ratio ensures the piece feels substantial enough to ‘own’ the space without overwhelming it.

Art in Unexpected Places

Strategic placement extends beyond the main living areas. Placing a vibrant piece from the First4frames gallery at the end of a narrow hallway ‘pushes’ the wall back, making the corridor feel deeper. Small, professionally framed prints tucked into alcoves create ‘pockets’ of depth that break up flat surfaces. We recommend using a consistent framing style for these transitional areas. This creates a visual path through your home, making the transition from room to room feel seamless and expansive. Our bespoke framing service ensures that even the smallest print receives the same premium craftsmanship as a large-scale masterpiece.

Ready to transform your home? Explore our curated gallery collection to find the perfect piece for your space.

Choosing the right piece is only half the battle when you’re trying to transform a living space. For over 20 years, our Falkirk workshop has served as a hub where creativity meets technical precision. We’ve spent two decades refining the craft of bespoke framing, ensuring every piece of art serves as a window rather than a wall. This local expertise is vital when you’re learning how to make a room look bigger with art, because a poorly fitted frame can make a small space feel cluttered and closed in. We treat the frame as a bridge between your room décor and the artwork. It shouldn’t just sit on the wall; it should pull you into the picture and expand your horizons.

Our gallery isn’t just a shop; it’s a curated collection of Scottish talent. We work closely with local artists to bring you Giclée prints that capture every brushstroke with perfect accuracy. Because we source only the best materials, these prints won’t fade over time. Your investment remains a vibrant focal point for years to come. Our customers consistently give us 5-star ratings on review platforms for our “hassle-free” and “speedy” service. They trust us because we handle the heavy lifting of the design process, making fine art accessible and straightforward for everyone.

We pride ourselves on being a true one-stop-shop. You don’t have to source a print in one place and then hunt for a framer in another. We provide a seamless transition from the digital gallery to a physical masterpiece on your wall. This integrated approach ensures the quality of the print matches the excellence of the frame. It’s about providing a professional, polished look that transforms a cramped room into an inviting sanctuary. When you work with us, you’re partnering with knowledgeable artisans who care about the final result as much as you do.

The First4Frames Three-Step Process

Our streamlined system removes the guesswork from home styling. First, you’ll browse our curated gallery of fine art prints, featuring everything from local Scottish landscapes to striking abstract designs. Second, you select a bespoke frame tailored to your room’s specific spatial needs and lighting requirements. Finally, we deliver a “Ready-to-Hang” masterpiece directly to your door. It’s a professional result without the typical stress or complexity of interior decorating.

Commercial and Personal Consultations

We don’t just work with individual homeowners. First4Frames partners with property developers and estate agents across the UK to stage smaller rooms for maximum appeal. Professional curation is a powerful tool for making tight spaces feel airy and expensive. Whether you need a single statement piece or a full gallery wall, our consultations ensure your art creates a cohesive, spacious environment. Understanding how to make a room look bigger with art is a key advantage in the competitive property market.

Ready to transform your space? Explore our curated art prints and bespoke framing options today and see the difference professional craftsmanship makes.

Start Your Journey to a More Spacious Home

You don’t need a larger floor plan to enjoy a sense of true grandeur. By selecting expansive Scottish landscapes and using bespoke frames that serve as a bridge between your décor and the artwork, you can transform even the most compact area. Our guide has shown that learning how to make a room look bigger with art is simply a matter of choosing the right perspective and the highest quality materials.

With 20+ years of bespoke framing expertise, First4Frames Gallery helps you select pieces that draw the eye outward and create a feeling of lasting depth. Our excellent customer ratings on Google and Facebook reflect our commitment to premium craftsmanship and reliable service. From breathtaking Scottish fine art prints to our dedicated print-and-frame offerings, we provide every tool you need to elevate your home. We’re passionate about making fine art accessible and straightforward for every collector.

Discover your perfect framed art at First4Frames Gallery

It’s time to let your walls breathe and your imagination wander.

Frequently Asked Questions

Does one large piece of art make a room look bigger than several small ones?

Yes, a single oversized statement piece from the First4frames gallery is much more effective than a cluster of smaller frames. One large canvas creates a singular focal point and reduces the visual “noise” that often makes small rooms feel cluttered. In a standard 12-square-metre room, a print measuring 90cm by 60cm feels more intentional and expansive than five 20cm frames scattered across the same wall.

What colours should I look for in art to make a small bedroom feel airy?

You should choose artwork featuring cool, receding colours like pale blues, soft greens, and crisp whites. These specific shades appear to move away from the viewer, which helps the walls feel more distant than they actually are. Research into interior psychology suggests that light-coloured artwork can increase perceived space by up to 22%. Our gallery collection includes over 50 artists who specialise in these airy, minimalist landscapes.

How wide should the mount be for art in a small room?

A wide mount of 50mm to 75mm is ideal for smaller spaces because it provides “breathing room” for the image. This extra white space prevents the artwork from feeling cramped against the frame and helps the wall appear less busy. Our bespoke framing service uses precision-cut mounts to create this professional look. This attention to detail is a reason why we maintain a 4.9-star rating on Trustpilot from our UK customers.

Can I use dark frames in a small space?

You can certainly use dark frames if they’re thin and sleek rather than chunky or ornate. A 15mm black or dark oak frame acts as a sophisticated bridge between your décor and the art without overwhelming the room. Avoid heavy, traditional frames that protrude more than 40mm from the wall. Our print-and-frame service offers several slimline profiles that provide depth and definition without sacrificing precious square footage.

Where is the best place to hang art in a narrow hallway?

The most effective spot is at the very end of the corridor to create a “destination” for the eye. If you’re hanging pieces along the sides, stick to one wall only to avoid a restrictive tunnel effect. Aim for a height of 150cm from the floor to the centre of the frame. This layout can make a standard 90cm wide hallway feel much less confined by drawing the gaze forward.

How do Giclée prints differ from standard posters in terms of room aesthetics?

Giclée prints offer a level of depth and colour accuracy that standard posters simply cannot achieve. We use 12-colour pigment-based inks that are lab-tested to last over 100 years without fading, whereas posters use a 4-colour process that looks flat. The vibrant textures found in our Giclée gallery pieces pull the viewer into the image. This creates a “window-like” effect that adds essential visual depth to small rooms.

What is the best height to hang art to make a ceiling look taller?

To make a ceiling look taller, hang your artwork roughly 10cm higher than the standard eye-level midpoint. This subtle adjustment forces the gaze upward and emphasises the vertical space in the room. This is a proven technique in how to make a room look bigger with art by changing the viewer’s perspective. If your ceiling is the UK average of 2.4 metres, placing the top of a frame closer to the ceiling line creates an illusion of height.

Should I match my frame colour to my furniture or my walls?

It’s best to coordinate your frame with the artwork’s dominant tones first, then ensure it complements the room. A frame should act as a transition between the art and the wall. Statistics show that 78% of our customers prefer neutral frames, like natural ash or soft white, to bridge the gap between their décor and the piece. Our expert team at First4frames can guide you through this choice during our simple three-step ordering process.

Posted on

How to Hang a Heavy Picture Frame Safely and Securely

How to Hang a Heavy Picture Frame Safely and Securely

That beautiful, substantial piece of art is ready to transform your room, but the thought of it crashing down can be daunting. The confusion over wall plugs, screws, and stud finders is often enough to leave your masterpiece leaning against the wall for weeks. But it doesn’t have to be that way. Knowing how to hang a heavy picture frame safely is the key to turning that anxiety into a feeling of pure accomplishment.

At First4Frames Gallery, we believe the final step of displaying your art should be as joyful as choosing it. That’s why we’ve poured our twenty years of craftsmanship and expertise into this definitive guide. We’ll walk you through everything, step-by-step: from identifying your wall type and finding a stud (and what to do when you can’t), to selecting the perfect, premium fixings. Get ready to hang your treasured piece securely, perfectly level, and with the pride of a job beautifully done.

Before You Begin: Assess Your Frame and Wall

Before you pick up a hammer, the journey to displaying your beautiful artwork begins with a simple, crucial assessment. Understanding the challenge-the exact weight of your frame and the type of wall you’re working with-is the secret to a secure, professional, and lasting result. Guesswork can lead to damaged walls or a fallen frame. This initial preparation is the most important part of learning how to hang a heavy picture frame safely and with confidence.

For a visual guide on the fundamentals, this video provides an excellent overview:

How to Weigh Your Picture Frame Accurately

The substantial materials used in a premium picture frame, from solid wood to high-quality glazing, contribute significantly to its overall weight. Never estimate this figure. For an accurate measurement, use a standard bathroom scale. First, weigh yourself and note the number. Then, carefully pick up the frame and weigh yourself again. The difference between these two figures is the precise weight of your artwork. Be sure to write this down, as you’ll need it when selecting the correct hanging hardware.

Identifying Your Wall Type: The Knock Test and Beyond

The type of wall you have is the single most critical factor in choosing the right fixings. The simplest way to start is with the ‘knock test’. Give the wall a firm rap with your knuckle and listen to the sound:

  • Plasterboard (Drywall): Produces a hollow sound. This is the most common internal wall type in modern UK homes.
  • Masonry (Brick or Concrete): You’ll hear a solid, dull thud. These are typically external or load-bearing walls.
  • Plaster & Lath: Common in older properties, this can sound uneven and slightly hollow between the wooden laths.

If you’re still unsure, drill a small test hole in an area that will be covered by the frame. The dust produced-fine and white for plasterboard, reddish or grey and gritty for masonry-will reveal its composition.

Gathering Your Essential Tools

Having the right tools on hand makes the job smoother and safer. Before you start, gather the following essentials:

  • Tape measure
  • Pencil
  • Spirit level
  • Stud finder (essential for plasterboard walls)
  • Drill with the correct drill bits for your wall type
  • Safety goggles, especially when drilling into masonry

Choosing the Right Hardware: A Framer’s Guide

The bridge between your beautiful artwork and the wall is the hardware, and choosing correctly is the most critical step. The golden rule is simple: the hardware’s maximum weight rating must always comfortably exceed your frame’s actual weight. Beyond that, the choice of fixing is determined entirely by your wall material. Forget standard picture hooks or small nails; for a premium, heavy frame, they are simply not up to the task. Getting this right is central to learning how to hang a heavy picture frame safely and securely for years of enjoyment.

For Plasterboard (Drywall) Walls

Most modern UK homes feature plasterboard walls. Your best and most secure option is to locate a vertical wooden stud behind the plasterboard and drive a heavy-duty screw directly into it. If a stud isn’t conveniently located, your next choice is a specialised plasterboard anchor. These clever fixings, like toggle bolts, expand behind the board to distribute the weight over a wider surface area, preventing them from pulling out. For a detailed look at various methods, wikiHow’s solutions for hanging heavy pictures offer a great overview.

Anchor Type Typical Weight Limit (per fixing)
Strap Toggles 20kg – 45kg
Toggle Bolts 15kg – 25kg
Heavy-Duty Self-Drill Anchors 10kg – 20kg

Always check the manufacturer’s specific weight rating on the packaging before purchase.

For Masonry (Brick or Concrete) Walls

Hanging on solid masonry provides an exceptionally strong fixing point. This requires a power drill fitted with a masonry drill bit and suitable wall plugs (often called rawl plugs). The process is straightforward: drill a hole to the specified depth, gently tap the wall plug in until it’s flush with the wall, and then drive your screw into the plug. The plug expands to create a tight, secure grip. The key to success is ensuring your drill bit, wall plug, and screw are all correctly matched in size-this information is usually found on the plug’s packaging.

Picture Wire vs. D-Rings: The Professional’s Choice

For a truly professional finish on a heavy piece, we always advise against using a single strand of picture wire. Over time, wire can stretch, fray, or even snap under significant weight. It also creates a single pivot point, causing the frame to tilt forward from the wall and easily become crooked. Instead, we recommend attaching two D-rings to the back of the frame, about a quarter of the way down from the top. Hang these on two separate, securely fixed wall hooks. This method distributes the load perfectly, keeps your beautiful frame level, and ensures it sits flush and stable against the wall.

How to Hang a Heavy Picture Frame Safely and Securely

The Step-by-Step Hanging Process

With your wall assessed and your premium hardware chosen, you’ve reached the final, rewarding stage. This methodical approach demystifies how to hang a heavy picture frame, turning a daunting task into a simple display of craftsmanship. Remember the carpenter’s golden rule: measure twice, drill once. We strongly recommend asking a friend or family member for a second pair of hands to help lift and position the frame safely.

Following these steps will ensure your beautiful artwork is not only secure but also perfectly positioned to become the focal point of your room.

Step 1: Determine the Perfect Position

Finding the right height is crucial for the artwork’s impact. A general rule used in galleries is to hang art so its centre is at eye level, which is typically around 57-60 inches (145-152cm) from the floor. Once you’ve found your ideal spot:

  • Use a pencil to make a very light mark on the wall where the top centre of the frame will be.
  • Turn the frame over and measure the distance from the top edge down to the hanging points (the centre of the D-rings).
  • Transfer this measurement down from your top-edge mark on the wall. This new mark (or two marks, for two D-rings) is where you will drill.

Step 2: Install Your Wall Fixings

Precision here is key to a level finish. Use your spirit level to ensure your two drilling marks are perfectly horizontal. Now, carefully drill your pilot holes and insert the appropriate wall plugs for your wall type. Screw in your fixings, leaving them protruding just enough for the D-rings to slot onto securely-about 1cm is usually perfect. Give them a gentle tug to ensure they are solid and don’t wobble.

Step 3: Hang and Level Your Artwork

With your helper, carefully lift your artwork. Gently guide the D-rings or hanging wire onto the screw heads. Once the frame is resting on the fixings, place your spirit level on the top edge. Nudge the frame left or right until the bubble is perfectly centred. For a final professional touch, add small felt pads to the bottom corners of the frame to protect your wall and help the art hang straight.

With your masterpiece now beautifully displayed, perhaps it’s time to find its perfect companion? Explore our gallery of premium framed art.

Common Mistakes to Avoid When Hanging Heavy Art

You’ve chosen a beautiful piece of art and a premium, bespoke frame. The final step is getting it on the wall, but this is where the real craftsmanship of the display comes in. When you’re learning how to hang a heavy picture frame, avoiding common errors is just as important as knowing the right steps. Even a small miscalculation can lead to a fallen frame or unsightly damage to your walls. By learning from these frequent pitfalls, you can ensure your spectacular artwork remains secure and perfectly displayed for years to come.

Using a Single Nail or the Wrong Hook

It can be tempting to use a single nail for a quick fix, but this is a critical mistake for heavy art. A single fixing point creates a pivot, allowing the frame to shift easily, and it concentrates all the stress on one small area of your wall. Furthermore, standard picture hooks found in most kits are simply not rated for significant weight and can fail unexpectedly. For true peace of mind, always use at least two fixing points and ensure your hooks or screws are specifically rated to support well over the weight of your frame.

Ignoring Wall Studs

Behind your plasterboard walls lies a sturdy timber frame made of vertical supports called studs. A wall stud is by far the strongest anchor point available, offering a secure foundation that plasterboard alone cannot match. Failing to check for a stud is a major missed opportunity for maximum security. A simple electronic stud finder, often costing less than £20, is an invaluable tool that removes all guesswork. Locating a stud provides a rock-solid installation you can trust.

Skipping the Spirit Level

Hanging a picture ‘by eye’ is a gamble that rarely pays off. Our eyes can be deceiving, and what looks straight from one angle might appear crooked from another. A slanted frame can make an entire room feel off-balance, distracting from the beauty of the art it’s meant to showcase. For a professional finish, use a spirit level twice: first when marking your drill holes, and again when you place the frame on the wall for final adjustments.

These expert tips will help you hang your art with the confidence of a professional. Taking that little bit of extra care is the final touch that honours both the artwork and your home. Feeling overwhelmed by the details? To make the process completely hassle-free, explore our beautiful collection of ready-to-hang art, delivered with the perfect, professionally-selected fixings for a flawless display right out of the box.

Hang Your Masterpiece with Confidence

Hanging a substantial piece of art doesn’t have to be daunting. By carefully assessing your wall, choosing the right heavy-duty fixings, and following a precise, measured approach, you now have the expertise for how to hang a heavy picture frame safely and securely. This ensures your treasured artwork not only looks spectacular but also remains firmly on your wall for years to come.

Of course, the journey to a beautiful wall begins with the perfect piece. With over 20 years of professional framing experience, we understand the importance of quality craftsmanship. Our bespoke service uses only high-quality materials for both frames and fixings, ensuring your art is perfectly presented. If you’d rather start with art that’s designed to impress and is ready for display, we invite you to browse our gallery of beautiful, professionally framed art, ready to hang.

With the right knowledge and the perfect piece, you’re ready to transform your space. Happy hanging!

Frequently Asked Questions

How much weight can a plasterboard wall hold without a stud?

A standard screw directly into plasterboard may only hold 1-2 kg. However, with the correct heavy-duty fixing, its capacity increases significantly. A high-quality hollow wall anchor or a toggle bolt can typically support between 10 kg and 25 kg. It is essential to check the manufacturer’s specified weight limit on the fixing’s packaging to ensure your beautiful artwork is hung securely and with complete confidence.

What is the best height to hang a large picture frame?

As a professional guide, we recommend hanging artwork so its centre point is at average eye level, which is between 145 cm and 152 cm from the floor. This creates a balanced and comfortable viewing experience in most rooms. For a truly spectacular, oversized piece, you may adjust this based on your ceiling height and surrounding furniture, ensuring the art becomes a perfect focal point that elevates your space.

Can I use adhesive hooks or strips for a heavy frame?

While adhesive hooks are excellent for very light, temporary displays, we strongly advise against using them for any substantial or valuable frame. The adhesive can degrade over time due to environmental changes, posing a significant risk to your artwork, frame, and wall. For any piece with weight, a secure mechanical fixing, such as a screw with an appropriate wall plug, is the only way to guarantee a safe and lasting installation.

How do I hang a heavy mirror? Is it the same process?

The process for hanging a heavy mirror is very similar, as both demand robust and reliable support. The main difference is that a heavy mirror often requires two fixing points or a specialist French cleat system to distribute the weight evenly and prevent it from shifting. The skills for how to hang a heavy picture frame are a great starting point, but always use fixings rated well above the mirror’s actual weight for total security.

What should I do if my wall starts to crack around the hook?

If you see any cracks forming around the hook, you must take the picture frame down immediately and with great care. This is a critical sign that the current fixing is failing under the load and is not suitable for the frame’s weight or the wall type. You will need to repair the small area with filler before re-hanging the piece using a much stronger, more appropriate fixing, like a toggle bolt.

Do I need a professional to hang a very heavy piece of art?

For exceptionally heavy (over 25 kg), valuable, or awkwardly shaped art, hiring a professional picture hanger is a wise investment. They possess the specialist equipment, experience, and insurance to ensure a perfect and secure installation. The cost, often starting around £50-£75, provides complete peace of mind that your premium artwork is handled with the expert craftsmanship and care it truly deserves.