Posted on

Custom Multi-Aperture Photo Frames: The Ultimate Design Guide

Your most cherished memories deserve more than a digital folder, but the thought of arranging them can be daunting. Will they look cluttered? What if the measurements are wrong? Designing the perfect gallery wall often feels so complex that many of us never start. But what if you could bypass the complexity and create a stunning, professional display with ease? With multi-aperture photo frames custom-designed for your story, you can transform a collection of moments into a single, beautiful work of art.

Forget the guesswork and the fear of a messy result. This is your ultimate design guide to creating a bespoke frame that is uniquely yours. We’ll walk you through every simple step, from choosing a spectacular layout that tells your story to selecting the perfect mount and frame colours with confidence. Prepare to turn your precious photos into a spectacular, professionally crafted centrepiece for your home.

What is a Custom Multi-Aperture Frame (And Why You Need One)

A multi-aperture frame is more than just a way to display photos; it’s a canvas for your memories. Unlike a standard frame that holds a single image, a multi-aperture design uses one beautiful frame to house a collection of pictures, each visible through its own window, or ‘aperture’. This transforms scattered snapshots into a cohesive visual story, creating a powerful, curated display that a series of individual frames simply cannot match. It’s the perfect solution for showcasing family milestones, a spectacular travel series, or the highlights of a special event like a wedding.

To see how these elements come together, this short video provides a great visual example:

Beyond the Single Photo: The Art of Visual Storytelling

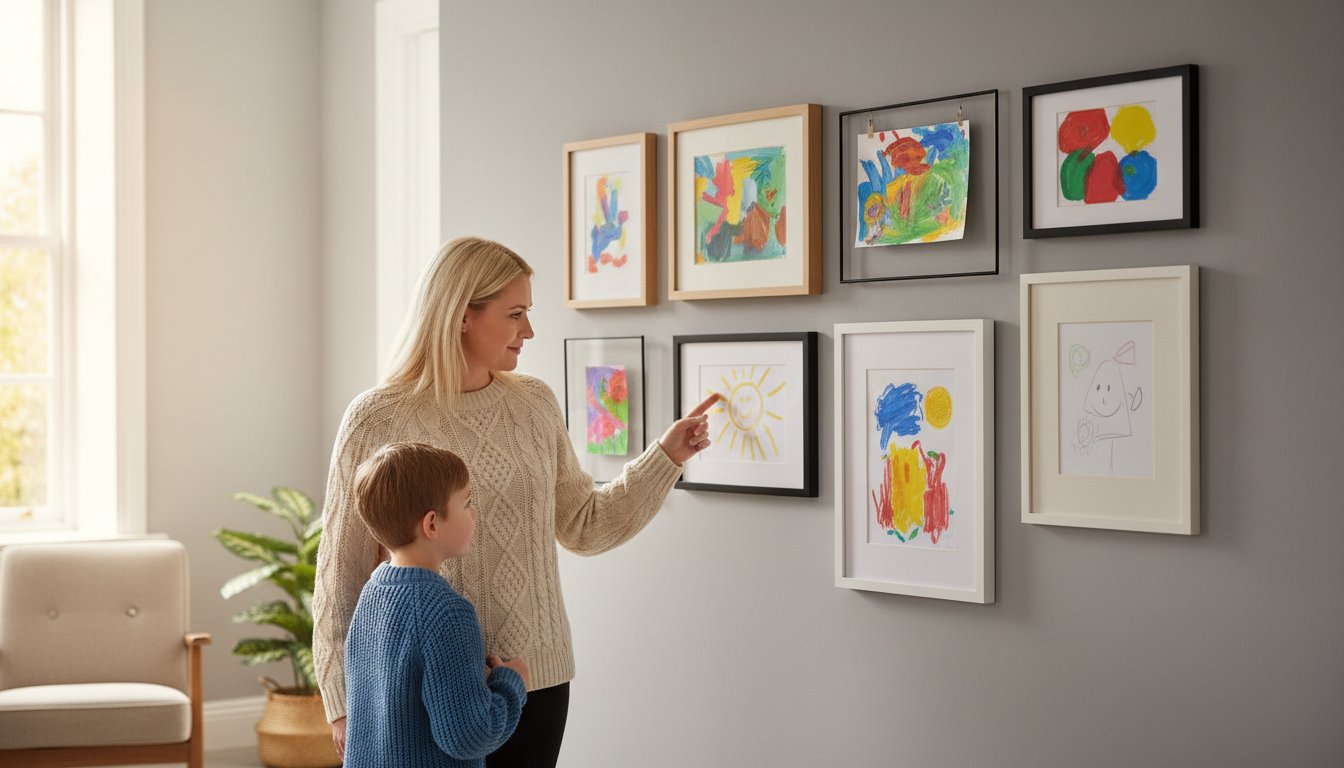
The true magic of a multi-aperture frame lies in its narrative power. By grouping photos, you can tell a story at a glance-a baby’s first year, from newborn to first steps; a holiday adventure, from cityscapes to sunsets; or a collection of your favourite family portraits through the years. It’s also a spectacular way to display a collection of small art prints or cherished postcards. This makes it an incredibly thoughtful and personalised gift, capturing a shared history in one beautifully crafted piece.

Custom Bespoke vs. Off-the-Shelf: A Quality Comparison

While off-the-shelf multi-photo frames are available, they often come with limitations. You’re restricted to standard photo sizes and fixed, uninspired layouts. With multi-aperture photo frames custom made by artisans, the possibilities are endless. You choose the exact dimensions for each photo, design a unique layout, and select from premium materials. This bespoke approach ensures not only a perfect fit for your images and décor but also superior quality and longevity, protecting your precious memories for years to come.

The Anatomy of a Multi-Aperture Frame

Understanding the components helps appreciate the craftsmanship involved. Every professional picture frame consists of several key elements working in harmony. The moulding is the outer frame, the glazing is the protective glass or acrylic, and the backing board secures everything in place. The star of this design, however, is the mount (or mat board). This is where we precision-cut the ‘apertures’-the individual windows that showcase each of your photos, creating a clean, professional, and unified display.

Designing Your Layout: A Step-by-Step Guide to Visual Storytelling

A beautiful display begins long before the hammer meets the nail. The secret to a spectacular result lies in a clear plan. Far from being intimidating, designing the layout for your multi-aperture photo frames custom made for your space is a rewarding creative process. This guide demystifies the steps, helping you transform a collection of individual photos into a single, harmonious piece of art that tells your unique story with balance and a professional finish.

Step 1: Curate Your Photos & Find a Theme

The first step is to choose your story. Select a group of photos that share a consistent theme, whether it’s a family holiday, your wedding day, or a series of architectural shots. Consider a unified colour palette for a cohesive look. You might choose all black and white images for a timeless, classic feel, or photos with similar warm or cool tones. Most importantly, ensure you are using high-resolution digital images. This prevents a blurry or pixelated finish, honouring your memories with the clarity they deserve. Choosing your best photos means you’ll want to protect them for years to come, which is why we always recommend using archival-quality materials for mounts and glazing.

Step 2: Choosing a Layout Style

Once you have your photos, it’s time to arrange them. Think about the overall feeling you want to convey. A quick sketch on paper can help you visualise the final piece before you commit. Common layout styles include:

  • Symmetrical Grid: Classic, orderly, and perfect for displaying images of the same size and orientation. This creates a clean, formal balance.
  • Asymmetrical/Collage: A more dynamic and informal style that works beautifully with a mix of photo sizes and orientations. It adds energy and a modern touch.
  • Linear/Timeline: Ideal for telling a story chronologically, such as a baby’s first year or the key moments from an event.

Step 3: Mastering Spacing & Balance

The final touch of craftsmanship comes from mastering the space around your photos. In professional framing, we consider two key areas. The ‘border’ is the space between the outer edges of your photos and the frame itself. The ‘gutter’ is the space between each individual photo aperture. For a clean, polished look, always keep the gutter spacing consistent. A popular design technique is to use a ‘weighted’ bottom border, making the mount slightly wider at the bottom. This adds visual weight and prevents the composition from feeling like it’s falling, creating a perfectly balanced, gallery-worthy display for your multi-aperture photo frames custom design.

Selecting Materials: A Framer’s Guide to Mounts, Mouldings & Glazing

Once you’ve perfected the layout of your photos, the next step is where true craftsmanship comes to the forefront. Selecting the right materials is the bridge between your artwork and your décor; it’s the process that transforms a good design into an exceptional, gallery-quality piece. At First4Frames, we use only premium, hand-selected materials to ensure your frame is not only beautiful but also built to last, protecting your cherished memories for years to come.

The Picture Mount: Your Artwork’s Breathing Room

A picture mount, or matboard, serves two vital purposes. Visually, it provides “breathing room,” creating a clean separation between your photos and the frame, which helps each image stand out. Functionally, it keeps the photos from touching the glazing, protecting them from potential moisture damage. You can choose from crisp whites to make colours pop, subtle creams for a softer, classic feel, or even bold colours for a dramatic statement. For ultimate protection, we use conservation-grade, acid-free boards, which follow professional preservation matting and framing guidelines to prevent yellowing and fading. Consider a double mount for an added layer of depth and sophistication.

Choosing Your Frame Moulding: Style & Substance

The moulding is the body of your frame, defining its character and style. The choice should complement both your photographs and your home’s interior. Our bespoke service offers a wide range of high-quality, durable options:

  • Classic Wood: From warm oak to rich walnut, wooden frames are perfect for traditional, rustic, or Scandinavian-inspired décor.
  • Sleek Aluminium: With clean lines and a contemporary finish, metal frames are ideal for modern, minimalist, or industrial spaces.
  • Ornate Styles: Swept or decorative mouldings add a touch of timeless elegance, perfect for formal portraits or classic art collections.

The width and profile of the moulding also play a significant role. A slim profile offers a subtle, modern look, while a wider, more substantial frame makes a bold statement. The perfect moulding transforms your collection of photos into a cohesive piece of art, which is why our multi-aperture photo frames custom-designed service focuses so heavily on this detail.

Selecting the Right Glazing (Glass)

Glazing is your photos’ first line of defence against the elements. While often overlooked, choosing the right glass is a crucial investment in preservation. We offer several premium options:

  • Standard Float Glass: A high-quality, clear glass that provides excellent clarity for most environments.
  • Anti-Glare Glass: This diffused glass is expertly treated to scatter reflections, making it perfect for brightly lit rooms or spaces with direct light sources.
  • UV-Protective Glass: Essential for irreplaceable photos or artwork, this glazing blocks up to 99% of harmful ultraviolet rays, the primary cause of fading.

Investing in superior glazing ensures your memories remain as vibrant as the day they were captured. Explore our online gallery to see how these beautiful materials come together in our finished frames.

Inspiration Gallery: Ideas for Your Custom Multi-Photo Frame

A custom multi-photo frame is more than just a display; it’s a canvas for your stories. The beauty of multi-aperture photo frames custom-designed for you is their ability to tell a complete narrative in a single, elegant piece. To spark your imagination, we’ve gathered some of our favourite ideas to show you just how versatile these beautiful frames can be.

The Family Timeline

Chart the beautiful journey of your family by combining cornerstone moments into one display. Imagine a wedding photo, a first baby picture, and a recent family portrait flowing together. A linear or stepped layout beautifully illustrates this progression through time. We recommend a classic, premium wood frame, like oak or walnut, to lend a warm, timeless feel that honours these precious memories.

The Travel Chronicle

Don’t let your incredible travel photos stay hidden on a hard drive. Group together a collection of shots from a single spectacular holiday or a series of global adventures. A dynamic, overlapping collage-style layout captures the energy and excitement of your travels. Pair these vibrant images with a simple, slim black or white frame to make the colours truly pop, creating a stunning visual diary on your wall.

Baby’s First Year

Celebrate every milestone with a frame dedicated to your baby’s first twelve months. This is a truly cherished keepsake, perfect for a nursery or as a heartfelt gift for grandparents. A clean, symmetrical grid with twelve apertures provides a wonderfully organised look. For a gentle aesthetic, consider a soft off-white mount paired with a light, natural wood or a simple painted white frame.

For many of us, pets are cherished family members, and their story is one worth telling. From their first days at home to their senior years, a multi-aperture frame is a beautiful way to showcase their journey. Capturing these happy moments goes hand-in-hand with providing the best care, including premium nutrition to keep them healthy and vibrant for every photo. For example, pet owners are increasingly turning to services that provide fresh, human-grade meals, like those offered by dogfood.com.my, to support a long and happy life.

The Pet’s Story

Artistic & Themed Collections

Multi-aperture frames are also a perfect way to create a gallery wall in miniature. Showcase a personal photography project, such as a series of black-and-white architectural shots, dramatic local landscapes, or botanical close-ups. You can even use a frame to display a collection of small prints from a favourite artist. The right presentation turns individual images into a single, cohesive work of art. Have an idea? Let our experts help you bring it to life.

Bring Your Story to Life with a Bespoke Frame

You’ve journeyed through the art of visual storytelling, from designing a compelling layout to selecting the perfect materials for your project. A custom multi-aperture frame is more than just a display; it’s a personal gallery that narrates your unique story. With multi-aperture photo frames custom-designed by you, every detail-from the mount to the moulding-contributes to a beautiful, cohesive narrative that celebrates your cherished moments.

Ready to turn your vision into a beautifully crafted reality? With over 20 years of professional framing experience, our team brings your ideas to life. Every piece is meticulously handcrafted in our Falkirk, Scotland workshop using only the highest quality conservation materials, ensuring your memories are preserved perfectly. Let us help you create something truly special.

Start designing your bespoke frame with our experts today! Let’s create a spectacular centrepiece for your home that you will treasure for years to come.

Frequently Asked Questions

How much does a custom multi-aperture frame cost?

The final cost of a bespoke frame is wonderfully unique, just like your photos. Pricing depends on the overall size, your choice of premium frame moulding, the number of photo apertures, and the type of glazing selected. A smaller, simple design may start from around £50, while larger, more intricate pieces can range upwards of £200. Our online design tool provides a clear, instant quote as you build, ensuring complete transparency with no surprises.

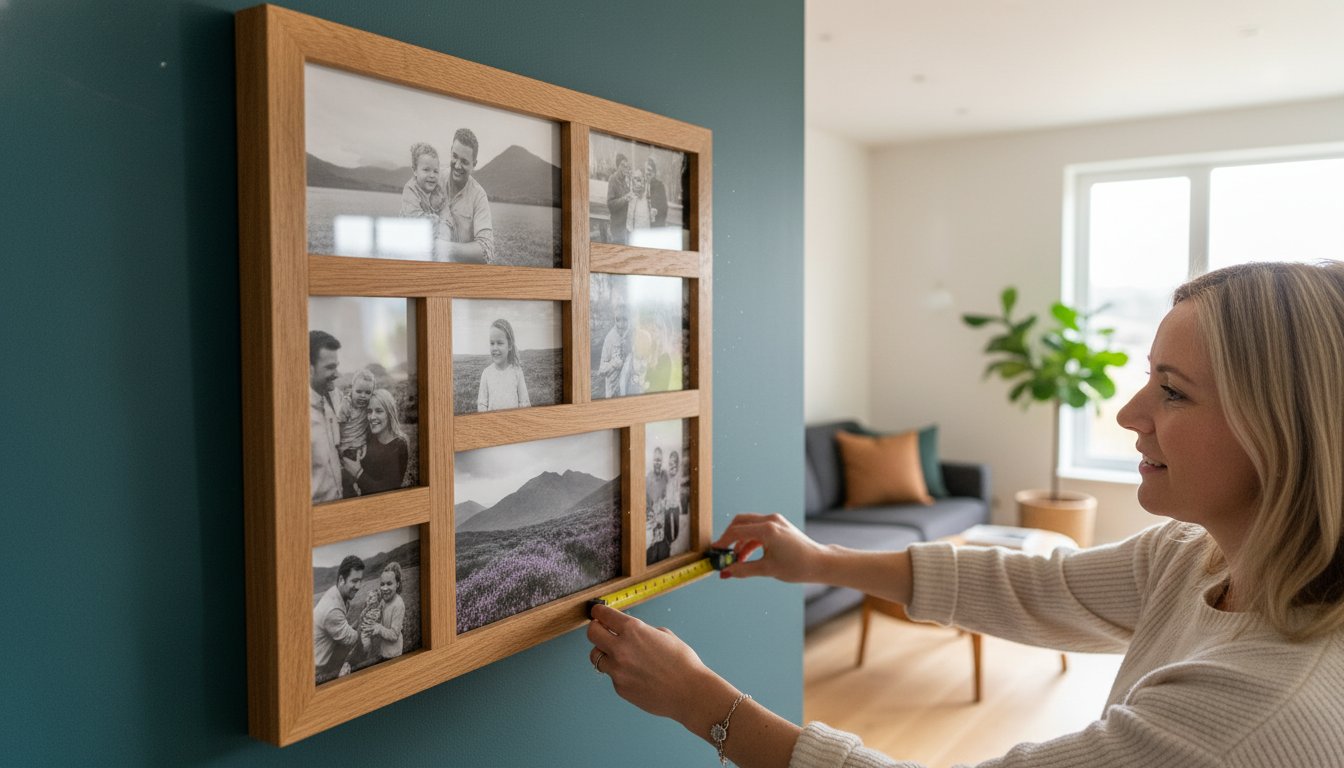
How do I measure my photos accurately for a custom frame?

For a perfect, professional fit, measure the exact height and width of each individual photo you want to display. It’s important not to include any white borders in your measurements. When you input these dimensions into our online designer, our system automatically calculates a small overlap for the mount. This ensures your photos are held securely behind the aperture windows, creating that flawless, gallery-quality finish you’ll love.

What is the turnaround time for a bespoke multi-aperture frame?

We pride ourselves on our blend of meticulous craftsmanship and speedy service. From the moment you place your order, our skilled team in our UK workshop will craft and dispatch your frame within 5-7 working days. Once it leaves our hands, our trusted courier service typically delivers within 1-2 working days. We’ll notify you as soon as your beautiful new frame is on its way to you.

Can you frame my existing photos, or do I need to order prints from you?

We offer a flexible service designed around your convenience. You are more than welcome to post your treasured photographs to us for professional mounting and framing. For a complete one-stop-shop experience, you can also upload your digital files directly. We will then produce spectacular fine art Giclée prints and frame them to your exact specifications, delivering a finished piece that is ready to hang and admire.

What’s the maximum number of photos I can have in one frame?

The beauty of a custom design is its flexibility! While there is no strict maximum, the number of photos is guided by the overall frame size and the need to maintain a visually pleasing, balanced composition. Our online tool is perfect for exploring layouts, but for highly complex multi-aperture photo frames custom designed with a large number of images, we recommend contacting our friendly team. We can provide expert guidance to help create your perfect piece.

How do I clean and care for my new framed piece?

Caring for your new artwork is simple. To clean the glazing, lightly spray a high-quality glass cleaner onto a soft, lint-free microfibre cloth and gently wipe the surface-never spray directly onto the frame. The frame moulding itself should only require a light dusting with a dry cloth. Avoid using abrasive materials or harsh chemical cleaners, as this will protect the premium finish and ensure your memories look beautiful for years to come.

Posted on

Framing Children’s Artwork: 9 Creative Ideas to Cherish Their Masterpieces

From the vibrant splash of a first finger painting to a painstakingly drawn family portrait, your child’s creativity is a spectacular thing. But as the pile of paper grows, so can the clutter-and the quiet guilt of not knowing what to do with it all. What if you could celebrate every creation without turning your home into a classroom? The solution lies in finding beautiful framing children’s artwork ideas that transform these precious masterpieces into cherished parts of your home’s story, preserving their magic for years to come.

In this guide, we’ll help you embark on that journey. We are sharing nine inspiring and practical ways to frame and display your child’s art, turning fridge-door displays into stunning, bespoke décor. From simple, budget-friendly DIY projects to premium, professionally framed options that create a true gallery wall, you’ll discover the perfect method to honour your little artist’s work, make them feel immensely proud, and seamlessly integrate their creativity into your stylish home.

Why Framing Transforms Your Child’s Art (And Your Home)

Every parent knows the colourful chaos of the refrigerator door-a vibrant, ever-changing gallery of drawings, paintings, and school projects held up by a fleet of magnets. While charming, this temporary display can feel cluttered. Choosing to frame your child’s masterpieces is one of the most impactful framing children’s artwork ideas because it does more than just decorate a wall; it celebrates the artist and preserves a precious moment in time.

For a little inspiration on how framing can elevate your child’s creations, take a look at this lovely video:

From Refrigerator Art to a Lasting Legacy

There is a profound psychological difference between a magnet and a frame. A magnet holds a drawing in place; a frame gives it a place of honour. This simple act sends a powerful message to your child: ‘Your work is important, and we value your creativity.’ It elevates a simple piece of paper into a work of art, showing them you take their creative expression seriously and are proud to make it a permanent part of your home.

Building Confidence Through Curation

Involving your child in choosing which pieces to frame creates a wonderful sense of pride and ownership. When they see their drawing professionally mounted and displayed on the wall, it validates their creative hobby and boosts their self-esteem immeasurably. This process turns their artistic exploration into a celebrated family activity, creating positive memories around their passion and encouraging them to continue creating with confidence.

Integrating Kids’ Art Seamlessly into Your Decor

A common concern is that children’s art will create a cluttered, ‘classroom’ feel. This is where the magic of a bespoke frame comes in. A well-chosen frame provides structure and definition, acting as a bridge between the playful energy of the artwork and your sophisticated home decor. By understanding what is a picture frame and its function, you can select materials and colours that tie the vibrant hues of their art directly into your room’s palette, creating a look that is both personal and polished.

9 Creative Ideas for Framing and Displaying Children’s Artwork

That ever-growing pile of paintings and drawings is a testament to your child’s boundless imagination. But how do you display it without overwhelming your home? The key is to treat their creations with the care of fine art. From a single, spectacular piece to a dynamic gallery wall, here are some of our favourite framing children’s artwork ideas to help you celebrate their creative journey and turn those precious papers into beautiful, lasting memories.

1. The Single Statement Piece

For a truly powerful impact, select one masterpiece that holds special significance-perhaps their first family portrait or a painting you both adore. By placing it in a premium, oversized mount within a quality frame, you elevate the artwork, giving it the importance it deserves. This approach turns a simple drawing into a treasured heirloom and a stunning focal point for any room.

2. The Cohesive Gallery Wall

A gallery wall is a classic way to showcase a collection of your child’s art. The secret to a polished, unified look is consistency. By using identical frames and mounts, you create a harmonious display that lets the artwork shine. You can arrange the frames in a neat, symmetrical grid for a formal feel or create a more playful, asymmetrical layout. For more inspiration, Forbes offers some excellent tips on creative ways to arrange artwork, helping you design the perfect composition for your space.

3. The Rotational Art Gallery

If you have a prolific young artist at home, a rotational gallery is the perfect solution. Use front-opening frames that allow you to store multiple pieces and easily swap the front-facing one. This keeps your display fresh and exciting, allowing you to celebrate their latest creations without clutter. It’s a wonderful way to show your child that you value their ongoing artistic development.

4. The Themed Collection

Add a thoughtful, curated touch to your display by grouping artworks together by a common element. You could create a collection based on:

  • A specific theme: A series of animal drawings or outer space paintings.
  • A colour palette: Group all their blue-toned masterpieces together.
  • An artistic ‘phase’: Celebrate their “dinosaur period” or “rainbow phase” in one spectacular display.

This approach tells a beautiful story about their interests and creative evolution.

5. Beyond Paper: The 3D Box Frame

Some of the most cherished creations aren’t flat. From clay sculptures and pasta necklaces to tiny handprints in plaster, these 3D objects deserve a special place. A box frame, or shadow box, is the perfect way to protect and display these delicate items. The depth of the frame turns memorable crafts into beautifully preserved objects of art that you can cherish for years to come. Have a special object to frame? Explore our bespoke box framing service.

Another wonderful way to preserve and share their art is to take it beyond the wall entirely. By digitising a favourite drawing, you can have it printed on items like t-shirts, hoodies, or tote bags. This turns their creation into a wearable masterpiece or a unique gift for family members. For professional-quality results, specialist printers like RAW Merch can transform their art into custom apparel that celebrates their talent in a fun, practical way.

Choosing the Perfect Frame: A Simple Guide for Parents

Choosing a frame can feel like the hardest part, but it’s where the real magic happens. A well-chosen frame acts as a bridge between your child’s masterpiece and your home décor, transforming a simple drawing into a treasured display. This simple guide will demystify the key components, giving you the confidence to explore different framing children’s artwork ideas and find the perfect match for their creations.

Frame Materials & Colours: Wood, Metal, and More

The frame itself sets the overall tone. While the options are endless, a few simple guidelines can help you make a spectacular choice. The goal is to complement the art, not overpower it. Consider these simple rules of thumb:

  • Classic Black or White: These are your go-to options. They create a clean, gallery-like feel that allows the vibrant colours of your child’s art to take centre stage.
  • Natural Wood: A beautiful oak or pine frame adds warmth and a softer, more organic touch, perfect for nature scenes or family portraits drawn in crayon.
  • A Pop of Colour: For a playful look, choose a frame that picks out a secondary colour from the artwork. A bright yellow frame for a drawing of a sunflower can look simply perfect.

The Magic of Mounts (Matting)

A mount (the card border inside the frame) is a small detail that delivers a huge impact. It’s not just for decoration; it provides a crucial breathing space between the artwork and the glass, preventing potential damage from condensation. A crisp, white mount adds a professional finish and can make a small A5 drawing feel much more significant and intentional on your wall.

Choosing the Right Glass (Glazing)

The final piece of the puzzle is the glazing. While it might seem like a minor detail, the right glass protects and enhances the view. For most situations where you plan to rotate pieces regularly, standard glass is perfectly suitable. However, for a truly special piece you want to preserve for decades, consider upgrading to a premium UV-protective glass to prevent colours from fading. In a bright, sun-lit room, anti-reflective glass is a fantastic option to minimise glare and keep the focus on the art.

With these elements in mind, you can confidently select a frame that honours your child’s creativity. Whether you’re creating a DIY gallery wall or opting for a bespoke, professionally framed piece, these small choices will make all the difference. To see how these components come together, why not browse our online gallery for inspiration?

DIY vs. Professional Framing: When to Choose Each

Your home is likely filled with a wonderful, ever-growing collection of your child’s creations. While every piece is precious, not every doodle needs a museum-quality frame. Deciding between a DIY approach and a professional service comes down to the artwork itself and your long-term vision for it. Exploring different framing children’s artwork ideas helps you find the perfect balance between celebrating every piece and preserving the true masterpieces.

When DIY Framing is the Perfect Choice

For the joyful, prolific output of a young artist, DIY framing is a fantastic and practical solution. It’s the ideal choice for creating a dynamic, rotational gallery wall that can be updated as new favourites are made. This approach is perfect for:

  • Standard Sizes: Artwork on A4 or A3 paper fits perfectly into affordable, off-the-shelf frames from high-street shops.
  • Rotational Galleries: If you love to frequently swap out artwork in a playroom or kitchen, inexpensive frames make it easy and cost-effective.
  • Speed and Budget: It’s the quickest and most budget-friendly way to get those beautiful pictures out of a folder and onto the wall for everyone to admire.

When to Invest in Professional Bespoke Framing

Some pieces of art are more than just a drawing; they are milestones. These are the treasures you’ll want to look at in twenty years with the same fondness you feel today. Investing in professional, bespoke framing elevates these special creations into lasting family heirlooms. Consider it for:

  • Unique Creations: For artwork on non-standard paper sizes, circular canvases, or collages with unusual shapes that a ready-made frame simply won’t accommodate.
  • Preservation: To protect a truly special piece-like a first family portrait or a prize-winning painting-with archival, acid-free mounts and UV-protective glass that prevent fading and degradation.
  • 3D Artwork: For those wonderful creations with depth, like pasta necklaces or clay models, a custom-built box frame provides protection and a stunning display.
  • A Flawless Finish: When you want a gallery-quality result that honours the art with perfect corners, premium materials, and professional craftsmanship that will last a lifetime.

What to Expect from a Professional Framer

Working with a professional framer is a partnership. It’s not just about buying a product; it’s about accessing expertise to make the perfect choice. A trusted framer provides expert advice on the ideal combination of frame style, mount colour, and glass type to make your child’s art truly shine. You gain access to a much wider selection of beautiful, high-quality materials and can be assured of precision craftsmanship for a spectacular result every time. Talk to our experts about framing your child’s masterpiece today.

Transforming Crayons into Keepsakes

Your child’s artwork is a fleeting, precious snapshot of their imagination. As we’ve explored, the right frame does more than just protect a drawing; it elevates it into a cherished piece of family history, turning a simple piece of paper into a beautiful focal point in your home. From creating a dynamic gallery wall to choosing a single, spectacular statement frame, these framing children’s artwork ideas are designed to help you celebrate their creativity in a way that lasts a lifetime.

For those extra-special masterpieces, professional framing provides a truly perfect finish. With over 20 years of framing expertise, our passionate team offers bespoke craftsmanship using high-quality, conservation-grade materials to preserve their art for years to come. Ready to turn those precious drawings into timeless art? Explore our bespoke framing services. Let’s give their creativity the beautiful showcase it deserves.

Frequently Asked Questions

How much does it cost to professionally frame a child’s drawing?

The cost for professionally framing children’s artwork can vary. For a standard A4-sized piece with a quality mount and a simple, beautiful wooden frame, you can expect prices to start from around £35 to £50. The final cost depends on the size of the artwork, the frame material you choose, and whether you opt for premium options like anti-reflective or UV-protective glazing. A bespoke service ensures a perfect, long-lasting finish that truly honours their creation.

What’s the best way to store the artwork that I’m not currently displaying?

To preserve your child’s masterpieces for the future, proper storage is essential. We recommend placing each piece between sheets of acid-free tissue paper to prevent colours from bleeding. Store them flat in an archival-quality portfolio or box, which protects them from light, dust, and moisture. Avoid attics or basements where temperature and humidity fluctuate, as this can cause paper to yellow or degrade over time. A cool, dark cupboard is an ideal spot.

Should I use frames with or without glass for kids’ art?

We always recommend using glazing to protect the artwork from dust, fading, and accidental splashes. However, for a child’s room or a high-traffic area, traditional glass can be a safety concern. A fantastic alternative is acrylic glazing (also known as perspex or safety glass). It’s lightweight, shatter-resistant, and offers the same level of clarity and protection, giving you peace of mind without compromising on the professional, polished look of a beautifully framed piece.

How can I make a gallery wall of kids’ art look stylish and not cluttered?

Creating a stylish gallery wall is one of our favourite framing children’s artwork ideas. The key to a cohesive look is consistency. Choose frames of the same colour and style, even if they are different sizes. Use a generous mount (the card border inside the frame) to give each piece breathing room and a more elevated, gallery-like feel. Plan your layout on the floor first, ensuring even spacing between each frame for a balanced, intentional, and clutter-free display.

Can you frame things that aren’t flat, like a clay handprint or a painted rock?

Absolutely! Three-dimensional treasures require a special type of frame called a shadow box or a deep rebate frame. These frames have a greater depth between the glazing and the backing board, creating space to house bulkier items securely. They are perfect for showcasing everything from clay models and painted rocks to baby’s first shoes or sports medals. Our bespoke craftsmanship ensures we can create the perfect enclosure to protect and display your most cherished objects.

What’s the best type of frame for a nursery or child’s bedroom?

Safety and durability are paramount when choosing a frame for a child’s room. We recommend lightweight wood or high-quality composite frames with soft, rounded corners over sharp, metallic ones. Most importantly, ensure the frame is fitted with shatter-resistant acrylic glazing instead of glass. Finally, make sure the frame is securely fixed to the wall using appropriate hardware to prevent it from being accidentally knocked down, ensuring their room remains a safe and inspiring space.

Posted on

How to Preserve Old Photographs: A Complete Guide for Cherished Memories

That shoebox of treasured family photographs holds more than just images; it contains generations of stories. But watching those precious moments fade, yellow, or become brittle can be heartbreaking. You worry that one wrong touch could cause irreparable damage, and the simple desire to display a beloved portrait is often clouded by the fear of sunlight stealing its character forever. It’s a common concern, and you’re not alone in wanting to protect your family’s irreplaceable legacy.

This guide is here to give you confidence and clarity. We’ll demystify the entire process and provide clear, practical steps on how to preserve old photographs for generations to come. From the correct way to handle these delicate treasures to understanding what terms like ‘acid-free’ and ‘archival-quality’ truly mean, you’ll learn everything you need. Soon, you’ll be able to safely store your entire collection and beautifully display your most cherished memories, giving them the premium care and craftsmanship they deserve.

Understanding the Enemy: What Really Damages Old Photographs?

Before we explore the best methods for how to preserve old photographs, we must first understand what we are saving them from. An old photograph is more than just an image on paper; it’s a delicate chemical object, a moment captured through a fragile process. Most of the fading, yellowing, and decay we see is not inevitable but the result of a slow, gradual attack from its environment. Identifying these key threats is the first, most crucial step in protecting your precious memories for generations to come.

This short video provides a great visual overview of the common culprits that can damage your collection:

Environmental Factors: Light, Heat, and Humidity

The world around your photos is often their biggest adversary. These three elements work together to accelerate aging:

  • Light: The number one cause of fading. Ultraviolet (UV) light, found in sunlight and fluorescent bulbs, breaks down the chemical bonds that form the image, causing colours to bleach and black-and-white photos to lose contrast.
  • Heat: High temperatures speed up chemical reactions, causing prints to become yellow and brittle. A hot loft or a sun-drenched wall is a photograph’s worst enemy.
  • Humidity: Too much moisture encourages mould growth and can cause photos to stick together, often irreparably. Too little makes them dry and fragile. Constant fluctuations are particularly damaging.

Chemical Contamination: The Hidden Danger of Acidity

Sometimes, the danger comes from within the materials themselves. A deeper understanding of how photographs are made reveals their vulnerability to acidic materials. Many older photo albums and backing papers were made from wood pulp, which is naturally acidic and releases chemicals that eat away at the photograph over time. Similarly, old glues, tapes, and cheap plastic sleeves can off-gas, creating a harmful micro-environment that causes staining and decay. Even writing on the back with the wrong kind of pen can bleed through and permanently damage the image.

Physical and Biological Threats

Finally, we have the more direct dangers. Improper handling is a common cause of damage; fingerprints leave behind oils that can etch the surface, while simple carelessness can lead to scratches, creases, and tears. Beyond our own hands, pests like silverfish are drawn to the gelatin in photo emulsions, and dust or dirt particles can act like sandpaper, abrading the delicate surface every time the photo is moved. This is why knowing how to preserve old photographs involves both the right storage and the right handling techniques.

First Steps: Handling, Cleaning, and Documenting Your Collection

Before you even think about albums or archival boxes, the journey of preservation begins with your own two hands. This initial phase is fundamental to learning how to preserve old photographs without causing accidental harm. Taking the time to handle, clean, and organise your collection now not only prevents smudges, tears, and fading but also saves you significant headaches later. More importantly, it ensures the precious stories behind each image are not lost to time.

The Right Way to Handle Vintage Photos

Every photograph is a delicate piece of history, and the natural oils on your skin can cause permanent damage over time. To protect these irreplaceable items, adopt a professional approach from the very start. These techniques are essential for proper care, and for a more detailed guide, the U.S. Library of Congress offers an excellent resource on the Care, Handling, and Storage of Photographs.

  • Start with clean hands. Always wash and dry your hands thoroughly before you begin. For the best protection, wear clean cotton or nitrile gloves.
  • Hold photos by their edges. Gently cup the photograph by its borders to avoid touching the fragile emulsion of the image itself.
  • Avoid damaging fasteners. Never use paper clips, staples, rubber bands, or adhesive tape. These materials will stain, tear, and degrade the photograph over time.

Gentle Cleaning and Dusting

Decades of storage can leave photos covered in a layer of dust and debris. Cleaning them requires an extremely gentle touch, as improper methods can scratch or permanently mar the image. The golden rule is to always start with the least invasive method possible.

  • Use a soft, clean brush. A soft-bristled artist’s or camera lens brush can be used to gently sweep away loose surface dust.
  • Try a puff of air. A photographer’s air bulb (a rubber bulb you squeeze) is perfect for dislodging stubborn particles without physical contact. Never use canned air, as the propellant can leave a damaging chemical residue.
  • Never use water or cleaners. Liquids can dissolve the image emulsion and cause irreversible staining and warping. If a photograph is very dirty or fragile, it’s best to consult a professional photo conservator.

Capturing the Story: How to Label Photos

A photograph without its story is only half a memory. Documenting the who, what, where, and when is just as vital as the physical preservation of the print. Just be sure to do it safely.

  • Never write on the front. Ink can bleed through, and the pressure from a pen can create indentations visible from the front.
  • Use a soft graphite pencil. If you must write on the back, use a very soft graphite pencil (like a 2B) and write gently along the border where there is no image.
  • Note key details. Include names (from left to right), the date, and the location or event.
  • Create a reference log. A fantastic alternative is to place each photo in a numbered archival sleeve and keep a separate logbook or digital file with corresponding details.

Safe Storage Solutions: Protecting Your Photos for the Long Term

Just as a premium frame protects and enhances a piece of art, the right storage solution creates a perfect, stable environment for your cherished photographs. The goal is simple: to house your memories in a space that is chemically inert and physically secure, protecting them from the very materials designed to hold them. Not all photo albums and boxes are created equal; many common products contain acids and chemicals that can cause irreversible fading and yellowing. Understanding what ‘archival-safe’ truly means is the most important step in learning how to preserve old photographs for generations to come.

Decoding the Jargon: Acid-Free, Lignin-Free, and PAT

When shopping for archival supplies, you’ll encounter specific terms. Here’s what the most important ones mean for the safety of your collection:

  • Acid-Free: This refers to materials with a neutral pH of 7.0 or higher. Acidity is a primary cause of embrittlement and discoloration in paper and photographs.
  • Lignin-Free: Lignin is a natural compound in wood pulp that breaks down over time, releasing acid. Even if a paper is initially acid-free, the presence of lignin means it will become acidic later. Always choose lignin-free materials.
  • PAT (Photographic Activity Test): This is the gold standard. Materials that have passed the PAT (an ISO standard) are guaranteed to be chemically inert and will not react with or damage your photos over time.

Choosing the Right Sleeves and Envelopes

Each photograph deserves its own protective enclosure to prevent it from sticking to others and to guard it against fingerprints and dust. When choosing individual sleeves, opt for chemically stable plastics like polyester, polypropylene, or polyethylene. Crucially, avoid PVC (polyvinyl chloride) sleeves, as they can release harmful chemicals and cause permanent damage. If you prefer paper, ensure any envelopes or interleaving sheets are both acid-free and lignin-free.

Archival Boxes vs. Photo Albums

For the bulk of your collection, archival-quality boxes are the most efficient and safest choice. Look for sturdy boxes made from acid-free, lignin-free board-not standard cardboard, which is highly acidic. These create a controlled micro-environment perfect for long-term storage.

If you prefer an album for easier viewing, ensure every component is archival quality, from the pages to the sleeves and any descriptive paper inserts. Be especially wary of old ‘magnetic’ photo albums. Their adhesive backing is extremely damaging, leaving a sticky residue that can ruin photographs beyond repair. Carefully removing photos from these albums is a critical preservation step.

From the Box to the Wall: How to Display Old Photos Safely

Your most cherished photographs deserve to be seen, not hidden away in a box. However, bringing them into the light exposes them to their greatest enemy. Sunlight and even standard indoor lighting can cause irreversible fading and damage. A standard, off-the-shelf picture frame can often do more harm than good, accelerating decay with acidic materials. The secret to displaying your memories without destroying them lies in professional conservation framing, a crucial step in learning how to preserve old photographs for generations to come.

The Anatomy of a Conservation-Grade Frame

A conservation frame is more than just a beautiful border; it’s a bespoke protective environment for your photograph. True craftsmanship involves using specific, high-quality materials designed for longevity. Key components include:

  • UV-Protective Glazing: This specialist glass or acrylic acts as a powerful shield, blocking up to 99% of the harmful ultraviolet rays that cause colours to fade.
  • Acid-Free Mounts and Backing Boards: Standard boards contain acids that can leach into your photo over time, causing yellowing and brittleness. We use premium, acid-free and pH-neutral materials to prevent this “acid burn.”
  • Proper Spacing: Spacers or a deep window mount ensure the photograph’s surface never touches the glass. This prevents moisture build-up and potential damage to the delicate emulsion.

Framing an Original vs. Framing a High-Quality Copy

For a truly irreplaceable family heirloom, the safest approach is to display a perfect copy. This allows the precious original to remain protected in dark, archival storage, away from any potential harm. A professionally produced Giclée print can create a spectacular, identical copy that captures every detail with museum-grade quality. Modern high-resolution scanning can often enhance faded details, breathing new life into the image you display while the original stays safe. This is an expert method for how to preserve old photographs while still enjoying them every day.

Finding a Professional Framer

Choosing the right framer is essential. Look for a trusted professional who is passionate about conservation and understands the science behind it. Don’t be afraid to ask questions about their materials-do they use UV-protective glass? Are their mount boards genuinely acid-free? A dedicated framer will happily guide you through the options, helping you choose the perfect combination of protection and aesthetic appeal for your memory. They act as a knowledgeable partner in protecting your history.

If you’re ready to give your treasured photographs the protection they deserve, we can help. Discover our bespoke conservation framing services and let our expertise bring your memories to life safely.

Digital Preservation: Creating a Backup for Peace of Mind

While carefully storing your physical prints is essential, creating a high-quality digital copy is the ultimate insurance policy for your precious memories. A digital archive protects your family’s history against unforeseen events like fire, flood, or accidental damage. It’s the modern, definitive answer to how to preserve old photographs for generations to come.

This digital archive, along with your original prints, represents an irreplaceable collection. Ensuring the physical security of your home where these items are stored is a vital part of a complete preservation strategy. For comprehensive protection against threats like theft or fire, resources like homesecurityinstallation.co.uk can provide an essential layer of security for your valuables.

Beyond simple protection, digitising your collection unlocks new possibilities. You can effortlessly share cherished moments with relatives across the globe, collaborate on family history projects, or create beautiful photo books. It also provides you with a ‘master copy’ from which you can make stunning new prints for display, keeping the fragile originals safely tucked away.

Best Practices for Scanning Your Photographs

To achieve a digital copy worthy of your memories, a little care goes a long way. Follow these professional tips for the best results:

  • Use a Flatbed Scanner: For the best quality and to avoid damaging delicate prints, a flatbed scanner is superior to a sheet-fed scanner or a phone app.
  • Clean Your Equipment: Use a microfibre cloth to gently wipe both the scanner glass and the surface of your photograph to remove any dust or smudges.
  • Scan at High Resolution: A minimum of 600 DPI (Dots Per Inch) is recommended for archival purposes. For very small photos or those you intend to enlarge, consider 1200 DPI.
  • Choose the Right File Format: Save your master scans as uncompressed TIFF files (.tiff). While large, they retain all the original data. You can create smaller JPEG (.jpg) copies for easy sharing.

Organising Your Digital Archive

A well-organised archive is a joy to browse. Start by creating a logical folder structure, perhaps by year, by event, or by family branch (e.g., ‘Smith Family’, ‘Jones Family’). Adopt a consistent and descriptive file-naming system, such as ‘1972-08-Grandma-Joan-Cornwall-Holiday.tiff’. This makes searching for specific images simple and ensures the context isn’t lost over time.

The 3-2-1 Backup Strategy

Digital files are not immune to loss. Hard drives can fail and cloud services can change. Professionals use the 3-2-1 strategy to ensure their data is secure. It’s a simple and effective method for anyone wanting to know how to preserve old photographs digitally. The principle is:

  • Keep at least three total copies of your files.
  • Store the copies on two different types of media (e.g., an external hard drive and a cloud storage service).
  • Keep one copy off-site (e.g., your cloud backup, or a second hard drive stored at a trusted relative’s house).

Once you have a premium digital master, you can create beautiful new prints to display without ever risking the original. Explore our gallery for inspiration on how to bring your newly preserved memories to life with bespoke framing.

Your Cherished Memories, Beautifully Preserved

Your old photographs are more than just paper; they are irreplaceable links to your family’s history and personal story. This guide has shown you that with the right knowledge, you can become the dedicated guardian of these moments. From careful handling and archival storage to creating essential digital backups, learning how to preserve old photographs is a rewarding act of love that ensures these stories are passed down through generations.

When a memory is too special to keep in a box, it deserves to be displayed with the same level of care. That’s where preservation meets beautiful presentation. At First 4 Frames, we bring over 20 years of framing expertise to this craft. Trusted by artists and collectors across Scotland, we use only the finest conservation-grade materials to protect and showcase your most precious images, creating a perfect bridge between your history and your home.

Protect your cherished memories. Explore our bespoke conservation framing. Give your history the beautiful, lasting home it deserves.

Frequently Asked Questions

Can I laminate an old photograph to protect it?

We strongly advise against laminating any precious old photograph. The process uses heat and adhesives that cause irreversible damage to the delicate paper and image emulsion. While it may seem like a protective measure, it actually seals in harmful acids and moisture, which can accelerate fading and deterioration over time. True archival preservation requires breathable, acid-free materials, not permanent plastic encapsulation. It’s a method best avoided for any treasured memory.

Are the old ‘magnetic’ sticky photo albums safe to use?

Unfortunately, those vintage ‘magnetic’ albums with sticky pages are one of the worst storage solutions for photographs. The adhesive on the cardboard is highly acidic, which leaches into the photo paper, causing yellowing and brittleness. The plastic overlay also off-gasses chemicals that accelerate fading. We always recommend transferring your beautiful images to albums made with premium, acid-free, archival-quality paper and polypropylene sleeves to ensure their longevity.

How can I safely remove an old photograph that’s stuck to the frame glass?

This is a delicate situation that requires immense patience. Never try to pull the photograph away, as this will tear the image emulsion. The safest first step is to consult a professional photo conservator. If you wish to attempt it yourself, a last resort involves submerging the entire glass and photo in room-temperature distilled water. After a few hours, the photo may release, but this process carries significant risk of further damage, so proceed with extreme caution.

What is the ideal temperature and humidity for storing my photo collection?

The key to long-term storage is a stable environment. The ideal conditions are a consistent temperature below 20°C and a relative humidity between 30% and 40%. Avoid attics and basements, where temperature and moisture fluctuate dramatically. A cool, dark cupboard in the main part of your house is a much better choice. Following these guidelines is a crucial step in knowing how to preserve old photographs and protect them from mould, fading, and chemical decay.

Should I try to restore a torn or faded photograph myself before framing it?

While the temptation to fix a tear with tape or touch up a faded spot is understandable, we advise against it. DIY restoration attempts often use non-archival materials like standard tape or inks that can cause permanent staining and make professional repair more difficult later. For a truly precious image, it’s best to consult an expert photo restorer. They possess the craftsmanship and specialised tools to ensure a beautiful, seamless, and safe restoration for your artwork.

How much does professional conservation framing cost?

The cost of professional conservation framing in the UK varies based on the size of the photograph and the materials chosen. For a small to medium-sized print, you can typically expect to pay anywhere from £70 to £180 or more. This price reflects the use of premium, essential materials like acid-free mount boards and backing, plus UV-protective glazing to prevent fading. While it’s an investment, this bespoke service provides the ultimate protection for your irreplaceable memories.