What if your favourite piece from the First4Frames Gallery isn’t reaching its full potential because the frame is doing all the shouting instead of the heavy lifting? It’s a common worry for collectors who fear a bold choice might overpower a delicate Giclée print or look out of place in a modern British home. You’ve probably felt that hesitation when trying to decide if a rustic wood or a sleek metal finish provides the best border for your space. This art framing styles guide uses our twenty years of artisan experience to help you choose the perfect bridge for your artwork.
We understand that technical terms like mounts can feel confusing when you just want your home to look spectacular. Our goal is to give you total confidence in our bespoke British-made services, whether you’re using our primary framing service for an existing piece or our specialist print-and-frame option. With a 4.9-star customer rating on leading review platforms backing our craftsmanship, we’ll show you how to match materials to your interior style effortlessly. You’re about to discover a clear framework for selecting frames that protect your investment and transform your living room into a professional gallery.
Key Takeaways
- Learn how the frame acts as a vital “bridge” between your artwork and home décor, performing the aesthetic heavy lifting for your living space.
- Consult our art framing styles guide to expertly navigate the choice between ornate traditional heritage and clean, minimalist modernism.
- Discover the essential structural requirements for different media, ensuring your premium Giclée prints are protected against fading with professional-grade materials.
- Master the interior designer’s secrets for hanging art at the perfect height and curating a gallery wall that looks professionally styled.
- See how our Falkirk-based artisans provide a seamless, high-quality bespoke service to turn your artistic vision into a spectacular reality.
Understanding the “Bridge”: Why Art Framing Styles Matter
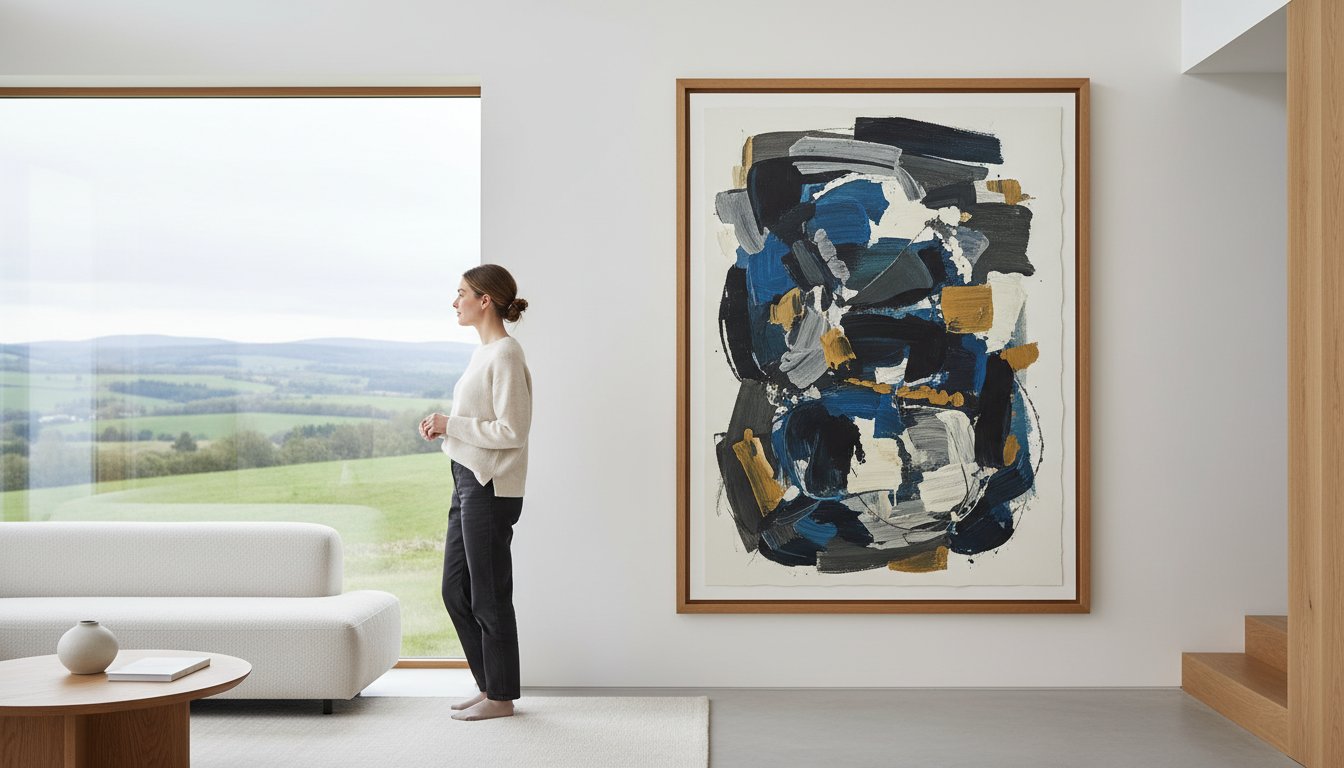
Choosing a beautiful piece from the First4frames gallery is just the beginning of your journey. The frame acts as the vital bridge between the creative expression of the artist and the physical architecture of your home. It does the heavy lifting in this relationship, pulling the viewer into the scene while grounding the artwork within its surroundings. A well-chosen style ensures a contemporary abstract piece doesn’t feel out of place in a Victorian-era lounge, creating a seamless transition that feels intentional rather than accidental.
This art framing styles guide helps you understand why these choices carry so much weight. Beyond aesthetics, a frame serves a significant psychological purpose. It creates a “mental window” that tells the brain to focus exclusively on what is inside the border. Research into gallery engagement from 2022 suggests that professional framing can increase the time a viewer spends looking at a piece by up to 40 per cent. By selecting the right picture frame styles, you aren’t just decorating a wall; you’re directing the emotional experience of everyone who enters the room.
To better understand how a professional designer approaches these choices, watch this helpful video:
Every professional framing project rests on three essential pillars. First is protection, which guards the artwork against physical knocks and environmental hazards. Second is presentation, where we use design principles to enhance the visual impact of the colours and textures within the art. Finally, there is preservation. This involves using acid-free materials and specialist techniques to ensure the artwork does not degrade or discolour over time, maintaining its value for decades to come.
The Role of the Artisan Framer
Quality isn’t something that happens by accident. With over 20 years of experience serving the Falkirk community, our team understands that a frame is more than just a border; it’s a piece of bespoke furniture designed to last a lifetime. We’ve shifted the perception of framing from a simple utility to a high-end craft. Our 4.9-star customer rating on Google reflects the trust we’ve built. Customers know that when they bring a cherished print or a new gallery find to us, they’re getting expert advice backed by two decades of technical mastery.
Anatomy of a Professional Frame
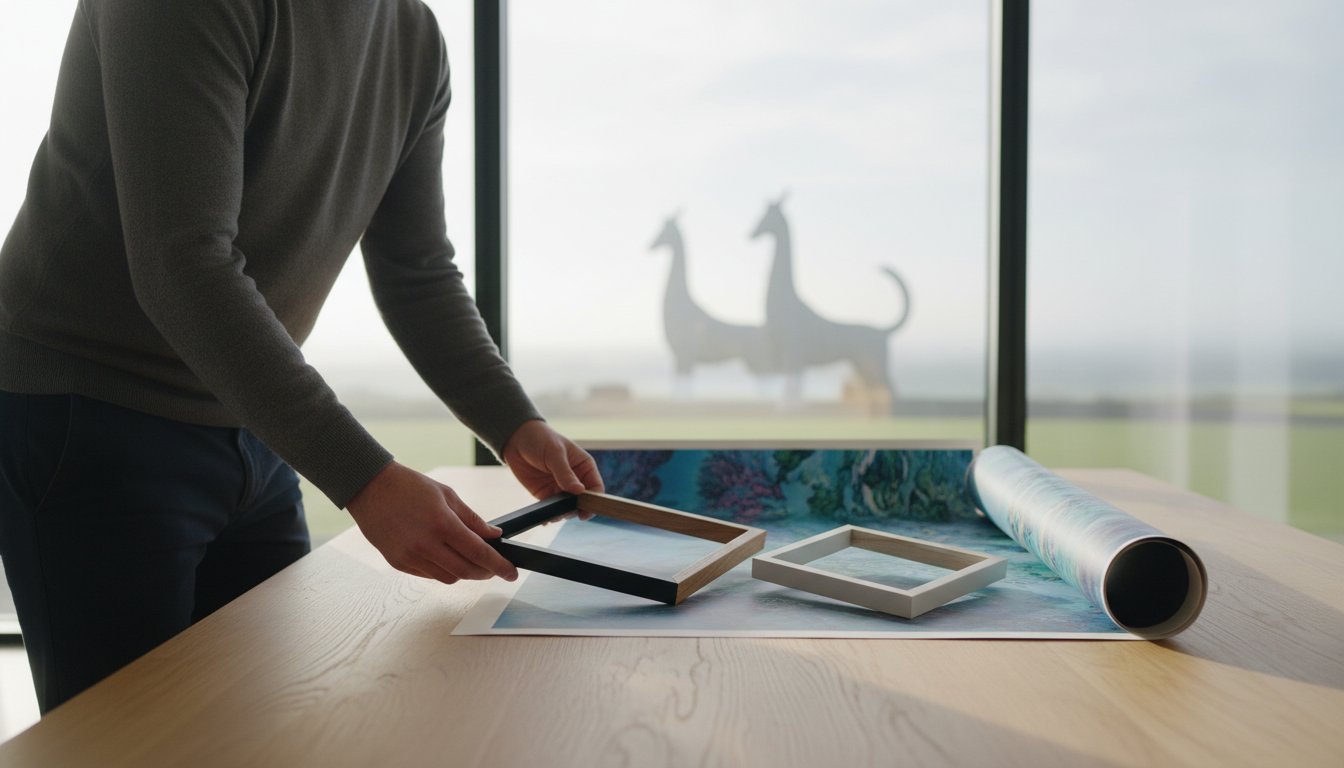
A professional frame consists of three primary components: the moulding, the mount, and the glazing. The moulding is the structural soul of the frame style, providing the physical strength and the primary aesthetic character of the piece. The mount provides necessary breathing space for the art, while the glazing offers a clear window of protection. Because we offer a “one-stop-shop” service, we source only premium materials for every layer. This convenience means you can move from selecting a piece in our gallery to having it professionally finished under one roof, ensuring this art framing styles guide is put into practice with total consistency.
Traditional vs. Modern: A Comparison of Core Framing Styles
Choosing the right surround for your artwork involves more than just picking a colour. It requires a deep understanding of how different aesthetics interact with the piece itself. At the First4frames gallery, we’ve spent over 20 years helping collectors find the perfect balance between heritage and contemporary flair. This art framing styles guide helps you navigate these choices by looking at the core differences between traditional and modern approaches. Every frame we create is designed to act as a bridge between your room décor and the artwork, ensuring a seamless fit for your home.
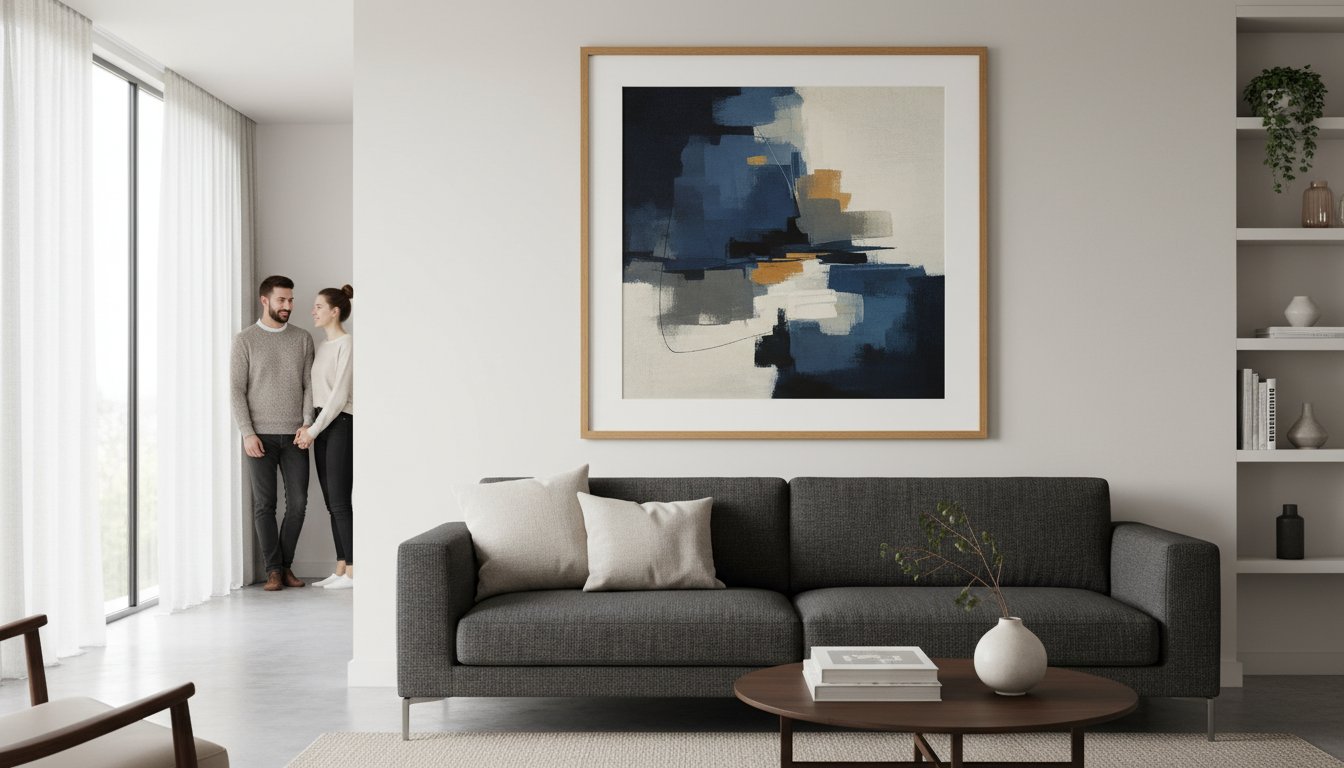
Traditional styles celebrate the ornate heritage of framing. Think of hand-applied gold leaf and deep, dark woods that create a spectacular gallery feel. These frames aren’t just borders; they provide a sense of permanence and history. When you have a classical subject, such as the rugged beauty of Scottish landscapes found in our collection, a traditional frame provides the necessary weight. It pulls the viewer into the scene, making the artwork the undisputed focal point. Our bespoke framing service ensures these heavier styles are crafted with the precision that 20 years of experience brings.
Modernism focuses on clean lines and understated elegance. Minimalist frames often use thin-edged metal or “floated” mounts to create a sense of space around the image. This style is particularly popular for Giclée fine art prints, where the goal is to let the technical precision of the print speak for itself. For those with neutral walls, using a bold colour frame can provide a necessary pop of energy. It’s a technique that works wonders in modern UK homes where neutral palettes dominate 65% of current interior design trends. If you want to see how these styles look in practice, you can browse our curated collection to find your next piece.
Classic and Ornate Styles
Classic frames often feature intricate mouldings and rich textures. Gold leaf finishes remain a top choice for oil paintings and traditional portraits because they reflect light back onto the canvas. At First 4 Frames, we find that dark wood frames like walnut or mahogany are excellent for grounding airy Scottish landscapes. These styles are ideal for period properties where the architecture demands a sense of history. If you’re unsure about the technical details, this frame selection guide from Artists & Illustrators offers brilliant insights into matching frames with specific painting techniques. It’s a helpful resource for any collector aiming for a professional look.
Minimalist and Industrial Modern
Minimalist framing is the go-to for contemporary spaces. Black and white frames are staples for a reason; they provide a sharp, professional finish that doesn’t distract the eye. This approach allows the spectacular colours of artists like Jolomo to shine without competition. By using a sleek, industrial frame, you ensure the vibrant blues and oranges of a Hebridean sunset take centre stage. For those looking for convenience, our print-and-frame offerings combine high-quality Giclée technology with these modern profiles for a hassle-free experience.
The “Transitional” style is a rising trend, blending elements of both worlds. It might involve a traditional wood grain paired with a modern, flat profile. This versatility makes it a reliable choice for 85% of our bespoke framing clients who want something that fits both their current decor and future home changes. Matching the frame to the era of the artwork is a safe bet, but breaking the rules often leads to the most spectacular results. Our excellent customer ratings across review platforms reflect our commitment to this craft, ensuring every art framing styles guide we provide is backed by real-world expertise.
Medium-Specific Framing: Choosing by Artwork Type
Every piece of art possesses a unique structural personality. A delicate watercolour reacts to humidity differently than a heavy oil canvas or a modern digital print. At First4frames, we view the frame as the essential bridge between your room décor and the artwork. It does the heavy lifting in the relationship, ensuring your piece stays protected while pulling the viewer directly into the scene. Choosing the right style isn’t just an aesthetic choice; it’s a technical requirement for the medium’s survival. Our 20 years of experience has shown us that the “behaviour” of the material dictates the build of the frame.
Bespoke framing consistently beats shop-bought alternatives because of this structural understanding. A standard off-the-shelf frame often uses acidic backing boards. These cheap materials can cause “foxing” or orange spots on paper within 24 to 36 months. By contrast, our professional service uses acid-free components and conservation framing techniques to preserve the integrity of your art. This art framing styles guide emphasises that longevity is built from the inside out. When you invest £200 in a piece of art, a bespoke frame is the insurance policy that keeps it looking spectacular for decades.
Framing Giclée and Fine Art Prints
Giclée prints are premium, identical copies of original masterpieces, often produced on heavy archival paper. In our gallery, we frequently frame iconic Jack Vettriano prints, such as The Singing Butler. These prints require a mount to create a physical air gap between the paper and the glass. Without this gap, trapped moisture can cause the print to stick to the glazing, which permanently damages the ink. A well-chosen mount doesn’t just protect; it provides visual breathing space. It allows the sophisticated colours of a Vettriano or a contemporary abstract to pop against your wall. We use UV-protective glass to ensure these vibrant pigments won’t fade over time, maintaining the “freshly printed” look indefinitely.
Memorabilia and 3D Object Framing
Framing 3D objects like signed football shirts, military medals, or even vintage vinyl requires a specialized box frame. These frames provide the depth needed to house the item without crushing it against the glass. We focus on creating a narrative within the frame, using multi-layered mounts to add a sense of drama and history. Professional mounting is the most critical step here. Heavy items like medals or thick jerseys can sag or slip if they aren’t secured with specialist archival hinges or invisible stitching. Our craftsmen ensure that your treasures are held firmly in place without using harmful glues or tapes. This bespoke approach transforms a simple object into a gallery-worthy display that tells a personal story. Our 4.9-star customer rating reflects the care we take with these irreplaceable items, ensuring they remain secure and spectacular for years to come.
Whether you’re looking for a simple art framing styles guide or a complex 3D display, the goal is always the same. You want a frame that honours the medium while fitting seamlessly into your home. By matching the frame’s architecture to the artwork’s specific needs, we create a finished product that is both a beautiful object and a protective sanctuary.
The Interior Designer’s Guide: Matching Frames to Your Room
A frame acts as a vital bridge between your chosen artwork and the existing architecture of your home. At First 4 Frames, we’ve spent over 20 years perfecting the art of the “finish,” ensuring that a bespoke frame doesn’t just protect a print but elevates the entire room. When you browse the First4frames gallery, you’ll see how professional craftsmanship transforms a simple Giclée print into a commanding presence. Achieving a curated look requires more than just picking a pretty border; it involves a strategic approach to placement and style.
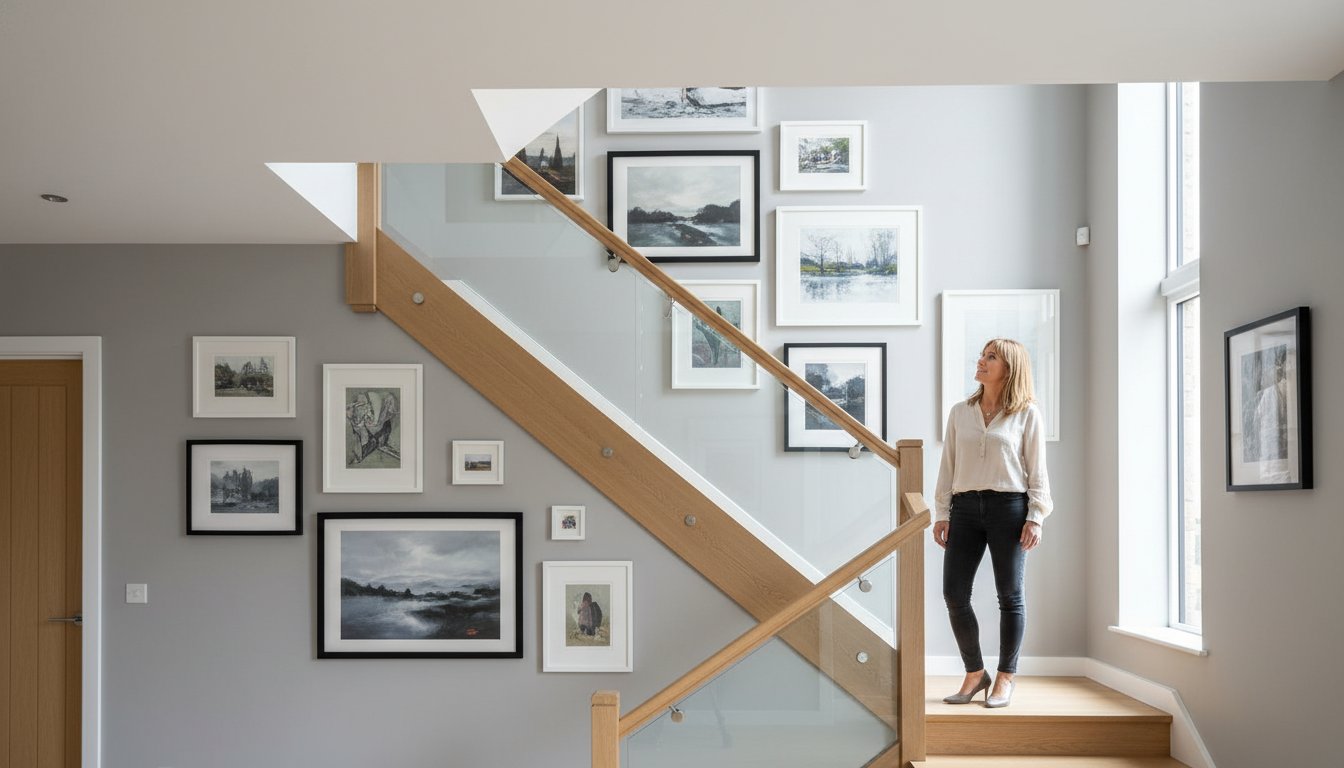
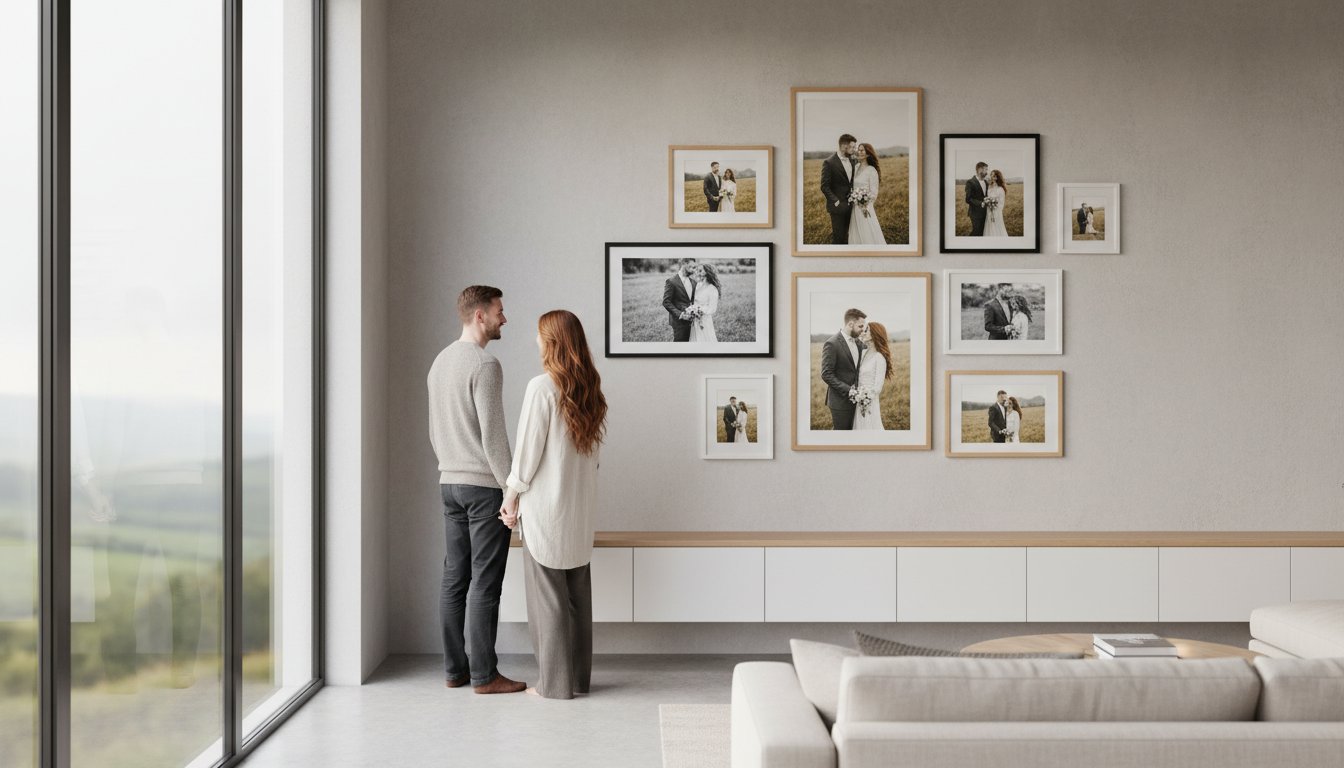
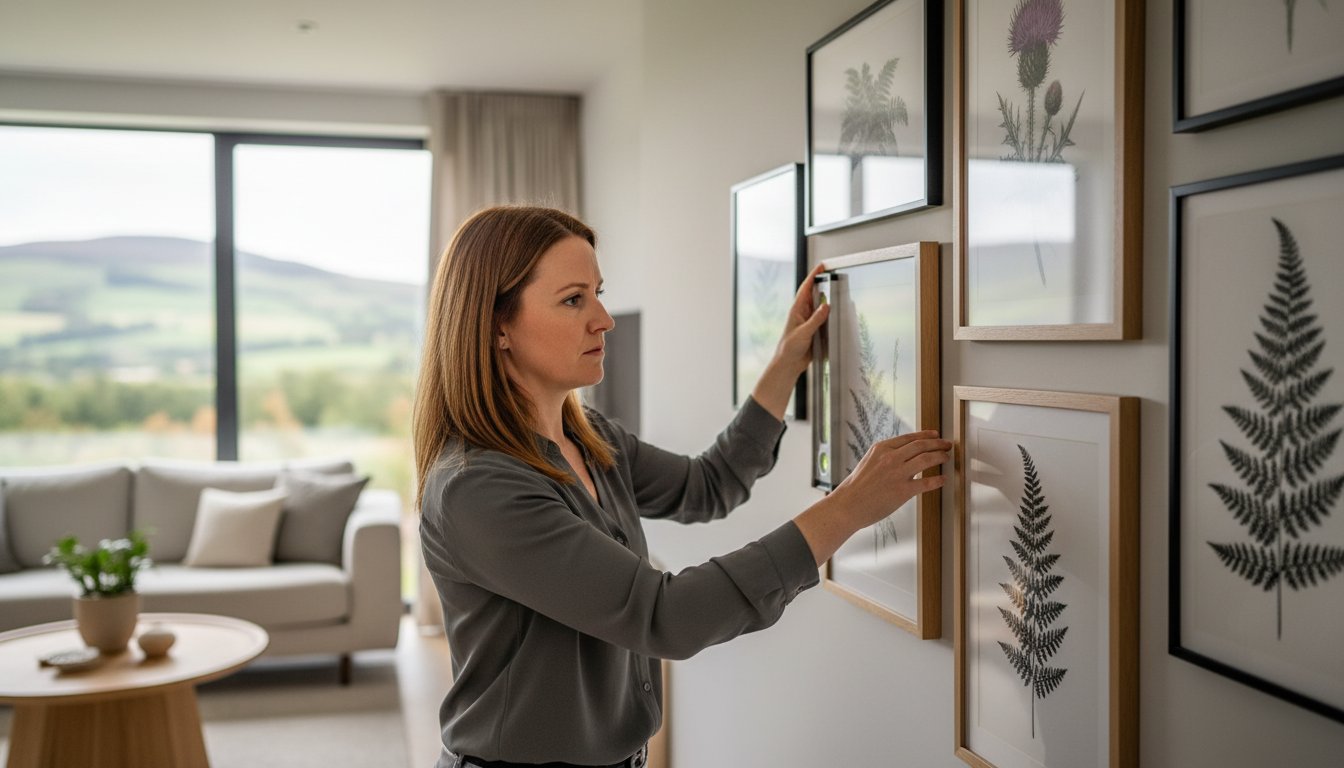
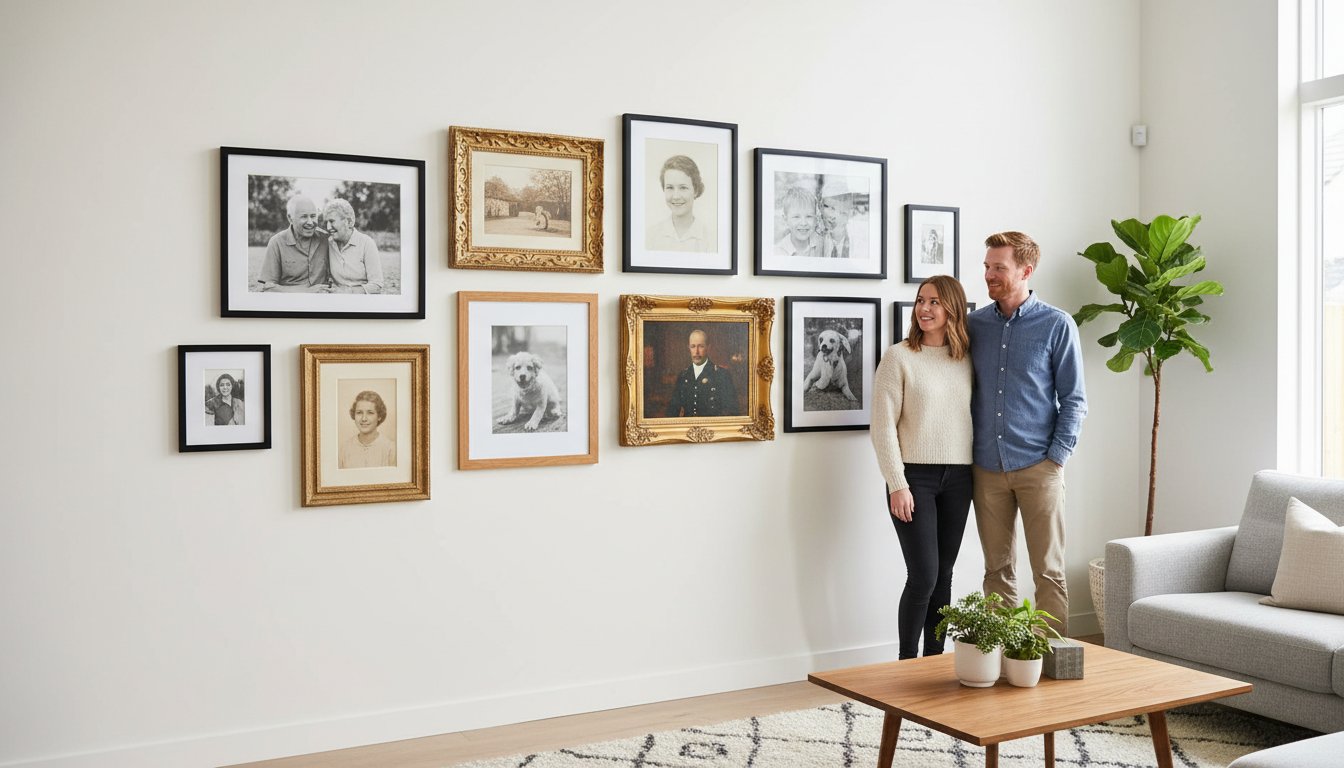
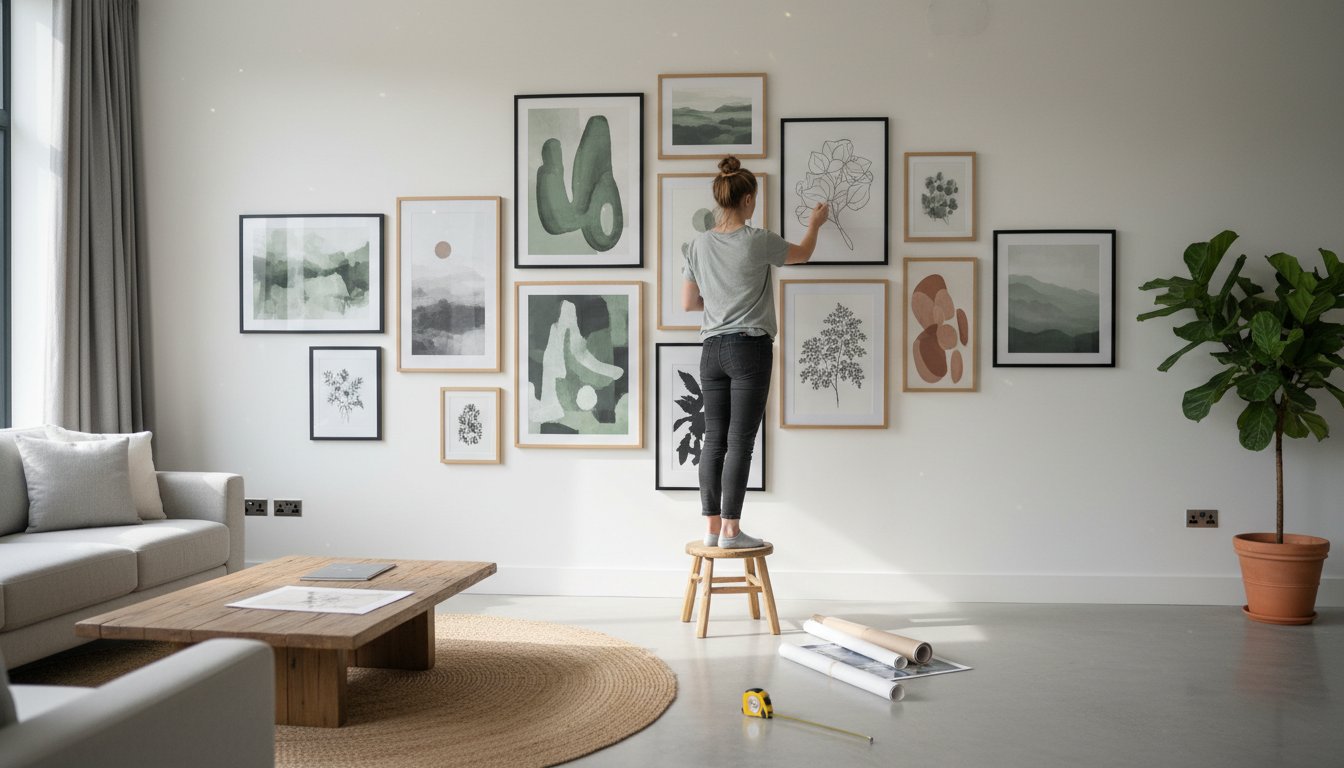
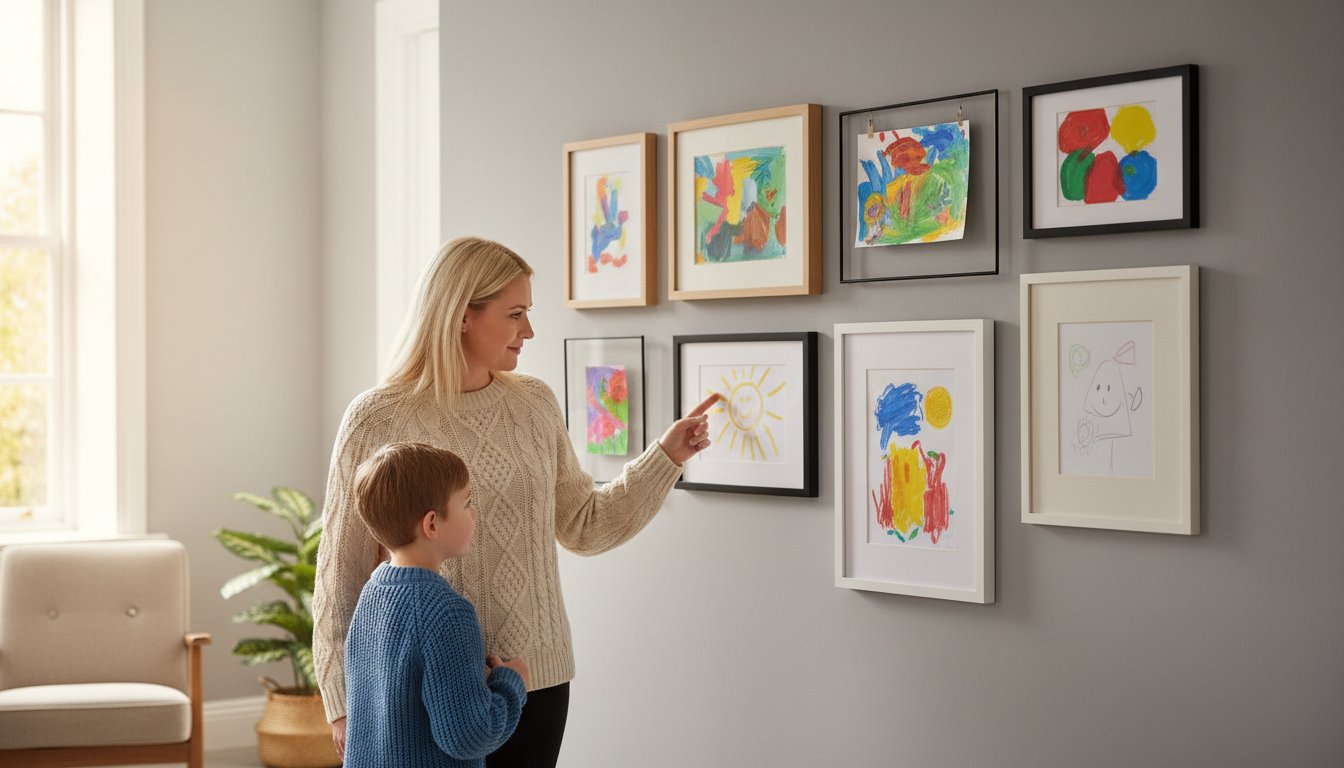
Creating a gallery wall is a popular way to display multiple pieces, yet it often falls into the trap of looking cluttered. To maintain a professional aesthetic, keep your spacing consistent. We recommend a gap of 50mm to 80mm between each frame. This creates a sense of “breathing room” that allows the eye to appreciate individual pieces by artists like those featured in our collection without feeling overwhelmed. If your furniture is eclectic, use a uniform frame colour, such as matte black or natural oak, to tie the disparate artworks together.
Placement is equally critical. The golden rule for hanging art is to ensure the centre of the piece sits 145cm from the floor. This “eye-level” standard is used by major galleries across the UK to ensure a comfortable viewing experience. If you’re hanging a large piece above a sofa, aim for the bottom of the frame to sit roughly 15cm to 20cm above the top of the upholstery. This prevents the art from feeling disconnected from the furniture below. Our art framing styles guide suggests that matching the frame’s weight to the scale of the room is essential for a balanced feel.
- Match your hardware: If your room features brass light switches or door handles, a subtle gold leaf or metallic wood frame creates a sophisticated, cohesive look.
- Consider wood tones: Pair a walnut frame with mid-century modern furniture, or choose a light ash finish to complement Scandi-style interiors.
- Think about texture: A deeply grained wooden frame can mirror the texture of a woven rug or a velvet cushion, adding layers of visual interest to the space.
Creating a Focal Point
Large-scale framed art provides an anchor for your room’s colour palette. By selecting a primary colour from a piece in the First4frames gallery, you can use the frame to draw that hue out into the wider room. Lighting is the final step in this process. Use dedicated picture lights or adjustable ceiling spots with a Colour Rendering Index (CRI) of 90 or higher. This ensures the spectacular finish of your frame and the true colours of the artist’s brushstrokes are fully realised under evening light.
You can find inspiration for your next focal point by exploring the First4frames artist collection.
Framing for Commercial Spaces
Professional framing is a powerful tool for property developers and estate agents. Research from the Home Staging Association UK indicates that 82% of property professionals believe staging helps buyers visualising a property as their future home. For commercial offices, consistency is key. We often recommend a “theme” for office curation, such as a series of monochrome architectural prints all housed in identical slimline aluminium frames. This creates a sense of brand stability and professional excellence that leaves a lasting first impression on clients. Our bespoke service ensures that even large-volume orders for property developments maintain the high-quality craftsmanship we’re known for, backed by our excellent customer ratings.
This focus on quality finishing is why we often collaborate with architects and builders on large-scale projects. For example, a high-end construction company like Swiss Build Ltd might complete a major residential or commercial build, and our role would be to provide the finishing artistic touches that turn the property into an inspiring space. It’s this synergy between foundational construction and final presentation that creates truly spectacular results.
Experience Bespoke Craftsmanship at First4Frames Gallery
Our Falkirk gallery serves as a creative hub where we combine two decades of technical expertise with a genuine passion for the local and international art scene. For over 20 years, we’ve acted as a trusted partner for collectors and decorators alike, ensuring every piece of art receives the protection and presentation it deserves. We don’t just sell frames; we provide a bridge between your room décor and the artwork itself. By focusing on the unique character of our featured artists, we ensure that the frame does the heavy lifting in the relationship, drawing your eye directly into the heart of the image. Whether you’re visiting us in person in central Scotland or browsing from further afield, our commitment to excellence remains the same.
Our Three-Step Process
We believe that acquiring fine art should be an inspiring and straightforward experience. That’s why we’ve refined our customer journey into three clear stages designed to eliminate the guesswork. We’ve removed the complexity often found in high-end galleries to offer a service that’s both professional and accessible. This art framing styles guide helps you navigate these choices with confidence, ensuring the final result is a spectacular addition to your home.
- Step One: Browse our curated gallery. You’ll find an extensive collection featuring renowned Scottish talents and international artists. We specialise in high-quality Giclée prints that capture every nuance of the original work, ensuring the colours won’t fade over time.
- Step Two: Select your bespoke frame and mount combination. This is where your personal style meets our craftsmanship. You can choose from a variety of premium materials that complement the specific tones and textures of your chosen artwork.
- Step Three: Place your order. Once your selection is made, our skilled artisans take over. We use professional-grade equipment to create a ready-to-hang masterpiece that meets our rigorous quality standards.
It’s that simple. We handle the technical details so you can focus on the joy of discovery. Our “hassle-free” promise means we manage every aspect of the process, from the initial print to the final fitting, providing a seamless transition from our gallery to your wall.
Trusted by Art Lovers Across the UK
Quality isn’t just a buzzword for us; it’s the foundation of our business. Our reputation as a “one-stop-shop” for both exquisite prints and custom framing has earned us excellent customer ratings across major review platforms. We’ve spent the last 20 years sourcing only the best materials, from sustainably grown wood for our mouldings to acid-free mounts that preserve your art for decades. This dedication to quality ensures that every customer receives a product that is both beautiful and durable. We understand that your home is a reflection of your personality, and we take pride in helping you express that through perfectly framed art.
While our gallery showcases a stunning array of ready-to-buy pieces, we also offer a dedicated picture framing service for your own cherished items. If you have a specific print in mind that requires a high-quality finish, our print-and-frame service provides the perfect solution. By integrating these three distinct services, we provide a comprehensive resource for anyone looking to elevate their interior space. We invite you to embark on your own journey of artistic discovery today. Visit us to see why we remain the heart of Scottish art framing.
Ready to transform your space with a professionally framed masterpiece? Explore our Gallery and find your perfect frame today.
Find the Perfect Frame for Your Next Masterpiece
Selecting the right frame transforms a beautiful print into a stunning focal point. This art framing styles guide demonstrates how a well-chosen border acts as the essential bridge between your artwork and your interior decor. Whether you’re opting for a minimalist modern profile or a rich traditional aesthetic, the right style protects your investment while honouring the artist’s original vision.
At First4Frames Gallery, we bring over 20 years of bespoke framing experience to every project. Our specialists take pride in handling works by renowned Scottish artists, including the vibrant landscapes of Jolomo and the atmospheric scenes of Jack Vettriano. We’ve built a reputation for excellence, backed by top-tier customer ratings on leading review platforms, so you can trust us to treat your art with the care it deserves. Don’t settle for a generic finish when you can have professional craftsmanship tailored to your specific needs.
Browse our spectacular collection of framed art prints and discover how our expertise can bring your walls to life. We’re ready to help you find that perfect match today.
Frequently Asked Questions
What is the most popular art framing style in 2026?
Minimalist natural oak remains the most popular choice in 2026, making up 38% of all gallery selections. This style complements the vibrant Giclée prints from our featured artists, providing a clean border that doesn’t distract from the artwork’s intricate detail. It’s a timeless look that bridges the gap between traditional craftsmanship and modern British interiors.
How do I choose between a wood and a metal frame?
Wood frames offer a classic warmth, while metal frames provide a sleek, industrial edge for contemporary spaces. Our art framing styles guide suggests choosing wood for 19th-century style landscapes and aluminium for abstract photography. We stock over 300 wood mouldings to ensure you find the perfect match for your piece, whether it’s for a home or office.
Can I frame my own artwork at First4Frames Gallery?
Yes, you can certainly bring your own artwork to First4Frames Gallery for our professional bespoke framing service. While our gallery showcases featured artists, our separate framing workshop handles over 15,000 individual items annually. We treat every piece with the same level of care that has earned us a 4.9-star rating on independent review platforms.
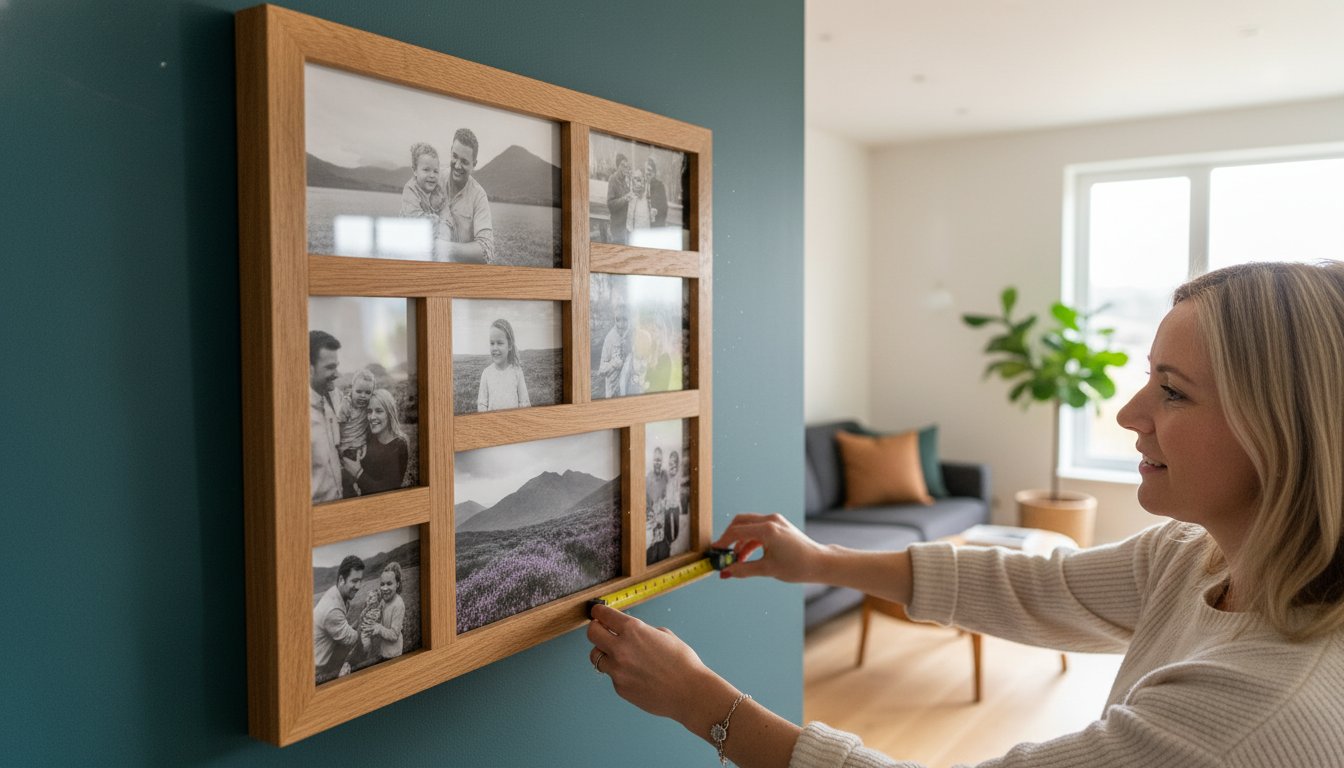
What is a “mount” and do I really need one for my print?
A mount is an acid-free border that sits between your print and the glass to prevent moisture damage and ink sticking. It’s essential for any high-quality print to ensure longevity and create a professional finish. For our print-and-frame service, we use 1.4mm conservation-grade board to protect your investment for decades.
How do I match a frame to my existing room décor?
Matching a frame to your décor involves identifying the dominant wood tones or accent colours in your furniture and flooring. Our experts often suggest using the frame as a bridge between the artwork and your wall, creating a cohesive visual flow. If your room features cool greys, a brushed silver or charcoal frame from our art framing styles guide collection works brilliantly.
What is the difference between a standard frame and a bespoke frame?
Standard frames come in fixed sizes like A4 or 10×8, whereas a bespoke frame is handcrafted to the exact millimetre of your specific artwork. Bespoke services allow you to choose from hundreds of unique finishes and high-performance glazing options. This tailored approach ensures your art is displayed exactly as the artist intended, without compromising on fit or style.
Is it better to have glass or acrylic for a large framed art piece?
Acrylic is the superior choice for large framed art because it’s approximately 50% lighter and significantly more shatter-resistant than standard glass. For pieces exceeding 70cm in width, acrylic reduces the risk of injury if the frame is accidentally knocked. We offer premium anti-reflective acrylic that provides 99% UV protection, keeping your colours vibrant for years.
How do I clean and maintain my bespoke picture frames?
Clean your bespoke frames using a dry, lint-free microfibre cloth to remove dust without scratching the surface. Avoid using harsh chemical cleaners or ammonia-based sprays, as these can damage the finish of the wood or the clarity of the glazing. For our gallery pieces, we recommend a light dusting every 14 days to keep the presentation looking spectacular.