The ‘safe’ mount colour you’re considering might be the very thing holding your artwork back. It’s a familiar dilemma: you’ve found a beautiful piece, perhaps a spectacular print from one of our First4Frames Gallery artists, but now you’re stalled. Faced with an overwhelming wall of colour swatches, the fear of making the wrong choice is real. Should it match the wall? Should it pull a colour from the art? When you’re asking, “what colour mount should I choose?”, defaulting to a simple cream can feel like the only option, but it rarely does justice to the art.
We believe choosing a mount shouldn’t be a source of stress. It’s an art form in itself. With over 20 years of bespoke framing experience, we’re here to share our professional secrets and give you a clear framework for making the perfect choice. This guide will show you exactly how to select mount colours that enhance your artwork, creating a seamless bridge between your art and your home décor. We’ll explore the simple rules professionals follow, so you can feel confident creating a truly stunning, gallery-quality display at home.
Key Takeaways
Learn the professional technique of looking beyond the dominant colour in your artwork to find the perfect complementary mount.
Find a definitive answer to what colour mount should I choose by learning how to assess the artwork’s unique mood and energy.
Discover how a mount can act as the perfect design bridge, harmonising your chosen art with your room’s unique lighting and furnishings.
See these principles applied in practice with expert analysis of framing iconic Scottish artists like John Lowrie Morrison (Jolomo) and Jack Vettriano.
The Essential Role of the Picture Mount: More Than Just a Border
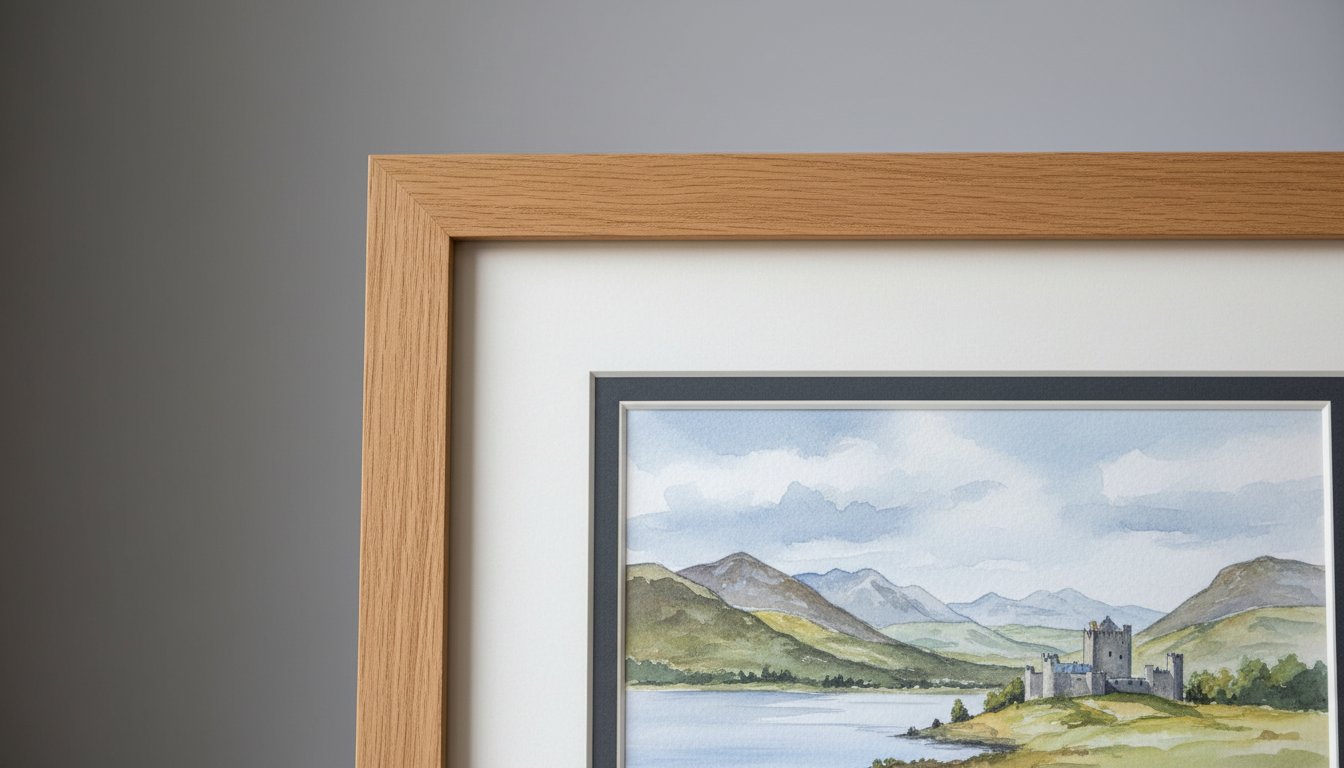
Choosing the perfect frame is an exciting step, but there’s a crucial element sitting between the art and the frame that deserves just as much attention: the picture mount. Before we explore the central question of what colour mount should I choose, it’s vital to understand why the mount itself is so fundamental. A mount, also known as a mat, is the precision-cut, premium card that creates a window around your artwork, sitting directly between the print and the protective glass. It’s far more than a simple border; it’s a key player in both the presentation and preservation of your art.
Think of the mount as providing essential ‘breathing space’. Without it, a piece of art can feel cramped and lost within its frame, its edges visually crashing into the frame moulding. A mount provides a quiet, neutral space that allows the eye to transition smoothly from the surrounding room into the artwork itself. At First4Frames, we see the mount as the perfect bridge connecting your room’s décor with the world inside the picture. It harmonises the colours of a vibrant abstract print, like those in our gallery, with the calm tones of your wall, creating a cohesive and professional display.
Why a Professional Mount Makes the Difference
The difference between a piece of fine art framed with and without a mount is instantly noticeable. A ‘bare’ frame can diminish the artwork, whereas a professionally selected mount elevates it, focusing the viewer’s attention and drawing them into the artist’s world. The width of the mount also has a profound impact. A generous mount can make a smaller print feel more substantial and significant, increasing its visual presence and perceived value. A standard A4 print, for example, can command the same wall space as a much larger piece when given a 3- to 4-inch mount, turning it into a spectacular focal point.
Archival Quality: Beyond Just Colour
The material of your mount is just as important as its shade. Low-quality, acidic boards will yellow over time and can cause irreversible damage to your print, a phenomenon known as ‘mount burn’. That’s why at First4Frames, we use only premium, acid-free, conservation-grade materials for all our picture framing services. This commitment to quality ensures your art is protected for decades. Part of this quality comes down to the core of the mountboard, which becomes visible as a fine line on the bevelled edge of the window cut. A white core offers a crisp, clean finish, while a black core can add a dramatic, sharp outline that works beautifully with monochrome photography. Understanding the role of the picture mount in preservation is key. In short, archival mounting is the non-negotiable industry standard for ensuring Giclée print longevity and colour fidelity.
Now that you appreciate the mount’s crucial role as a protector and a vital design tool, you’re ready for the next step. Answering the question of what colour mount should I choose is where your personal creative journey truly begins.
The Professional’s 3-Step Guide to Choosing Mount Colours
Choosing a mount colour can feel overwhelming, but it doesn’t have to be. With over 20 years of bespoke framing experience, we’ve refined the process into a simple, three-step method that ensures a spectacular result every time. This isn’t just about matching colours; it’s about creating a bridge between your room and the artwork, enhancing the piece without overpowering it. Our goal is to help you answer the question, “what colour mount should I choose?” with confidence and creativity.
Follow these steps to find the perfect partner for your print:
Step 1: Look Beyond the Obvious. Your first instinct might be to match the mount to the most dominant colour in the artwork. Instead, we advise looking for the secondary or tertiary colours. In a landscape by an artist like Anthony Barrow, you might ignore the dominant blue of the sky and instead pick up the subtle, warm ochre from a distant field. This technique creates a sophisticated, cohesive look that draws the viewer deeper into the image.
Step 2: Match the Mood. Every piece of art has its own emotional energy. Is it a vibrant, dynamic abstract bursting with life? Or is it a calm, muted photograph that inspires quiet contemplation? A bright, bold mount can amplify an energetic piece, while a soft, understated tone will preserve the serenity of a calmer one. The mount’s job is to support the artwork’s story, not to tell a different one.
Step 3: Consider Your Walls. The mount is the final link between the art and its environment. Hold your chosen mount samples against your actual wall paint or wallpaper. You’re looking for harmony, not an exact match. The colour should feel at home in the space, complementing your décor while allowing the artwork to remain the star.
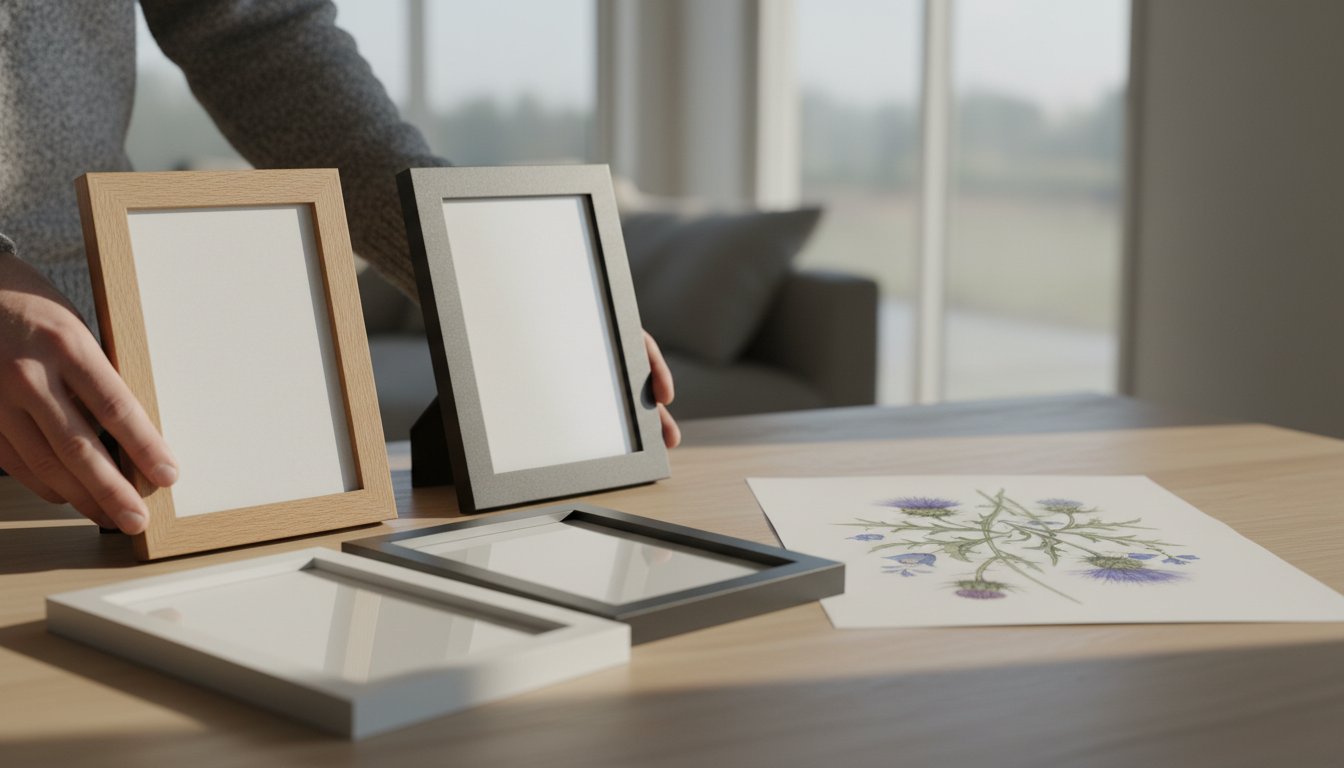
Option A: The Neutral Approach (Timeless & Safe)
For a classic, gallery-quality finish, you can’t go wrong with neutral tones like off-white, cream, or pale grey. This approach is timeless for a reason: it provides breathing room, allowing the artwork to speak for itself without any competition. It’s the perfect choice for busy compositions or pieces you want to stand the test of time. For our premium Giclée prints, matching the mount to the specific white tone of the archival paper creates a seamless, professional transition from print to frame. This attention to detail is a key part of professional presentation, a topic covered well in this comprehensive guide to framing art.
Option B: The Accent Approach (Bold & Modern)
If you’re aiming for a more contemporary or dramatic effect, using the mount to create an accent is a powerful choice. By selecting a colour that picks up a tiny, almost hidden detail in the art, you can make that element pop and bring a new dimension to the piece. Dark mounts in charcoal, deep navy, or forest green work beautifully to add depth and drama, especially for light-toned prints or monochrome photography. Just remember the ‘Rule of Tones’: ensure your mount is either significantly darker or lighter than your wall colour to create a clean contrast and avoid a muddled appearance. You can see these principles beautifully applied when you browse the professionally framed pieces in our gallery.
Case Studies: Mounting Iconic Scottish Art from First4Frames
Theory is a great starting point, but the real magic happens when you apply it to actual artwork. To truly understand the impact of a mount, let’s explore how we approach framing for two of Scotland’s most iconic and stylistically different artists, both featured in our First4Frames gallery. Their work provides a perfect lesson in how a bespoke mount can either tame a riot of colour or deepen a dramatic narrative.
Framing Jolomo: Managing Intense Colour
John Lowrie Morrison’s (Jolomo) paintings are an explosion of expressionist energy. His depictions of the Scottish West Coast pulse with vibrant pinks, electric blues, and brilliant yellows. A single, stark white mount can often feel jarring against such intensity. So, when customers ask us what colour mount should I choose for a Jolomo, our bespoke framing team often recommends a double mount. The top mount, a wider layer of a soft, neutral colour like ‘Hayseed’ or ‘Cloudy White’, gives the artwork essential breathing room. The second, thinner mount underneath provides a ‘sliver’ of colour. By carefully selecting a subtle secondary shade from the painting, like a pale yellow to echo a sunlit cottage wall, you create a beautiful, harmonious transition that pulls you right into the landscape. With this much happening in the art and mount, a simple, elegant frame in a matte black or light oak finish is all that’s needed to complete the piece.
Framing Vettriano: Enhancing the Narrative
Jack Vettriano’s work is the polar opposite of Jolomo’s. His art is cinematic, atmospheric, and steeped in a noir-inspired narrative. Here, a light, neutral mount can sever the connection to the piece’s moody interior world. To honour this aesthetic, we often guide clients toward deep, rich tones. A wide, dramatic mount in a deep burgundy, charcoal grey, or classic black can extend the painting’s atmosphere beyond its edges. While many an expert guide to framing and hanging art suggests playing it safe with white, Vettriano’s work often demands a bolder choice. This creates a powerful ‘window’ effect, making you feel as though you’re peering into a private scene from another era. A crucial consideration with dark mounts is reflection. We always recommend pairing them with one of our premium glazing options, like anti-reflective Artglass, to ensure the view remains crystal clear. It’s this attention to detail that our customers praise in their 5-star reviews, ensuring the final framed piece is nothing short of spectacular.
Understanding these different approaches shows that the answer to “what colour mount should I choose?” isn’t a single rule, but a creative decision based on the artwork itself. Whether you’re purchasing a print from our gallery or using our framing service for your own art, our expert team is here to help you make the perfect choice.
Matching the Mount to Your Interior Décor
A picture mount does more than just protect your artwork; it acts as a crucial design bridge, connecting the piece to your room’s décor. The right mount colour can harmonise with your wall paint, echo the tones in your soft furnishings, or create a deliberate, stunning contrast. It’s the final touch that transforms a simple print into an integral part of your home’s aesthetic. So, when asking yourself ‘what colour mount should I choose?‘, think beyond the artwork and consider the entire space.
This holistic view extends to all elements of the room’s architecture and design. For example, the way light enters a room through its windows plays a huge role. The clean, structured lines of high-quality window shutters, such as those designed by specialists like Shutters Factory, can create a particular style—be it modern minimalism or classic elegance—that you may want your framing choices to reflect.
The lighting in your room plays a significant role. A crisp, brilliant white mount might look spectacular in a room with abundant natural light, but under the warm, yellow glow of a 2700K tungsten bulb in the evening, it can appear jarringly bright. Conversely, a subtle off-white or cream mount can look dull under cool, blue-toned LED office lighting. We find that our ‘Minuet’ conservation-grade mount board, a soft and versatile off-white, works beautifully in over 90% of residential settings because it adapts gracefully to changing light conditions.
Your goal also dictates the choice. For a personal gallery wall at home, the selection is about your unique story. For commercial spaces, such as staging a new property development or designing a hotel lobby, the mount’s job is to create a cohesive and aspirational atmosphere that appeals to a wider audience.
The Gallery Wall Strategy
Creating a gallery wall is a beautiful way to display a collection, but it presents a key question: should all the mounts match? Using a uniform mount colour, like a consistent off-white, is a professional trick to bring order and sophistication to a collection of different art styles and frame types. It creates a visual rhythm that allows the eye to move seamlessly from a vibrant abstract by Sarah Hooper to a delicate botanical print. This approach is one we frequently recommend to our commercial clients, helping them curate a high-end, cohesive look across multiple rooms with precision and style.
Measuring and Proportion
Great mounting isn’t just about colour; it’s about proportion. Have you ever noticed how professionally framed art just looks ‘right’? The secret is often ‘bottom weighting’. This technique involves making the bottom border of the mount slightly wider than the top and sides, typically by 10-20%. This small adjustment counteracts an optical illusion that makes a centred object appear to be slipping down, giving the artwork a stable, perfectly balanced foundation. This level of detail is only achievable with a bespoke service, which allows for creative and precise proportions that standard off-the-shelf frames can’t offer.
Achieving this professional finish is embedded in our simple, three-step process. First, browse the beautiful fine art in our gallery. Second, choose your bespoke frame and mount combination, applying these expert principles. Third, place your order and let our craftsmanship bring it all together. Ready to find the perfect piece and apply these professional mounting principles? Explore the First4Frames gallery today.
Experience the First4Frames Bespoke Framing Service
Choosing the right mount is an art form in itself, but you don’t have to master it alone. For over 20 years, our family-run business in Falkirk, Scotland, has been the trusted partner for art lovers and creators. We combine a deep passion for craftsmanship with professional expertise to help you find the perfect finish for your artwork, ensuring every piece looks its absolute best.
Our unique advantage is the ‘one-stop-shop’ experience. You can explore our gallery’s stunning collection of fine art Giclée prints and have your chosen piece professionally mounted and framed right here. This seamless process means your art arrives ready to hang, with every element perfectly harmonised by our expert team. We handle all the details, so you can simply enjoy the beautiful result. This commitment to quality is why our customers have given us a 4.9-star rating on Google Reviews; we believe every frame should be a masterpiece.
At the heart of our service is an unwavering dedication to quality. We source only the best materials for every bespoke order, from premium, conservation-grade mount boards that protect your art from discolouration to high-clarity glazing. Our professional craftsmanship ensures precision-cut mounts and flawlessly joined frames that are built to last a lifetime.
Custom Framing for Your Own Treasures
Our expertise extends far beyond the prints in our gallery. We apply the same principles of colour theory and design to your own cherished items. Bring us your family photographs, military medals, or treasured memorabilia, and we’ll help you preserve and display them with the care they deserve. Our consultation process makes deciding what colour mount should I choose a creative and enjoyable experience, as we guide you through a spectacular range of options to find the perfect match.
Visit Our Falkirk Gallery
The best way to understand the impact of a mount is to see it for yourself. We invite you to visit our Falkirk gallery to experience our spectacular Giclée prints in person, where you can truly appreciate their rich texture and vibrant colour. Get hands-on with our extensive range of mount samples and see the ‘bridge’ effect in real-time as you pair different tones with beautiful artwork. Let us help you find the perfect combination. Start your artistic discovery and browse our gallery today.
Frame Your Art with Confidence and Craftsmanship
Choosing a mount is no longer a mystery. By remembering to serve the artwork first and considering how the mount acts as a bridge to your décor, you can select a colour that truly elevates your piece. You now have the professional insight to decide whether a neutral tone will let the art speak for itself or if a bolder choice will create a stunning statement. Armed with this advice, the question of what colour mount should I choose transforms from a daunting task into an exciting part of the creative process.
At First4Frames, we’ve channelled over 20 years of bespoke framing expertise into helping art lovers make these very decisions. Our passion for craftsmanship is reflected in our top-rated customer reviews for quality and service, particularly for the spectacular Scottish fine art and Giclée prints we specialise in. You’re not just buying a frame; you’re investing in decades of experience.
What is the most popular mount colour for art prints?
The most popular mount colour is overwhelmingly a shade of off-white or ivory. Classic choices like our ‘Snow White’ or ‘Antique White’ mounts are versatile and timeless. They create a clean, bright space around your artwork, allowing the piece itself to be the true focus without any colour distraction. This neutral approach complements the vast majority of art styles and interior decors, making it a safe yet professional choice for almost any print in our gallery.
Should the mount be lighter or darker than the wall?
A mount should typically be lighter than the artwork but distinct from your wall colour. This creates a beautiful, seamless transition from the wall to the art. If you’re wondering what colour mount should I choose to make a statement, a darker mount can make the colours in your print appear more vibrant and ‘pop’. However, for most pieces, a soft, neutral mount that is a few shades lighter than the most prominent colour in the art provides a classic, gallery-quality finish.
What is a double mount, and when should I use one?
A double mount features two layers of mountboard, with the bottom layer cut slightly larger to reveal a thin border of colour around the artwork. It’s a premium technique used to add depth and a bespoke, decorative finish. We often use a double mount to pick out a subtle secondary colour from one of our artist’s prints, creating a stunning, cohesive look. This small detail elevates the final piece, demonstrating true bespoke craftsmanship and drawing your eye into the image.
Can I change the mount colour if I change my room décor?
Yes, you can absolutely change the mount if your décor changes. It’s one of the simplest and most effective ways to refresh your framed art. Our professional picture framing service can easily replace an existing mount with a new one to perfectly match your updated colour scheme. This is a far more cost-effective solution than buying entirely new art, ensuring the pieces you love continue to look perfect in your home, a service reflected in our excellent customer ratings.
Does the mount colour affect the perceived size of the artwork?
Yes, the mount colour significantly affects the perceived size of your artwork. A light or white mount tends to open up the image, making the entire framed piece feel larger and more airy on your wall. In contrast, a dark mount, such as a deep grey or black, creates a more focused and contained effect. This can sometimes make the artwork itself appear slightly smaller, but it also adds a sense of drama and intimacy to the viewing experience.
Is there a ‘standard’ width for a picture mount?
There isn’t a strict ‘standard’ width, as the perfect mount is always proportional to the artwork. However, a common guideline for most A4 to A2 sized prints is a width between 50mm and 85mm. The primary goal is to give the artwork breathing room, preventing it from feeling cramped against the frame. For very large or small pieces, our bespoke framing experts adjust this width to achieve the perfect visual balance, ensuring a professional and harmonious result.
How do I choose a mount for a black and white photograph?
For a black and white photograph, classic mount choices are crisp white, off-white, or black. A pure white mount creates a sharp, high-contrast look that makes the blacks in the photo appear deeper and richer. An off-white provides a softer, more traditional feel. For a bold, contemporary statement, a black mount is superb, especially when paired with a thin white inner mount (a double mount) to cleanly separate the photograph from the dark surround.
Why should I choose an acid-free mount for my Giclée prints?
You should always choose an acid-free mount for Giclée prints to guarantee their preservation. Standard mounts contain acids that can seep into the paper over years, causing permanent yellowing and damage known as ‘mat burn’. Our conservation-grade, acid-free mounts are pH neutral. They protect your fine art print from deterioration, ensuring the archival inks and paper retain their vibrancy and quality for over 100 years, safeguarding your investment in beautiful, lasting art.
You’ve invested in a beautiful piece of art, and now it deserves a frame that truly does it justice. But when faced with framing options, it’s easy to feel a little lost. You might wonder if that extra layer in the mount is worth the investment, or worry about choosing colours that might clash with your decor. The secret to achieving that polished, gallery-quality finish often lies in a simple yet powerful technique: using double mounted picture frames. This small detail of expert craftsmanship can add incredible depth, draw the eye inward, and create a spectacular bridge between your art and your room.
In this complete guide, we’ll demystify the world of double mounting. We will explore why this bespoke touch adds such a professional feel, guide you through selecting the perfect colour combinations with confidence, and show you exactly which types of artwork are elevated most by this beautiful framing style. By the end, you’ll have all the knowledge you need to transform your cherished pieces from simply ‘hung’ to truly showcased, achieving a premium look you’ll be proud of.
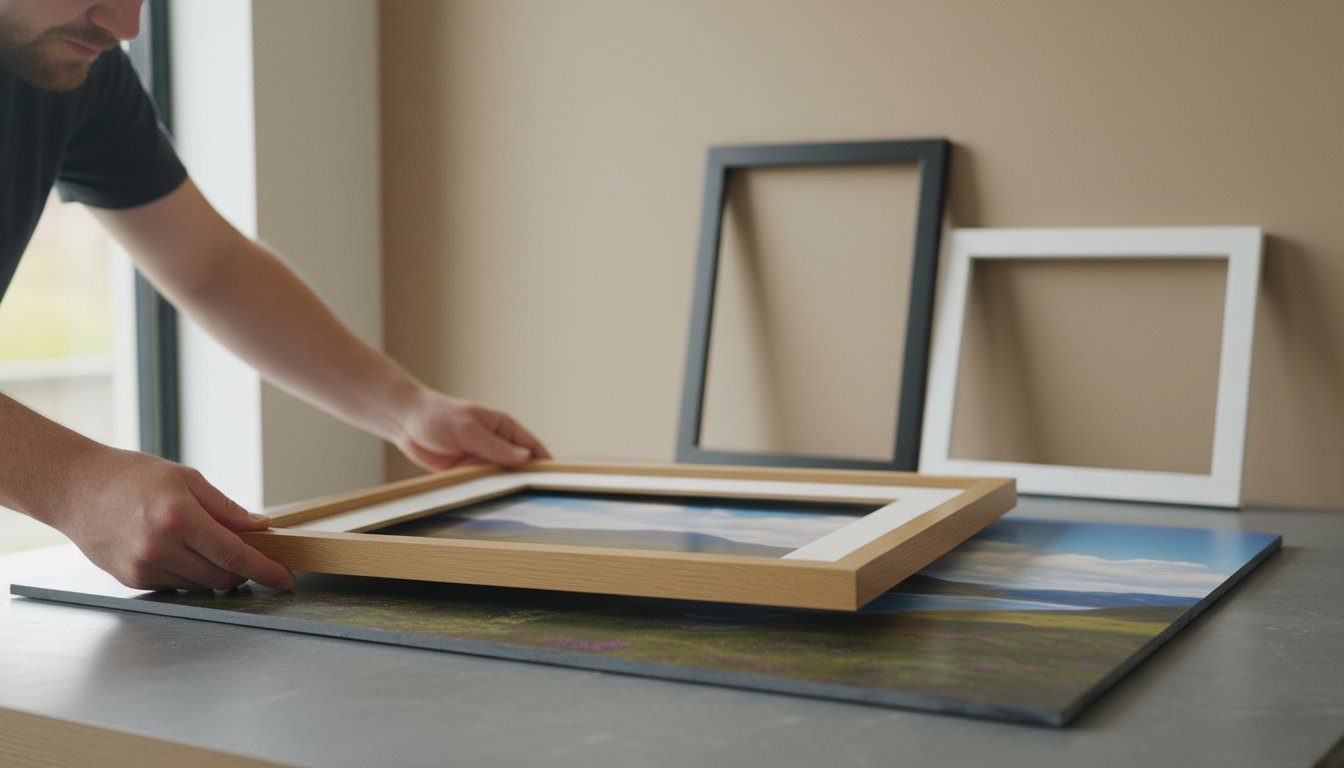
What is a Double Mounted Picture Frame?
At its heart, a double mounted picture frame is a premium presentation method that uses two layers of mount board instead of the traditional single layer. This beautiful technique adds instant depth and a professional finish to your artwork. The bottom mount peeks out from underneath the top mount, creating a thin, often contrasting, border that acts as a perfect accent. This layered effect is a hallmark of bespoke framing, drawing the eye inwards and creating a seamless bridge between the art and the frame itself. The mount, also known as a mat, serves both aesthetic and protective purposes; you can learn more about the fundamentals by reading this guide on What is a Mount or Mat?
To help visualise how different elements of a frame come together, this video offers a closer look:
The Anatomy of a Double Mount
Understanding the components of a double mount helps in appreciating its craftsmanship. Each part plays a specific role in the final, spectacular presentation:
Top Mount: This is the main, wider mount board that you see the most of. It provides the primary border and space around your artwork.
Bottom Mount: Tucked neatly underneath the top layer, this mount provides the colourful or contrasting accent line.
The ‘Reveal’ or ‘Step’: This is the small, visible portion of the bottom mount-typically between 3mm and 6mm. The size of the reveal can be adjusted to create a subtle or more pronounced effect.
Both of these precision-cut mount boards sit safely behind the glazing (glass or acrylic) to protect your print from dust and damage.
Single Mount vs. Double Mount: A Visual Comparison
A single mount offers a classic, clean, and minimalist border that suits many styles of art. It’s a timeless choice that provides breathing room for the piece without adding extra complexity. It may be preferable for extremely busy or colourful artwork where an additional border could feel distracting.
However, double mounted picture frames introduce an extra layer of sophistication. The subtle accent line of the bottom mount can be used to pick out a secondary colour in the artwork, unifying the entire presentation. This technique doesn’t just frame the art-it enhances it, guiding your focus directly to the heart of the image with a polished, gallery-quality finish.
The Aesthetic Power: Why Choose a Double Mount?
While a single mount provides a classic and clean finish, the primary reason for choosing a double mount is pure visual enhancement. It’s a technique that speaks of attention to detail and a deep appreciation for the art it holds. A double mount acts as a beautiful transition, a visual pause that prevents the artwork from ‘bleeding’ into the frame. This thoughtful layering is a hallmark of high-quality, bespoke framing, transforming a simple display into something truly spectacular.
Creating Depth and Drawing the Eye
The most immediate effect of a double mount is the incredible sense of depth it creates. The layered effect, with the bottom mount peeking out as a thin border, gently lifts the artwork from its background, making it pop. This inner border acts as a perfect focal point, subtly guiding the viewer’s gaze directly to the image. By creating this separation, double mounted picture frames give your art essential ‘breathing room’, ensuring it remains the undisputed star of the show.
Accentuating Colours Within Your Artwork
This is where the true artistry of double mounting shines. The bottom mount offers a unique opportunity to pick up on a subtle or secondary colour within your artwork. Imagine a landscape painting with a hint of lavender in the sky; a thin lavender bottom mount will make that colour sing, creating a harmonious visual echo. This technique masterfully pulls a chosen hue from the piece, making it appear more vibrant and deliberately connecting the artwork to the frame and your room’s decor.
Achieving a Professional, Gallery-Quality Finish
Step into any professional gallery or exhibition, and you’ll frequently see double mounts in use. This method instantly gives any piece a more considered, luxurious, and premium feel. It’s a signal that the framing is as important as the art itself. This professional approach extends beyond just aesthetics; it reflects a commitment to the highest standards, including proper conservation framing practices. By choosing this option, you can elevate a family photograph or a simple print into a genuine statement piece worthy of any wall.
How to Choose the Perfect Colours for a Double Mount
Choosing the right colours is where the true artistry of double mounted picture frames comes to life. More than just a border, the mountboard acts as a visual bridge, harmonising the artwork with its surroundings. The goal is always to enhance the piece, not to overpower it. A successful pairing requires careful consideration of the artwork’s dominant colours, its subtle undertones, and the decor of the room where it will be proudly displayed. To help you achieve a beautiful, professional result, we’ve outlined three popular and effective strategies for selecting the perfect mount colours.
Strategy 1: The Classic Neutral Combination
For a truly timeless and sophisticated finish, you can’t go wrong with a classic neutral pairing. This tried-and-tested approach involves using two different shades of the same neutral colour. For example, you might pair a crisp off-white for the top mount with a slightly darker cream for the bottom reveal. This subtle difference creates an elegant depth that gently draws the eye inward towards the art. It’s a wonderfully safe yet effective choice that complements nearly any style, from traditional watercolours to bold, modern photography, ensuring your artwork remains the star of the show.
Strategy 2: Using a Bold Accent Colour
If you want your display to have a vibrant, custom touch, the accent colour strategy is a fantastic option. The technique is simple: select a neutral top mount-like a soft grey or classic white-and pair it with a bold, colourful bottom mount. The secret to making this work beautifully is to choose a colour for the slim reveal that is pulled from a minor, secondary hue in the artwork itself. This popular technique, detailed in many framing resources like Frame Destination’s A Guide to Double Matting, expertly pulls a subtle colour forward, creating a striking and cohesive look that feels both personal and polished.
Strategy 3: Tonal and Complementary Pairings
For a deeply cohesive and professionally curated appearance, consider a tonal pairing. This sophisticated method involves selecting a top mount colour that perfectly matches a mid-tone within your artwork. The bottom mount is then chosen in a darker, richer shade of that same colour, creating a seamless gradient effect. This method builds a powerful visual connection between the frame and the art, adding a sense of depth and luxury. The result is a stunningly harmonious presentation that feels thoughtfully assembled by an expert. If you’re unsure which tones to pull, you can always explore colour options with our bespoke framing experts.
What Types of Art Benefit Most from Double Mounting?
While almost any piece can be enhanced by thoughtful presentation, the professional finish of a double mount is particularly effective for certain types of artwork. This technique does more than just create a visual border; it offers protection, adds a sense of depth, and can elevate the perceived value of the piece. By considering the style and medium of your art, you can use a double mount to unlock its full potential.
From treasured family photos to valuable fine art prints, this is where the artistry of double mounted picture frames truly comes into its own, providing a perfect bridge between the artwork and your decor.
Photographs and Fine Art Giclée Prints
A double mount adds immediate presence to printed works. For monochrome photographs, a narrow inner mount (or ‘reveal’) in a dark, contrasting colour can create a dramatic, sharp border that draws the eye inward. With premium Giclée prints, a carefully chosen colour combination can echo and enhance the rich tones within the image, making the colours feel more vibrant and alive. This layering technique adds a bespoke, gallery-quality feel that distinguishes a professionally finished piece.
Watercolours, Pastels, and Works on Paper
For delicate mediums, a double mount serves a crucial protective function. The combined thickness of the two mount boards creates essential space between the surface of the artwork and the glazing (glass). This is vital for pastels, charcoals, and watercolours, preventing smudging or moisture transfer. Aesthetically, a neutral double mount allows the unique texture of the paper to stand out, while a soft, complementary tone can beautifully echo the subtle hues found in these mediums.
Certificates, Signatures, and Memorabilia
Double mounting lends an air of formality and importance, making it the perfect choice for displaying significant documents. University degrees, awards, and certificates gain a sense of occasion when framed this way. For signed prints or memorabilia, the inner mount can be used to frame the signature, drawing attention to its authenticity. Even smaller items, like medals or vintage postcards, are given greater stature and a clear focal point within double mounted picture frames.
Whatever you choose to display, the right mount can transform its presence. Explore our gallery to see inspiring examples of professionally finished art.
Design and Practical Considerations for Your Frame
Choosing the colours for your double mount is an exciting first step, but the true artistry lies in the details. To achieve a truly professional and balanced display, it’s essential to consider the proportions, materials, and the interplay between the mount and the frame itself. These final considerations are what transform a simple picture into a stunning focal point for your room.
Getting the Proportions Right
Creating visual harmony is all about proportion. A well-balanced mount gives your artwork breathing space and draws the eye inward. Here are a few professional guidelines to follow:
The Reveal: The bottom mount’s visible border, or ‘reveal’, is typically kept subtle. A standard width is between 5mm and 10mm, providing a crisp, defining line without being distracting.
Mount Width: The top mount should almost always be significantly wider than the frame. As a general rule, wider mounts suit larger pieces of art, preventing them from feeling cramped.
Avoid Identical Widths: For a more dynamic look, ensure the width of the mount and the width of the picture frame moulding are not identical. This simple trick prevents visual competition between the two elements.
Choosing the Right Materials: Conservation Quality
A frame’s job is not just to look beautiful, but also to protect your art for a lifetime. The quality of the mount board is paramount for preservation. Always insist on acid-free, conservation-grade mount board. This premium material prevents the dreaded ‘yellowing’ or ‘mount burn’ that can permanently damage artwork over time. Beyond preservation, mount boards are available in various textures and finishes, from perfectly smooth to subtly textured, adding another layer of bespoke detail to your final piece. At First4Frames Gallery, we use only the highest quality, conservation materials in all our double mounted picture frames, ensuring your art remains as vibrant as the day it was framed.
Matching the Mount to the Frame
The final step is to ensure the entire package works as a single, cohesive unit. The frame and mount should act as a bridge between your artwork and your room’s decor. Consider how the frame’s colour, style, and width interact with your mount choices. A bold, complex double mount often shines when paired with a simple, minimalist frame. Conversely, an ornate, decorative frame might call for a more subtle and neutral mount combination to avoid overwhelming the art. The goal is always the same: to create a beautiful presentation that elevates and showcases your chosen piece.
Ready to see how these principles come to life? Explore our gallery of professionally framed art to find inspiration for your own masterpiece.
Bring Your Vision to Life with a Bespoke Double Mount
As we’ve explored, a double mount is a powerful tool in the world of framing. It does more than simply border your art; it creates a spectacular sense of depth, draws the viewer’s eye inward, and provides a professional, gallery-quality finish. The right double mounted picture frames build a beautiful bridge between your artwork and your living space, ensuring the final piece feels perfectly at home.
Achieving this perfect balance requires true craftsmanship. At First 4 Frames, we bring over 20 years of bespoke framing experience to every project. Based in Falkirk and serving clients across Scotland and the UK, we use only premium, conservation-grade materials to ensure your cherished artwork is both beautifully displayed and perfectly preserved for years to come.
Does a double mounted picture frame cost more than a single mount?
Yes, a double mounted frame does cost slightly more than a single mount. This is because it requires two separate pieces of premium mount board and involves more time and precision from our expert framers to cut and assemble perfectly. However, the increase in cost is modest, typically adding between £10 and £20 to the final price. We believe this is a worthwhile investment for the spectacular depth and professional finish it brings to your treasured artwork.
What is a triple mount and when would you use one?
A triple mount adds a third layer of mount board, creating an even greater sense of depth and sophistication. This technique is perfect for making a special piece truly stand out. It is often used for smaller, highly detailed artwork, cherished photographs, or displaying items like medals or memorabilia where you want to create a dramatic, gallery-quality presentation. The three layers allow for a beautiful play of complementary colours, adding a truly bespoke touch to the final frame.
How wide should the border (the reveal) of the bottom mount be?
The ‘reveal’ of the bottom mount-the small border of colour visible beneath the top mount-is typically between 5mm and 10mm. This width is ideal for creating a crisp, defining line that draws the eye towards the artwork without being distracting. For a more subtle effect, a 5mm reveal is perfect, while a 10mm reveal can make a bolder statement. The final choice depends on the artwork and your personal preference, and our team is always happy to offer guidance.
Can you add a double mount to an existing framed picture?
It is sometimes possible to add a double mount to an existing frame, but it depends entirely on the frame’s ‘rebate’ depth. The rebate is the recess at the back of the frame that holds all the components. Adding a second mount increases the overall thickness, and if the rebate isn’t deep enough, the backing board cannot be secured safely. For a professional assessment, we recommend bringing your frame to us so we can determine if it can be upgraded.
What’s the difference between conservation and standard mount board?
The primary difference is archival quality and the protection of your art. Standard mount board contains acids that can leach into your artwork over many years, causing discolouration or “mat burn.” In contrast, conservation mount board is completely acid-free and lignin-free. It is specifically designed to preserve your art and protect it from pollutants for decades to come. For any piece you value, we always recommend using conservation-grade materials to ensure its beauty and longevity.
Should the bottom mount be darker or lighter than the top mount?
A classic and very popular choice is to have a darker bottom mount beneath a lighter top mount. This creates a sharp, defined border that cleanly separates the artwork from the mount, drawing your focus inward. However, the reverse can be equally stunning. Using a lighter bottom mount creates a soft, glowing ‘halo’ effect around the image, which can work beautifully with more delicate or ethereal pieces. Ultimately, the perfect combination is the one that best complements your art.
The excitement of finding the perfect artwork can quickly turn to confusion when faced with measurements, mounts, and a sea of frame sizes. The fear of making a costly mistake is real, and it can leave your treasured pictures languishing in a tube instead of taking pride of place on your wall. But it doesn’t have to be this complicated. Learning how to choose the right size frame is the most crucial step in transforming a simple print into a spectacular, professionally finished piece that you’ll be proud to display.
In this complete guide, we’ll demystify the entire process with our expert advice. We’ll walk you through everything from accurately measuring your artwork to understanding the essential role of a picture mount and decoding confusing terms. You’ll discover how to make a choice that not only fits perfectly but also beautifully enhances your picture, turning that framing challenge into a simple, enjoyable act of craftsmanship. Let’s embark on this journey together and give your art the beautiful home it deserves.
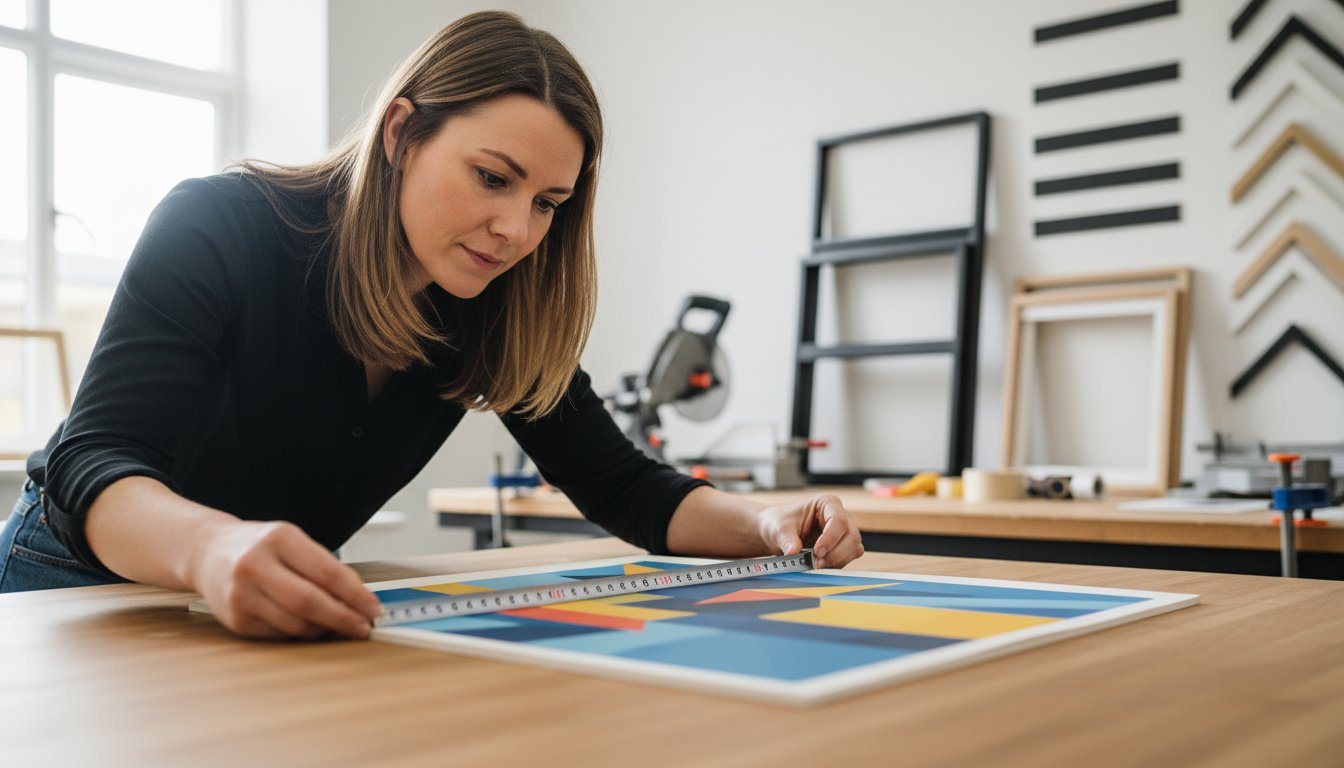
First Things First: Understanding the Three Key Measurements
Embarking on the journey to frame your art is an exciting step, but the secret to a spectacular result lies in precision. Before you fall in love with a particular style, getting your measurements right is the essential foundation. Understanding the difference between your artwork size, the mount aperture, and the final frame size will prevent any guesswork and ensure a perfect, professional fit. This is the most important part of learning how to choose the right size frame and guarantees your piece will look its absolute best.
To see these principles in action, this helpful video provides a clear visual guide:
How to Measure Your Artwork Accurately
To achieve a bespoke, gallery-quality finish, accuracy is paramount. Always begin by measuring the artwork itself, not the paper it is on, unless you want the border to show. For the most reliable results, follow these simple steps:
Use a steel tape measure, as fabric ones can stretch and give inaccurate readings.
Carefully measure the exact height and width of the image area you want to display.
Measure each dimension twice to confirm your numbers and avoid any small errors.
Note down your dimensions clearly, ideally in both millimetres (mm) for precision and inches for reference.
Frame Size vs. Aperture: What’s the Difference?
These two terms are often confused, but they refer to distinct measurements. The frame size relates to the inner dimensions of the frame itself-the size of the glass and backing board that will fit inside it. The aperture, on the other hand, is the opening or ‘window’ in the picture mount through which your artwork is viewed. To hold your art securely, the aperture should be slightly smaller than your artwork. A 5-10mm overlap on all sides is standard, preventing your picture from slipping through the opening.
The Crucial Role of the Picture Mount
A picture mount (or mat) is far more than just a decorative border; it is a key component of professional framing. It creates a visual space between the artwork and the frame, drawing the viewer’s eye inward. Crucially, it also separates your art from the glazing (the glass or acrylic), protecting it from potential damage caused by condensation. Whether you have a bespoke piece or one that fits common standard photo print sizes, a mount provides a beautiful finish. Remember, the width of the mount’s border adds to the overall dimensions, so you must factor this in when determining the final frame size you need.
Standard Sizes vs. Bespoke Framing: Which Path is Right for You?
Once you have carefully measured your artwork, you arrive at a crucial decision point. Do you opt for a convenient, ready-made frame, or invest in a bespoke service for a truly perfect finish? Both paths have their merits, and understanding the difference is a key part of how to choose the right size frame. Let’s explore the pros and cons to help you find the ideal solution for your art.
A Guide to Common Ready-Made Frame Sizes
Standard, or “off-the-shelf,” frames are manufactured to fit the most common photo and paper dimensions. In the UK, you’ll frequently find sizes designed for photographs like 6×4, 7×5, and 10×8 inches, as well as the international ‘A’ series for prints and documents (A4, A3, A2). If your art matches one of these dimensions, a standard frame can be a simple solution. Remember to account for a mount (also called a mat or passe-partout), which adds a border and requires a larger frame.
When is a Standard Size Frame the Best Choice?
A ready-made frame is often the most practical choice in several situations. It’s an excellent, cost-effective option when you need a frame quickly or are framing a piece of lower sentimental or monetary value. Consider a standard frame if:
You are framing standard-sized photos, posters, or certificates.
You are working with a tight budget.
You need a frame immediately for a last-minute gift.
You are happy with a more limited selection of styles and colours.
Why Bespoke Framing Guarantees a Perfect Result
For artwork that is unusually sized, valuable, or deeply personal, bespoke framing is the ultimate expression of care. A custom frame is crafted to the precise millimetre of your piece, ensuring a flawless, gallery-quality presentation. Our experts, who adhere to the highest standards of craftsmanship upheld by organisations like the Professional Picture Framers Association, provide a premium service. The key benefit of learning how to choose the right size frame with a bespoke service is the unlimited potential it unlocks-giving you complete control over the materials, colour, mount style, and glazing to create a truly unique and protective home for your art.
This level of personalisation is particularly meaningful when framing cherished photographs of loved ones to create a lasting tribute. While a beautiful frame honours a memory at home, services like Funera focus on creating a respectful and beautiful service to honour a life lived.
The Art of Proportion: Matching Frame Size to Artwork and Style
Finding the perfect frame goes beyond simply matching the dimensions of your artwork. It’s an exercise in visual balance and harmony. The real secret behind how to choose the right size frame lies in understanding proportion-how the width of the mount and the thickness of the frame itself work together to complement and elevate the piece. A well-proportioned frame doesn’t just protect your art; it enhances its story and draws the viewer in, becoming the perfect bridge between your art and your decor.
Giving Your Art ‘Breathing Room’ with Mounts
A mount creates vital space between the artwork and the frame, preventing the glass from touching the art’s surface while adding visual separation. This ‘breathing room’ is crucial for creating a professional finish. For a balanced look, a general rule is that the mount should be significantly wider than the frame moulding. For a classic, gallery-style aesthetic, consider an off-centre or ‘weighted’ mount, where the bottom border is slightly wider, which gives the artwork a subtle visual lift. Understanding these basic principles is a great first step, and a comprehensive a guide to framing art can provide even more foundational knowledge on achieving the perfect balance.
Framing Small Art for a Big Impact
Don’t let a small piece of art get lost on your wall. Instead, turn it into a deliberate, spectacular focal point. Using an oversized frame with a very wide mount is a professional technique that creates drama and immediately draws the eye towards the centre, making a small print feel more significant and luxurious. For a contemporary touch, you could also:
‘Float’ the artwork: Mounting the art on top of the mount board creates a subtle shadow and a striking 3D effect.
Create a gallery wall: Grouping several small, identically framed pieces creates a cohesive and powerful display.
See these professional techniques in action by exploring the beautiful examples in our online gallery.
How to Frame Large Art Without Overpowering It
When you’re deciding how to choose the right size frame for a large, statement piece, the philosophy is often “less is more.” A large painting or print already has a commanding presence, so a thick, ornate frame can feel overwhelming and compete for attention. Instead, opt for a relatively thin, simple frame that acts as a clean, crisp border. This keeps the focus squarely on the artwork itself. For very large pieces, a mount may not be necessary at all, allowing the art to extend to the edge. Most importantly, ensure your chosen frame is built with premium craftsmanship to support the weight safely and securely for years to come.
Beyond the Art: Choosing a Frame Size for Your Space
The perfect frame does more than just protect your artwork; it acts as a beautiful bridge between the piece and your room’s décor. When you consider the context of your space-the scale of the wall, the surrounding furniture, and the overall style-the right frame size can transform a picture into a stunning focal point. Understanding how to choose the right size frame for your wall is a key step in achieving a polished, professionally styled interior.
The 2/3 Rule: Scaling Your Frame to the Wall
A simple yet powerful interior design principle is the two-thirds rule. Aim for your artwork, whether a single statement piece or a curated gallery wall, to occupy roughly two-thirds to three-quarters of the available wall space. This prevents a small frame from looking lost and insignificant on a large wall, creating a sense of balance and intentionality that instantly elevates your room.
Hanging Art Above Furniture (Sofas, Beds, Tables)
When placing art above furniture like a sofa, bed, or console table, scale is crucial. Your framed art should be approximately two-thirds the width of the furniture it hangs over. To create a cohesive look, hang the piece so its bottom edge is 6-8 inches above the furniture. This creates a strong visual anchor, ensuring the art and furniture feel connected rather than floating apart.
Planning a Gallery Wall: Mixing and Matching Sizes
A gallery wall is a spectacular way to display a collection of treasured pieces. To create a harmonious composition, start by placing your largest frame first, often slightly off-centre, as an anchor. Arrange your smaller frames around it, maintaining a consistent spacing (usually 2-3 inches) between each one. A top tip: lay your entire arrangement on the floor first to perfect the layout before a single nail touches the wall.
A Final Checklist for Choosing the Perfect Frame Size
Feeling confident? Here is our simple checklist to guide you through the final steps for selecting a beautiful, perfectly-proportioned frame:
Step 1: Carefully measure your artwork’s height and width.
Step 2: Decide if you want a mount, and calculate its dimensions.
Step 3: Assess the wall space and apply the design rules for scale and placement.
Step 4: Choose a standard size for convenience or opt for a bespoke frame for a perfect fit.
Choosing a frame is about more than just measurements; it’s an art in itself. By understanding the key relationship between your artwork, the mat, and the frame, and considering the proportions of your space, you now have the knowledge for how to choose the right size frame with confidence. This ensures your treasured piece doesn’t just hang on a wall-it truly belongs.
For those special pieces that deserve nothing less than perfection, a bespoke solution is the ultimate expression of care. At First4Frames Gallery, we bring over 20 years of professional framing experience to every project. From our Falkirk workshop, our expert craftsmen use only high-quality, conservation-grade materials to create a beautiful, lasting home for your art. Let us handle the details with the precision and passion your artwork deserves.
Embark on your framing journey today and give your art the spectacular presentation it was made for.
Frequently Asked Questions
What size frame do I need for an A4 picture?
For a standard A4 print (21cm x 29.7cm), you have two beautiful options. For a simple, contemporary look, choose an A4 frame where your artwork will fit perfectly edge-to-edge. If you desire a more classic, gallery-style presentation, we recommend using a larger frame, such as 30cm x 40cm, with a mount. This creates a professional border that draws the eye to the artwork and gives it space to breathe.
Should a picture frame be bigger than the picture?
In most cases, yes. Selecting a frame that is larger than your artwork allows for the inclusion of a mount. This beautiful border serves two key purposes: it creates visual separation between the art and the frame, enhancing its impact, and it protects your print by preventing it from touching the glass. While a frame that is the exact size of the picture offers a modern, ‘full-bleed’ effect, a larger frame with a mount provides a timeless, professional finish.
How do I measure for a frame if I want to include a mount?
First, carefully measure the exact height and width of your artwork. This measurement will be the ‘aperture’ size, or the opening, of the mount. Next, decide on your desired mount border width-for example, 5cm. To find the required frame size, add double the mount width to both the height and width of your artwork. For a 20x30cm print with a 5cm mount, you would need a 30x40cm frame.
How wide should a picture frame border (the mount) be?
The perfect mount width creates a harmonious balance between the art and the frame. As a general rule of thumb, the mount should be noticeably wider than the frame moulding itself-never narrower. A border of between 5cm and 8cm is a popular and well-proportioned choice for many standard-sized prints. For smaller artworks, a more generous mount can add presence, while larger pieces may suit a proportionally smaller border. It is an artistic choice that should ultimately complement the piece.
Is it better to choose a frame that matches the art or the room?
A truly perfect frame acts as a bridge between your artwork and your room’s décor, so it should ideally complement both. The frame’s primary role is to enhance the art, so its style and colour should harmonise with the piece first. However, it must also feel at home in your space. Consider the frame and mount as the elements that seamlessly integrate your chosen art into your existing interior design, creating a cohesive and polished look.
Can I put a small picture in a large frame?
Absolutely! Using an oversized frame with a wide mount is a spectacular way to give a small piece of art significant visual impact. This technique creates a dramatic, gallery-quality effect that turns a cherished photograph or a delicate sketch into a premium focal point. Deciding to give a small piece more presence is a creative answer to the question of how to choose the right size frame, making a confident and stylish statement on your wall.
You have a cherished A4 photograph, a proud certificate, or a beautiful piece of art, but finding the right frame feels overwhelming. Which material best suits your décor? What style will truly enhance the image without overpowering it? Choosing from the vast world of a4 picture frames shouldn’t be a source of stress, but an exciting part of the creative process.
This guide is your trusted partner, designed to make that choice simple and inspiring. We will journey through everything you need to know, from the timeless warmth of wooden frames to the clean lines of modern metal designs. Discover the transformative power of a picture mount and gain the confidence to select a style that makes your art sing. By the end, you won’t just find a frame; you’ll find the perfect, premium home for your most treasured pictures, ready to create a display that is uniquely and beautifully yours.
Understanding the A4 Frame: Dimensions, Uses, and Versatility
Before embarking on your framing journey, it’s essential to understand the foundation: the A4 size itself. You encounter it every day-it’s the standard for letters, documents, and printouts across the UK and much of the world. This universal familiarity is precisely what makes an A4 frame such an accessible and practical choice for displaying your most cherished items, transforming them from simple sheets of paper into treasured displays.
To better understand how these dimensions translate into beautiful displays, this short video offers a helpful visual guide:
Exact A4 Frame Dimensions
Clarity is key in craftsmanship. An A4 frame is built to house an item measuring exactly 210 x 297 millimetres. These precise measurements, defined by the official ISO A4 paper dimensions, ensure a snug and professional fit. It’s crucial to distinguish between the aperture-the visible area inside the frame-and the external dimensions, which include the width of the frame moulding itself. The aperture will be slightly smaller than A4 to hold the paper securely behind the frame’s lip.
Unit
Dimensions (Width x Height)
Millimetres (mm)
210 x 297 mm
Centimetres (cm)
21.0 x 29.7 cm
Inches (in)
8.3 x 11.7 inches
Common Uses for A4 Picture Frames
The true beauty of a4 picture frames lies in their spectacular versatility. Their standardised size makes them the perfect choice for a wide array of personal and professional displays. They provide a premium, polished look for:
Professional Achievements: University diplomas, training certificates, and industry awards in your home office.
Precious Memories: Family portraits, beloved school photos, and candid snapshots on a gallery wall or desk.
Beautiful Artwork: Giclée prints, original sketches, and digital illustrations, making fine art accessible for any space.
Commercial Displays: Important notices, restaurant menus, or promotional materials in a business setting.
Portrait vs. Landscape: Which Way Up?
The orientation of your artwork dictates how you should hang your frame. A ‘portrait’ orientation is vertical (taller than it is wide), ideal for headshots, certificates, and single-subject art. A ‘landscape’ orientation is horizontal (wider than it is tall), perfect for scenic photographs, group pictures, and panoramic prints. Thankfully, you don’t have to choose one forever. All our high-quality frames are supplied with robust fittings that allow for easy hanging in either portrait or landscape, giving you complete creative freedom.
Choosing Your A4 Frame: A Guide to Materials and Styles
Selecting the perfect frame is an art in itself. A frame does more than simply protect your print; it acts as a bridge between the artwork and your room’s decor, completing the visual story. When choosing from the vast array of a4 picture frames available, the material, style, and colour you pick will significantly impact the overall look, feel, and longevity of your displayed piece. Making a thoughtful choice is what elevates your picture from a simple print into a spectacular feature, giving it the bespoke presentation it deserves.
Frame Materials: Wood, Metal, and More
The foundation of any great frame is its material. Each option offers a unique character and set of benefits, allowing you to find the perfect match for both your image and your budget.
Classic Wood (Oak, Pine): Wooden frames bring a natural warmth and timeless appeal. Oak offers a rich, traditional feel, while pine is lighter and more rustic. Highly versatile, wood can be stained or painted to suit any style.
Sleek Metal (Aluminium): For a modern, minimalist aesthetic, metal is an excellent choice. Aluminium frames are prized for their slim, clean profiles and durability, making them ideal for contemporary photography and graphic prints.
Versatile Composite (Polcore): A cost-effective and eco-friendly option, Polcore frames are made from recycled polystyrene. They are lightweight, durable, and available in an extensive range of finishes, from smooth matte colours to wood-effect grains.
Matching Frame Style to Your Interior
A beautiful frame should harmonise with its surroundings. Considering your room’s existing decor is key to creating a cohesive look. Harmonising your frame with your decor is an art in itself, and you can find many expert tips on choosing a frame from leading art authorities to guide your decision. Here are a few popular styles to consider:
Modern & Minimalist: Opt for thin black, white, or brushed metal frames to maintain a clean, uncluttered look.
Traditional & Classic: Choose ornate wood frames with gentle curves or detailing to complement classic interiors.
Rustic & Farmhouse: Embrace the charm of natural or distressed wood finishes to add a warm, textural element.
Scandinavian: Simple white or light wood frames, such as oak, perfectly capture the Scandi principles of simplicity and functionality.
The Psychology of Colour in Framing
Colour is a powerful tool in presentation. The right hue can draw the eye, enhance the colours within the image, and tie the entire piece together. Consider the emotional impact of each colour:
Black: A timeless classic. Black frames add contrast, making the colours in your artwork appear more vibrant and defined.
White: Clean, fresh, and contemporary. A white frame creates an airy feel and works beautifully in bright spaces or with minimalist art.
Natural Wood: Earthy and inviting, a natural wood finish adds warmth and connects your artwork to the natural world.
Metallic (Gold/Silver): For a touch of elegance and sophistication, a metallic finish is perfect for certificates, formal portraits, or classic art pieces.
The Secret Ingredient: Using Mounts and Glazing with A4 Frames
While the frame itself provides structure and style, the true secret to a professional, gallery-worthy display lies in two key components: the mount and the glazing. These elements work together to protect, enhance, and draw the eye towards your artwork, transforming a simple picture into a spectacular centrepiece. Far from being optional extras, they are essential tools in the art of beautiful presentation.
Why a Picture Mount is Essential
A picture mount, sometimes called a mat, is the precision-cut cardboard border that sits between your artwork and the frame. Its purpose is twofold. Visually, it creates breathing room around your image, preventing it from feeling cramped and guiding the viewer’s focus directly to the art. Practically, it serves a crucial protective role by creating a small air gap that stops your print or photograph from touching the glazing, which prevents moisture damage and sticking over time.
How to Choose the Right Mount
When framing an A4 print, using a mount means you’ll need a larger frame. A classic and perfectly balanced choice is to place your A4 image within an A3 frame using a custom-cut mount. This provides a generous, elegant border. For colour, you can’t go wrong with a classic off-white or cream, as it complements nearly any piece. However, for a more dramatic effect, a dark charcoal mount can make colours pop, while a coloured mount can be used to skilfully accent a specific shade within the artwork itself.
Glass vs. Acrylic (Perspex): What’s the Difference?
The glazing is the clear protective layer of your frame. The right choice depends on your budget, where the frame will hang, and the value of the piece. Here’s a simple breakdown:
Standard Glass: Offers excellent clarity and a traditional, high-quality feel. However, it is heavier and can be fragile.
Acrylic (Perspex): A lightweight and shatter-resistant alternative, making it safer for shipping and for homes with children or pets. Premium acrylic often includes UV protection to prevent your beautiful art from fading.
Anti-Reflective Glazing: If your frame will hang in a brightly lit room or opposite a window, this specialist option minimises glare and reflections, ensuring your art can be viewed perfectly from any angle.
Choosing the perfect combination of mount and glazing for your a4 picture frames is an art in itself. If you need expert advice to achieve a flawless, professional finish, we are here to help. Explore our bespoke framing options.
Creative Ideas for Displaying Your A4 Framed Pictures
The A4 frame is a true cornerstone of home and office décor, prized for its perfect balance of presence and versatility. But its potential extends far beyond hanging a single picture on a wall. With a little creativity, an A4 frame becomes a powerful tool for telling your story, celebrating achievements, and curating a space that feels uniquely yours. Let’s move beyond the basics and explore how you can create beautiful, balanced arrangements.
The Professional Look: Framing Certificates & Diplomas
Give your hard-earned qualifications the prestige they deserve. A classic black or rich, dark wood frame lends immediate authority and creates a timeless, formal look. To elevate it further, consider a mount in a contrasting, deep colour like navy blue or dark green. This simple addition adds a layer of distinction, making it a perfect display for your home office, study, or a professional waiting area.
Creating a Personal Photo Display
An A4 frame is the ideal size for showcasing those truly special moments-a key family portrait, a spectacular holiday landscape, or a favourite candid snap. Don’t be afraid to mix and match frame styles on a gallery wall for an eclectic, personal feel. Alternatively, the A4’s stable size makes it perfect for standing independently on a console table, bookshelf, or bedside table, adding a warm, personal touch to any surface.
Building a Gallery Wall with A4 Frames
A collection of frames can transform a blank wall into a stunning focal point, and a4 picture frames are the perfect foundation for this. Their standard size provides a sense of structure and rhythm, allowing you to build a beautiful and cohesive display. Here are three popular approaches:
The Anchor: Use A4 frames as the central, consistent size in a mixed-size gallery wall. Build outwards with larger A3 and smaller A5 or A6 frames for a dynamic and visually interesting arrangement.
The Symmetrical Grid: For a clean, modern, and high-impact aesthetic, create a symmetrical grid using identical A4 frames. This works beautifully for a series of related images, art prints, or black and white photographs.
The Eclectic Mix: Combine different A4 frame styles, colours, and finishes to reflect your personality. The consistent size will tie the varied looks together, creating a display that is both cohesive and deeply personal. For inspiration, why not explore our customer gallery to see how others have curated their walls.
Quality Matters: Ready-Made vs. Bespoke A4 Framing
While A4 is one of the most common and convenient sizes for prints, photos, and documents, not all a4 picture frames are created equal. The choice between a readily available off-the-shelf frame and a bespoke, professionally crafted one can dramatically affect how your art looks and how long it lasts. It’s the difference between simply covering your art and truly celebrating it.
The Pros and Cons of Ready-Made Frames
Off-the-shelf frames from high street retailers are tempting due to their immediate availability and lower price point. They offer a quick and easy solution for framing standard-sized items. However, this convenience often comes at a cost to quality:
Lower-Quality Materials: Many are made from MDF with a foil wrap or plastic, which can be less durable than solid wood.
Limited Choice: The selection of styles, colours, and mount options is often restricted to mass-market trends.
Inadequate Protection: The glazing is typically thin acrylic or glass with no UV-filtering properties, leaving your artwork vulnerable to fading from sunlight.
The Advantages of Bespoke Framing for A4 Art
Choosing a professional framing service, even for a standard A4 piece, unlocks a world of quality and customisation. It’s an investment in showcasing your art to its full potential while ensuring its preservation for years to come. The benefits are clear:
Perfect Finish: A bespoke frame is crafted for a guaranteed perfect fit, with meticulously joined corners and a flawless finish.
Unmatched Choice: You gain access to a vast range of high-quality, solid wood mouldings and conservation-grade mount boards in hundreds of colours.
Long-Term Conservation: We use acid-free materials and UV-protective glazing as standard to shield your art from environmental damage and fading.
Expert Guidance: Our experienced framers can offer advice on the perfect frame and mount combination to complement your artwork and your décor.
Your Art Deserves the Best Frame
A beautiful frame is more than just a border; it’s the bridge between your art and your living space, protecting your treasured memories while elevating your interior design. At First4Frames, we are passionate about craftsmanship. We use only premium, conservation-quality materials across our entire range, from our ready-to-hang art to our full bespoke framing services. We believe every piece of art deserves a frame that will help it last a lifetime. Explore how professional framing makes a difference. Discover our curated collection of framed art today.
Your Perfect A4 Frame Awaits
Choosing the right a4 picture frames is a journey of creativity and personal expression. As we’ve explored, this wonderfully versatile size is perfect for everything from cherished family photos to spectacular art prints. Understanding how different materials, styles, and the addition of a professionally cut mount can transform your display is the key to creating a truly stunning result. The right frame does more than just protect your picture-it completes it, acting as the perfect bridge between your art and your decor.
If you’re ready to find that perfect piece, our passionate team is here to guide you. With over 20 years of professional framing experience, we specialise in a bespoke service that uses only high-quality, conservation-grade materials to protect and enhance your art. Let our expertise help you make the perfect choice. Find the perfect frame for your art in our gallery.
Embark on your framing journey today and give your art the beautiful display it deserves.
Frequently Asked Questions About A4 Picture Frames
What are the exact dimensions of an A4 picture frame?
An A4 picture frame is crafted to perfectly house an A4 print, which measures exactly 210mm by 297mm (21cm x 29.7cm). This is the internal dimension, or the size of the artwork the frame is designed to hold. The exterior dimensions will be larger, depending on the width and style of the frame moulding itself. Always check that the frame is specified for A4 to ensure a beautiful, snug fit for your photograph or fine art print.
Do I need a mount for an A4 frame?
While not essential, using a mount is highly recommended to give your artwork a professional finish. An A4 print fits perfectly into an A4 frame without a mount, but adding one creates visual breathing space that draws the eye inward. A mount also serves a practical purpose, preventing the artwork from touching the glass, which protects it from potential moisture damage over time. It truly elevates the final presentation of your piece.
Can I put an A5 picture in an A4 frame?
Absolutely! Placing a smaller A5 print (148mm x 210mm) inside a larger A4 frame is a spectacular way to make a statement. To achieve this, you will need a mount with an A5-sized aperture (the window opening). This technique beautifully centres the smaller image, creating an elegant border that enhances its presence. It’s a classic gallery technique that adds a layer of sophistication to your display, turning a simple photo into a standout piece.
What is the best material for an A4 photo frame?
The “best” material depends on your personal style and the artwork itself. For timeless elegance and durability, you can’t go wrong with solid wood frames, such as oak or ash, which offer beautiful grain and warmth. For a more contemporary, minimalist aesthetic, sleek aluminium frames are a superb choice. We also offer premium Polcore frames, an eco-friendly option made from recycled materials that provides a flawless, consistent finish perfect for any modern home.
How do I clean my picture frame and glass?
To keep your frame looking pristine, simply dust the moulding with a soft, dry microfibre cloth. For the glazing, we recommend spraying a small amount of glass cleaner directly onto a clean cloth, not onto the glass itself, to prevent any liquid from seeping behind the frame. Gently wipe the surface in a circular motion to remove smudges and fingerprints. This simple care routine will ensure your beautifully framed art remains the centrepiece of your room.
Are all A4 frames the same size on the outside?
This is a common and excellent question. While all A4 picture frames are made to hold a 210mm x 297mm print on the inside, their external dimensions vary significantly. The final outside measurement depends entirely on the width of the frame profile, or ‘moulding,’ you select. A slim, modern frame will have a much smaller overall size than a wide, ornate one. Always check the external dimensions if you have a specific space to fill on your wall.
You’ve found the perfect piece of art-a stunning print, a cherished photograph, or a hard-earned certificate that deserves to be seen. But now comes the crucial next step: finding the perfect a3 photo frame to do it justice. This is where the questions often begin. Should you add a mount for that professional gallery look? Will a warm, classic oak or a sleek, modern metal best complement your interior? It’s easy to feel uncertain, worried that a poor choice could detract from the very piece you want to celebrate.
Embark on your framing journey with confidence. This guide is designed to be your trusted partner, demystifying every aspect of choosing an A3 frame. We will explore everything from precise dimensions and the transformative power of a mount, to selecting premium materials that act as the perfect bridge between your artwork and your décor. Discover how to protect and enhance your art, ensuring it becomes a spectacular focal point in your home for years to come.
What is an A3 Photo Frame? Dimensions & Common Uses Explained
Choosing the perfect frame begins with understanding the right size for your art. An a3 photo frame is designed to house artwork or photographs measuring A3 size, a popular and versatile choice for making a statement without overwhelming your space. It strikes a beautiful balance, offering significant visual impact while fitting comfortably on most walls, making it a favourite for both homes and professional settings.
To help you visualise the scale and potential of this size, here is a helpful overview:
A3 Frame Dimensions: Getting It Right
Precision is key in craftsmanship. The A3 size is part of the internationally recognised ISO 216 standard, which ensures consistency worldwide. These dimensions refer to the size of the paper or print the frame is built to hold:
In millimetres: 297 x 420 mm
In centimetres: 29.7 x 42 cm
In inches: Approximately 11.7 x 16.5 inches
It’s important to remember that these measurements are for the artwork itself. The visible area, or ‘aperture’, may be slightly smaller due to the frame’s lip holding the artwork in place. The external dimensions of the frame will be larger, depending on the width of the bespoke moulding you choose.
Popular Uses for A3 Picture Frames
The A3 size is wonderfully adaptable, making it a superb choice for a variety of displays. Its generous proportions provide the perfect canvas for showcasing meaningful pieces with professional flair. Common uses include:
Fine Art & Posters: Displaying beautiful giclée prints or favourite posters, creating a spectacular focal point in a living room or hallway.
Professional Certificates: Framing diplomas, awards, and accreditations for a polished and impressive office display.
Large-Format Photography: Giving treasured family portraits or stunning landscape shots the presence they deserve.
Children’s Artwork: Elevating a child’s creative masterpieces into cherished pieces of bespoke art for your home.
Choosing Your Material: A Guide to A3 Frame Styles & Durability
The material of your frame is more than just a border; it’s the bridge between your room’s décor and the artwork itself. It performs the heavy lifting, setting the tone and ensuring your piece is protected for years to come. Choosing the right material is key to creating a spectacular display, influencing both the aesthetic feel and the long-term durability of your chosen a3 photo frame.
Classic Wood A3 Frames
For a touch of natural warmth and timeless elegance, nothing compares to wood. A wooden a3 photo frame is exceptionally versatile, seamlessly fitting into traditional, rustic, and even minimalist Scandinavian interiors. We source premium woods like solid oak, celebrated for its beautiful grain and texture, and versatile pine, which can be finished to suit any style. Choose from a natural finish to showcase the wood itself, a rich stain for a classic look, or a painted finish in black or white for a clean, modern edge. Wood is the perfect partner for fine art prints, treasured family photographs, and serene nature photography.
Modern Metal A3 Frames
If your style leans towards the contemporary, a metal frame is an impeccable choice. Sleek aluminium frames offer a clean, minimalist aesthetic that is perfect for modern homes, professional office spaces, and industrial-inspired décor. Their characteristically slim profiles ensure that the focus remains entirely on the artwork, providing a sharp, unobtrusive border. This modern simplicity makes them an excellent choice for showcasing bold posters, crisp graphic art, and important certificates where the content needs to command attention.
Glazing Options: Acrylic vs. Glass
The ‘glass’ that protects your artwork, known as glazing, is a crucial component for both clarity and preservation. The two primary options each have distinct benefits:
Standard Glass: Offers exceptional clarity and a traditional, high-quality feel. However, it is heavier and can be prone to breakage.
Acrylic (Perspex): A lightweight and shatter-resistant alternative that is often safer for shipping and high-traffic areas. Premium acrylic offers clarity comparable to glass.
For irreplaceable or valuable prints, we strongly recommend opting for glazing with UV protection. This specialist coating filters out damaging ultraviolet light, preventing fading and preserving the vibrancy of your art for a lifetime. For a deeper understanding of how different components work together, the Image Permanence Institute provides a comprehensive guide to preservation framing materials.
To Mount or Not to Mount? Elevating Your A3 Artwork
When you choose a frame, one of the most impactful decisions you can make is whether to include a picture mount. A mount, sometimes called a mat, is the elegant cardboard border that sits between your artwork and the frame itself. It’s far more than just a decorative touch; it serves a dual purpose that is crucial for both the presentation and preservation of your piece.
First, a mount provides essential protection. By creating a small air gap, it prevents your print from touching the glazing. This is vital for avoiding potential damage from condensation, mould, or the photograph permanently sticking to the glass over time. Secondly, it offers visual ‘breathing room’. This clean space separates the art from the frame, eliminating distractions and drawing the viewer’s eye directly to the image. This simple addition is the secret to achieving a professional, gallery-quality look in your own home.
When to Use a Mount with Your A3 Print
A mount is a versatile tool, but it truly shines in specific situations. Consider adding a mount to your a3 photo frame if you are displaying:
Fine Art Prints and Photographs: A mount is highly recommended to protect the print and enhance its artistic merit.
Certificates and Awards: It lends an air of sophistication and importance to official documents.
Smaller Images: A mount is the perfect way to elegantly fit a smaller picture (like an A4 print) into a larger A3 frame, creating a beautiful, balanced display.
Conversely, for full-bleed posters or bold graphic prints where you want the image to have a direct, punchy impact right to the edge, it’s often best to frame without a mount.
Choosing the Right Mount Colour and Size
The colour and size of your mount act as the bridge between your art and your decor. While bespoke options are endless, a few classic choices work beautifully for most pieces:
Off-White or Cream: These are timeless, safe choices that complement both traditional and contemporary artwork without competing with it.
Crisp White: For a clean, modern, and high-contrast look, a pure white mount is an excellent option, especially for black and white photography.
Darker Mounts: A black or charcoal mount can create a dramatic, moody effect, making the colours in your artwork appear more vibrant.
As a rule of thumb, standard mount borders are typically between 50mm and 80mm wide, providing a substantial and well-proportioned border for your A3 print.
Styling and Hanging Your A3 Frame Like a Pro
You’ve chosen the perfect print and a beautiful, bespoke frame to match. Now for the exciting part: bringing it all together in your home. A well-placed frame does more than just hold a picture; it acts as a bridge between your artwork and your room’s decor, creating a focal point that pulls the entire space together. An a3 photo frame is a wonderfully versatile size, large enough to make a statement yet adaptable enough to suit any room.
With a little planning, you can display your new art with the confidence of a professional curator. Here are our expert tips for styling and hanging your frame for maximum impact.
Matching Frames to Your Interior Style
The key to a cohesive look is choosing a frame that complements your existing decor. Think of the frame as the final piece of the puzzle. Our premium frames are designed to suit a range of popular aesthetics:
Minimalist: For a clean, contemporary feel, opt for a thin frame in black, white, or brushed silver. The simplicity of the frame allows the artwork to take centre stage.
Traditional: Warm, natural oak or a more ornate wooden frame adds a touch of classic elegance. These styles work beautifully in period homes or rooms with traditional furnishings.
Bohemian/Eclectic: Don’t be afraid to mix and match! A collection of different frame styles, colours, and finishes creates a relaxed, personal, and artfully curated vibe.
Industrial: A simple, bold black metal frame offers a strong, graphic look that pairs perfectly with exposed brick, concrete, and raw materials.
Creating a Breathtaking Gallery Wall
The A3 size is the perfect anchor for a stunning gallery wall. It provides a strong central element to build around, ensuring your display feels balanced rather than cluttered. Whether you’re filling a large empty wall or creating a feature above a sofa, here are a few ideas:
The Hero Piece: Use a single a3 photo frame as the focal point of your collection. Surround it with a mix of smaller A4, A5, and square frames to create a dynamic, asymmetrical layout.
Symmetrical Grid: For a powerful, high-impact statement, hang a grid of three or four identical A3 frames. This works especially well with a series of related prints, like architectural drawings or botanical illustrations.
Pro Tip: Before you pick up a hammer, map out your arrangement on the floor. Cut paper templates to the size of your frames and tape them to the wall to perfect your spacing and layout.
Beyond Off-the-Shelf: When to Choose a Bespoke A3 Frame
Ready-made frames offer a quick and convenient solution, but for artwork or photographs that truly matter, they often fall short. Mass-produced frames can have limitations in material quality, protective properties, and the overall finish, which can detract from the beauty of your piece. Bespoke framing is the ultimate step up, transforming a simple picture into a beautifully presented and protected work of art.
While ‘A3’ is a standard paper size, your artwork is anything but standard. Opting for a custom-made a3 photo frame is an investment in preserving your memories and showcasing your art with the professional craftsmanship it deserves. It’s about creating a perfect partnership between the image and its enclosure, ensuring it captivates attention for years to come.
The Advantages of Custom Framing
Choosing a bespoke service opens up a world of creative possibilities and guarantees a superior result. It’s the difference between a good fit and a perfect one. The key benefits include:
Unrivalled Material Choice: Gain access to a spectacular range of high-quality, sustainable wood mouldings, colours, and finishes that you simply won’t find on the high street.
Conservation-Grade Protection: We use acid-free, conservation-grade mounts and backing boards to protect your print from fading and discolouration, preserving its vibrancy for a lifetime.
Expert Guidance: Our experienced team provides passionate, practical advice, helping you select the perfect combination of frame, mount, and glazing to complement your art and your decor.
A Flawless Finish: Every bespoke frame is handcrafted by our skilled team for a guaranteed perfect fit, providing a professional, gallery-quality finish that elevates your piece.
Is Bespoke Framing Right for Your A3 Print?
A custom frame is the ideal choice when you want to give your picture the care and attention it deserves. Consider a bespoke solution if your A3 print is:
Valuable or a Limited Edition: For a signed print, a limited edition piece, or a fine art Giclée print, professional framing is essential to protect its value and integrity.
Deeply Sentimental: A cherished wedding photograph, a family portrait, or a child’s first drawing deserves to be preserved beautifully and protected from damage.
A Unique Statement Piece: If you want a specific colour or style to create a stunning focal point in your room, a bespoke a3 photo frame offers limitless customisation.
For Peace of Mind: When you want the confidence that comes from knowing your treasured item has been handled and framed by experts using the best materials available.
Your most precious images deserve more than a standard frame. They deserve a bespoke home that protects and enhances them. Let our experts help you create the perfect frame to tell your story. Get in touch today!
Your Perfect A3 Frame Awaits
Choosing the right frame is a journey of discovery. As we’ve explored, the perfect choice goes beyond simple dimensions; it’s about selecting a material that complements your artwork’s soul and deciding whether to use a mount to give it the breathing space it deserves. Styling your a3 photo frame correctly transforms it from a simple border into a stunning focal point in your home.
For those pieces that demand a truly unique touch, nothing compares to a bespoke solution. With over 20 years of expert framing experience, our passionate team is dedicated to creating something spectacular for you. Every frame is handcrafted in our Falkirk, Scotland workshop, using only premium, conservation-quality materials to protect and preserve your art for a lifetime.
What are the exact dimensions of an A3 photo frame in cm and inches?
An A3 photo frame is designed to hold artwork that is 29.7 x 42 cm, or 11.7 x 16.5 inches. These are the internal dimensions of the frame, ensuring your A3 print fits perfectly. The external, overall dimensions of the frame will be larger and vary depending on the width of the beautiful frame moulding you choose. Always check the artwork size specification when purchasing to guarantee a perfect fit for your piece.
Will my A3 size paper fit perfectly into a standard A3 frame?
Yes, absolutely. A standard A3 frame is crafted with precise internal measurements to house an A3 print snugly and securely. This ensures a professional, gap-free presentation that lets your artwork shine. When you choose a high-quality a3 photo frame, you can be confident that it has been made to the exact specifications required to display your A3 document or art print perfectly, right to the edge.
Can I put a smaller photo, like an A4 print, into an A3 frame?
Certainly! Using a smaller print in a larger frame is a classic and highly effective display technique. By placing a picture mount (a cardboard border) inside the A3 frame, you can elegantly showcase an A4 print. This creates a beautiful visual space around the artwork, drawing the eye to the image and giving it a premium, gallery-style appearance that truly elevates the piece within your space.
What is the difference between a picture frame and a poster frame?
The primary difference lies in the quality of craftsmanship and materials. A picture frame is typically built for longevity, using premium materials like solid wood and high-quality glass or acrylic glazing to protect and enhance fine art. Poster frames are often more lightweight and budget-conscious, sometimes using plastic or MDF. They are perfectly suitable for prints where archival protection is less of a priority, while a picture frame is an investment in preserving your art.
How do I clean the acrylic or glass on my A3 frame without scratching it?
For beautiful, clear results, always use a soft, clean microfibre cloth to gently wipe away dust. For more stubborn marks like fingerprints, lightly dampen the cloth with water. It is crucial to avoid using paper towels or abrasive fabrics, as these can cause fine scratches. We also advise against using harsh, ammonia-based chemical cleaners, which can damage the surface of high-quality acrylic glazing over time.
Is it better to choose an A3 frame with or without a mount?
This is a wonderful creative choice that depends on your desired aesthetic. Framing without a mount creates a bold, ‘full-bleed’ look where your artwork fills the entire frame. Including a mount provides a classic, sophisticated border that draws the viewer’s eye inward. A mount also serves a practical purpose, separating your artwork from the glazing to aid in its preservation. The perfect choice is the one that best complements your art and your decor.