Is dry mounting safe for a photograph you may want to preserve or reframe? It can create a smooth, flat presentation, but it bonds the print to its support and is not designed to be undone without risk. For valuable prints, that distinction matters.
So, what is a reversible mounting technique? It secures artwork in a way intended to let it be removed later without residue, damage or alteration. Archival hinges and corner pockets avoid permanently bonding a print to a backing board. The right choice depends on the paper, its condition and how it will be displayed.
This guide explains how reversible mounting works, how adhesives and trimmed edges affect your options, and when dry mounting may be unsuitable for photographs or collectible prints. You’ll also learn how float mounting displays a print’s full edge and what to consider when choosing a presentation that protects the work and looks at home on your wall.
Key Takeaways
- Choose a bespoke frame to suit your print, its condition and intended display, not appearance alone.
- A trimmed print can still be float mounted; its edge and position on the backing shape the finished result.
- Pressure-sensitive adhesives and dry mounting can make removal difficult, so consider their impact before framing a photograph or collectible print.
- Archival hinges and corner pockets offer alternatives for preserving a print and keeping future reframing options open.
Can I float mount a print that has already been trimmed?
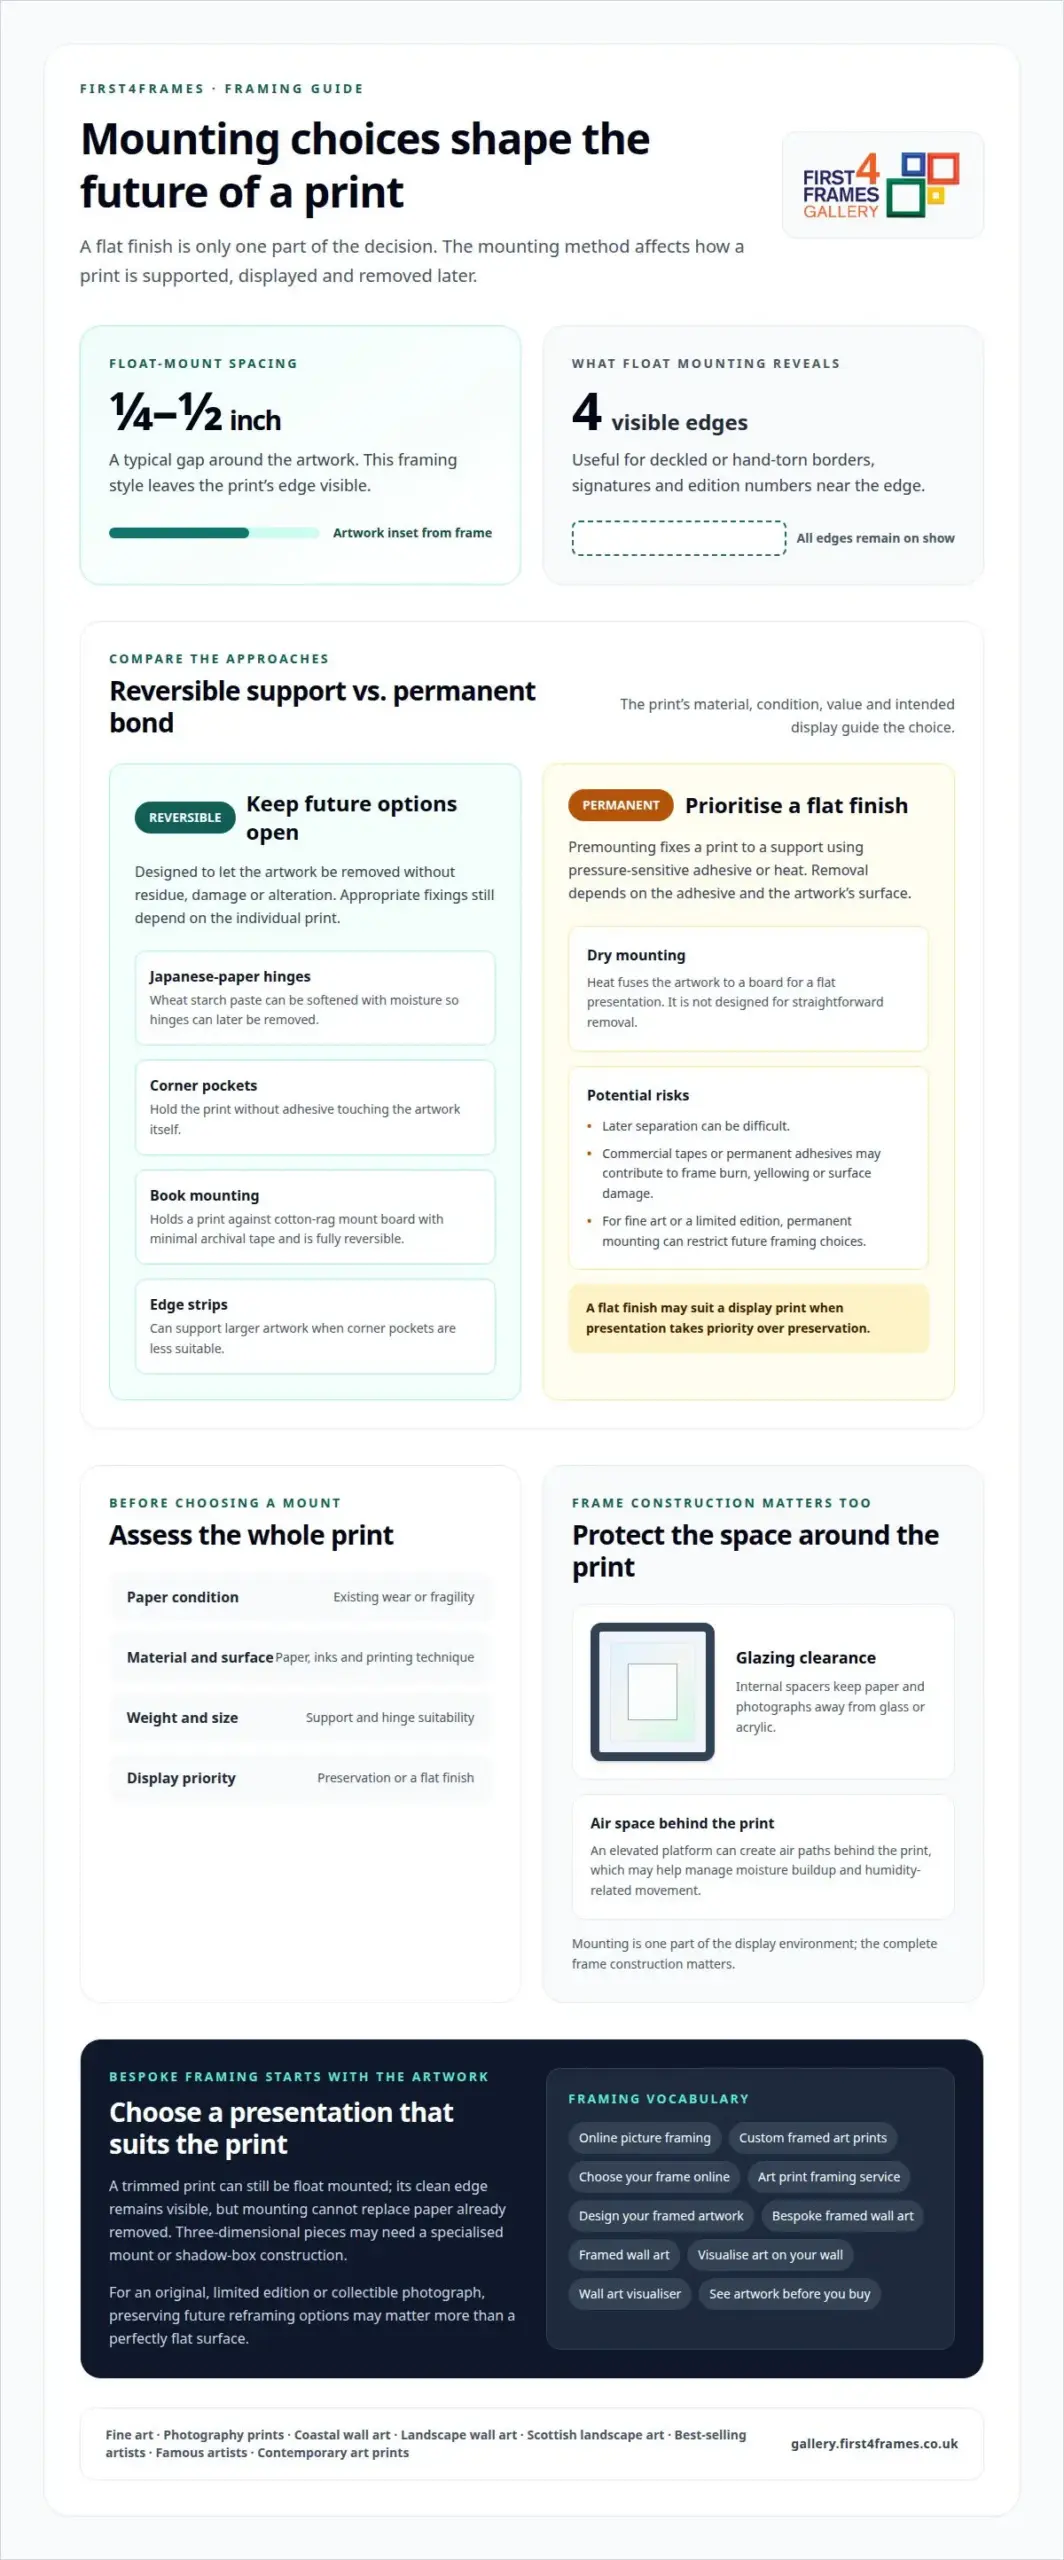
Yes. A trimmed print can still be float mounted using hinges attached to its reverse and a backing board. The cut edge remains visible, but mounting cannot replace paper that has already been removed. The right choice depends on the print’s material, condition, value and intended display.
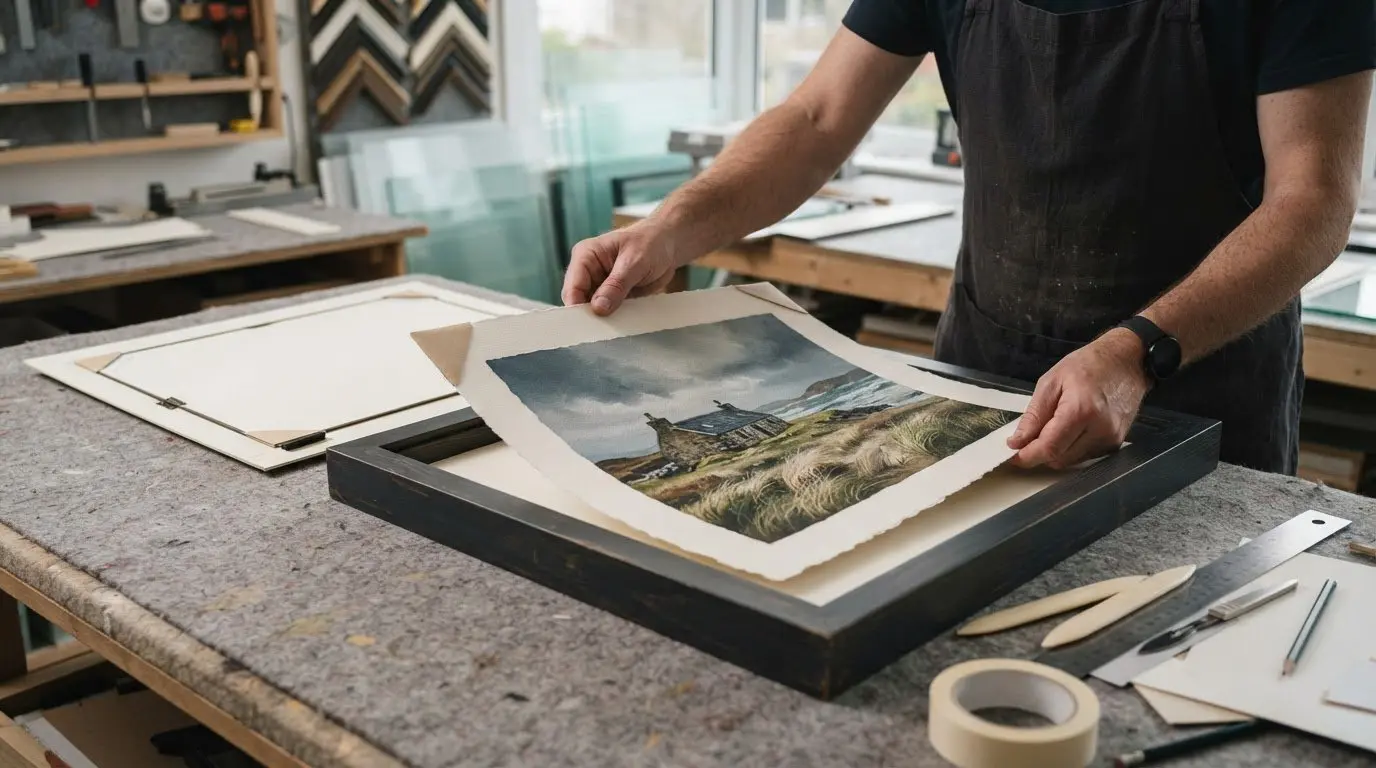
Reversible mounting can suit flat paper artwork, photographs and posters. Japanese-paper hinges or corner pockets can hold a print without permanently bonding it to the board. Three-dimensional pieces need a different approach, such as a specialised mount or shadow-box construction, because their shape and depth affect how they can be supported.
For an original, limited edition or collectible photograph, preserving future options may matter more than achieving a perfectly flat surface. Hinge mounting or corner pockets allow removal without adhesive touching the print itself. Edge strips can support larger artwork when corner pockets are less suitable. A small, replaceable print intended mainly for display may call for different priorities.
Float mounting displays all four edges, making it useful for deckled paper, hand-torn borders, signatures or edition numbers near the edge. A trimmed sheet can still gain this presentation, though its clean edge, rather than an irregular deckled edge, becomes part of the design. A typical float mount leaves a gap of 1/4 to 1/2 inch around the artwork.
Protection also depends on spacing and frame construction. Internal spacers keep paper and photographs away from glass or acrylic, while an elevated platform can create air paths behind the print. This may help manage moisture buildup and humidity-related movement, but mounting is only one part of the display environment.
Book mounting offers another option for valuable or rare artwork. It holds a print against cotton-rag mount board with minimal archival tape, without adhesive touching the artwork, and is fully reversible. It can suit a piece where preservation takes priority over a raised float effect.
Premounting with pressure-sensitive and dry adhesives
Premounting fixes a print to a support before framing, using pressure-sensitive adhesive or heat. Whether it can later be removed depends on the adhesive and the artwork’s surface.
Conservation Adhesives and Hinge Papers
Conservation adhesives can secure prints while allowing the mounting method to be reversed. Wheat starch paste can attach Japanese mulberry paper hinges to a print’s reverse; moisture can later soften the paste so the hinges can be removed. This matters when an original or collectible may need reframing. Hinge paper and adhesive are chosen to support the work without bonding its face to the board. Some wet hinges use kozo paper or pre-gummed conservation tape activated with de-ionised water. When wet methods do not suit the artwork, heat-activated conservation adhesive may be used with flexible hinges. The adhesive must suit the inks and printing technique.
Permanent Adhesive Risks
Pressure-sensitive tapes, spray mounts and dry mounting can bond a print permanently to its support. Dry mounting uses heat to fuse artwork to a board, creating a flat presentation, but it is not designed for straightforward removal. Commercial tapes and permanent adhesives can cause frame burn, yellowing or surface damage as acidic materials migrate into paper. Adhesive applied directly to a print also makes later separation more difficult. For fine art or a limited edition, this can compromise the sheet and restrict future framing choices. Permanent mounting may suit a display print when a flat finish is the priority, but it places preservation second.
Removal and Reversibility Limitations
Reversible mounting uses removable fixings, while permanent mounting bonds or alters the artwork. Japanese-paper hinges with wheat starch paste can be humidified and removed by a conservator; corner pockets hold a print without adhesive touching it. These options reduce the risks of removal, but don’t make every print suitable for every method. Paper condition, ink and the artwork’s weight affect the support and hinge choice. What adhesives or fixings allow damage-free removal? Properly selected hinges and pockets avoid permanent bonding, though removal still depends on the print and its condition. Reversible methods may not hold every large or delicate work securely. For prints you’re choosing to display, explore the fine art print gallery alongside your mounting needs.
What Is Reversible Mounting?
Reversible mounting secures artwork while allowing later removal without residue, damage or alteration. For fine art, archival materials support both preservation and a considered visual presentation.
Archival Materials and Methods
Archival mounting uses selected materials and fixings to support artwork while minimising the risk of damage. Acid-free mount board provides a stable foundation, while cotton-rag board is made from cotton fibres rather than wood pulp. Japanese-paper hinges or corner pockets can hold a print without permanently bonding it. These choices matter when future reframing or preservation is important. A mat can also keep paper away from glazing, though protection depends on the complete frame.
Guidance for Reversible Mounting
For preservation-focused framing in the UK, prioritise methods designed for safe removal. Hinge mounting and corner pockets are reversible options for paper artwork, including valuable prints and historical documents. The appropriate method depends on the artwork’s material, condition, size and intended display. Acid-free board and suitable hinges help support the work, but no single material makes every mounting arrangement appropriate. A conservator considers the complete object, its weight and its visual presentation.
Mounting Steps, Tools, and Materials
A reversible mount starts with acid-free board and a suitable fixing, such as Japanese-paper hinges or corner pockets. First, assess the paper’s condition, weight and surface. Then position the artwork on the board and choose fixings that support it without permanent bonding. Attach hinges with conservation-grade wheat starch paste, or use pockets to hold the edges. Finally, place the mounted piece in its frame with space between the artwork and glazing. These materials form the essential toolkit.
Conservation Uses for Artworks and Photographs
Conservators use reversible mounting to support original artwork, photographs and historic paper while keeping future treatment possible. For a signed print, hinges can hold the sheet without covering a signature near its edge. Corner pockets can support a delicate photograph without adhesive touching its surface. The mount’s weight and the paper’s condition guide the choice of fixing. This approach balances secure display with the option to remove or reframe the work later.
Reversible mounting for valuable prints
For a valuable print, mounting affects both its display and its future options. An original, limited edition, historic document or collectible photograph may later be reframed, sold or assessed. A permanent bond can alter the artwork, so consider preservation before choosing a presentation.
Hinge mounting can support paper prints while allowing removal. Two hinges are sufficient for standard prints up to 11×14 inches, while three are recommended for artwork up to 20×24 inches. Position hinges about 1 to 2 inches from the top corners. The number and placement should reflect the print’s weight, opacity and any waviness.
Corner pockets hold a print without adhesive touching the artwork itself, and work best for small to medium pieces up to approximately 16×20 inches. For larger works, edge strips along the top or all four sides can provide firmer support. The right mounting method depends on the sheet’s size and condition, not value alone.
Float mounting can keep a valuable print’s full perimeter visible, including a signature, edition number or rare mark near the edge. Hinges connect the artwork to a backing board or raised platform, leaving the sheet’s edges uncovered by a window mat. Match the fixing method to the inks and printing technique, as unsuitable adhesives can affect the surface.
Auction houses, insurers and conservators look for evidence of how a work has been mounted. For collectible pieces, reversible fixings help preserve options for future reframing or assessment. A permanent method may be less suitable when the print’s condition and provenance matter. Consider these factors alongside the visual finish before framing.
Choosing a print and planning its presentation can go hand in hand. Explore fine art prints with preservation in mind.
First4Frames Gallery
First4Frames Gallery helps you shape a considered presentation for artwork you value. Its handmade, bespoke frames are made to order from high-quality materials, with 2 mm float glass fitted as standard. Custom Picture Framing can bring together the print, frame and finish; Ready-to-Hang Framed Art and Giclée Fine Art Prints offer other routes to framed wall art.
For online picture framing, choose your frame online and design your framed artwork to suit your space. Explore fine art, Scottish landscape art, coastal wall art, landscape wall art and contemporary art prints by artists, including best-selling and famous artists. Photography prints and custom framed art prints can also make a room feel personal. Use a wall art visualiser to visualise art on your wall and see artwork before you buy; consider how the frame complements the image. A bespoke art print framing service can create framed wall art to suit your space.
To discuss a framing choice for your print, contact First4Frames Gallery.
Give your print a thoughtful next chapter
A print’s presentation can shape how it feels in a room and how easily its display can change later. Before choosing a frame, consider the artwork’s purpose, the space it will inhabit and whether you may want a different arrangement in future. That intention can guide a choice that works both visually and practically.
Understanding what a reversible mounting technique means is a useful starting point, not a one-size-fits-all answer. The paper, printing process and condition all affect which approach suits a particular piece. If you are unsure how to bring those considerations together, discussing your print can help clarify the right presentation.
Let the artwork lead the decision, then choose a frame that gives it room to be appreciated. For guidance on your next framing decision, contact First4Frames Gallery and take the next step with confidence.
Frequently Asked Questions
Is dry mounting safe for photographs?
Dry mounting can flatten a photograph, but it bonds the image permanently to a support, making it unsuitable when future removal matters. Heat and adhesive may also affect the photograph’s surface or contribute to discolouration over time. For a valuable or irreplaceable photograph, a removable fixing is the more preservation-focused choice. The print’s process, condition and intended use all influence the decision.
Can a float mount be undone if a collector wants to reframe the art later?
Often, yes, if the float presentation uses reversible fixings rather than a permanent bond. Appearance alone does not show whether it can be undone: hinges, pockets or permanent adhesive may sit behind the same visible edges. Before reframing a collectible, establish how the print is attached. If removal involves delicate or valuable work, a conservator can assess the fixing and paper first.
What Is Archival Mounting?
Archival mounting describes a preservation-minded choice of materials and methods, rather than one specific look or technique. It aims to reduce risks from unsuitable supports and fixings. The term does not automatically mean a mount is reversible: archival materials can still be used in a way that makes a print difficult to remove. For a collectible, find out what touches the artwork and how the attachment can be separated.
What does reversible mounting mean?
Reversible mounting means the artwork can be separated from its support without residue, damage or alteration, when the method and condition allow. Put simply, a reversible mounting technique preserves the option to reframe or reassess the piece later. Keep a note of the fixing and materials used. This record can help a future framer or conservator understand how the work is held.
What UK guidance or standards apply to reversible mounting?
For preservation-focused framing in the UK, prioritise methods designed for safe removal, such as hinge mounting or corner pockets, with acid-free board and suitable archival fixings. The right method depends on the artwork’s material, condition, size and intended display.