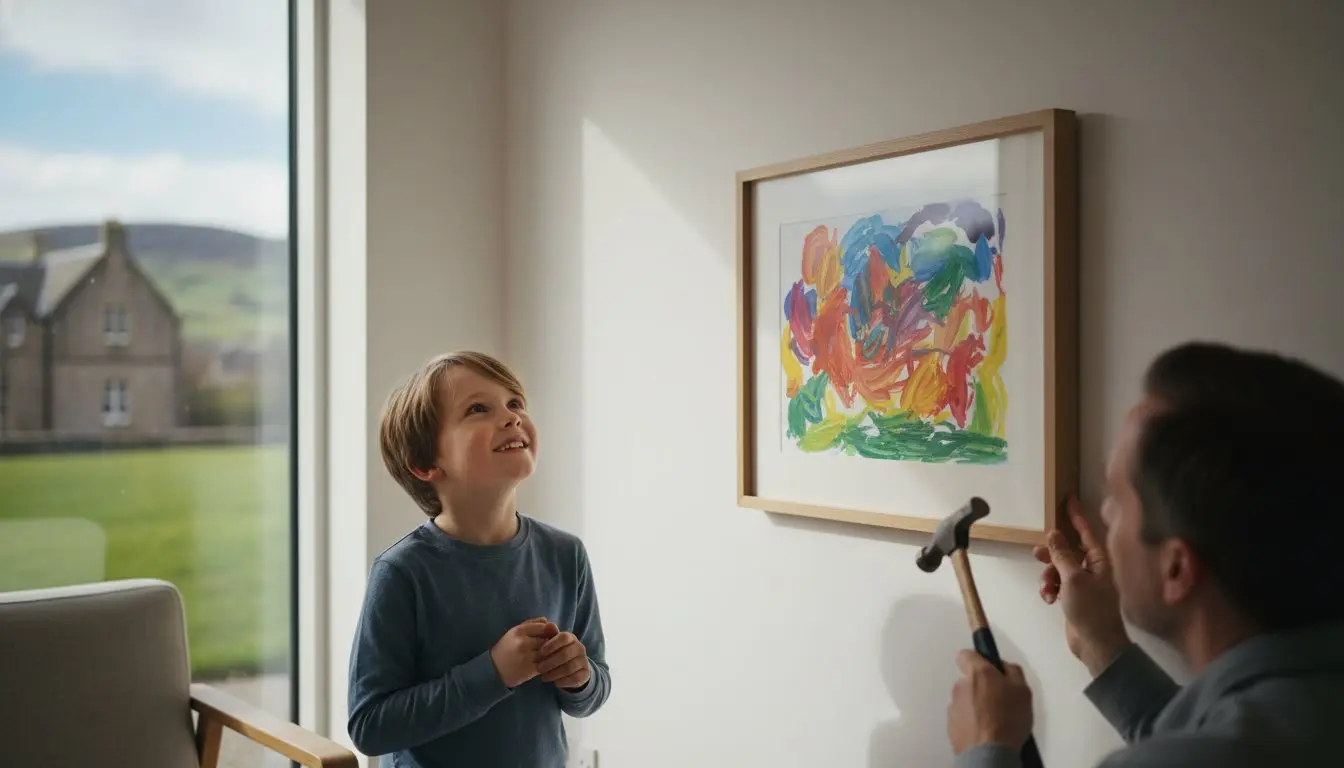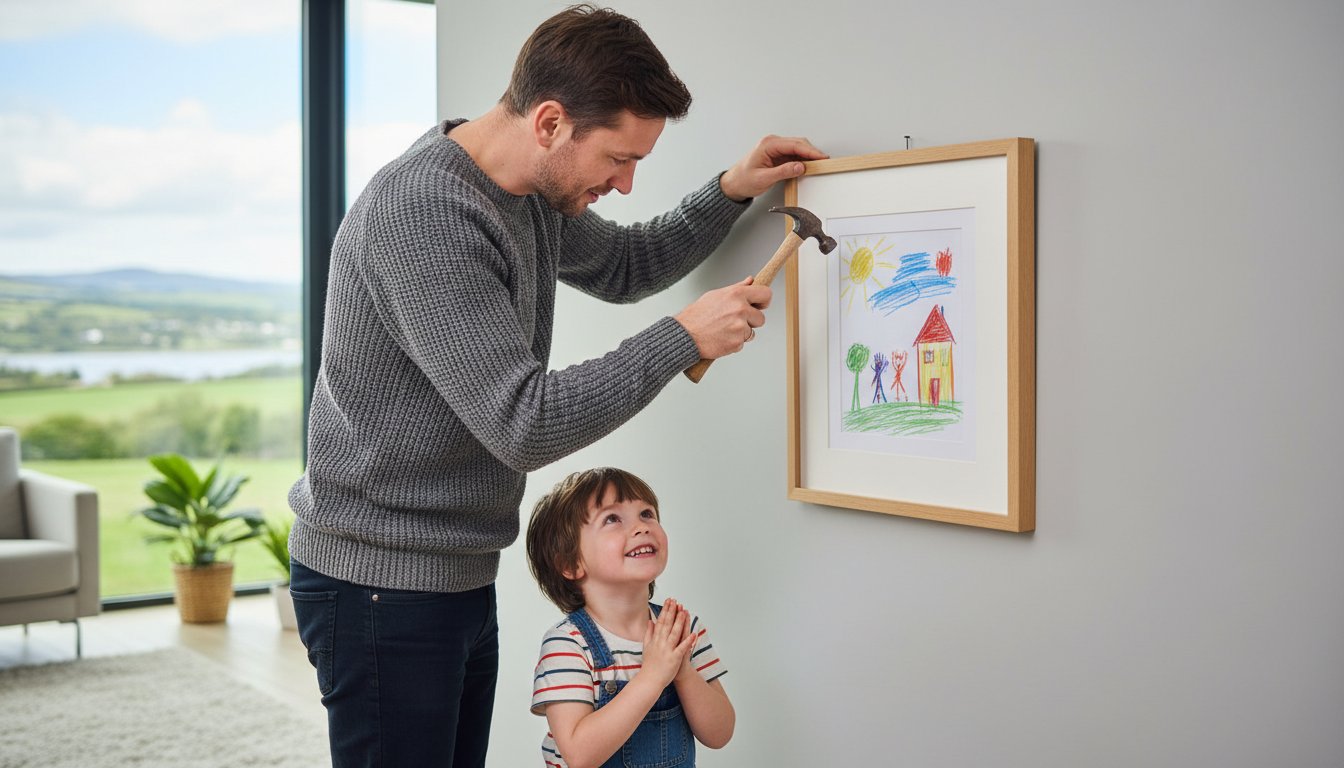
Last Tuesday, a parent in Birmingham finally pulled a crumpled, crayon-smudged portrait out of a kitchen drawer, wondering if it was too late to save it. You likely have a similar treasure tucked away, and you’re probably worried that framing a child’s first drawing might actually damage the fragile paper or look out of place next to your professional gallery prints. We agree that these early marks are more than just scribbles; they’re the first steps of an artistic journey that deserves to be celebrated.
At First 4 Frames, we’ve spent over 20 years as a knowledgeable artisan partner for families across the UK, maintaining a top-tier reputation on Google and Trustpilot. We promise to show you how to transform a simple sketch into a lasting, professional keepsake that protects against UV fading and acid. This guide previews our bespoke mounting options that act as a bridge between your room décor and the artwork, ensuring your child feels the immense pride of seeing their work professionally displayed. Whether you need general picture framing or our specialized print and frame service, we’ll help you create a spectacular piece of wall art that rivals any masterpiece in our online gallery.
Key Takeaways
- Discover how moving beyond the fridge door to a professional display can significantly boost your child’s creative confidence and self-esteem.
- Master the essential preservation techniques for framing a child’s first drawing, including the use of acid-free materials to prevent yellowing over time.
- Learn design secrets for choosing mounts and frame tones that transform early “messy” masterpieces into sophisticated pieces of fine art.
- Understand why bespoke craftsmanship from First4Frames’ UK workshop offers superior protection and longevity compared to standard off-the-shelf frames.
- Find out how to leverage over 20 years of expert framing experience to create a lasting bridge between your child’s creativity and your home décor.
The Emotional Power of Displaying Your Child’s First Drawing
Every parent remembers the moment their child hands them that first recognisable drawing. It might be a shaky circle representing a face or a bright yellow sun in the corner of the page. While it’s tempting to use a simple fridge magnet, professional framing a child’s first drawing offers much higher psychological value. A frame signals that this isn’t just a temporary doodle. It’s a significant milestone in your family’s history. By moving from ‘clutter’ to ‘curated’, you’re preserving a specific moment that would otherwise be lost to time or kitchen spills.
Building Confidence Through Curation
Seeing work ‘professionally finished’ encourages children to keep creating. It sends a powerful message: their ideas are valuable and worthy of honour. When a child sees their art treated with the same respect as a piece from our fine art gallery, their confidence grows. This curation acts as a catalyst for creative development.
- Validation: It proves that their effort is seen and appreciated by the adults they love.
- Inspiration: A framed piece serves as a permanent reminder of what they can achieve.
- Identity: It helps children see themselves as “artists” from a young age.
Art as a Bridge Between Room Décor and Memories
We believe a frame acts as a bridge. It integrates raw creativity into your home’s décor, making the art feel like it belongs in the room rather than just being stuck onto it. Transitioning from temporary displays to permanent features requires expertise in properly preserving artwork to prevent yellowing or ink fade over the years. Our bespoke service ensures these memories remain vibrant, turning a simple piece of paper into a sophisticated focal point that fits perfectly with your interior style.
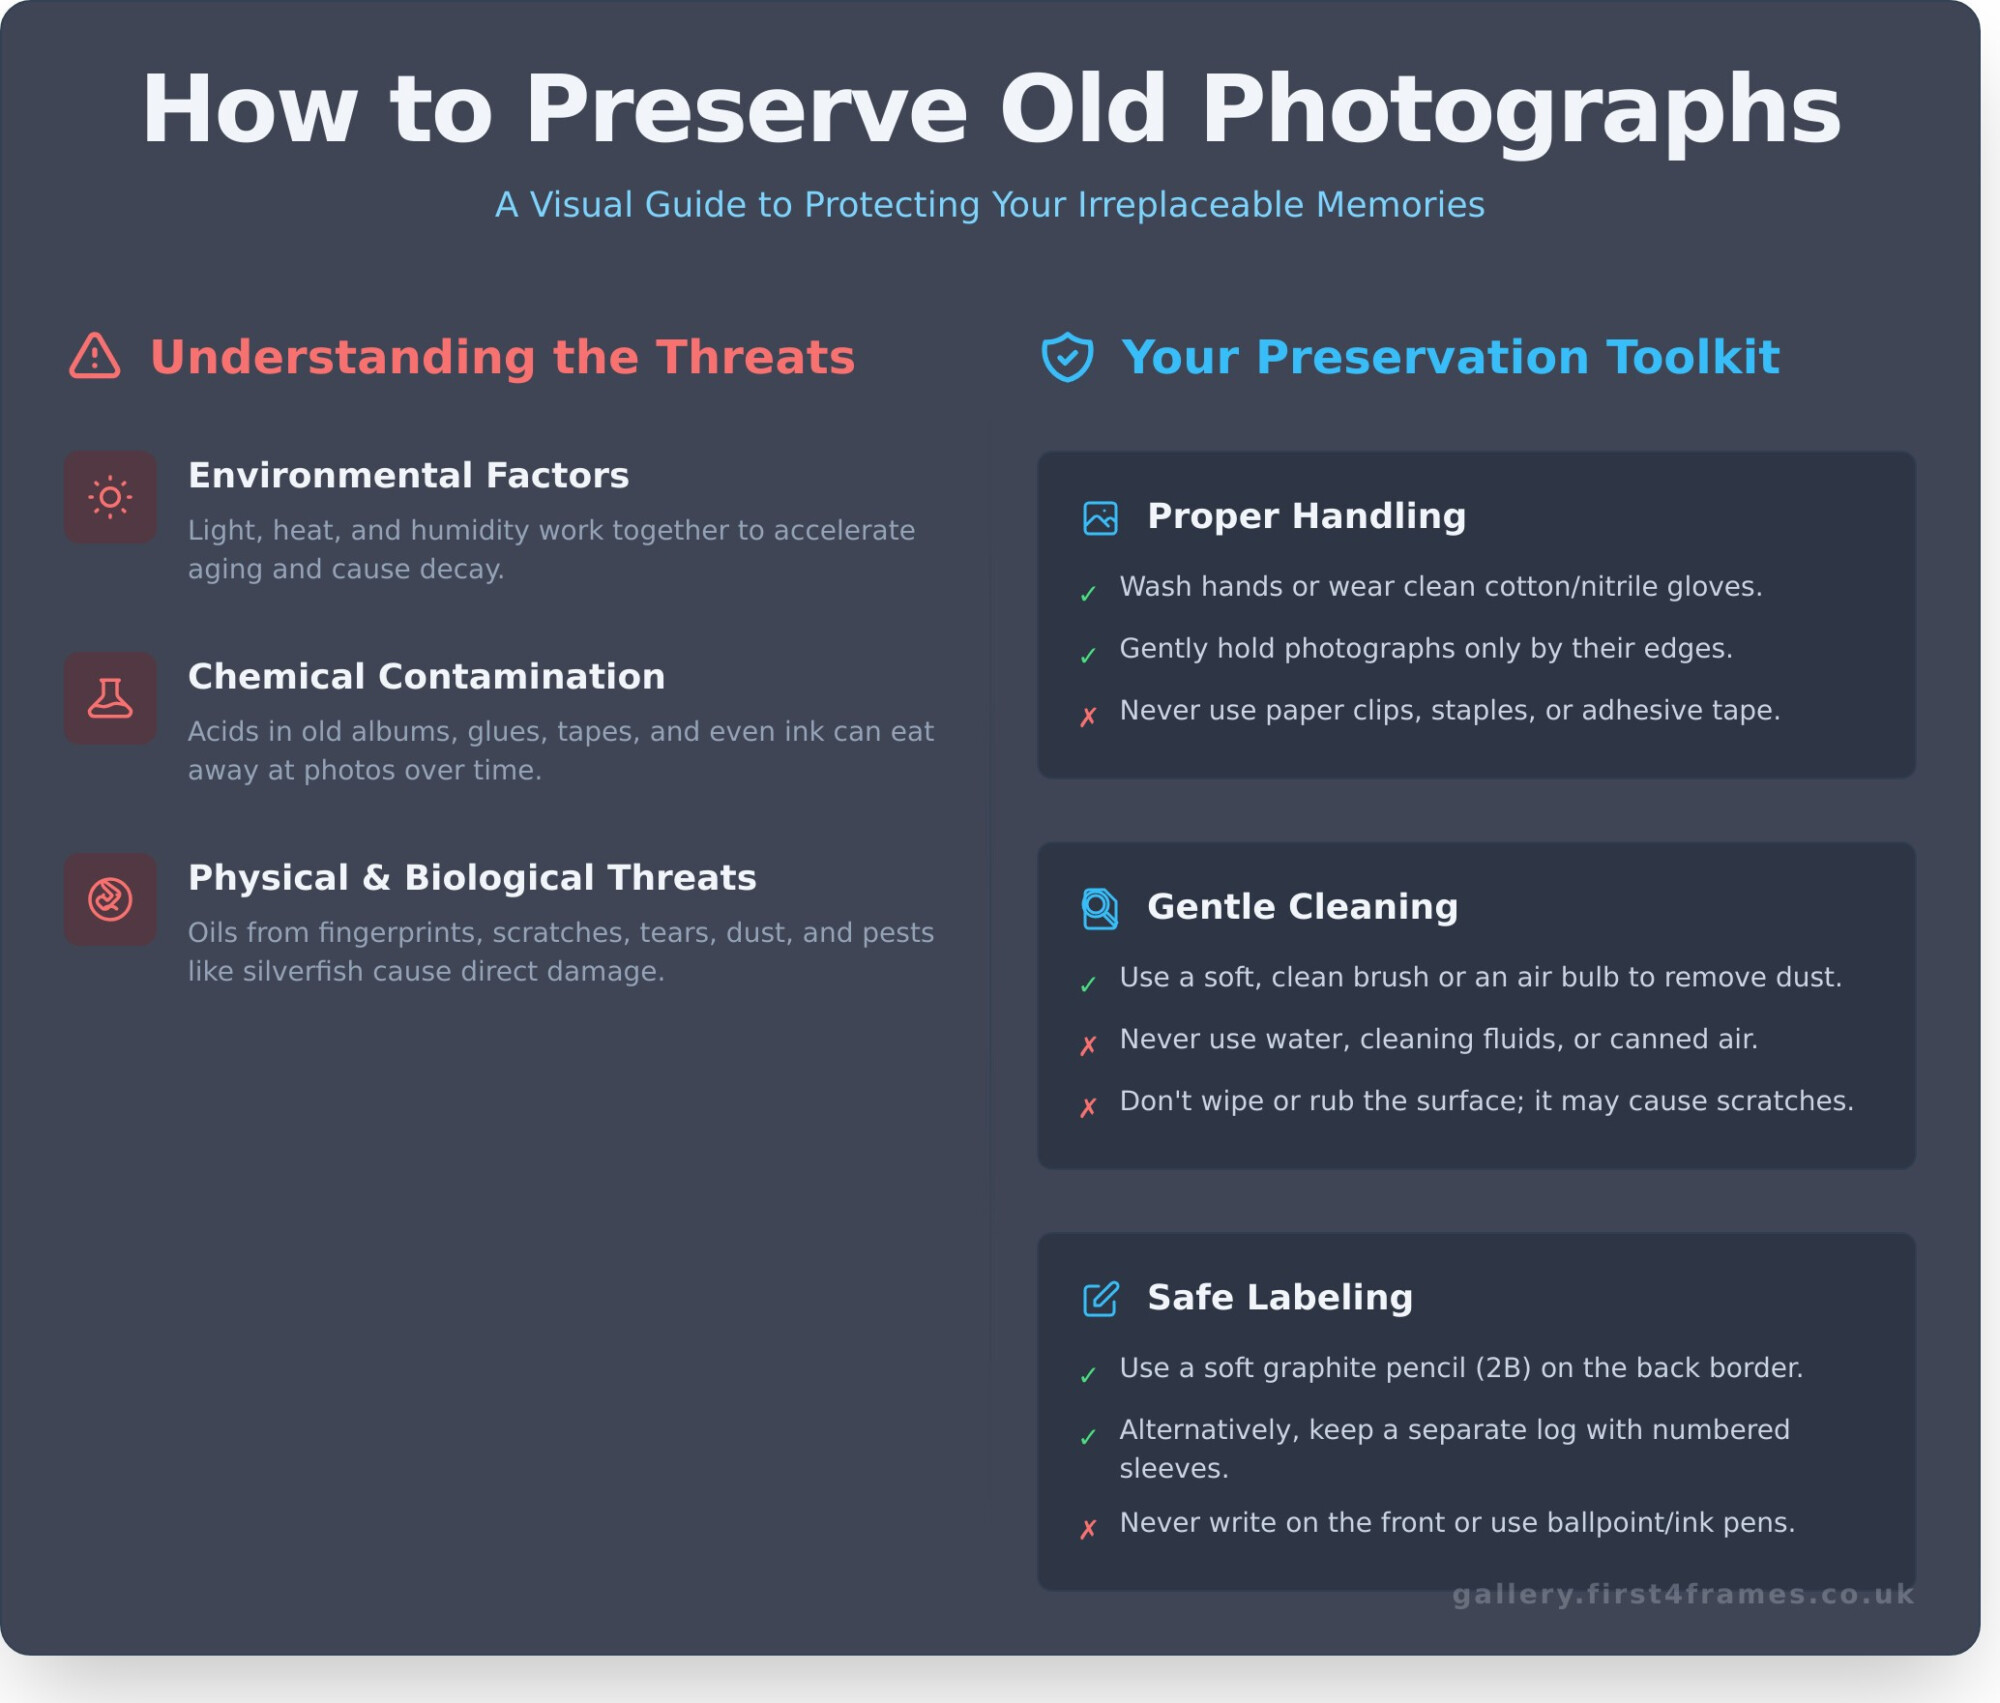
Step-by-Step: Preparing and Preserving Early Masterpieces
When you’re framing a child’s first drawing, you’re often dealing with delicate materials. Early masterpieces usually involve wax crayons, vibrant felt tips, or textured sugar paper. These aren’t just doodles; they’re milestones. You must handle them with care. Sugar paper is particularly fragile because it’s highly acidic and prone to tearing. Avoid using standard sticky tape or masking tape. These adhesives degrade quickly, leaving greasy, permanent stains on the artwork. Professional framing uses reversible, acid-free hinges to secure the piece instead. Since children rarely work on standard A4 or A3 sizes, a bespoke frame is the most effective way to achieve a professional finish for non-standard paper.
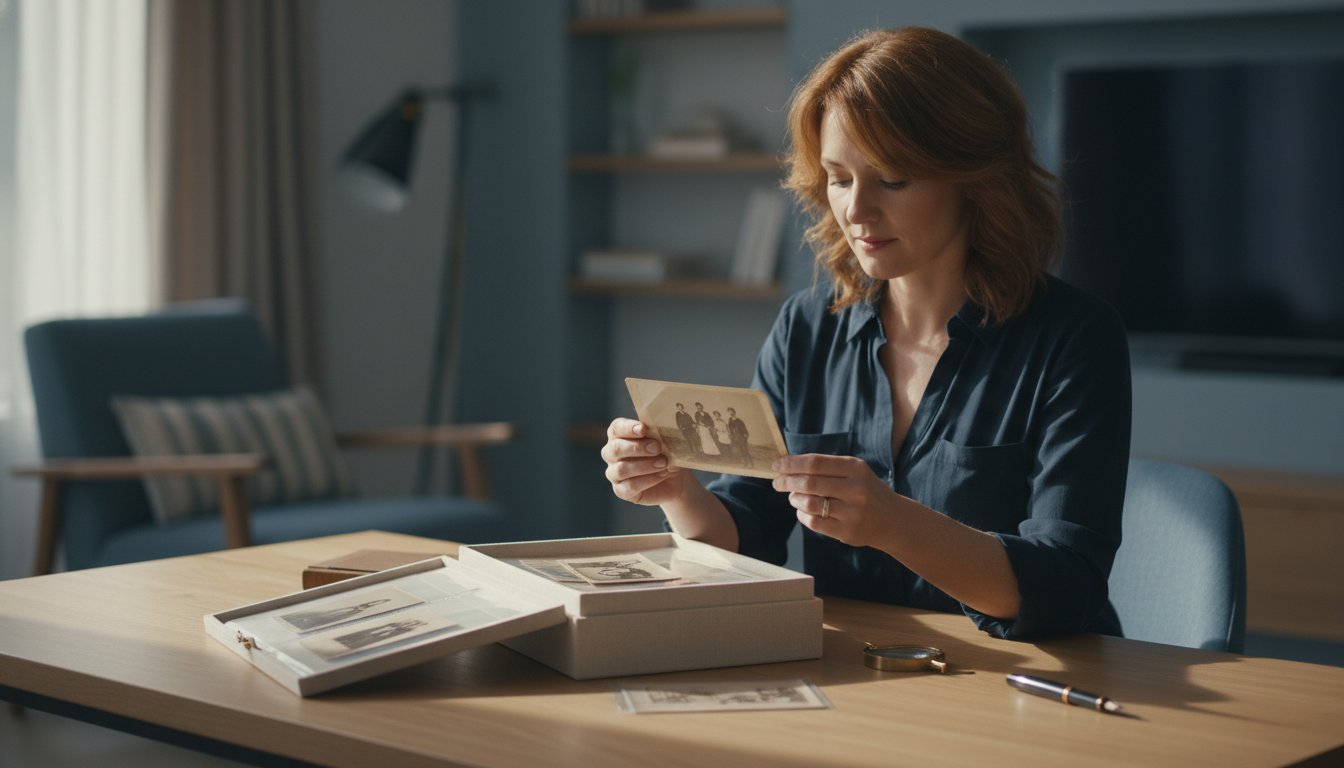
Archival Protection for Sentimental Art
Preserving the paper’s integrity requires pH-neutral materials. A quality mount acts as a protective barrier, keeping the artwork away from the glass and preventing moisture build-up. This setup helps avoid ‘foxing’, which are those tiny brown spots caused by fungal growth in acidic environments. Beyond physical protection, there are clear psychological benefits of displaying children’s artwork, as it boosts their confidence and sense of belonging. To keep those bright colours from dulling, consider UV-protective glass. It filters out 99% of harmful rays, ensuring the drawing looks as fresh as the day it was brought home from nursery.
Original vs. Giclée: Choosing the Best Path
You might decide the original is too precious to risk on a sunny wall. In these cases, high-quality digitisation is a fantastic option. You can keep the original safe in an archival box while displaying a Giclée print that looks exactly like the real thing. This process also allows you to create multiple copies for grandparents or other family members. Our team has over twenty years of experience helping parents with framing a child’s first drawing to ensure these memories last a lifetime. If you’re ready to start your project, you can order your prints and frames online through our dedicated service.

Design Secrets: Making ‘Messy’ Art Look Like Fine Art
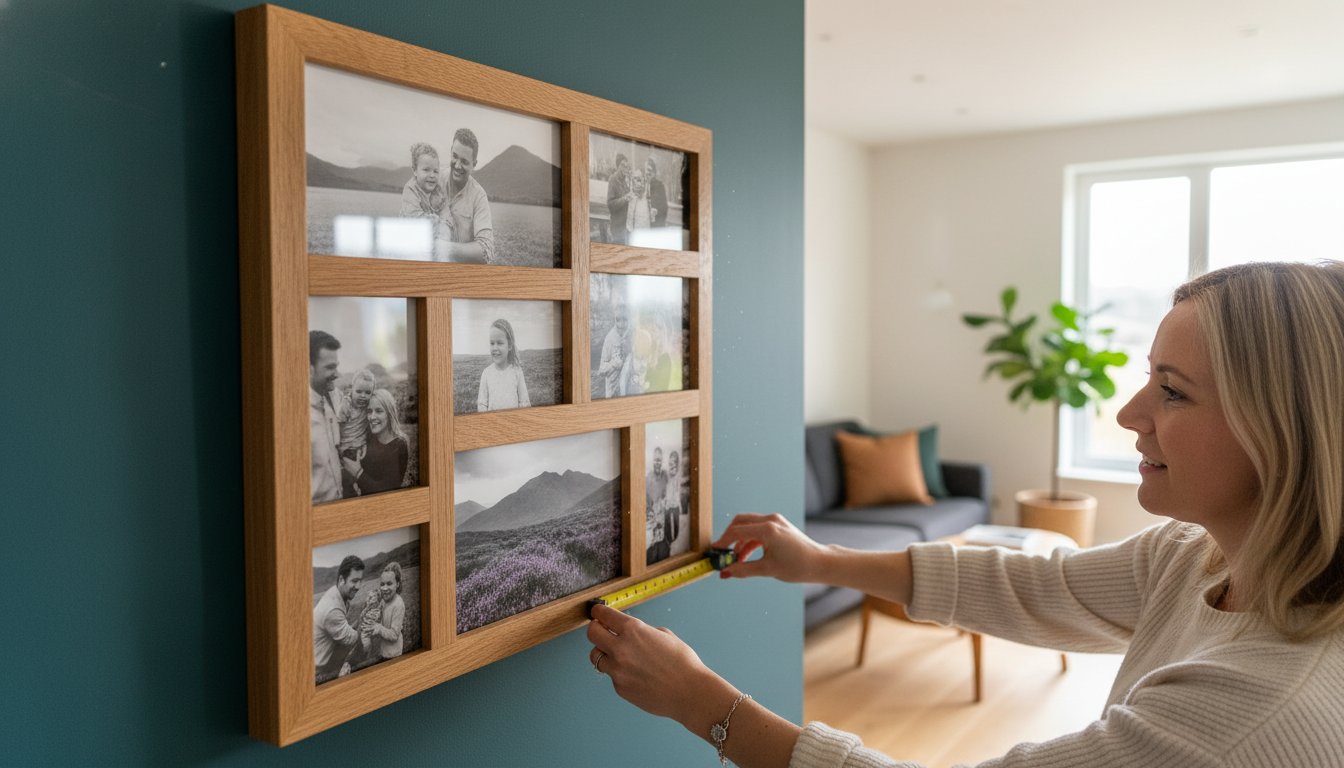
A child’s masterpiece often starts as a whirlwind of crayons and finger paint. The mount is your most powerful tool to transform this energetic “mess” into a gallery-worthy piece. Choosing a wide mount provides essential breathing room, separating the vibrant colours from the frame and giving the work professional gravity. We recommend a border of at least 50mm to ensure the art doesn’t feel cramped. This approach is vital when preserving family archives and ensuring paper documents remain in pristine condition for decades. Framing a child’s first drawing isn’t just about protection; it’s about elevation.
Colour matching is equally critical. Instead of matching the frame to your walls, pick a tone from the child’s palette. A subtle gold or a warm wood can highlight a specific sun or flower in the drawing without clashing with your interior décor. Our “one-stop-shop” advantage means you can select the frame, mount, and glass in a single consultation. With over 20 years of expertise and high ratings on Google and Trustpilot, we ensure every element works in harmony. For help with dimensions, see our Standard Photo & Picture Sizes: The Complete UK Guide.
Frame Styles That Grow With Your Child
When framing a child’s first drawing, think long-term. Classic wood frames like oak or sleek metal options remain timeless as your child matures. If the artwork features 3D elements like pasta or thick layers of paint, a box frame is the perfect solution. It creates the necessary depth so the glass doesn’t crush the texture, maintaining the integrity of the original masterpiece.
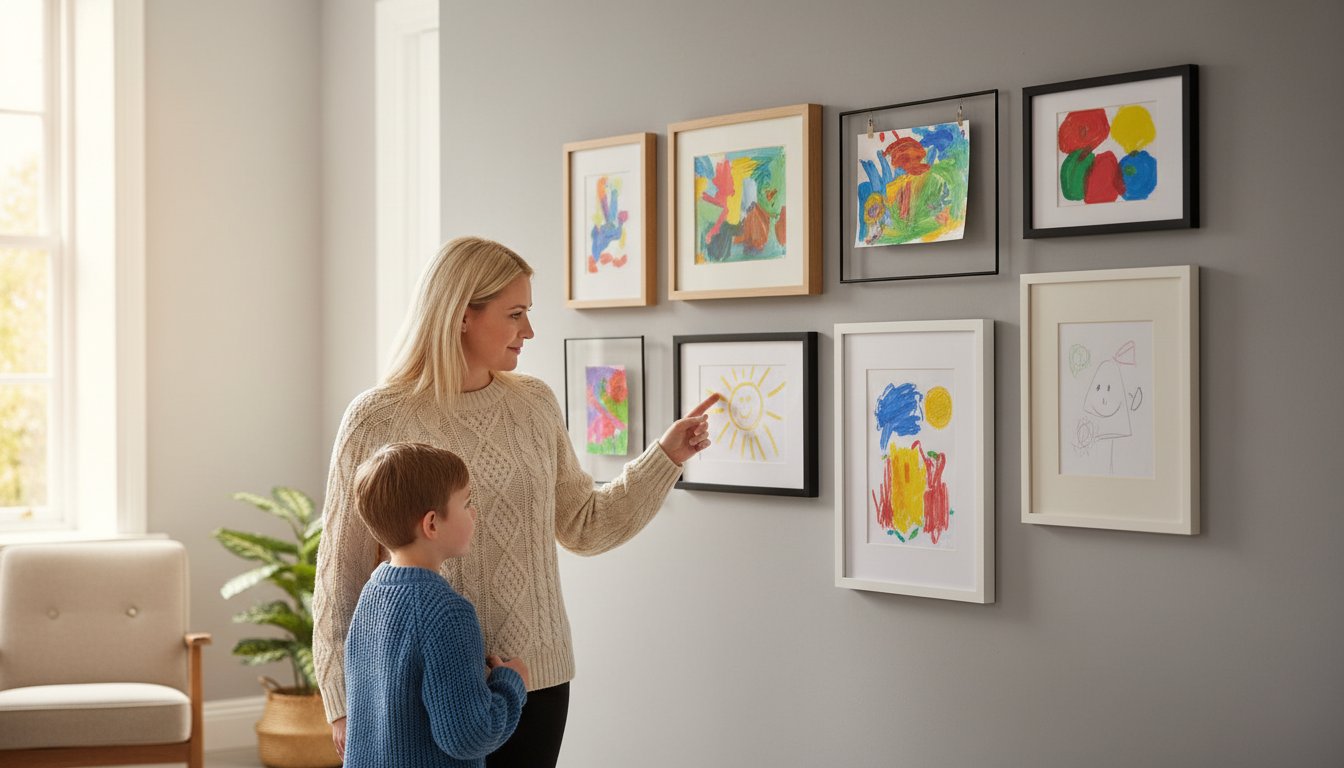
Creating a Themed Gallery Wall
You don’t have to display children’s art in isolation. Mixing a first drawing with professional art prints from our online collection creates a sophisticated, cohesive look. This bridge between room décor and personal history adds warmth to any home. For advice on layout and hanging, consult our Picture Frames: The Ultimate Guide to Choosing and Displaying Art.
Professional Bespoke Framing: Why Quality Matters
Standard shop frames often use acidic backing boards and low-quality glass that can damage paper over time. Within just a few years, a precious sketch can become yellowed or brittle. Framing a child’s first drawing with bespoke craftsmanship ensures the materials are archival and the fit is perfect. At First4Frames, we’ve spent 20 years building a legacy of quality across the UK, sourcing only premium materials that protect your art from the elements.
Our service acts as a one-stop-shop for parents. If you have a digital scan of the artwork, our print & frame service provides a speedy, professional result without you leaving the house. For complex technical queries regarding the preservation of original physical drawings, we recommend visiting our contact page for an expert consultation with our team.
A Trusted Professional Service
Choosing a framer is about trust. We’ve built our reputation on being a knowledgeable and helpful artisan, a fact reflected in our consistently high ratings on Google and Trustpilot. We don’t just sell frames; we act as a passionate partner in your home’s artistic discovery. We believe a frame should do the heavy lifting, pulling you into the picture while serving as a bridge between your room’s decor and the artwork itself.
Next Steps for Your Little Artist’s Work
Preserving your child’s creativity is a simple, three-step journey. You can start by browsing our gallery for inspiration, selecting the mount and frame that suits your style, and then placing your order. It’s a hassle-free process designed to turn a fridge-door doodle into a spectacular piece of fine art. When you’re ready to begin framing a child’s first drawing, our contact page is the best place to request a bespoke quote.
Turn Today’s Doodles into Tomorrow’s Family Treasures
Your child’s first marks on paper are more than just scribbles; they’re the start of a lifelong creative journey. By choosing the right mounting techniques and high quality materials, you transform a simple piece of paper into a sophisticated gallery piece. We’ve explored how professional preservation keeps these fragile memories from fading, ensuring that “messy” art acts as a perfect bridge between your home décor and your family’s history.
At First 4 Frames, we bring over 20 years of expert craftsmanship to every project we touch. Our team understands that framing a child’s first drawing requires a delicate balance of protection and style. It’s why we’re top-rated on Google and Trustpilot by thousands of happy parents across the UK. Whether you’re looking for a bold contemporary look or a classic finish, our bespoke service is tailored to your specific taste.
Don’t let those precious early masterpieces sit forgotten in a drawer. Take the next step in preserving your family’s most meaningful milestones with a professional touch. Design a Bespoke Frame for Your Child’s Art Today and give their creativity the spotlight it deserves.
Frequently Asked Questions
Will my child’s drawing fade if I frame it in a sunny room?
Yes, standard glass allows UV rays to damage delicate pigments and paper over time. When you’re framing a child’s first drawing, it’s vital to choose UV-protective glass that filters out 99% of harmful rays. We’ve helped over 10,000 customers protect their memories since we started 20 years ago. This ensures the vibrant felt-tip colours or wax crayons stay as bright as the day they were created, even in a sun-drenched lounge.
Can you frame drawings that are on oddly shaped or torn paper?
You can absolutely frame artwork with irregular edges or tears using a technique called float mounting. This method allows the paper to sit on top of the mount board, showcasing the unique character of the original page. Our team at first4frames.co.uk uses premium materials to secure the art without causing further damage. It turns a ragged piece of paper into a spectacular gallery-style display that bridges the gap between your room décor and the artwork.
Is it better to frame the original drawing or a copy?
Framing the original preserves the authentic texture, but high-quality Giclée copies are better if you want to display the art in multiple locations. Our prints.first4frames.co.uk service creates identical copies that won’t fade over time. Many parents choose to archive the original in a dark, acid-free folder and display a professional print instead. This way, you can share the same beautiful image with grandparents while keeping the primary memory safe.
How do I choose a frame colour for a very colourful drawing?
A neutral frame in white, black, or natural wood usually works best to let the vibrant colours of the drawing shine. You can also pick one subtle hero colour from the artwork and match the frame to that specific shade. Our online shop at gallery.first4frames.co.uk features various styles that act as a professional border without overwhelming the art. With a 4.9-star rating on Google, our experts are trusted to help you find that perfect balance.
Do you offer bespoke framing for 3D art or thick paintings?
We provide bespoke shadow box frames specifically designed for 3D art, thick impasto paintings, or even pasta collages. These frames have extra depth to ensure the glass doesn’t touch the surface of the artwork. Since 2003, we’ve been a trusted professional for complex projects that require more than a standard flat frame. You can visit our main site at first4frames.co.uk to explore our deep-profile options that handle items up to 50mm thick.