Posted on

Custom Circle and Oval Frames: A Complete Guide

Custom Circle and Oval Frames: A Complete Guide

When you picture a framed piece of art, your mind likely defaults to a classic rectangle. But what if your artwork is calling for something different, something with softer lines and a more unique character? Perhaps you’ve dismissed the idea, worried that a round frame might look dated or that the process would be too complicated and costly. The truth is, the right frame is the perfect bridge between your art and your decor, and premium custom circle and oval frames offer a spectacular way to make a truly personal statement.

At First4Frames Gallery, we are passionate about beautiful, bespoke craftsmanship. In this complete guide, we’ll demystify the entire journey, from concept to creation. We will explore the stunning aesthetic benefits of curved frames, guide you through the available materials and finishes, and show you exactly how to measure your piece with confidence. Prepare to discover how to commission the perfect frame that will transform your art into an extraordinary centrepiece for your home.

Key Takeaways

  • Learn how the curved lines of a circular or oval frame can soften your interior design and create a captivating focal point.
  • Discover the key customisation options, from wood types to unique finishes, to ensure your frame perfectly complements your artwork.
  • Our step-by-step guide demystifies the process, showing you how simple it is to commission beautiful custom circle and oval frames.
  • Gain confidence with practical tips on hanging, styling, and budgeting for your unique frame to ensure it looks stunning in your space.

Why Choose a Circle or Oval Frame? Thinking Beyond the Rectangle

In a world dominated by straight lines and sharp corners-from our walls and windows to our furniture-introducing a curve can be a breath of fresh air. A frame is the essential bridge between your artwork and your décor, and choosing a non-rectangular shape is a powerful design statement. Opting for bespoke custom circle and oval frames allows you to soften a room’s aesthetic, create an undeniable focal point, and add a touch of timeless elegance that a standard frame simply cannot match.

To see the beautiful craftsmanship involved in creating these unique shapes, take a look at the video below:

The Unique Aesthetic: Creating Softness and Focus

A round or oval frame immediately breaks the visual monotony of a space. Its gentle, continuous lines draw the eye inward, naturally guiding the viewer’s attention directly to the heart of the artwork. This effect makes it perfect for highlighting a specific subject. Whether you are aiming for a vintage, classic, or even a whimsical feel, the curved silhouette provides a sense of intimacy and charm that makes the piece feel special and distinct.

A Nod to Tradition: From Victorian Portraits to Modern Heirlooms

Oval frames have a rich history, most notably gaining popularity in the 18th and 19th centuries for portraiture and mirrors. This classic shape carries an inherent sense of elegance and nostalgia, instantly elevating a piece to feel like a cherished heirloom. While the history of Picture frame shapes is diverse, the oval has remained a symbol of sophistication. Today, these traditional forms are being reimagined in modern interiors, creating a beautiful contrast between classic and contemporary styles.

What Artworks Shine in a Curved Frame?

While any piece can be enhanced with the right frame, some artworks are particularly well-suited to a curved presentation. Our custom circle and oval frames provide the perfect showcase for:

  • Portraits and Silhouettes: The shape naturally complements the curves of the human face and form, creating a classic and focused presentation.
  • Botanical Prints & Delicate Illustrations: The soft edges of the frame enhance the organic and graceful nature of floral and natural subjects.
  • Single-Subject Compositions: Artwork with a clear central focus, from a single animal to an abstract shape, is beautifully contained and highlighted within a circle or oval.
  • Creative Displays: Think beyond prints! These frames are perfect for showcasing antique mirrors, intricate embroidery, or treasured family memorabilia.

A Guide to Customisation: Materials, Styles, and Finishes

Creating the perfect bespoke frame is a journey of artistic discovery, where every choice contributes to the final masterpiece. A frame is more than just a border; it is the bridge between your art and your interior, a carefully crafted combination of three key elements: the wood, the finish, and the profile. Understanding these components empowers you to design a piece that not only protects your art but elevates it, turning a simple picture into a spectacular focal point.

Choosing the Right Wood: From Classic Oak to Sleek Walnut

The foundation of any premium frame is the wood itself. Each species brings a unique character and grain, setting the stage for the final look. The beauty of creating custom circle and oval frames is that the continuous curve of the wood is always on display.

  • Classic Oak & Ash: For a timeless, natural aesthetic, the prominent grain of Oak or Ash brings texture and an organic feel, perfect for both traditional and contemporary settings.
  • Elegant Walnut & Cherry: These hardwoods offer a richer, more formal feel with their deep, warm tones and subtle grain, adding a touch of sophisticated elegance.
  • Versatile Tulipwood: As a premium paint-grade wood, Tulipwood provides a flawless, smooth surface, making it the perfect canvas for any custom colour you can imagine.

Finishes That Define the Mood: Natural, Painted, or Gilded

The finish is where your frame’s personality truly comes to life. It can be used to create harmony with your artwork or a stunning contrast that demands attention. We offer a finish to suit every piece and every home.

  • Natural & Stained: A clear wax or a carefully selected stain celebrates the wood’s inherent beauty, allowing the natural grain to remain the star of the show.
  • Custom-Painted: From subtle neutrals to bold, dramatic hues, a painted finish offers limitless possibilities. We can match any colour to seamlessly integrate the frame with your decor.
  • Gilded & Ornate: For a touch of classic luxury, a gilded finish in gold or silver leaf provides a truly opulent look, ideal for traditional portraits, mirrors, and fine art.

Understanding Frame Profiles: From Simple Curves to Ornate Details

A frame’s profile is its cross-sectional shape-the contours and curves that give it depth and character. This detail has a powerful impact on how the artwork is viewed. The concept of using a frame to draw attention to a subject has deep roots, with the ancient origins of picture frames found in Romano-Egyptian mummy portraits, demonstrating a long history of this beautiful craft.

  • Minimalist Profiles: Simple, gently rounded profiles offer a clean, contemporary aesthetic that allows the artwork to take centre stage without distraction.
  • Decorative & ‘Scooped’ Profiles: More traditional profiles often feature a ‘scoop’-a concave curve that draws the viewer’s eye inward, directly towards the art. These add a wonderful sense of depth and detail to custom circle and oval frames.

Custom Circle and Oval Frames: A Complete Guide

The Bespoke Process: How Your Custom Frame is Made

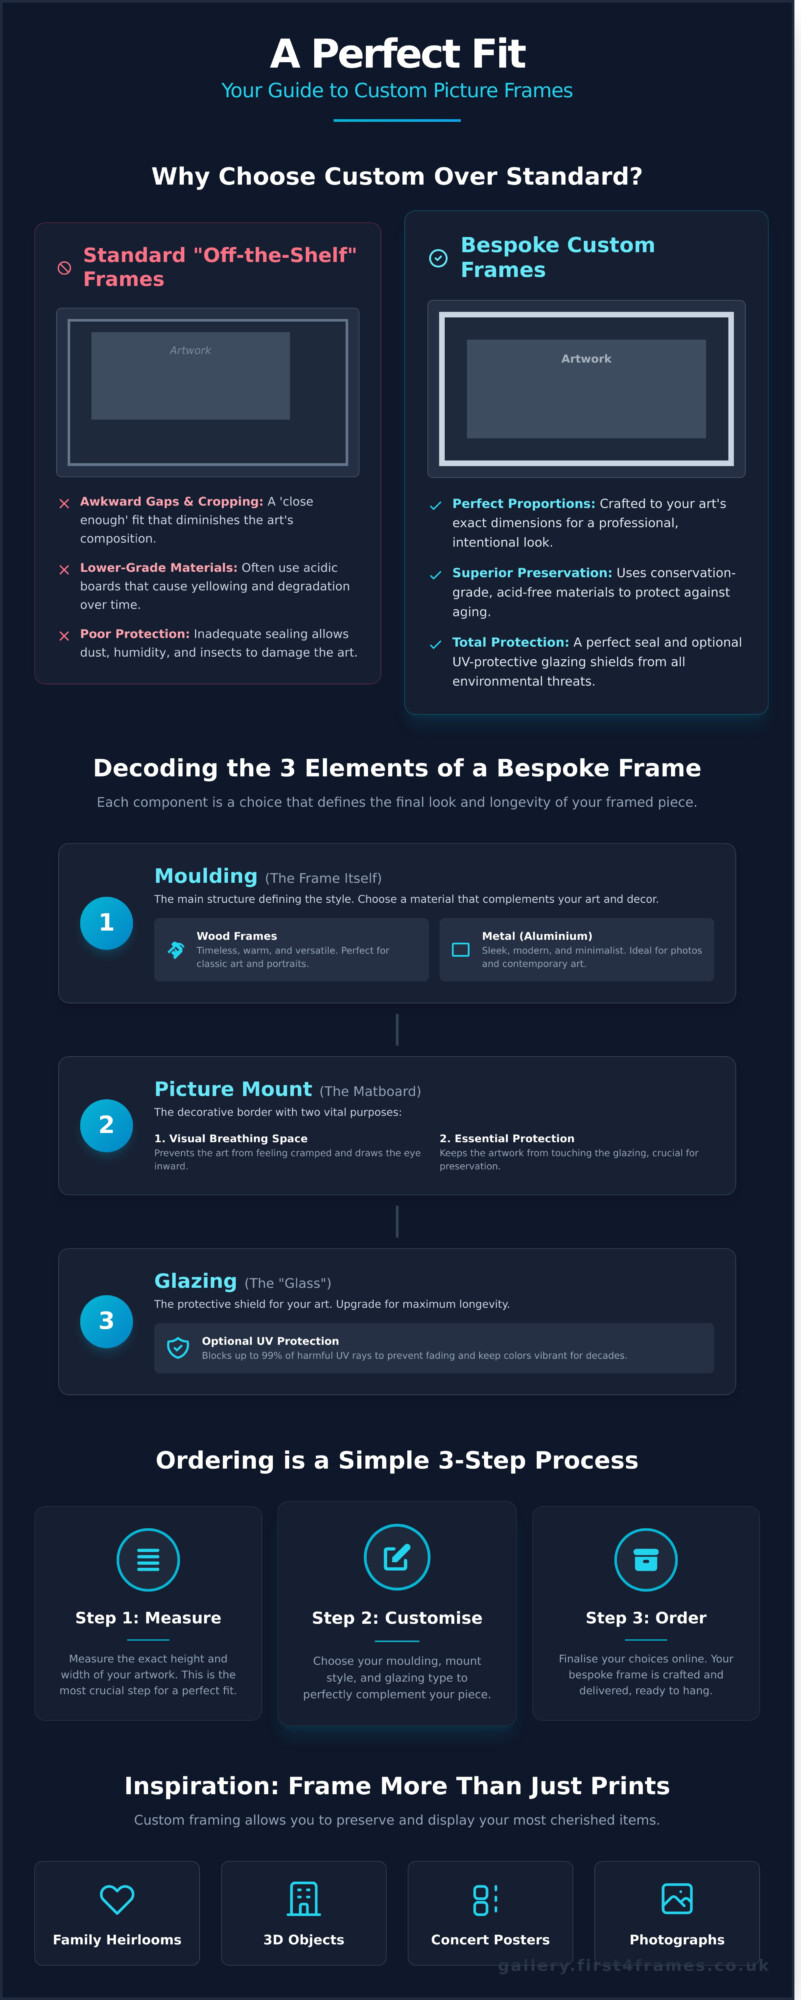
Embarking on a bespoke framing journey might seem complex, but our process is designed to be a simple, collaborative, and rewarding experience. We believe that creating the perfect frame is a partnership between your vision and our expertise. From the initial measurement to the final polish, we guide you at every stage, ensuring you feel confident and inspired as we bring your unique frame to life.

Step 1: Consultation and Measuring Your Artwork

The journey begins with the essentials: understanding your art and your space. We’ll guide you on how to measure your piece accurately-for a circle, we need the diameter at its widest point; for an oval, both the height and width. This is more than just a measurement; it’s a conversation. We discuss your vision, the artwork’s character, and where it will be displayed to ensure the final frame is a perfect complement to your home.

Step 2: Design, Material, and Glazing Selection

This is where your creativity truly shines. Together, we explore our extensive collection of premium materials to find the ideal wood, profile, and finish that acts as the perfect bridge between your art and your décor. We also help you select the right glazing to protect and enhance your piece:

  • Standard Glass: For a clear, classic finish.
  • Anti-Reflective Glass: To minimise glare and maximise clarity.
  • UV-Protective Glass: To safeguard your artwork from fading over time.

We’ll also consider mounts and other finishing touches for a truly professional result.

Step 3: The Craftsmanship in Our Falkirk Workshop

Once the design is finalised, our skilled artisans in our Falkirk workshop begin their meticulous work. Crafting seamless custom circle and oval frames requires a unique blend of traditional techniques and modern precision. Every curve is expertly shaped and every joint is flawlessly finished, transforming high-quality, conservation-grade materials into a frame that is both beautiful and built to last. This is where our passion for craftsmanship truly comes to life.

Step 4: Final Fitting and Finishing Touches

The final step is where your artwork and its new frame become one. We handle your piece with the utmost care, fitting it securely within its new bespoke home. A final, rigorous quality check ensures every detail is perfect, from the smooth finish to the secure backing. Your unique, ready-to-hang masterpiece is then carefully prepared for you to cherish for years to come.

Ready to start your project? Contact our experts today.

Practical Advice for Displaying Your Round and Oval Frames

Once you’ve commissioned your perfect bespoke frame, the final, exciting step is displaying it with the confidence it deserves. A uniquely shaped frame can transform a space, but it often comes with questions about cost, hanging, and styling. Here is our expert advice to ensure your beautiful new frame looks its absolute best.

What Influences the Cost of a Custom Shaped Frame?

The artisan craftsmanship required for custom circle and oval frames is more intricate than for standard rectangular ones. Bending and joining wood into a perfect curve is a highly skilled process. The final price is influenced by several key factors:

  • Size: A larger diameter requires more premium materials and labour.
  • Wood Choice: Hardwoods like oak will differ in cost from softer woods or custom-painted finishes.
  • Profile Complexity: An ornate, detailed moulding is more complex to shape than a simple, minimalist one.

We encourage you to view your frame not as a simple accessory, but as a long-term investment in protecting and elevating a piece of art you love.

Tips for Securely Hanging Your Frame

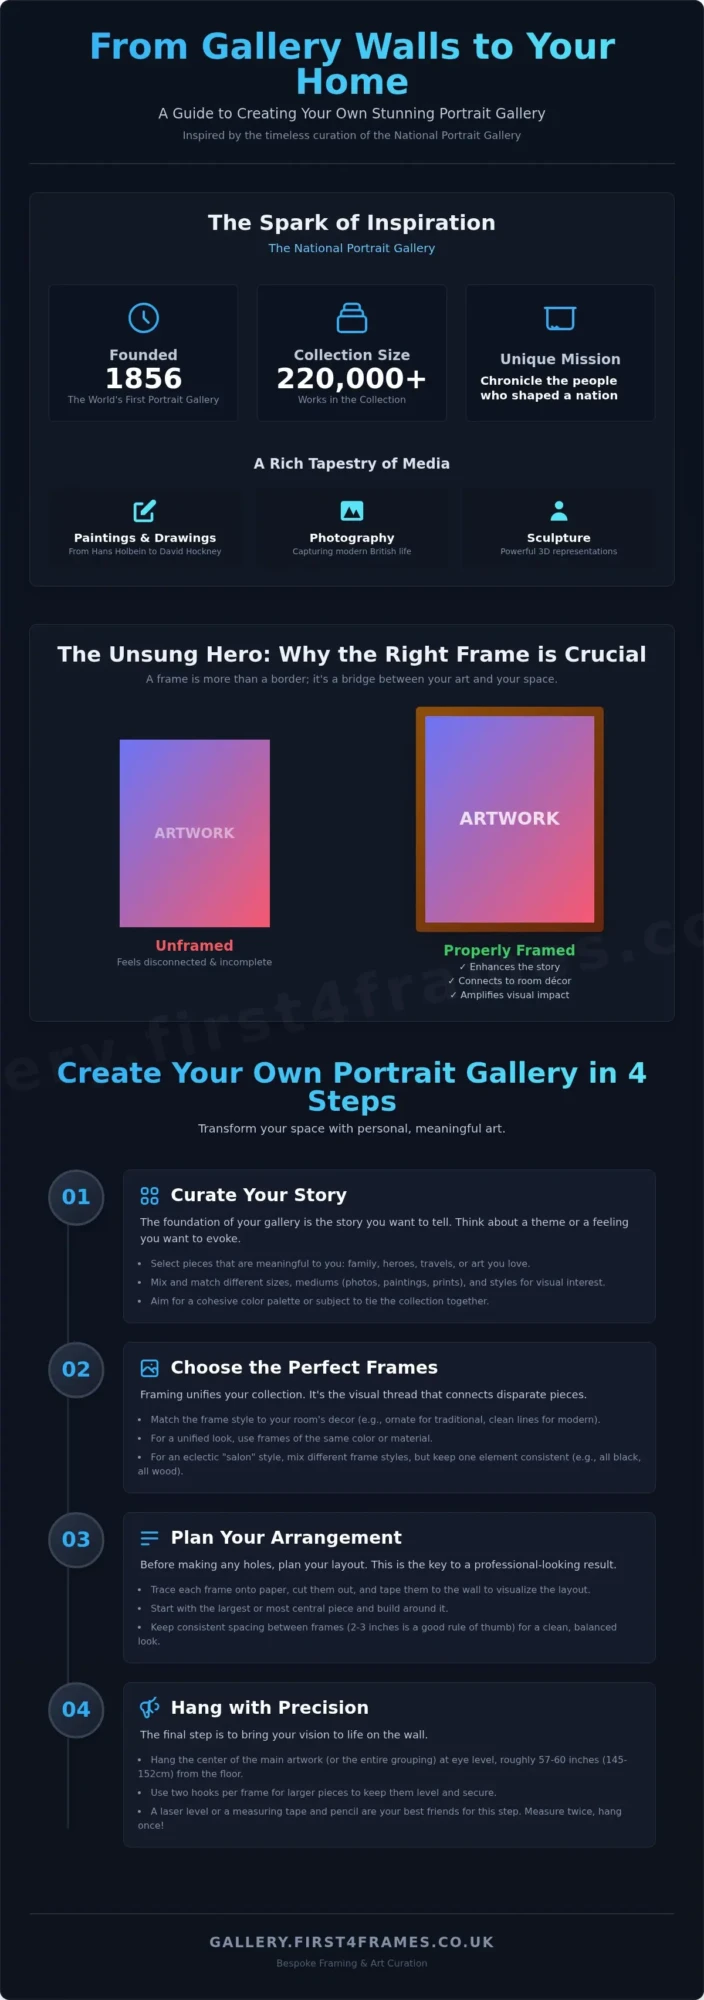
Due to their shape, round and oval frames hang best with specific fittings. We recommend using two D-rings attached to the back of the frame, roughly at the ’10-to-2′ clock positions. A strong picture cord is then strung between them, allowing the frame to hang securely from a single, well-anchored wall hook. This method prevents the frame from tilting or spinning. For maximum visual impact, hang your piece at eye level (around 57 inches from the floor) or use it to create a focal point above a piece of furniture like a console table or headboard.

Creating a Cohesive Look: Mixing Shapes on a Gallery Wall

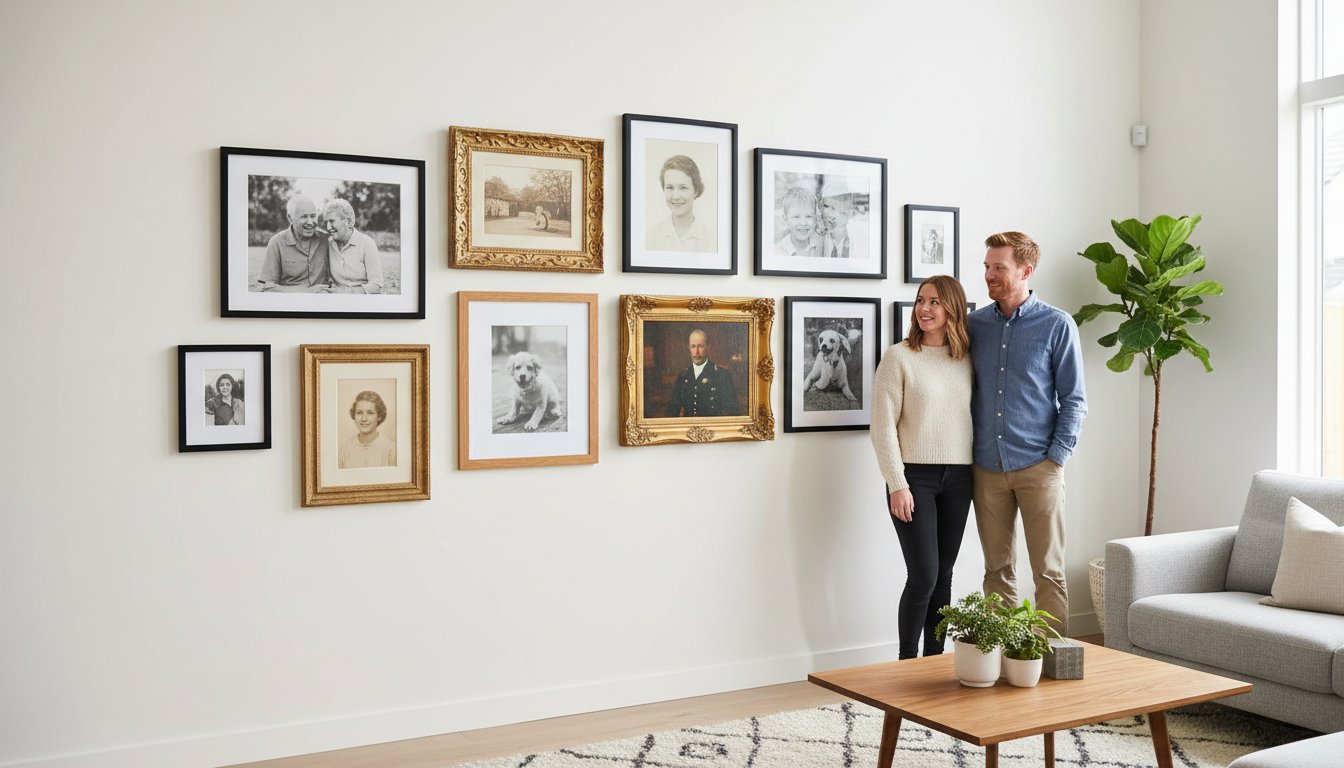
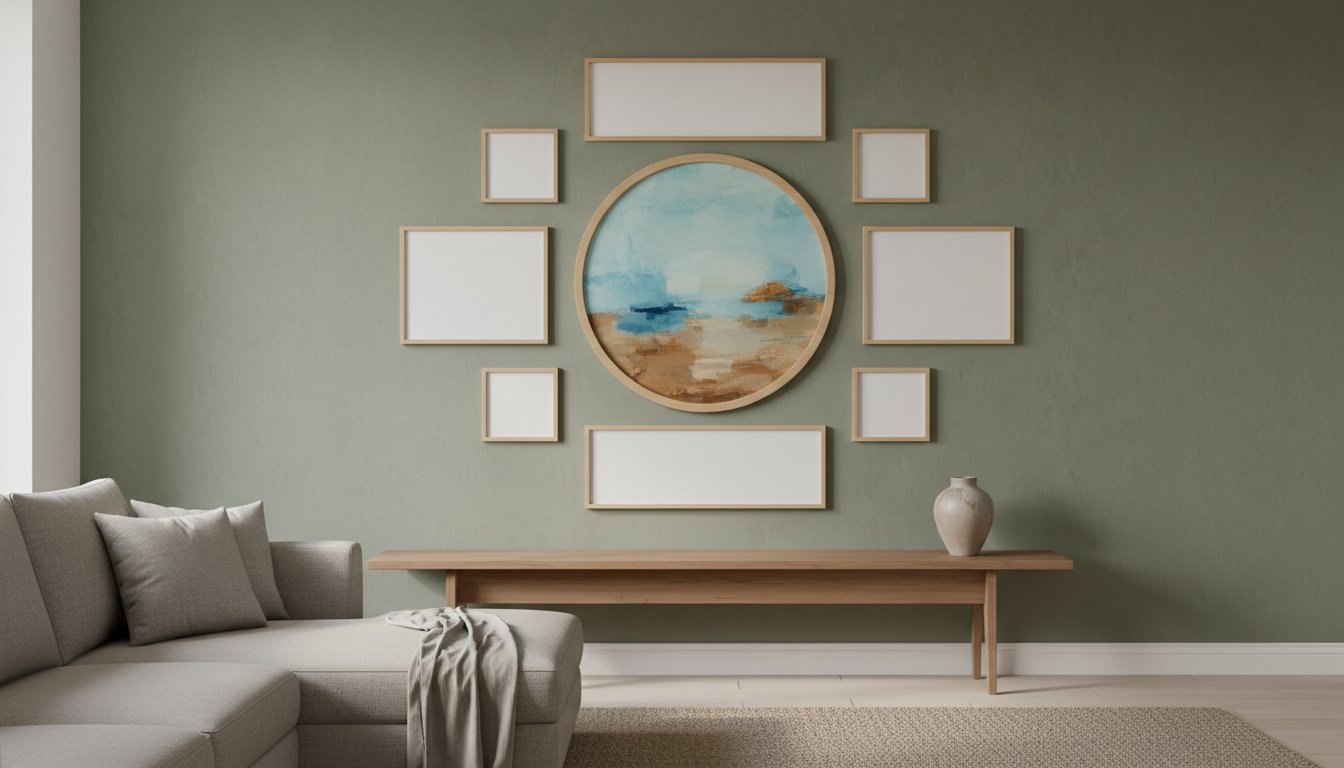
A circular or oval frame can be a spectacular anchor for a gallery wall, breaking up the monotony of straight lines. To create a balanced and harmonious display, let your shaped frame be the hero. Place it centrally or slightly off-centre and build your arrangement of rectangular frames around it. Tie the collection together by using a consistent element-such as a similar frame material, colour palette, or artistic theme-to create a visual bridge between the different pieces. A cohesive look feels intentional and professionally curated.

For more beautiful examples and inspiration, we invite you to view our gallery.

Bring Your Vision to Life with Bespoke Framing

Choosing a frame is about more than just protection; it’s about presentation and personality. As we’ve seen, circular and oval frames offer a wonderfully elegant alternative to sharp corners, creating a softer, more focused viewing experience. By understanding the bespoke process and the rich variety of materials and finishes available, you are perfectly equipped to commission a piece that truly complements your art and your home.

At First 4 Frames, our passion is bringing these unique visions to life. With over 20 years of bespoke framing experience, we combine time-honoured techniques with premium, conservation-grade materials. Every one of our custom circle and oval frames is meticulously hand-crafted in our Scottish workshop, ensuring a spectacular, lasting finish for your treasured artwork.

Are you ready to create a stunning focal point for your space? Discuss your unique framing project with our Falkirk-based experts. We look forward to helping you create a future heirloom.

Frequently Asked Questions

Are custom oval and circle frames more expensive than rectangular ones?

Due to the intricate craftsmanship involved, custom circle and oval frames are typically priced higher than standard rectangular styles. The process requires specialised techniques and precision cutting, which results in more material waste. However, this investment ensures you receive a truly unique, handcrafted piece that provides a spectacular display for your art, making it a worthwhile centrepiece for any room.

How do I correctly measure my round or oval artwork for a frame?

Measuring for your bespoke frame is a simple, precise process. For circular artwork, measure the diameter-the widest distance from edge to edge, passing through the centre. For an oval piece, you will need two measurements: the height at its tallest point and the width at its widest point. We always recommend measuring twice to ensure perfect accuracy before placing your order so our artisans can craft a frame that fits flawlessly.

What is the typical turnaround time for a bespoke shaped frame?

Our passion is craftsmanship, and perfection takes a little time. The typical turnaround for a bespoke circular or oval frame is between 7 to 10 working days from order confirmation to dispatch. This allows our expert framers to give your piece the dedicated attention it deserves, ensuring every detail is finished to our premium standards before it begins its journey to you. We believe the spectacular result is always worth the wait.

Can you put a mount inside a circular or oval frame?

Absolutely! A professionally cut mount can be a beautiful addition. It creates a visual space between the artwork and the frame, drawing the viewer’s eye inward and adding a layer of depth and sophistication. We create bespoke mounts to perfectly follow the curve of your frame, providing a seamless and elegant border for your piece. It’s the perfect way to elevate your art and give it a professional, gallery-quality finish.

What kind of art looks best in a round frame?

The soft, continuous lines of a round frame are incredibly versatile. They are particularly stunning for portraits, creating an intimate, focused feel reminiscent of classical miniatures. Botanical illustrations, detailed still life scenes, and even abstract pieces with circular motifs look spectacular. Ultimately, these unique frames offer a beautiful way to break from tradition and turn any piece into an unforgettable focal point in your home.

Do you offer different types of glass for custom frames?

Yes, we offer a selection of premium glazing options to protect and enhance your artwork. Our standard offering is a high-quality 2mm float glass, perfect for most environments. For rooms with significant light, we recommend our anti-reflective glass to minimise glare and improve clarity. To preserve your fine art for a lifetime, our UV-protective glass is the ideal choice, blocking harmful rays that can cause fading over time.

Posted on

Picture Framing Supplies UK: The Ultimate Guide for Artists & DIYers

Picture Framing Supplies UK: The Ultimate Guide for Artists & DIYers

Have you ever held a piece of art, a cherished photograph, or your own creative work and felt that mix of pride and slight panic? You know it deserves a beautiful, bespoke frame, but navigating the vast world of picture framing supplies uk can be daunting. Which mount will complement the colours? What glazing offers the best protection? And are you investing in the right tools, or risking a costly mistake with your treasured piece?

Embark on your framing journey with confidence. This guide is your trusted partner, created to demystify the entire process. We’ll provide a clear checklist of every tool and material you need, from premium mount boards to conservation-grade tapes. You’ll learn to distinguish quality craftsmanship, achieve a professional-looking result, and ensure your artwork is protected for years to come. We’ll also help you understand when to embrace the rewarding DIY challenge and when to call in a professional for that perfect, lasting finish.

The Anatomy of a Frame: Core Supplies You’ll Need

A beautifully finished picture frame is a work of craftsmanship, a sum of carefully chosen parts working in harmony to protect and present your art. Each layer, from the visible moulding to the hidden backing board, plays a crucial role in both the final look and the long-term preservation of your piece. Understanding The Anatomy of a Picture Frame is the first step towards making informed choices when sourcing your materials. This foundational checklist will guide you through the essential components for any project.

To see how these components come together, this short video provides a helpful overview:

Before you begin, it’s important to distinguish between standard decorative framing and ‘conservation framing’. While standard framing focuses primarily on aesthetics, conservation framing uses archival-quality, acid-free materials to protect valuable or sentimental artwork from environmental damage. Choosing the right picture framing supplies uk retailers offer is key to achieving the level of protection your artwork deserves.

Frame Moulding: The Foundation of Your Design

The moulding is the structural and decorative border of your frame. The material and profile you choose set the tone for the entire piece.

  • Materials: Wood offers timeless warmth and versatility, aluminium provides a sleek, modern finish, and Polcore (a recycled polystyrene) is a durable and cost-effective alternative that beautifully mimics wood.
  • Profiles: Common styles include flat, contemporary profiles; curved ‘scoop’ profiles that draw the eye inward; ornate, traditional designs; and ‘floater’ frames for canvas art.
  • Sizing: Ensure the moulding width is proportional to your artwork-a delicate print needs a slender frame, while a large canvas demands a more substantial one. You can buy moulding in lengths to cut yourself or use a chop service for precise, mitred corners.

Glazing: Protecting Your Artwork

Glazing is the clear protective layer covering your art. Its primary job is to shield the piece from dust, moisture, and damaging light. The main options include standard glass, which is clear and scratch-resistant but heavy, and acrylic (often known by the brand name Perspex), which is lightweight, shatter-resistant, and an excellent choice for large frames or pieces that will be shipped. For precious artwork, always opt for glazing with at least 99% UV-filtering properties to prevent fading caused by sunlight.

Mountboard and Backing Board: Presentation and Preservation

The window mount (or mat) serves two purposes: it provides a visual border that draws the eye to the artwork and creates a crucial air gap between the art and the glazing. It’s vital to choose between a standard, decorative mountboard and an acid-free, conservation-grade board. Standard boards contain acids that can ‘burn’ and discolour your artwork over time, whereas conservation boards are archival quality. Finally, the backing board provides structural support and seals the frame ‘sandwich’, protecting it from behind.

Essential Tools for the DIY Framer’s Toolkit

While premium materials are the heart of a beautiful frame, the right tools are the skilled hands that bring it all together. Achieving those crisp, professional-looking corners and clean lines isn’t about luck; it’s about precision. Investing in a basic toolkit is the single most important step you can take to elevate your DIY framing from a hobby to true craftsmanship. To get started, it’s helpful to understand the Essential Tools for the DIY Framer and how they function. We’ve broken them down into three key stages: cutting, joining, and finishing.

Cutting and Sizing Equipment

Precision starts here. To create a perfect frame, every component must be sized with complete accuracy. A tiny error at this stage can compromise the entire project.

  • Mitre Saws or Guillotines: These are essential for cutting your moulding to a perfect 45-degree angle. A sharp, accurate cut is non-negotiable for seamless, gap-free corners.
  • Mat/Mount Cutters: A specialised cutter is the secret to achieving that clean, bevelled edge on your window mount, adding depth and a truly professional finish to the artwork.
  • Glass/Acrylic Cutters: A simple scoring tool allows you to cleanly and safely size your glazing to fit the frame dimensions perfectly.

Joining and Assembly Tools

Once your pieces are cut, you need the right equipment to join them securely. While professional framers use heavy-duty underpinners that drive V-nails into the corners for an instant bond, there are excellent, more accessible alternatives for the home workshop.

  • Frame or Band Clamps: An essential for the DIY framer, these tools hold the four corners of your frame tightly and squarely together while the wood glue dries, ensuring a strong, permanent bond.
  • Point Drivers or Tab Guns: This handy tool fires flexible or rigid points into the back of the frame, holding your artwork ‘sandwich’ (glazing, mount, artwork, and backing board) securely in place.

Finishing and Hanging Hardware

The final touches are what separate a good frame from a great one. Sealing the back and adding the right hardware ensures your artwork is protected and ready for beautiful display. When searching for these specific picture framing supplies UK retailers offer a wide variety to suit any project.

  • Framing Tape: Use this to seal the gap between the frame and the backing board. This creates a crucial barrier against dust, moisture, and even insects.
  • Hanging System: Choose from D-rings and picture wire for a traditional gallery hang, or a simple sawtooth hanger for smaller, lighter frames.
  • Felt Bumpers: Stick these small pads on the bottom corners to protect your wall from scuffs and allow air to circulate evenly behind the frame.

Picture Framing Supplies UK: The Ultimate Guide for Artists & DIYers

DIY vs. Professional Framing: A Cost and Quality Comparison

One of the biggest decisions you’ll face is whether to do it yourself or entrust your artwork to an expert. There’s an undeniable satisfaction in a successful DIY project, but it’s a craft that requires precision and patience. This comparison isn’t just about the initial price tag; it’s about understanding the true cost, the time involved, and matching the right approach to the value of the piece you’re framing.

The True Cost of DIY Framing

Venturing into DIY framing can be incredibly rewarding. However, before you start buying picture framing supplies UK, it’s crucial to understand the full investment. Beyond the frame moulding and mount board, you’ll need specialised tools for a quality finish. A common mistake is underestimating the cost of wastage from mis-measured mounts or poorly cut corners. For a simple poster or a child’s drawing, the DIY route can be a fun and cost-effective choice. For anything more, the costs quickly add up.

Item / Service Typical DIY Investment Typical Professional Cost (One-off)
Decent Mount Cutter £80 – £150+ Included in service
Mitre Saw / Guillotine £100 – £300+ Included in service
Tools (Glass cutter, tabs, etc.) £40 – £60 Included in service
Total Initial Tool Cost £220 – £510+ £0
Bespoke A3 Frame Service (Plus materials & time) £60 – £100

The Value of a Professional Framing Service

When you commission a professional framer, you’re not just buying a product; you’re investing in years of expertise and a guaranteed result. Professionals use specialist equipment that ensures perfectly joined corners, flawless, dust-free mounting, and structural integrity. They provide access to an extensive range of premium mouldings and conservation-grade materials designed to protect your art. These experts follow best practices, often guided by standards from the Fine Art Trade Guild, to shield your piece from UV light and environmental damage, preserving it for a lifetime. The result is a spectacular, gallery-quality finish that elevates your art and your home. See how affordable professional quality can be. Get a Bespoke Framing Quote.

Checklist: When to Choose a Professional

Still unsure which path to take? Here’s a quick checklist to help you decide when calling in an expert is the wisest choice for your art:

  • The artwork is valuable, an original, or has significant sentimental importance.
  • You are framing a large, oversized, or unusually shaped piece that requires specialist handling.
  • You need guaranteed conservation-grade, archival framing to protect your art for decades to come.
  • You want a flawless, premium finish that looks perfectly at home in a gallery, your office, or living space.

Sourcing High-Quality Picture Framing Supplies in the UK

Once you understand the essential components, the next step is finding them. The quality of your materials is not just a detail; it’s the very foundation of a beautiful, long-lasting frame. The right components act as the perfect bridge between your artwork and your decor, so choosing your source wisely is paramount to achieving a professional finish.

Where to Look for Materials

Your search for picture framing supplies UK will lead you to several types of vendors, each catering to different needs. For the widest selection of professional-grade mouldings, conservation boards, and specialist glazing, online suppliers dedicated to the framing industry are your best resource. For those just starting out or working on less critical projects, large high-street art retailers offer a good range of hobbyist and student-grade materials. And for the true artisan, local timber merchants can provide raw, unfinished wood to create bespoke mouldings from scratch.

What to Look for in a Supplier

A reliable supplier is more than just a shop; they are a partner in your creative process. When evaluating where to buy, look for these key indicators of quality and service:

  • Conservation-Grade Options: A reputable supplier will clearly label and offer a wide range of acid-free mountboards, backing boards, and UV-filtering glass or acrylic to ensure your artwork is protected from fading and degradation.
  • Helpful Services: Many online specialists offer a ‘chop service’, which provides moulding cut precisely to your required lengths with perfect mitre cuts. This saves you time and the need for specialised equipment.
  • Verified Reviews: Check customer feedback regarding the quality of the materials, the accuracy of their descriptions, and the care they take in packaging items for shipping to prevent damage.

The Professional Alternative: Let Us Source for You

While the DIY route is rewarding, it can also be a path of trial and error. Sourcing premium materials, ensuring compatibility, and achieving a flawless finish requires expertise. This is where our passion and experience come in. As professional framers, we have access to exclusive, trade-only suppliers and a deep understanding of which materials will best protect and enhance your specific piece of art.

We take the guesswork out of the equation, selecting only the finest mouldings, archival boards, and crystal-clear glazing for every project. We believe your art deserves nothing less than perfection. We source only the best materials for our frames. Discover Our Craftsmanship.

Your Masterpiece Deserves the Perfect Frame

Whether you’re an artist or a dedicated DIYer, framing your own work is a uniquely rewarding journey. This guide has equipped you with the essentials, from understanding the anatomy of a frame to sourcing the best picture framing supplies uk has to offer. The right materials and tools are the foundation of a project you can be proud of for years to come.

But for those pieces that demand an expert touch, or when you simply want a guaranteed, museum-quality result, nothing compares to professional craftsmanship. With over 20 years of experience, our Falkirk-based team at First4Frames Gallery uses only premium, conservation-grade materials to create stunning bespoke frames for art lovers across the UK.

Ready for a flawless finish? Let our experts create the perfect bespoke frame for your art. Get Your Quote Today and give your masterpiece the celebration it deserves.

Frequently Asked Questions

Is it cheaper to frame a picture yourself in the UK?

Framing a picture yourself can certainly be more cost-effective, particularly if you plan to frame multiple pieces. While there’s an initial investment in tools, the cost of materials for a single frame is often significantly lower than a bespoke framing service. For example, materials for a standard A4 frame could cost around £15-£25, whereas a professional service might start from £40. For those passionate about craftsmanship, the savings and satisfaction are well worth it.

What are the most essential supplies for a beginner picture framer?

To begin your framing journey, you’ll need a few essential tools to ensure a professional finish. We recommend starting with a quality mount cutter for crisp, clean bevels, a sturdy mitre box and saw for accurate corner cuts, and a reliable measuring tape. Wood glue for joining corners and a point driver to secure your artwork in the frame are also fundamental. These core items form the perfect foundation for your new craft, allowing you to create beautiful, bespoke frames at home.

What is conservation framing and why is it important?

Conservation framing is a premium method designed to protect and preserve your artwork for generations. It uses archival-quality, acid-free materials, including mountboards, backing boards, and tapes, to prevent yellowing and degradation. Crucially, it often incorporates special glazing that blocks up to 99% of harmful UV light, which is the primary cause of fading. This level of craftsmanship is essential for valuable or sentimental pieces, ensuring their beauty remains spectacular for years to come.

How do I choose the right size mount for my picture?

Choosing the right mount is about creating visual balance and drawing the eye towards the artwork. A good rule of thumb is to make the mount borders at least 1.5 times the width of your frame moulding, with a typical minimum of 50-65mm (2-2.5 inches). For a more traditional or dramatic effect, consider a ‘weighted’ bottom border, making it slightly deeper than the top and sides. This simple technique prevents the artwork from looking like it’s visually ‘slipping’ down.

Can I buy professional-grade frame moulding online?

Absolutely. The internet has made it incredibly easy to access a spectacular range of professional-grade materials. Many specialist retailers now offer the same high-quality frame mouldings used by bespoke framers directly to the public. When searching for picture framing supplies uk online, you can find everything from solid oak and ash to ornate Polcore and sleek aluminium profiles. This allows you to achieve a truly premium, gallery-quality finish for your projects right from your own workshop.

What’s the best way to seal the back of a picture frame?

Sealing the back of your frame provides a final, professional touch and, more importantly, protects your artwork from dust, humidity, and insects. The best method is to use a quality self-adhesive framing tape, such as brown Kraft tape. Simply apply the tape neatly over the gap where the backing board meets the frame moulding, ensuring you press it down firmly for a secure seal. This simple step elevates your work from homemade to beautifully handcrafted and ensures its longevity.

Posted on

10 Common Picture Framing Mistakes That Can Ruin Your Artwork

10 Common Picture Framing Mistakes That Can Ruin Your Artwork

That beautiful print you finally bought, the family photograph you cherish, or the original artwork you invested in – these pieces deserve more than just a frame; they deserve the perfect one. Yet, navigating the world of mounts, glass types, and materials can feel overwhelming. It’s easy to make common picture framing mistakes to avoid that could, at best, fail to do your art justice, and at worst, cause costly and irreversible damage over time. Don’t let uncertainty prevent you from creating a stunning display.

As passionate experts in bespoke craftsmanship, we’re here to guide you. This article will walk you through the ten most common pitfalls, ensuring you can confidently choose the right elements for your piece. You’ll learn how to protect your artwork from fading, achieve a spectacular, gallery-quality finish in your own home, and understand exactly when it’s worth investing in a professional service. Let’s ensure your art is beautifully and safely displayed for a lifetime.

Mistake #1: Ignoring Conservation-Grade Materials

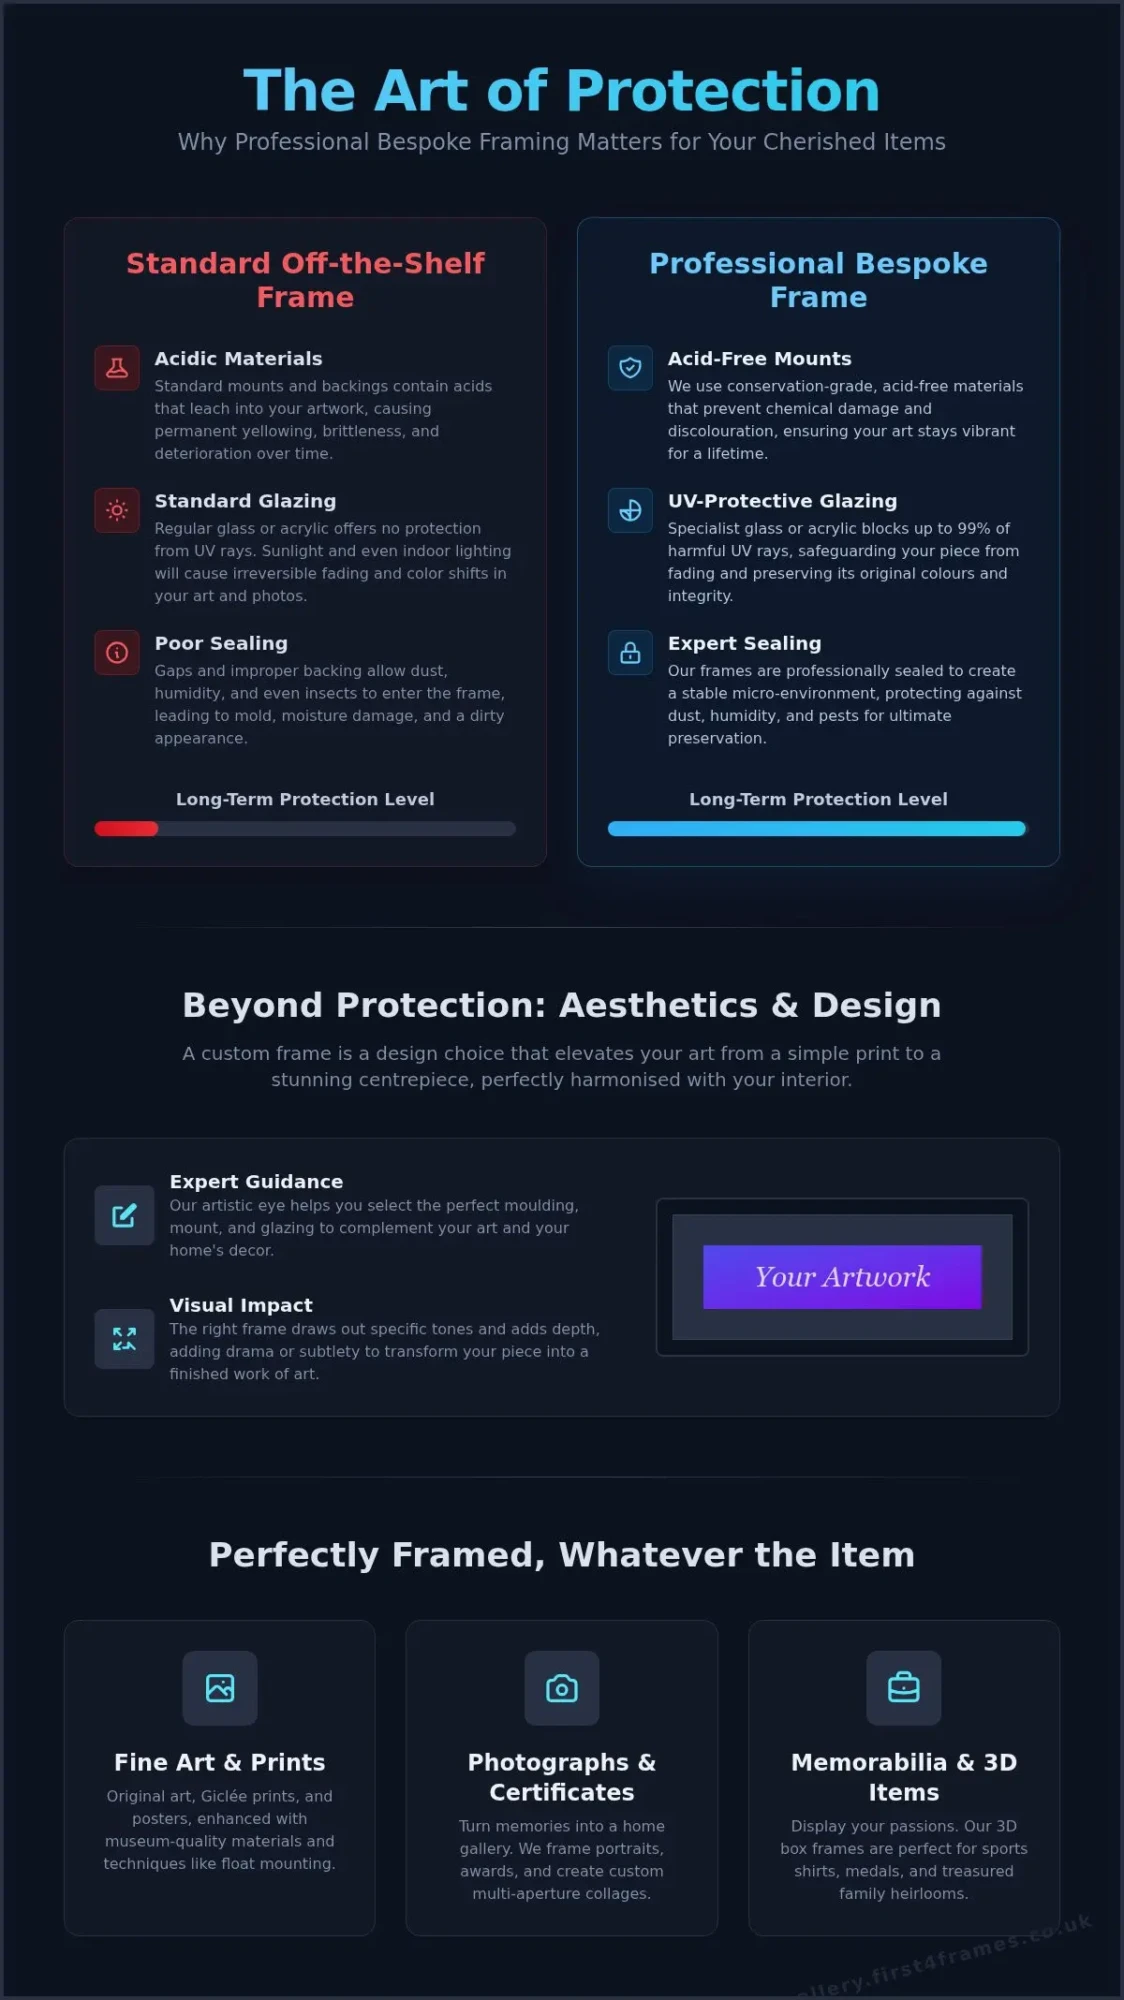
One of the most significant picture framing mistakes to avoid is viewing a frame as purely decorative. While a beautiful frame enhances your artwork and complements your décor, its most crucial role is preservation. A well-made picture frame is a protective shield, and opting for cheap, low-quality materials can cause irreversible damage to the very piece you wish to display. This is where the professional standard of ‘conservation framing’ becomes essential, ensuring your art is protected for generations.

At its core, conservation framing uses premium materials specifically designed to protect your artwork from environmental damage. To see why this is so important, the video below offers an excellent overview of common pitfalls.

Using Acidic Mounts and Backing Boards

Standard mount boards are often made from wood pulp, which contains acid. Over time, this acid leeches out of the board and into your artwork, causing a brownish stain known as ‘mat burn’. This discolouration is permanent and is perhaps the most common cause of damage we see. To prevent this, always insist on professional-grade materials like acid-free or, for ultimate protection, 100% cotton rag mounts and backing boards. These are chemically inert and will not harm your art.

Choosing the Wrong Type of Glazing (Glass)

Think of standard glass as a window that lets in damaging sunlight. It offers virtually no protection from ultraviolet (UV) rays, which are the primary cause of fading in photographs, prints, and original watercolours. The damage is gradual but devastating. In contrast, conservation-grade glazing is coated to filter out 99% of harmful UV rays, dramatically slowing the fading process. For crystal-clear viewing without distracting reflections, you can also opt for premium anti-reflective glass.

Improperly Securing the Artwork

Never, ever use household tapes like Sellotape or masking tape to attach your art to its mount. These tapes contain acids and adhesives that will yellow, become brittle, and leave a sticky, damaging residue that is extremely difficult to remove. The professional method involves using specialised acid-free paper ‘T-hinges’ to suspend the artwork from the backing board. This allows the paper to expand and contract naturally with changes in humidity, preventing buckling while ensuring it can be safely removed in the future.

Mistake #2: Making Poor Aesthetic and Design Choices

While the first mistake focuses on preservation, this one is about presentation. A frame does more than just protect; it’s a critical design element that completes the artwork. The right choice enhances the piece, pulling you into the picture, while the wrong one can be a jarring distraction. The goal is to create harmony between the art, the frame, and your room’s decor. The impact of picture frames on an interior space is significant, and getting the colour and proportions right is crucial for a spectacular result.

Selecting the Wrong Frame Size or Proportions

Proportion is everything. A frame that is out of scale with the artwork can make the entire presentation feel unbalanced. A large, powerful piece of art will look flimsy and unsupported in a frame that’s too thin. Conversely, a delicate sketch or a small photograph can be completely overwhelmed by a thick, bulky frame. A good rule of thumb is for the frame’s width to be a noticeable accent but never so wide that it competes with the art for attention. Think of it as the final, perfecting touch, not the main event.

Mismanaging the Mount (Mat Board)

The mount, or mat board, provides visual breathing space and is key to a professional finish. One of the most common picture framing mistakes to avoid is using a mount with perfectly equal borders. For a more balanced and visually stable look, the bottom border should be slightly ‘weighted’-or deeper-than the top and sides. This subtle adjustment prevents the optical illusion of the artwork ‘slipping’ down inside the frame. We also advise choosing a neutral mount colour, like off-white or soft grey, to let the artwork’s colours shine without competition.

Clashing the Frame Style with the Artwork

Your frame style should always complement the artwork’s personality. Placing a sleek, contemporary abstract print into a heavily ornate, traditional gold frame creates a jarring visual disconnect that serves neither the art nor the frame. The key is to consider the artwork’s era, style, and mood. Minimalist black or natural wood frames often pair beautifully with modern photography, while classic art may call for a more detailed profile. It’s about creating a harmonious pairing that feels intentional. See how we pair frames with art in our gallery.

Mistake #3: Falling into the ‘Ready-Made’ Frame Trap

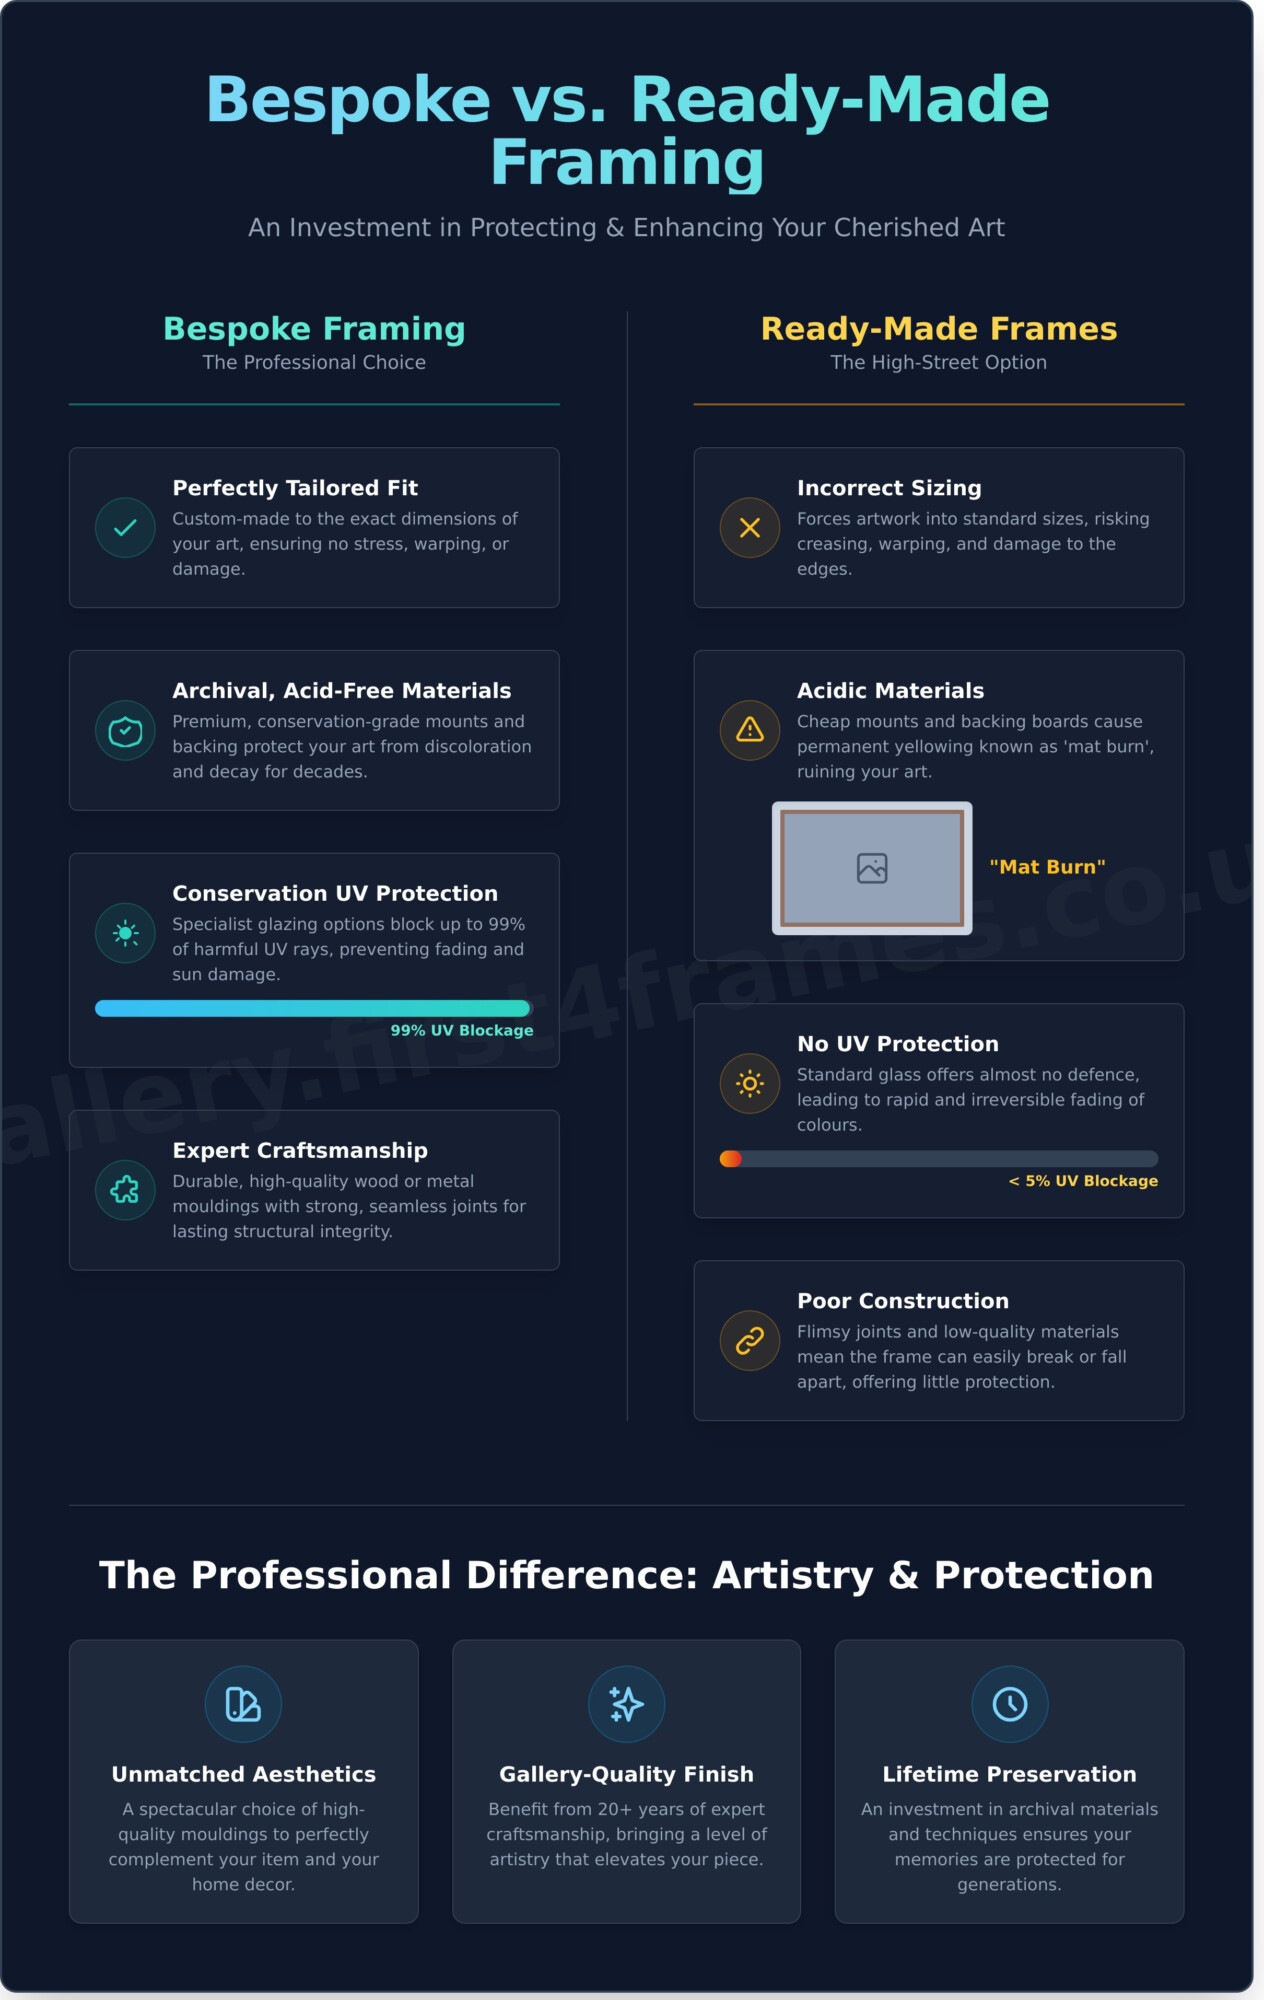
We’ve all been there. You find a piece of art you love, and the next logical step is a frame. The high street and online giants offer a tempting solution: cheap, ready-made frames that promise a quick fix for just a few pounds. While the low price tag seems like a victory, it often hides a much greater cost down the line. Many people believe professional framing is too expensive, but this is one of the most common picture framing mistakes to avoid. Think of it not as an expense, but as an investment in protecting something you cherish. The real cost of a cheap frame is the potential damage to your art-a classic case of “pay now or pay later.”

Forcing Your Art into a Standard Size

The first problem you’ll encounter is the one-size-fits-all approach. Most original art, prints, and photographs don’t conform perfectly to standard A4 or 50x70cm dimensions. This leaves you with a difficult choice: do you crop the edges of your beautiful artwork, or do you leave awkward, uneven gaps around it? Neither option does justice to the piece. A bespoke frame, however, is built with precision craftsmanship around your art, ensuring a perfect, harmonious fit that elevates the final presentation from amateur to spectacular.

Overlooking Low-Quality Construction

Beyond the poor fit, the materials used in mass-produced frames are simply not designed for preservation. You’ll often find:

  • Flimsy plastic or styrene glazing that scratches easily and offers no UV protection.
  • Thin, acidic backing boards made of cardboard that will leach chemicals and cause yellowing over time.
  • Poorly joined corners held by staples that can separate, leaving the frame unstable.

These materials are a false economy. They actively harm your artwork. True preservation requires archival-quality, acid-free materials as outlined in professional conservation framing guidelines. Choosing a quality, professionally made frame is the single best way to ensure your art is protected for years to come, avoiding one of the costliest picture framing mistakes to avoid. A premium frame is a protective home, not just a decorative border. To see the profound difference that professional craftsmanship makes, we invite you to explore our online gallery.

10 Common Picture Framing Mistakes That Can Ruin Your Artwork

Mistake #4: Committing Hanging and Placement Errors

You’ve invested in a beautiful, bespoke frame that perfectly complements your art. The job is done, right? Not quite. How and where you hang your artwork is the final, crucial step in its presentation. Even a professionally framed masterpiece can look out of place if hung incorrectly. Committing these common placement errors is one of the most disheartening picture framing mistakes to avoid, but thankfully, they are simple to fix.

Here are our expert tips for hanging your art with the precision and care it deserves.

Hanging Artwork Too High

This is perhaps the most frequent interior design mistake we see. Art hung too high feels disconnected from the room and its furniture. The solution is simple: follow the gallery rule. The centre of your artwork should be at average eye level, which is between 57 and 60 inches (approximately 145-152 cm) from the floor. This standard creates a natural, comfortable viewing experience and ensures your art feels grounded in the space.

Poor Lighting and Environmental Placement

Where you hang your art matters just as much as how high you hang it. The wrong environment can not only diminish its visual impact but also cause irreversible damage over time. Keep these key points in mind:

  • Avoid Direct Sunlight: Even with UV-protective glazing, prolonged exposure to harsh, direct sunlight will cause colours to fade. Choose a wall that doesn’t receive direct sun.
  • Beware of Humidity and Heat: High-moisture areas like bathrooms or kitchens can lead to warping and mould. Similarly, hanging art above a radiator or fireplace can cause the materials to dry out and crack.
  • Illuminate Intentionally: To make your art truly stand out, consider using directional spotlights or a dedicated picture light. This ensures your piece is beautifully lit without being exposed to harmful elements.

Creating Awkward Groupings or Spacing

The relationship between artworks and the space around them is critical. A tiny frame floating alone on a vast wall will look lost, while a gallery wall with inconsistent, wide gaps can feel chaotic. When creating a gallery wall, treat the entire collection as one single unit. A professional tip is to lay out your arrangement on the floor first. Trace each frame onto paper, cut them out, and tape them to the wall to perfect your spacing before hammering a single nail.

Getting the placement right is the final flourish that honours your art. Once you’ve mastered these hanging techniques, you’ll be ready to find your next spectacular piece. Explore our gallery for inspiration.

Frame Your Memories, Flawlessly

Your artwork tells a story, and its frame is a crucial part of the narrative. From selecting conservation-grade materials that protect against fading to making aesthetic choices that enhance its beauty, the details matter immensely. Escaping the ‘ready-made’ trap and ensuring correct placement are just as vital. By understanding these common picture framing mistakes to avoid, you can ensure your cherished art is preserved and presented perfectly for generations to enjoy.

Don’t leave it to chance. At First4Frames Gallery, we bring over 20 years of professional framing experience to every project. Our passion lies in craftsmanship, using only the finest conservation-grade materials to offer a truly bespoke service tailored to your artwork and your home. We build the perfect bridge between your piece and your décor, ensuring a flawless result every time. Avoid these mistakes. Trust our experts with your bespoke framing needs.

Embark on your framing journey with confidence. Let’s give your art the spectacular, lasting home it truly deserves.

Frequently Asked Questions

Is professional picture framing really worth the cost?

Absolutely. While professional framing can range from £50 to over £200, it’s a worthwhile investment in protecting your art. A professional framer uses archival, acid-free materials and UV-protective glass that prevent fading and irreversible damage over time. This bespoke craftsmanship not only enhances the artwork’s beauty but ensures its longevity, making it a crucial step for any piece you truly value, whether its worth is sentimental or monetary.

How can I tell if my current picture frame is damaging my art?

Look for tell-tale signs of poor-quality framing. Yellowing or brown marks on the artwork or mount board, known as acid burn, are a clear red flag. If the colours in your print appear faded, it likely lacks UV-protective glass. Also, check if the artwork is pressed directly against the glass; this can cause moisture damage and sticking. A flimsy frame that feels loose or weak also fails to provide adequate physical protection for your piece.

What is the most important thing to invest in: the frame, the mount, or the glass?

While all three elements work together, the mount and the glass are most critical for preservation. An acid-free, archival-quality mount is essential to prevent chemical burns that can destroy your artwork. Secondly, investing in glazing with at least 99% UV protection is the only way to prevent colours from fading over time. The frame provides the structural support and aesthetic finish, but the mount and glass do the real heavy lifting in protecting your art.

Can I frame a canvas painting myself?

While it is possible to frame a stretched canvas at home, especially with a simple floater frame, it requires care and precision. The main challenge is ensuring the canvas is stretched with perfect, even tension to avoid sagging or rippling over time. For valuable or sentimental paintings, we always recommend professional framing. This ensures the canvas is handled correctly and securely fitted, helping you steer clear of common DIY picture framing mistakes to avoid long-term damage.

How do I clean the glass on my framed pictures without causing damage?

The golden rule is to never spray cleaner directly onto the glass. Liquid can easily seep under the edge of the frame and damage the mount or the artwork itself. Instead, lightly spray a gentle, ammonia-free glass cleaner onto a clean microfibre cloth. Wipe the glass carefully, then use a dry part of the cloth to buff away any streaks. For acrylic or Perspex glazing, use only a cleaner specifically designed for acrylic to prevent scratching.

What’s the best way to hang a very heavy picture frame securely?

For any frame weighing over 10kg, standard picture hooks are not sufficient. The most secure method is to use two heavy-duty D-rings screwed into the back of the frame, hung on two separate, robust wall hooks. This distributes the weight evenly and helps keep the frame level. Always ensure your wall fixings are drilled into a solid stud in a plasterboard wall or secured with appropriate rawl plugs in a brick wall for maximum safety.

Posted on

How to Protect Art From Sun Damage: An Expert Guide

How to Protect Art From Sun Damage: An Expert Guide

That beautiful shaft of sunlight streaming into your living room brings life and warmth to your space. But for the cherished artwork on your walls, it can be a silent, slow-motion threat. Do you ever worry that your favourite pieces are losing their vibrancy, or feel you must choose between a bright, airy home and the preservation of your art? It’s a common dilemma for art lovers, but the solution is simpler and more elegant than you might imagine.

Thankfully, understanding how to protect art from sun damage doesn’t mean sacrificing your light-filled rooms. In this expert guide, we will walk you through the essential techniques to keep your collection safe. From the secrets of strategic placement to demystifying the world of UV-protective glass and bespoke framing, we’ll provide clear, actionable steps. You will gain the confidence to display your art beautifully and the knowledge to ensure its colours remain rich and true for a lifetime, safeguarding the pieces you love.

Why Sunlight is Art’s Greatest Enemy: Understanding the Damage

That beautiful stream of sunlight pouring into your room may feel warm and inviting, but for your cherished artwork, it’s a silent and persistent threat. The primary culprit is invisible to the human eye: ultraviolet (UV) radiation. This high-energy light is the single greatest cause of irreversible damage to art. The harm is cumulative, building up slowly over time until one day you notice that the vibrant colours you fell in love with have become a pale, faded memory. Understanding this process is the first step in learning how to protect art from sun damage effectively.

To see how different solutions can mitigate this damage, this video offers a helpful visual guide:

The Science of Fading: How UV Rays Break Down Pigments

Think of UV rays as tiny, energetic bullets that constantly bombard your artwork. When they strike the surface, they trigger chemical reactions that break down the molecular bonds in the pigments and dyes. This process, known as photodegradation, is what causes colours to fade. Certain pigments are more fragile than others; vibrant reds, yellows, and purples often fade much faster than earthy tones like browns and blues. Even our premium Giclée prints, which use archival-quality inks for longevity, are not immune and require proper protection to preserve their spectacular detail.

Beyond Fading: Heat and Visible Light Damage

UV radiation isn’t the only danger lurking in sunlight. The heat from direct sun causes materials to expand and contract, a cycle that puts immense physical stress on your art. Over time, this can lead to oil paint cracking, canvases sagging, and paper or photographs becoming warped and distorted. Furthermore, even intense visible light contributes to the decay, causing paper and mounting boards to yellow and become brittle. Managing these environmental factors is a core part of the preventive conservation techniques used by museum professionals to ensure a piece’s longevity.

Which Art is Most at Risk?

While all art is vulnerable to sunlight, some types are far more susceptible than others. It is crucial to know where your collection stands to provide the right level of care.

  • Highly Susceptible: Watercolours, photographs, and any works on paper are at the top of the list. Paper is absorbent and its fibres are easily broken down, leading to rapid fading and brittleness.
  • Textiles and Fabrics: Tapestries, quilts, and other fabric-based art can fade and their fibres can weaken and disintegrate very quickly when exposed to direct light.
  • More Robust (But Still Vulnerable): Oil and acrylic paintings are generally more resilient, as the pigments are suspended in a protective binder. However, they are still prone to cracking from heat and their colours will inevitably fade over many years of exposure.

Strategic Placement: Your First and Easiest Line of Defence

Before you even think about specialist glazing or frames, the most powerful tool in your art protection arsenal is completely free: the layout of your room. When learning how to protect art from sun damage, controlling the environment where your art lives is the foundational first step. A little planning when you first hang a piece can prevent a lifetime of irreversible fading and damage. It’s about working with your home, not against it.

Mapping the Sun in Your Home

Take a day to become a light cartographer in your own home. Observe which walls receive direct sunlight and, crucially, at what time of day. In the UK, north-facing walls are your safest bet, as they receive the least direct, most consistent light. Conversely, south-facing walls bear the brunt of the sun’s intensity, especially during midday, and require the most careful consideration for any valuable artwork.

The Best and Worst Walls for Hanging Art

With your new sun map in hand, choosing the right spot becomes much simpler. The goal is to minimise direct UV exposure as much as possible. Follow these key principles:

  • The Golden Rule: Never hang important or delicate art, like watercolours or photographs, in a location that receives prolonged, direct sunlight.
  • Avoid Direct Opposition: Walls directly opposite large, south-facing windows are high-risk zones. They receive both direct and intense reflected light.
  • Beware of Reflections: Be mindful of light bouncing off shiny surfaces. A polished wooden floor, a glass coffee table, or a mirror can redirect harmful rays onto a seemingly safe wall.

Using Window Treatments to Your Advantage

Your windows are the gateways for UV rays, but they don’t have to be an open invitation for damage. Simple, elegant solutions can make a spectacular difference. During peak sunlight hours, drawing curtains or lowering blinds is a highly effective tactic. For a more permanent and invisible solution, you can install professional window films that block UV rays, often rejecting up to 99% of them without obscuring your view. Even a simple set of sheer curtains can work wonders, diffusing harsh light and significantly reducing its damaging impact.

How to Protect Art From Sun Damage: An Expert Guide

The Protective Power of a Professional Frame

While strategic placement and window films offer a great first line of defence, the single most effective, long-term solution for protecting your art is professional conservation framing. A beautiful bespoke frame is far more than a decorative border; it is a precisely engineered conservation tool designed to create a safe, stable environment for your treasured piece. This is the ultimate answer to how to protect art from sun damage, safeguarding it from multiple environmental threats for decades to come.

Choosing the Right Glazing: A Shield Against UV Rays

The glass or acrylic (glazing) is your artwork’s primary shield against light. Standard picture glass offers minimal protection, blocking less than half of damaging UV rays. To truly protect your art, you need specialist glazing. Invisible UV radiation is the main culprit behind fading, breaking down the chemical bonds in pigments. You can learn more about the science of how UV rays cause fading from university research, but the solution lies in choosing the right material:

  • Conservation Clear Glass/Acrylic: This is the industry standard for preservation. It is specially coated to block up to 99% of harmful UV rays, dramatically slowing down the fading process.
  • Museum Glass/Acrylic: The premium choice for both protection and viewing. It offers the same 99% UV protection but includes an advanced anti-reflective coating, making the glazing virtually invisible for breathtaking clarity.

The Importance of Archival Mounts and Backing

Light isn’t the only enemy. The materials touching your artwork are just as critical. Standard mount boards contain acidic compounds that, over time, can leach into the paper, causing irreversible yellowing and brown marks-a phenomenon known as ‘mat burn’. We only use premium, acid-free archival mount boards (made from pure rag mat or alpha-cellulose) that will never discolour or damage your art.

Furthermore, a professional frame is sealed with a sturdy, archival backing board. This creates a robust barrier against dust, moisture, pollutants, and even insects, ensuring the artwork remains pristine from all sides.

How a Bespoke Frame Provides a Complete Seal

An off-the-shelf frame rarely provides the perfect fit, leaving small gaps that allow dust and humidity to creep in. A bespoke frame is crafted to the exact dimensions of your artwork, ensuring a complete and secure seal. This creates a stable micro-environment, buffering your art from the damaging effects of fluctuating humidity that can cause paper to warp or ripple. It’s this complete, 360-degree approach that provides true, lasting protection.

Let our experts create the perfect protective home for your art. Explore Bespoke Framing.

Long-Term Care for Your Art Collection

Protecting your beautiful art doesn’t stop once it’s perfectly hung on the wall. The journey of preserving its vibrancy and value is an ongoing one, built on simple, consistent habits. By understanding how to protect art from sun damage and other environmental factors inside your home, you can safeguard your entire collection-from professionally framed prints to unframed canvases-ensuring they remain a source of joy for years to come.

The Hidden Danger of Artificial Lighting

While direct sunlight is the most obvious threat, it’s a common misconception that your art is completely safe indoors. All light sources contribute to gradual fading over time. To minimise this risk, choose your lighting with care.

  • Embrace LED Bulbs: Modern LEDs are the best choice for illuminating art. They emit negligible UV radiation and very little heat, which helps preserve the delicate pigments in your favourite pieces.
  • Avoid Direct Halogen Spotlights: Older halogen and incandescent bulbs produce significant heat and UV rays, which can accelerate fading and cause lasting damage. Never aim a powerful, hot spotlight directly at your artwork.

Maintaining a Stable Environment

Fine art, much like any object of premium craftsmanship, thrives in stability. Drastic fluctuations in temperature and humidity cause materials like paper, canvas, and wood to expand and contract. This can lead to warping, cracking, or even mould. To create a safe haven for your art, avoid hanging it in areas with extreme environmental shifts, such as:

  • Directly above radiators or near fireplaces.
  • In the direct path of an air conditioning or heating vent.
  • In rooms prone to high humidity, like bathrooms or damp conservatories.

A consistent, moderate environment is crucial for long-term preservation.

The Art of Rotation: Keep Your Collection Fresh and Safe

One of the best professional tips for collectors is also one of the most enjoyable: rotate your art. Periodically swapping the pieces on your walls with those you have in storage significantly limits the cumulative light exposure for any single work. This simple practice not only preserves your most treasured pieces but also gives you a wonderful opportunity to refresh your home’s decor and fall in love with your collection all over again. It’s the perfect excuse to find a spectacular new print to add into the mix. Why not explore our gallery for fresh inspiration?

Give Your Art the Lasting Protection It Deserves

Protecting your cherished artwork from the irreversible effects of sunlight is a vital part of being a collector. As we’ve explored, from strategic placement away from direct light to mindful long-term care, every step you take makes a difference. Ultimately, understanding how to protect art from sun damage is about combining these smart daily habits with the unparalleled security and aesthetic finish of professional conservation framing.

At First4Frames Gallery, we bring over 20 years of bespoke framing experience to every piece we handle. We are passionate about our craft and believe a frame does more than just decorate-it protects. Trusted by artists and collectors across Scotland, we use premium, high-quality conservation materials to build a beautiful shield that preserves colour and detail for generations to come. Your art is an investment in joy, and it deserves to be preserved with expert care.

Your art deserves the best protection. Talk to our experts about conservation framing today.

Frequently Asked Questions About Protecting Your Art

Can sun-damaged art be repaired or restored?

Unfortunately, prevention is far better than a cure. Fading caused by UV light is irreversible, as the light has permanently altered the pigments in the ink or paint. While a professional art conservator may be able to treat issues like yellowing or brittle paper, the process is often complex and costly. The best strategy is always to protect your beautiful artwork from the very beginning to preserve its original vibrancy and integrity for years to come.

How can I tell if my artwork is already sun-damaged?

Look for tell-tale signs of UV exposure. The most obvious is fading, where colours appear washed out or less vibrant-reds and purples are often the first to go. You might also notice the paper or canvas has turned yellow or brown. In advanced cases, the material may feel brittle to the touch. A simple check is to carefully lift a corner of the art from under the frame’s lip and compare its colour to the exposed area.

Does UV-protective glass make the artwork look darker or change its colours?

This is a common concern, but rest assured, modern conservation-grade glazing is designed for optical purity. High-quality UV-protective glass is exceptionally clear and will not make your artwork look darker or alter its true colours. In fact, premium options often include anti-reflective properties, which can reduce glare and actually enhance the viewing experience, allowing the piece’s spectacular details and colours to shine through without interference from distracting reflections.

Is reflected or indirect sunlight still harmful to my art?

Yes, absolutely. UV rays are relentless and can bounce off walls, floors, and even furniture to reach your artwork. This means a piece hung on a wall opposite a bright window is still at significant risk. Understanding how to protect art from sun damage means recognising that any exposure to natural light, direct or indirect, contributes to cumulative and irreversible harm over time. Even on a cloudy day, harmful UV radiation is still present.

How much more does a frame with UV-protective glass cost?

Investing in UV-protective glazing is a wise choice for preserving your art. Typically, you can expect it to add between £20 and £60 to the cost of a standard-sized frame in the UK, depending on the size and the specific grade of protection. While it is an additional upfront cost, consider it a small price to pay for the priceless peace of mind that comes with safeguarding a valuable or sentimental piece from permanent damage.

Are LED lights completely safe for artwork?

LEDs are by far the safest lighting option for art, as they emit negligible UV radiation and very little heat compared to older incandescent or halogen bulbs. However, no light source is completely harmless. All visible light can cause fading over time, so it’s still best practice to use low-wattage LEDs, position them a sensible distance from the artwork, and only illuminate the piece when it’s being enjoyed rather than leaving lights on continuously.

Posted on

Float Mounting for Artwork: A Complete Guide to This Modern Framing Style

Float Mounting for Artwork: A Complete Guide to This Modern Framing Style

Have you ever admired a piece of art that seems to hover within its frame, casting a soft, captivating shadow? This modern, gallery-quality display can truly elevate a piece, but the terminology can be confusing. If you’re unsure what ‘float mounting’ means, if it’s the right choice for your treasured print, or how it differs from traditional framing, you’ve come to the right place. We believe understanding the beautiful technique of float mounting for artwork should be simple and inspiring, not a source of worry about potential damage.

As passionate artisans with decades of experience, we want to give you the confidence to make the perfect choice. In this complete guide, we’ll demystify the process, exploring what float mounting is and when to use it for a spectacular effect. You’ll discover how our bespoke, archival-quality craftsmanship not only creates a stunning display but also protects your art for years to come. Prepare to see your art in a whole new, professional light.

What is Float Mounting? A Modern Approach to Framing

Imagine your artwork not just displayed, but truly presented. Float mounting is a premium framing technique where your art is raised on a hidden, archival-quality mount. This elevates the piece away from the backing board, making it appear as if it is levitating or ‘floating’ within the frame. This subtle separation creates a soft, dramatic shadow beneath the artwork, adding a spectacular sense of depth and drawing the viewer’s eye directly to the piece itself.

To see this beautiful technique in action, watch this helpful demonstration from the experts:

This modern approach stands in beautiful contrast to traditional window mounting. In a window mount, a bespoke matboard is cut with an aperture and laid over the edges of the artwork, creating a classic border. While a standard picture framing mat serves to protect and frame the image, float mounting celebrates the entire piece, edges and all. For a quick comparison, see our table below.

Feature Float Mounting Window Mounting
Artwork Edges Completely visible and celebrated Overlapped and hidden by the mat
Visual Effect Dynamic 3D effect with a shadow Flat, layered, and traditional
Best For Original art, textured paper, modern interiors Photographs, prints, classic decor

The Key Elements of a Float Mount

The magic of float mounting lies in a few essential components working in perfect harmony:

  • The Artwork: Positioned centrally with every edge visible, showcasing the paper’s unique character.
  • The Backing Board: A premium, acid-free surface that provides a clean background and a visual border around the art.
  • The Spacers: Hidden supports, often made from archival foam board, that create the crucial gap between the art and the backing.
  • The Frame: A deeper frame, known as a ‘shadow box’, is required to accommodate the depth created by the spacers.

Why It’s a Favourite for Galleries and Artists

The preference for float mounting for artwork in professional galleries and studios comes down to respect for the art. This method offers a contemporary and sophisticated presentation that treats the artwork as a physical object, not just an image. It honours the craftsmanship by highlighting the unique qualities of the paper itself-be it a delicate, deckled edge on watercolour paper or the rich texture of a handmade print. It’s a statement that the art, in its entirety, is the hero.

When to Choose Float Mounting for Your Artwork

Float mounting is a spectacular way to present a piece, but its modern, gallery-style finish isn’t the perfect fit for every single artwork. This bespoke technique, which shouldn’t be confused with other display methods as detailed in this helpful guide on Float mounting vs. floater frames, is all about celebrating the artwork as an object. The decision hinges on the unique characteristics of your piece-its paper, the condition of its edges, and its overall style. This guide will help you determine if it’s the ideal choice to create that stunning, three-dimensional effect you’re looking for.

Ideal Candidates for Float Mounting

This premium presentation style truly shines when paired with specific types of art. It turns the entire piece, paper and all, into the star of the show. Consider this method if your artwork has:

  • Deckle or Torn Edges: The feathered, irregular edges of handmade paper are a beautiful feature. Float mounting showcases this unique texture rather than hiding it behind a window mount.
  • Originals on Heavy, Textured Paper: For works on high-quality, heavyweight paper (like watercolour or cotton rag), floating the art emphasises its tactile quality and substance.
  • Prints with Important Margins: If an artist’s signature, edition number, or an embossed stamp sits in the margin, float mounting ensures these vital details remain visible and part of the overall presentation.
  • Artworks with an Irregular Shape: Instead of commissioning an awkward, custom-cut window mount, floating an unusually shaped piece allows it to exist naturally within the frame.

When to Consider a Different Framing Style

While beautiful, float mounting for artwork isn’t a universal solution. In some cases, a traditional window mount provides better aesthetic or physical support. You might prefer a different style if:

  • The paper is very thin or fragile: Delicate papers, like those from old books or certain rice papers, may lack the rigidity to be float mounted and benefit from the full support of a traditional mount.
  • The edges are damaged or unappealing: If the borders of your artwork are creased, stained, or simply not intended to be seen, a window mount is perfect for creating a clean, crisp finish.
  • A classic aesthetic is preferred: Float mounting offers a contemporary look. For a more traditional or formal presentation, the classic elegance of a window mount is often a better match.
  • You are working to a tighter budget: As a more labour-intensive, bespoke process, float mounting typically costs more than standard mounting. It’s a premium service with a price tag to match.

The Professional Process: How a Float Mount is Constructed

Creating a genuine float mount is a meticulous craft that blends precision engineering with art conservation. It’s far more than simply sticking a picture to a board; it’s a bespoke technique designed to enhance and protect your piece. We use only premium, archival-grade materials to ensure your artwork is preserved without damage for decades to come. Understanding the craftsmanship involved highlights why trusting a professional framer is essential for any valuable or sentimental artwork.

Step 1: Preparing the Foundation

The process begins with a solid, stable base. We cut a sheet of high-quality, acid-free mountboard to the final dimensions of your chosen frame. Centred on this backing, we then secure a smaller, hidden ‘riser’-typically made from conservation-grade foam board. This riser is the hidden hero of the float mount, providing the crucial elevation that lifts your artwork away from the backboard and creates the signature shadow effect.

Step 2: Hinging the Artwork

This is where true conservation expertise comes into play. The artwork is carefully positioned and attached to the riser using a time-honoured method known as ‘T-Hinging’. We use delicate, strong Japanese paper and a reversible, pH-neutral wheat starch paste. This secure method is central to professional float mounting for artwork and is completely reversible, meaning the hinges can be removed by a conservator in the future without leaving any residue or causing damage. These principles are core to all archival framing, including advanced museum mounting techniques.

Step 3: Creating Space and Assembling

To complete the floating effect and protect the art’s surface, we fit spacers to the inside edge of the frame’s rebate. These spacers create a vital air gap between the artwork and the glazing (the glass or acrylic). This gap prevents moisture transfer and stops the art from ever touching the glass, which could cause irreversible damage over time. Finally, the glazing, the mounted artwork, and the backing are all carefully layered and secured within the frame, ready to display.

Float Mounting for Artwork: A Complete Guide to This Modern Framing Style

Key Benefits: Why Float Mounting is Worth It

While the visual appeal of float mounting is undeniable, its benefits extend far beyond a beautiful first impression. This premium technique is a thoughtful investment, offering a perfect marriage of superior aesthetics and professional-grade preservation. It’s a method designed to honour the art, allowing the piece to be the undisputed star of the show while ensuring it’s protected for decades to come. By respecting the integrity of the artwork and presenting it in its entirety, it provides a viewing experience that is both spectacular and sincere.

Unmatched Visual Impact

The defining feature of float mounting is the breathtaking 3D effect it creates. By elevating the artwork from the backing board, it casts a soft shadow that adds depth and a dynamic quality to the entire presentation. This clean, gallery-style aesthetic is perfectly suited to modern interiors, offering a minimalist frame that doesn’t compete with the art. The artwork’s own edges-whether crisp and clean or beautifully deckled-become an integral part of the composition.

Complete and Unobstructed View

Unlike traditional window mounts that cover the perimeter of your print, the great advantage of float mounting for artwork is that it leaves the piece completely visible. This means crucial details are never hidden from view. You can fully appreciate:

  • The artist’s signature
  • Edition numbers on limited prints
  • Embossments or watermarks from the printmaker
  • The unique texture and quality of the fine art paper

This method celebrates the artwork as a complete object, not just an image.

Superior Archival Protection

At First4Frames Gallery, our craftsmanship is rooted in conservation. Float mounting is an excellent choice for archival protection because the artwork never makes direct contact with the glazing (glass or acrylic). This crucial separation prevents potential moisture damage or the image adhering to the surface over time. We use only 100% acid-free, conservation-grade materials to prevent yellowing and degradation, and our non-invasive hinging technique can be safely reversed by a professional, protecting the long-term value of your piece.

To see how this beautiful technique transforms a piece of art, explore some stunning examples in our online gallery.

Your Artwork, Expertly Float Mounted by First4Frames

Achieving the perfect float mount is more than a technical process; it’s an art form that demands a passion for creativity and an expert’s eye for detail. With over 20 years of experience in bespoke picture framing, our team at First4Frames understands how to make your art the undeniable focal point of any room. We combine time-honoured craftsmanship with the finest archival materials to ensure your piece is not just displayed, but beautifully preserved. Trust us to transform your artwork into a stunning, gallery-worthy centrepiece that will be cherished for a lifetime.

Our Bespoke Consultation Process

Your vision is the starting point for everything we do. Our friendly, personalised consultation process is designed to bring that vision to life. We take the time to understand your artwork and what you want to achieve with its display. Our experts will:

  • Discuss your artwork’s unique characteristics and your personal style.
  • Guide you through our extensive collection of premium frame mouldings and backing colours to find the perfect combination.
  • Advise on whether float mounting for artwork is the ideal technique to create the dramatic, 3D effect you desire for your specific piece.

Commitment to Quality and Craftsmanship

We treat every piece of art that enters our workshop with the care and respect it deserves. From our dedicated workshop in Falkirk, our skilled framers employ professional conservation techniques to protect your art from environmental damage and ensure its longevity. Every frame is meticulously constructed, creating a bespoke home for your artwork that is built to last. This commitment to quality is the cornerstone of our service, giving you complete peace of mind.

Ready to give your art the display it deserves? Get a bespoke framing quote today.

Elevate Your Art with Expert Float Mounting

As we’ve explored, float mounting offers a stunning, contemporary way to display your cherished pieces. This technique creates a beautiful shadow effect that makes your art appear to levitate within the frame, drawing the eye directly to the unique edges and texture of the work. It’s the perfect choice for adding depth and a modern, gallery-quality feel to your home.

When you’re ready to experience the unique beauty of float mounting for artwork, trust the passionate experts. With over 20 years of professional framing experience, our team at the First4Frames workshop in Falkirk, Scotland, handles every piece with meticulous care. We use only archival, conservation-grade materials to create a bespoke frame that not only looks spectacular but also protects your art for a lifetime.

Ready to give your art the presentation it truly deserves? Explore our bespoke framing services and get a personalised quote.

Frequently Asked Questions About Float Mounting

Does float mounting cost more than standard framing?

Yes, float mounting typically costs more than standard framing. This is because the process requires more specialist materials, such as spacers to create the floating effect and often a deeper, more premium frame profile. The craftsmanship involved is also more detailed and time-consuming. While the exact price varies, you can generally expect to invest a little more for this spectacular, three-dimensional finish, but the stunning result is well worth it for a treasured piece.

Will float mounting damage my original artwork?

When carried out by a professional, float mounting is a completely safe and archival method that will not damage your artwork. We use conservation-grade, acid-free materials and specialised hinging techniques to secure the art to the backing board. This process is fully reversible, ensuring your piece is preserved in its original condition. Entrusting your art to an expert guarantees its protection and a beautiful, lasting display that honours the piece.

Can you float mount a canvas painting?

Absolutely! While the technique is slightly different, you can achieve a beautiful floating effect with a canvas. This is typically done using a ‘floater frame’. The stretched canvas is set into a deep frame, leaving a small, uniform gap all around the edge. This creates the illusion that the canvas is suspended within the frame, offering a clean, contemporary finish that allows the entire painted surface, including the sides, to be visible.

What is a ‘deckle edge’ and why is it good for float mounting?

A ‘deckle edge’ is the beautifully feathered, untrimmed edge found on high-quality, handmade paper. It’s a sign of true craftsmanship. This unique detail is why float mounting for artwork is such a perfect choice for these pieces. A traditional window mount would hide these gorgeous, irregular edges, but float mounting elevates the paper, turning the deckle edge into a celebrated feature of the final, stunning presentation.

How deep does a frame need to be for float mounting?

To create a successful float mount with a noticeable 3D effect, the frame needs a sufficient internal depth, known as the ‘rebate’. We recommend a frame with a rebate of at least 25mm. This depth is necessary to accommodate the backing board, the spacers that lift the artwork, the artwork itself, and the protective glazing on top. This ensures there is enough space to create that beautiful shadow and sense of dimension.

Is the artwork permanently stuck down in a float mount?

No, in a professionally executed float mount, your artwork is never permanently stuck down. We use a conservation method involving acid-free ‘T-hinges’ made from Japanese paper. These are applied only to the top edge of the artwork, allowing it to hang naturally and respond to environmental changes without buckling. This technique is completely reversible, meaning the artwork can be safely removed from the frame in the future without any damage.

Posted on

How to Frame a Watercolour Painting: A Professional Guide

How to Frame a Watercolour Painting: A Professional Guide

That beautiful watercolour painting deserves a place of honour on your wall, but the thought of framing it can be daunting. The delicate paper, the vibrant pigments-it’s natural to worry about the artwork wrinkling, the colours fading, or choosing the wrong materials for your precious piece. This is precisely why understanding how to frame a watercolour painting correctly is not just a skill, but an act of preservation and celebration.

Consider this your professional guide, where our passion for craftsmanship meets practical, clear advice. We will bridge the gap between your art and its perfect presentation, giving you the confidence to do it yourself or the knowledge to choose a professional framer. We’ll walk you through the essential steps, from selecting premium archival mounts and UV-protective glass to ensuring your art is perfectly secure. By the end, you’ll have the secrets to create a spectacular, lasting display that protects your treasured artwork for a lifetime.

Why Framing Watercolours Requires Special Care

Watercolour paintings possess a unique, luminous quality, where light seems to glow from within the paper itself. This delicate beauty, however, is also their greatest vulnerability. Unlike robust oil or acrylic paintings on canvas, watercolours on paper are incredibly susceptible to damage from their environment. Understanding how to frame a watercolour painting correctly is not just about aesthetics; it’s a crucial act of preservation to protect your beautiful artwork for generations to come.

To see these principles in action, take a look at this helpful guide:

The Challenge of Watercolour Paper

At its core, watercolour paper is a natural fibre that breathes. It absorbs and releases moisture from the air, causing it to expand and contract. In a humid environment, this can lead to a wavy, wrinkled effect known as ‘cockling’. This is why a watercolour painting should never be placed in direct contact with the frame’s glass. Trapped moisture can lead to mould growth and can even cause the paint to permanently fuse to the glass, causing irreversible damage.

Protecting Delicate Pigments from Fading

The transparent pigments used in watercolour are notoriously sensitive to light. The ultraviolet (UV) rays in sunlight and even some indoor lighting can break down the chemical bonds in the colours, causing them to fade and appear dull over time. A vibrant crimson can become a pale pink, and a rich blue can wash out completely. A professional framing solution includes UV-protective glazing, which acts as a vital shield, blocking up to 99% of harmful rays without compromising the view of your artwork.

The Frame’s Role: More Than Just a Border

A well-chosen frame does more than just complement your artwork; it creates a complete, protective micro-environment. This sealed package provides the essential structure to hold the glazing, mount, and backing board securely in place. This approach aligns with established art conservation principles, which emphasize creating a stable environment to shield the art from physical damage, dust, humidity, and insects. It is the foundation of any professional guide on how to frame a watercolour painting.

The Essential Components for Framing a Watercolour

Properly framing a watercolour is about more than just aesthetics; it’s about preservation. Think of the final assembly as a protective, archival sandwich, with your beautiful artwork nestled safely in the middle. Each layer has a specific job, and understanding them is the key to knowing how to frame a watercolour painting for lifelong enjoyment. The single most important rule is to use archival, acid-free materials at every stage to protect your art from damage and discolouration over time.

The Mount (or Mat): Creating Essential Airspace

The mount, often called a mat in the US, is the elegant cardboard border that sits between the frame and your artwork. Its primary job is practical: it creates a crucial air gap that prevents the watercolour paper from touching the glazing. This stops moisture condensation from causing mould and prevents the delicate paint from sticking to the surface. Aesthetically, a well-chosen mount provides visual breathing room, drawing the viewer’s eye inward to the heart of the painting. Always insist on acid-free, conservation-grade mountboard to avoid ‘mat burn’-a permanent yellowing stain caused by acid leaching into the artwork.

The Glazing: Your Artwork’s Shield

Glazing is the clear barrier that protects your art from dust, moisture, and, most importantly, light. Watercolours are particularly susceptible to fading, so choosing the right shield is vital. Your main options include:

  • Standard Glass: Offers excellent clarity but can be heavy and reflective.
  • Acrylic (Perspex): Much lighter and shatterproof, making it safer for larger pieces or shipping.
  • UV-Filtering Options: Available in both glass and acrylic, this is our premium recommendation. It blocks up to 99% of harmful ultraviolet rays, acting as a powerful sunscreen for your art and dramatically slowing the fading process.

The Frame & Backing Board: Structure and Support

The frame itself provides the structure and style, with materials like natural wood or sleek aluminium offering different finishes to complement your artwork and decor. Behind your art sits the backing board, the final layer of the protective sandwich. This board provides rigidity and seals the entire package from dust and pests. Just like the mount, it must be an acid-free foam core or conservation backing board. This final layer is critical for long-term preservation, a principle detailed in the National Gallery of Art’s guide to paper conservation, as it prevents harmful acids from migrating into the artwork from behind.

Step-by-Step Guide: How to Assemble Your Watercolour Frame

Ready to bring all the elements together? This is where the magic happens and your creative vision truly comes to life. Assembling your frame requires a delicate touch and a clean workspace, but following these steps will ensure a professional, gallery-quality result that protects your beautiful artwork for years to come. This is the most hands-on part of learning how to frame a watercolour painting.

Step 1: Preparing Your Artwork and Workspace

First, ensure your painting is perfectly flat. If the paper has buckled slightly, you can gently flatten it by placing it between two sheets of acid-free paper under a smooth, heavy board for a day or two. Prepare a large, clean, and dust-free surface to avoid any debris getting trapped in the frame. Gather your essential tools:

  • Acid-free archival tape (paper gummed tape is ideal)
  • A sharp craft knife
  • Measuring tape
  • A soft, lint-free microfibre cloth

Step 2: Hinging the Artwork to the Mount

Never be tempted to glue or tape your watercolour directly to the backing board. Paper needs space to breathe, expanding and contracting with changes in humidity. Permanently fixing it will cause buckling and irreversible damage. In fact, professional Library of Congress guidelines on preservation stress that allowing for this natural movement is crucial for the artwork’s longevity.

The correct method is ‘T-hinging’. Attach two small tabs of archival tape to the top edge of the back of your artwork, sticky-side down, with half the tape on the art and half hanging off. Lay the artwork in position on the back of the mount board, and then place another piece of tape across each tab to form a ‘T’, securing it to the mount. This creates a strong yet flexible hinge, allowing the art to hang naturally.

Step 3: Assembling the Frame ‘Sandwich’

The assembly process is all about layering correctly. Lay your frame face down on your clean surface. Carefully clean both sides of your glazing (glass or acrylic) with a microfibre cloth to remove any dust or fingerprints. Place it inside the frame’s rebate. Next, gently lower your mounted artwork, face down, onto the glazing. Finish the stack by placing the backing board on top. Secure the ‘sandwich’ in place by pressing down the flexible tabs or, for a more secure fit, by using a point driver to insert framer’s points.

Step 4: Finishing Touches and Hanging

For a truly professional finish that shows exceptional craftsmanship, seal the gap between the frame and the backing board with framing tape. This creates a robust barrier against dust, insects, and humidity, offering premium protection for your art. Finally, attach your hanging hardware. Measure one-third of the way down from the top of the frame on both sides and screw in your D-rings. Thread a picture cord between them, tying secure knots and leaving just enough slack for it to hang neatly on a picture hook.

Feeling unsure about the process? Sometimes, the best approach is to trust an expert to achieve that perfect, lasting result. Let our experts handle the framing for you.

How to Frame a Watercolour Painting: A Professional Guide

Aesthetic Choices: How to Choose the Perfect Frame and Mount

With the technical essentials covered, we can now turn to the most exciting part: the artistic choices. A frame does more than protect; it acts as a beautiful bridge between your artwork and your room’s décor, enhancing the piece and drawing the viewer’s eye. This is where the thoughtful consideration in how to frame a watercolour painting truly pays off. Before you begin, always consider where the finished piece will hang-the colours and style of the room should help guide your creative decisions.

Matching the Frame to Your Watercolour’s Style

The golden rule is to complement, not compete. The delicate, often translucent nature of watercolour means the artwork can easily be overpowered by a heavy or distracting frame. Your goal is to find a perfect partner for the painting.

  • For modern or abstract pieces: A simple, clean-profile frame often works best. Think thin black, crisp white, or a light natural wood like oak to maintain a contemporary feel.
  • For traditional landscapes or portraits: You can explore frames with more character. A warm, natural wood or a classic frame with subtle, soft gold or silver detailing can beautifully echo the painting’s timeless quality.

Selecting the Right Mount Colour and Size

The mount (also known as a mat) provides essential breathing space, preventing the glass from touching the artwork and giving the piece visual impact. For a truly professional finish, the mount is non-negotiable.

Colour: While brilliant white can be too stark against the soft paper, a classic off-white or pale cream is a failsafe choice that allows the watercolour’s own colours to shine. For a more harmonious, bespoke look, consider choosing a mount in a very subtle, muted tone pulled directly from the painting itself-a soft grey from a sky, for instance, can be spectacular.

Width: Be generous with your mount width. A wider mount of at least 2.5 to 3 inches often gives a more professional, gallery-style look that elevates the artwork and gives it presence on the wall.

Considering Single vs. Double Mounts

For a touch of pure elegance, a double mount is an exceptional choice. This technique involves layering two mounts, with the bottom one visible as a very thin border (or ‘reveal’) of colour around the artwork. This subtle detail is a hallmark of high-quality, bespoke framing. Using an inner mount that picks up an accent colour from the painting-a deep blue from the sea or a rich terracotta from a roof-is a masterful way to add depth and tie the entire presentation together. It’s this level of craftsmanship that transforms a framed picture into a cherished piece of art.

For inspiration on pairing frames and mounts, explore the beautifully curated pieces in our online gallery.

DIY vs. Professional Framing: When to Call an Expert

After carefully selecting your materials and preparing your artwork, the final decision is whether to frame it yourself or entrust it to an expert. The right choice depends on the artwork’s value, your confidence, and your desired finish. The DIY approach to how to frame a watercolour painting can be a satisfying project, but for treasured pieces, a professional touch is invaluable.

The Pros and Cons of a DIY Approach

Assembling a frame yourself can be cost-effective, especially for practice pieces or inexpensive prints. It offers a hands-on connection to the finished product. However, the risks are significant. One slip can damage your art, and off-the-shelf frames from high-street shops often lack the essential conservation-grade materials. They rarely include UV-protective glazing or acid-free mounts, leaving your watercolour vulnerable to fading and discolouration over time.

When You Should Always Use a Professional Framer

While DIY has its place, certain situations demand the skill and resources of a professional. Consider this your checklist for when to call in an expert:

  • The Artwork is Valuable: If the piece has significant monetary or sentimental value, professional framing is non-negotiable. It’s an investment in its preservation.
  • It Requires Conservation Materials: To protect your art for a lifetime, you need archival-quality mounts, backing boards, and UV-filtering glazing.
  • The Size is Unconventional: Custom sizes require bespoke frames that you simply cannot find ready-made.
  • You Desire a Flawless Finish: For a truly spectacular, gallery-quality result that enhances the artwork, nothing beats the precision and craftsmanship of a professional.
  • You Need Design Guidance: A professional framer acts as a design consultant, helping you choose the perfect frame and mount combination to complement both the art and your decor.

What to Expect from Our Bespoke Framing Service

At First4Frames Gallery, we believe that framing is an art in itself. Our bespoke service begins with a personal consultation where we listen to your vision. We guide you through our extensive collection of premium, conservation-grade materials, from beautiful solid wood mouldings to museum-quality glazing. Our expert craftspeople then bring it all together with meticulous attention to detail, ensuring your watercolour is not just protected, but beautifully presented. We handle every piece with the care it deserves, delivering a perfect finish every time. Start your bespoke framing journey with us today.

The Perfect Finish for Your Watercolour Masterpiece

Framing a watercolour is about more than just aesthetics; it’s a vital step in preserving its delicate beauty for a lifetime. From choosing the right conservation-grade materials to selecting a mount and frame that elevates the art, you now have the knowledge to give your piece the protection it deserves. Understanding how to frame a watercolour painting is the final, crucial brushstroke in its journey from paper to pride of place on your wall.

For those special pieces that demand a flawless, professional finish, our team is here to help. With over 20 years of professional framing experience, we use only the finest conservation-grade, acid-free materials. Our friendly Falkirk team offers expert design advice to create a truly bespoke frame that acts as the perfect bridge between your artwork and your home.

Ready to give your art the beautiful, lasting home it deserves? Explore our bespoke framing services for your artwork.

Frequently Asked Questions

Do you really need a mount for a watercolour painting?

Absolutely. A mount is essential for professionally framing a watercolour. Its most important job is to create a small air gap between the painting’s surface and the glass. This prevents moisture from being trapped against the artwork, which can lead to mould or the paint sticking to the glass. A mount also provides a beautiful visual border, allowing the artwork to breathe and drawing the viewer’s eye inward, enhancing the overall impact of your piece.

Can you frame a watercolour without glass to avoid glare?

We strongly advise against framing any watercolour without glass. The delicate paper and water-soluble pigments are highly vulnerable to irreversible damage from dust, humidity, and airborne pollutants. Glazing is the only way to protect your art from these elements and from fading caused by UV light. To combat glare, you can opt for premium anti-reflective or museum-grade glass, which offers crystal-clear viewing while providing vital protection for your treasured artwork.

What is the best way to stop my watercolour paper from buckling inside the frame?

The key to preventing buckling, or ‘cockling’, is correct mounting. Your artwork should be attached to an acid-free backing board using a ‘T-hinge’ method with archival tape along the top edge only. This allows the paper to hang naturally and expand or contract with humidity changes without warping. Taping the artwork down on all four sides is a common mistake that restricts this movement, which is what causes the paper to buckle and ripple over time.

What’s the difference between standard framing and ‘conservation framing’?

The difference lies in the quality and longevity of the materials. Standard framing may use mounts and backing boards with acidic cores that can cause your artwork to yellow and deteriorate. Conservation framing exclusively uses acid-free, archival-quality materials for everything that touches the art, including the mount, backing, and tapes. This professional method, often paired with UV-protective glass, is designed to preserve the beauty and value of your fine art for generations to come.

How much does it cost to get a watercolour professionally framed?

In the UK, the cost for professional framing depends on several factors: the artwork’s size, your choice of frame moulding, the type of mount, and the glazing. For a small, simple piece, you might expect to pay between £60 and £90. For a larger painting with a bespoke frame, a double mount, and specialist anti-glare glass, the cost could be £150 to £300 or more. Think of it as a crucial investment in protecting and showcasing your beautiful art.

What kind of tape should I use to mount my watercolour painting?

It is vital to use only archival, acid-free tape. Everyday tapes like masking tape or Sellotape contain acids that will leech into the paper, causing irreversible yellow stains and damage. For a secure and safe mount, always choose a gummed archival paper or linen tape. This is the professional standard and a crucial step in how to frame a watercolour painting to conservation levels, ensuring your artwork remains pristine within its frame.

Posted on

UV Protection Framing Glass: The Complete Guide to Preserving Your Art

UV Protection Framing Glass: The Complete Guide to Preserving Your Art

That beautiful piece of art you chose for your wall-the one that perfectly captures a memory or completes your room-is under constant threat from an invisible enemy. Every ray of sunlight, while brightening your home, contains UV light that can cause irreversible fading, slowly robbing your artwork of its vibrancy. But what if you could provide an invisible shield? This is the crucial role of premium UV protection framing glass, which acts as a guardian for your treasured prints and photographs, preserving them for years to come.

Navigating the world of bespoke framing can feel overwhelming, filled with technical terms about reflection control and conservation grades. We understand the worry of making an expensive mistake. This guide is designed to be your trusted partner, demystifying the options with clear, straightforward advice. We’ll walk you through everything you need to know, empowering you to confidently choose the perfect glass to protect your investment, ensuring your art looks spectacular and lasts a lifetime.

The Invisible Threat: How UV Light Permanently Damages Your Artwork

We’ve all seen it. A treasured family photograph left on a mantelpiece, its once-vibrant colours now a pale, washed-out memory. Or a beautiful print that, over the years, has developed a sad, yellow tinge. This heartbreaking transformation isn’t just a sign of age; it’s the result of a silent and relentless attacker: ultraviolet (UV) light.

Think of UV light as an invisible, high-energy part of daylight. While we can’t see it, its effects are profound. It works tirelessly to break down the chemical bonds in paper, inks, and pigments, causing irreversible damage that robs your artwork of its life and value.

To see how different glazing options stand up to this invisible threat, this short video offers a clear demonstration:

The damage from UV exposure is cumulative and permanent. Every moment your art is exposed, a little more of its original beauty is lost forever. This happens even on overcast British days, as UV rays easily penetrate cloud cover. This is why investing in professional UV protection framing glass is not an indulgence, but an essential act of preservation for any piece you love.

What Exactly Fades? Pigments, Dyes, and Signatures

UV radiation attacks the very molecules that create colour. Delicate watercolours can fade to near invisibility, and the rich tones in a photograph can become flat and discoloured. Even the artist’s signature, often penned in ink, can vanish completely, taking with it a crucial part of the artwork’s history and value. Furthermore, UV breaks down a compound called lignin within paper, a process that causes the familiar yellowing and brittleness. Understanding the role of different types of picture-framing glass is the first step in preventing this.

Common Sources of UV Radiation in Your Home

While you might think your art is safe indoors, UV radiation is surprisingly pervasive. The main culprits include:

  • Direct Sunlight: The most potent source. Even a few hours of direct sun per day can cause significant fading in a short time.
  • Indirect Sunlight: Ambient light from windows is a constant, year-round source of UV radiation that slowly degrades your artwork.
  • Fluorescent Lighting: Older fluorescent tubes and compact fluorescent lamps (CFLs) emit significant levels of UV, making them a hidden danger.

Fortunately, modern LED lighting emits virtually no UV radiation. However, with sunlight being the primary and most powerful threat, choosing high-quality UV protection framing glass remains the single most effective step you can take to safeguard your cherished pieces for generations to come.

Your Shield Against Fading: An Introduction to Conservation Glazing

When we talk about framing, the ‘glazing’ is the clear, protective layer that sits between your artwork and the world. This can be either glass or acrylic, and its role is far more critical than simply keeping dust off. While standard picture frame glass offers a basic physical barrier and blocks some UVB rays, it does almost nothing to stop the most damaging UVA rays. Over time, this exposure causes irreversible fading, yellowing, and brittleness in your beautiful prints and photographs.

This is where conservation-grade glazing becomes an essential part of any bespoke framing project. Think of it not as a luxury, but as vital insurance for your treasured pieces. As detailed by preservation experts, Limiting Light Damage is crucial for longevity. High-quality UV protection framing glass is engineered to block over 99% of harmful ultraviolet rays, effectively halting the primary cause of fading and ensuring your art remains as vibrant as the day it was created.

Conservation Clear® Glass: The Industry Standard

For most custom framing needs, Conservation Clear® glass is the perfect choice. It provides the crucial 99% UV protection that is the cornerstone of art preservation. As our most popular and cost-effective conservation option, it offers peace of mind without a premium price tag. It’s the ideal glazing for any project where the spectacular clarity of your art is the focus and ambient reflections are not a significant concern.

Museum Glass®: The Ultimate Protection and Clarity

When you want to feel as though there is nothing between you and the artwork, Museum Glass® is the answer. It combines the same 99% UV protection with an astonishingly effective anti-reflective coating. This advanced optical technology makes the glass seem to disappear, revealing every intricate detail, subtle texture, and deep colour in your piece. It is the premium choice for deeply coloured or dark artwork where clarity is paramount.

UV-Filtering Acrylic (Plexiglass): When to Choose It Over Glass

Sometimes, glass isn’t the most practical solution. Our UV-filtering acrylic offers the same 99% UV protection but in a lighter and shatter-resistant format. This makes it the ideal UV protection framing glass alternative for very large pieces where weight is a factor, or for artwork displayed in high-traffic areas, children’s rooms, or public spaces. One important consideration is that acrylic can carry a static charge, so we don’t recommend it for loose media like charcoal or pastels.

Making the Right Choice: Which UV Protection Do You Really Need?

Choosing the right glazing for your artwork doesn’t need to be complicated. The perfect choice is a simple balance between the artwork’s value (both monetary and sentimental), where it will hang in your home, and your budget. Our goal is to demystify the options, empowering you to discuss your project confidently with a professional framer and make a choice that protects your art for decades to come.

When is 99% UV Protection Non-Negotiable?

For some pieces, settling for anything less than 99% UV protection is a risk not worth taking. Light is a primary agent of deterioration, causing irreversible fading and damage to colours and materials. This level of protection is essential for:

  • Original artwork, limited edition prints, and signed pieces: These items are valuable and often irreplaceable, making maximum protection a crucial investment.
  • Irreplaceable sentimental items: Precious wedding photographs, family heirlooms, and historical documents all hold value that money can’t replace.
  • Textile-based art: Fabrics are highly susceptible to fading. This includes everything from antique needlepoint and tapestries to signed memorabilia shirts.

Choosing Between Conservation Clear and Museum Glass

Once you’ve decided on 99% UV protection, the next choice is between clarity and reflection control. Conservation Clear Glass is the industry standard and the perfect choice for most pieces displayed in rooms with controlled, indirect lighting. It offers fantastic protection without the premium cost of an anti-reflective coating.

However, you should invest in Museum Glass when viewing clarity is paramount. Its advanced anti-reflective coating makes the glass seem to disappear, offering a breathtakingly clear view. It’s the ideal choice if your art will hang opposite a window or bright light source, or for dark and intricately detailed pieces where reflections would obscure the beautiful craftsmanship.

Is Standard Glass Ever an Option?

We rarely recommend standard picture glass, as it offers no UV protection. It should only ever be considered for easily replaceable, low-value posters or prints that are displayed in a room with absolutely no natural light, such as a basement. Even in these cases, we encourage you to consider the small extra cost for proper UV protection framing glass. It’s a minor investment that provides major long-term peace of mind, ensuring your piece looks its best for years. If you’re still unsure, we’re here to help. Get a personalised recommendation from our framing experts.

UV Protection Framing Glass: The Complete Guide to Preserving Your Art

Beyond UV Rays: Why Anti-Reflection is a Game Changer

Choosing the right glass to protect your cherished artwork from fading is a crucial first step. But preservation is only half the battle. After all, what is the point of protecting a beautiful piece if you can’t truly see it? We’ve all experienced the frustration: you stand back to admire a newly framed print, only to be met with the distracting glare of a window or your own reflection staring back at you.

This is where anti-reflective coatings completely change the game. Think of it like the difference between a standard camera lens and a professional, multi-coated one, or the crystal-clear view you get with high-quality anti-glare eyeglasses. This technology isn’t just an add-on; it’s an essential component for the ultimate viewing experience, ensuring your art is seen exactly as the artist intended.

How Anti-Reflective Technology Works

The magic lies in advanced optical engineering. Anti-reflective glass is treated with microscopic layers of metallic oxides that are invisible to the naked eye. These coatings are precisely designed to disrupt and scatter reflected light, dramatically reducing glare and reflections to less than 1%. This allows far more light to pass directly through the glass. While standard glass has a light transmission of around 90%, premium options like Museum Glass® boast an incredible transmission of over 97%. This seemingly small difference makes colours appear richer, blacks deeper, and fine details spectacularly sharp.

Is Museum Glass Worth the Extra Investment?

For anyone passionate about presentation, the answer is a resounding yes. Combining 99% UV filtering with near-invisibility, this premium UV protection framing glass delivers a powerful “wow” factor. It creates the stunning illusion that there is no glass there at all, allowing you to connect directly with the texture and depth of the artwork.

Investing in this level of clarity provides several key benefits:

  • A Gallery-Quality Finish: It provides the high-end, professional presentation seen in the world’s finest galleries and museums.
  • Unmatched Clarity: Your art is viewed without the interference of distracting reflections, from any angle.
  • Elevates the Entire Piece: The perfect clarity enhances not only the art but also the craftsmanship of the bespoke frame surrounding it.

This top-tier UV protection framing glass doesn’t just preserve your art; it presents it. It’s an investment in the daily joy and appreciation you get from your collection. Explore our gallery to see the stunning clarity for yourself.

Your Art’s Future is Clear: The Final Frame

Your artwork is more than just decoration; it’s a story, a memory, and a source of daily inspiration. As we’ve explored, the invisible threat of UV light can permanently fade those vibrant colours, but the right defence can preserve them for a lifetime. Choosing high-quality UV protection framing glass is the single most important step you can take. When combined with the stunning clarity of anti-reflective coatings, you not only shield your art from harm but also enhance your viewing experience, removing distractions and pulling you into the picture.

Making the perfect choice doesn’t have to be complicated. With over 20 years of professional framing experience, our passion is matching your piece with the perfect protective solution. We use premium, conservation-grade materials as standard and offer the expert advice needed to guide you. Protect your art for a lifetime. Discuss your bespoke framing options with us today. Let’s give your cherished pieces the beautiful, lasting home they deserve.

Frequently Asked Questions About UV Protection Glass

Does UV protection glass have a visible colour or tint?

Modern, high-quality UV protection glass is engineered to be virtually invisible. Unlike older materials that might have had a slight green or yellow hue, today’s premium options offer exceptional clarity. For the most spectacular view, options with an anti-reflective coating not only block UV rays but also reduce glare, making it seem like there is no glass there at all. This ensures the true colours of your beautiful artwork shine through without any distortion.

How long does the UV-blocking coating on framing glass last?

The UV-blocking properties of professional framing glass are designed to last a lifetime. The protective coating is not a temporary film but is bonded directly to the glass during manufacturing. This durable layer will not peel, bubble, or degrade over time. When you invest in quality UV protection, you are securing a permanent shield that will tirelessly protect your art from fading for as long as it hangs on your wall, a testament to true craftsmanship.

Can I just apply a UV-filtering film to my existing frame’s glass?

While applying a UV-filtering film might seem like a cost-effective solution, we strongly advise against it for fine art. These films can often bubble, peel, or yellow over time, distorting the view of your artwork and diminishing its aesthetic appeal. Professional UV protection framing glass offers superior clarity, durability, and a more effective, permanent barrier. For a truly professional finish that honours your art, integrated UV glass is always the best choice.

Is UV glass still necessary if I use archival, acid-free mats and backing boards?

Yes, UV glass is still absolutely essential. Archival, acid-free materials protect your artwork from internal chemical damage, preventing yellowing and deterioration from contact with acidic materials. However, they offer no defence against external threats like light. UV radiation will fade pigments and damage paper regardless of the matting used. For complete, long-term preservation, you need both: archival mounting to protect from the inside and UV glass to shield from the outside.

Do I need to worry about UV damage from modern LED lights in my home?

It’s a common misconception that LED lights are completely safe for art. While they emit significantly less UV radiation than older fluorescent or halogen bulbs, they are not entirely UV-free. Over many years, even this low level of exposure can cause cumulative, irreversible fading. For any piece that is valuable or holds sentimental importance, we always recommend UV-protective glass as a wise and necessary precaution, ensuring its vibrancy for generations to come.

What is the best way to clean UV and anti-reflective glass without damaging it?

To clean your specialist glass without risking damage, always use two soft, lint-free microfibre cloths. Lightly spray an ammonia-free glass cleaner onto one cloth-never directly onto the glass itself, as liquid can seep under the frame. Gently wipe the surface with the damp cloth, then immediately follow up with the second, dry cloth to buff away any streaks. This simple method protects the delicate anti-reflective and UV coatings, keeping your view pristine.

What’s the real cost difference between standard, conservation, and museum glass?

The cost varies based on size, but you can think of it as an investment in your art’s longevity. If a piece of standard 2mm float glass for a medium frame costs around £15-£20, you can expect Conservation Clear glass (with 99% UV protection) to be roughly £35-£50. For the ultimate in clarity and protection, Museum Glass (with UV filtering and anti-reflective properties) could cost anywhere from £80 to over £120 for the same size, preserving your art’s value and beauty.

Posted on

Double Mounted Picture Frames: A Complete Guide to Elevating Your Artwork

Double Mounted Picture Frames: A Complete Guide to Elevating Your Artwork

You’ve invested in a beautiful piece of art, and now it deserves a frame that truly does it justice. But when faced with framing options, it’s easy to feel a little lost. You might wonder if that extra layer in the mount is worth the investment, or worry about choosing colours that might clash with your decor. The secret to achieving that polished, gallery-quality finish often lies in a simple yet powerful technique: using double mounted picture frames. This small detail of expert craftsmanship can add incredible depth, draw the eye inward, and create a spectacular bridge between your art and your room.

In this complete guide, we’ll demystify the world of double mounting. We will explore why this bespoke touch adds such a professional feel, guide you through selecting the perfect colour combinations with confidence, and show you exactly which types of artwork are elevated most by this beautiful framing style. By the end, you’ll have all the knowledge you need to transform your cherished pieces from simply ‘hung’ to truly showcased, achieving a premium look you’ll be proud of.

What is a Double Mounted Picture Frame?

At its heart, a double mounted picture frame is a premium presentation method that uses two layers of mount board instead of the traditional single layer. This beautiful technique adds instant depth and a professional finish to your artwork. The bottom mount peeks out from underneath the top mount, creating a thin, often contrasting, border that acts as a perfect accent. This layered effect is a hallmark of bespoke framing, drawing the eye inwards and creating a seamless bridge between the art and the frame itself. The mount, also known as a mat, serves both aesthetic and protective purposes; you can learn more about the fundamentals by reading this guide on What is a Mount or Mat?

To help visualise how different elements of a frame come together, this video offers a closer look:

The Anatomy of a Double Mount

Understanding the components of a double mount helps in appreciating its craftsmanship. Each part plays a specific role in the final, spectacular presentation:

  • Top Mount: This is the main, wider mount board that you see the most of. It provides the primary border and space around your artwork.
  • Bottom Mount: Tucked neatly underneath the top layer, this mount provides the colourful or contrasting accent line.
  • The ‘Reveal’ or ‘Step’: This is the small, visible portion of the bottom mount-typically between 3mm and 6mm. The size of the reveal can be adjusted to create a subtle or more pronounced effect.

Both of these precision-cut mount boards sit safely behind the glazing (glass or acrylic) to protect your print from dust and damage.

Single Mount vs. Double Mount: A Visual Comparison

A single mount offers a classic, clean, and minimalist border that suits many styles of art. It’s a timeless choice that provides breathing room for the piece without adding extra complexity. It may be preferable for extremely busy or colourful artwork where an additional border could feel distracting.

However, double mounted picture frames introduce an extra layer of sophistication. The subtle accent line of the bottom mount can be used to pick out a secondary colour in the artwork, unifying the entire presentation. This technique doesn’t just frame the art-it enhances it, guiding your focus directly to the heart of the image with a polished, gallery-quality finish.

The Aesthetic Power: Why Choose a Double Mount?

While a single mount provides a classic and clean finish, the primary reason for choosing a double mount is pure visual enhancement. It’s a technique that speaks of attention to detail and a deep appreciation for the art it holds. A double mount acts as a beautiful transition, a visual pause that prevents the artwork from ‘bleeding’ into the frame. This thoughtful layering is a hallmark of high-quality, bespoke framing, transforming a simple display into something truly spectacular.

Creating Depth and Drawing the Eye

The most immediate effect of a double mount is the incredible sense of depth it creates. The layered effect, with the bottom mount peeking out as a thin border, gently lifts the artwork from its background, making it pop. This inner border acts as a perfect focal point, subtly guiding the viewer’s gaze directly to the image. By creating this separation, double mounted picture frames give your art essential ‘breathing room’, ensuring it remains the undisputed star of the show.

Accentuating Colours Within Your Artwork

This is where the true artistry of double mounting shines. The bottom mount offers a unique opportunity to pick up on a subtle or secondary colour within your artwork. Imagine a landscape painting with a hint of lavender in the sky; a thin lavender bottom mount will make that colour sing, creating a harmonious visual echo. This technique masterfully pulls a chosen hue from the piece, making it appear more vibrant and deliberately connecting the artwork to the frame and your room’s decor.

Achieving a Professional, Gallery-Quality Finish

Step into any professional gallery or exhibition, and you’ll frequently see double mounts in use. This method instantly gives any piece a more considered, luxurious, and premium feel. It’s a signal that the framing is as important as the art itself. This professional approach extends beyond just aesthetics; it reflects a commitment to the highest standards, including proper conservation framing practices. By choosing this option, you can elevate a family photograph or a simple print into a genuine statement piece worthy of any wall.

How to Choose the Perfect Colours for a Double Mount

Choosing the right colours is where the true artistry of double mounted picture frames comes to life. More than just a border, the mountboard acts as a visual bridge, harmonising the artwork with its surroundings. The goal is always to enhance the piece, not to overpower it. A successful pairing requires careful consideration of the artwork’s dominant colours, its subtle undertones, and the decor of the room where it will be proudly displayed. To help you achieve a beautiful, professional result, we’ve outlined three popular and effective strategies for selecting the perfect mount colours.

Strategy 1: The Classic Neutral Combination

For a truly timeless and sophisticated finish, you can’t go wrong with a classic neutral pairing. This tried-and-tested approach involves using two different shades of the same neutral colour. For example, you might pair a crisp off-white for the top mount with a slightly darker cream for the bottom reveal. This subtle difference creates an elegant depth that gently draws the eye inward towards the art. It’s a wonderfully safe yet effective choice that complements nearly any style, from traditional watercolours to bold, modern photography, ensuring your artwork remains the star of the show.

Strategy 2: Using a Bold Accent Colour

If you want your display to have a vibrant, custom touch, the accent colour strategy is a fantastic option. The technique is simple: select a neutral top mount-like a soft grey or classic white-and pair it with a bold, colourful bottom mount. The secret to making this work beautifully is to choose a colour for the slim reveal that is pulled from a minor, secondary hue in the artwork itself. This popular technique, detailed in many framing resources like Frame Destination’s A Guide to Double Matting, expertly pulls a subtle colour forward, creating a striking and cohesive look that feels both personal and polished.

Strategy 3: Tonal and Complementary Pairings

For a deeply cohesive and professionally curated appearance, consider a tonal pairing. This sophisticated method involves selecting a top mount colour that perfectly matches a mid-tone within your artwork. The bottom mount is then chosen in a darker, richer shade of that same colour, creating a seamless gradient effect. This method builds a powerful visual connection between the frame and the art, adding a sense of depth and luxury. The result is a stunningly harmonious presentation that feels thoughtfully assembled by an expert. If you’re unsure which tones to pull, you can always explore colour options with our bespoke framing experts.

Double Mounted Picture Frames: A Complete Guide to Elevating Your Artwork

What Types of Art Benefit Most from Double Mounting?

While almost any piece can be enhanced by thoughtful presentation, the professional finish of a double mount is particularly effective for certain types of artwork. This technique does more than just create a visual border; it offers protection, adds a sense of depth, and can elevate the perceived value of the piece. By considering the style and medium of your art, you can use a double mount to unlock its full potential.

From treasured family photos to valuable fine art prints, this is where the artistry of double mounted picture frames truly comes into its own, providing a perfect bridge between the artwork and your decor.

Photographs and Fine Art Giclée Prints

A double mount adds immediate presence to printed works. For monochrome photographs, a narrow inner mount (or ‘reveal’) in a dark, contrasting colour can create a dramatic, sharp border that draws the eye inward. With premium Giclée prints, a carefully chosen colour combination can echo and enhance the rich tones within the image, making the colours feel more vibrant and alive. This layering technique adds a bespoke, gallery-quality feel that distinguishes a professionally finished piece.

Watercolours, Pastels, and Works on Paper

For delicate mediums, a double mount serves a crucial protective function. The combined thickness of the two mount boards creates essential space between the surface of the artwork and the glazing (glass). This is vital for pastels, charcoals, and watercolours, preventing smudging or moisture transfer. Aesthetically, a neutral double mount allows the unique texture of the paper to stand out, while a soft, complementary tone can beautifully echo the subtle hues found in these mediums.

Certificates, Signatures, and Memorabilia

Double mounting lends an air of formality and importance, making it the perfect choice for displaying significant documents. University degrees, awards, and certificates gain a sense of occasion when framed this way. For signed prints or memorabilia, the inner mount can be used to frame the signature, drawing attention to its authenticity. Even smaller items, like medals or vintage postcards, are given greater stature and a clear focal point within double mounted picture frames.

Whatever you choose to display, the right mount can transform its presence. Explore our gallery to see inspiring examples of professionally finished art.

Design and Practical Considerations for Your Frame

Choosing the colours for your double mount is an exciting first step, but the true artistry lies in the details. To achieve a truly professional and balanced display, it’s essential to consider the proportions, materials, and the interplay between the mount and the frame itself. These final considerations are what transform a simple picture into a stunning focal point for your room.

Getting the Proportions Right

Creating visual harmony is all about proportion. A well-balanced mount gives your artwork breathing space and draws the eye inward. Here are a few professional guidelines to follow:

  • The Reveal: The bottom mount’s visible border, or ‘reveal’, is typically kept subtle. A standard width is between 5mm and 10mm, providing a crisp, defining line without being distracting.
  • Mount Width: The top mount should almost always be significantly wider than the frame. As a general rule, wider mounts suit larger pieces of art, preventing them from feeling cramped.
  • Avoid Identical Widths: For a more dynamic look, ensure the width of the mount and the width of the picture frame moulding are not identical. This simple trick prevents visual competition between the two elements.

Choosing the Right Materials: Conservation Quality

A frame’s job is not just to look beautiful, but also to protect your art for a lifetime. The quality of the mount board is paramount for preservation. Always insist on acid-free, conservation-grade mount board. This premium material prevents the dreaded ‘yellowing’ or ‘mount burn’ that can permanently damage artwork over time. Beyond preservation, mount boards are available in various textures and finishes, from perfectly smooth to subtly textured, adding another layer of bespoke detail to your final piece. At First4Frames Gallery, we use only the highest quality, conservation materials in all our double mounted picture frames, ensuring your art remains as vibrant as the day it was framed.

Matching the Mount to the Frame

The final step is to ensure the entire package works as a single, cohesive unit. The frame and mount should act as a bridge between your artwork and your room’s decor. Consider how the frame’s colour, style, and width interact with your mount choices. A bold, complex double mount often shines when paired with a simple, minimalist frame. Conversely, an ornate, decorative frame might call for a more subtle and neutral mount combination to avoid overwhelming the art. The goal is always the same: to create a beautiful presentation that elevates and showcases your chosen piece.

Ready to see how these principles come to life? Explore our gallery of professionally framed art to find inspiration for your own masterpiece.

Bring Your Vision to Life with a Bespoke Double Mount

As we’ve explored, a double mount is a powerful tool in the world of framing. It does more than simply border your art; it creates a spectacular sense of depth, draws the viewer’s eye inward, and provides a professional, gallery-quality finish. The right double mounted picture frames build a beautiful bridge between your artwork and your living space, ensuring the final piece feels perfectly at home.

Achieving this perfect balance requires true craftsmanship. At First 4 Frames, we bring over 20 years of bespoke framing experience to every project. Based in Falkirk and serving clients across Scotland and the UK, we use only premium, conservation-grade materials to ensure your cherished artwork is both beautifully displayed and perfectly preserved for years to come.

Give your art the presentation it truly deserves. Ready to create the perfect frame? Contact our experts for a bespoke consultation. We look forward to helping you bring your vision to life.

Frequently Asked Questions

Does a double mounted picture frame cost more than a single mount?

Yes, a double mounted frame does cost slightly more than a single mount. This is because it requires two separate pieces of premium mount board and involves more time and precision from our expert framers to cut and assemble perfectly. However, the increase in cost is modest, typically adding between £10 and £20 to the final price. We believe this is a worthwhile investment for the spectacular depth and professional finish it brings to your treasured artwork.

What is a triple mount and when would you use one?

A triple mount adds a third layer of mount board, creating an even greater sense of depth and sophistication. This technique is perfect for making a special piece truly stand out. It is often used for smaller, highly detailed artwork, cherished photographs, or displaying items like medals or memorabilia where you want to create a dramatic, gallery-quality presentation. The three layers allow for a beautiful play of complementary colours, adding a truly bespoke touch to the final frame.

How wide should the border (the reveal) of the bottom mount be?

The ‘reveal’ of the bottom mount-the small border of colour visible beneath the top mount-is typically between 5mm and 10mm. This width is ideal for creating a crisp, defining line that draws the eye towards the artwork without being distracting. For a more subtle effect, a 5mm reveal is perfect, while a 10mm reveal can make a bolder statement. The final choice depends on the artwork and your personal preference, and our team is always happy to offer guidance.

Can you add a double mount to an existing framed picture?

It is sometimes possible to add a double mount to an existing frame, but it depends entirely on the frame’s ‘rebate’ depth. The rebate is the recess at the back of the frame that holds all the components. Adding a second mount increases the overall thickness, and if the rebate isn’t deep enough, the backing board cannot be secured safely. For a professional assessment, we recommend bringing your frame to us so we can determine if it can be upgraded.

What’s the difference between conservation and standard mount board?

The primary difference is archival quality and the protection of your art. Standard mount board contains acids that can leach into your artwork over many years, causing discolouration or “mat burn.” In contrast, conservation mount board is completely acid-free and lignin-free. It is specifically designed to preserve your art and protect it from pollutants for decades to come. For any piece you value, we always recommend using conservation-grade materials to ensure its beauty and longevity.

Should the bottom mount be darker or lighter than the top mount?

A classic and very popular choice is to have a darker bottom mount beneath a lighter top mount. This creates a sharp, defined border that cleanly separates the artwork from the mount, drawing your focus inward. However, the reverse can be equally stunning. Using a lighter bottom mount creates a soft, glowing ‘halo’ effect around the image, which can work beautifully with more delicate or ethereal pieces. Ultimately, the perfect combination is the one that best complements your art.

Posted on

Picture Framing Quote Online: A 5-Step Guide to the Perfect Price

Picture Framing Quote Online: A 5-Step Guide to the Perfect Price

Embarking on the journey to get a picture framing quote online should be an exciting step, but it can often feel daunting. Are you navigating a confusing tool, only to be left wondering about hidden costs for specialist glass or unexpected shipping fees? There’s nothing worse than the worry that the beautiful frame you design on-screen won’t live up to your expectations, or that you might choose the wrong materials for your treasured artwork. This uncertainty can take the joy out of creating the perfect finishing touch for your piece.

We believe in the simple beauty of fine art and craftsmanship, and that includes the process of choosing its frame. This guide is your friendly, knowledgeable partner, designed to cut through the confusion. In five straightforward steps, you’ll learn exactly what you need to provide for a fast, accurate quote. We’ll empower you to confidently select the ideal frame, mount, and glazing, and understand precisely what’s included in the final price. Prepare to move forward without any surprises-just the anticipation of receiving a spectacular, professionally crafted frame that truly honours your art.

Before You Click ‘Get Quote’: The 3 Things You Must Prepare

Embarking on the journey to find the perfect bespoke frame is an exciting moment. Before you dive into our online designer, however, a few moments of preparation can make all the difference. Taking these simple first steps ensures the picture framing quote online you receive is perfectly accurate, saving you time and preventing any costly mistakes. This thoughtful preparation is the key to a hassle-free experience and a spectacular final result that you’ll cherish for years.

To see just how straightforward the process can be with the right information at hand, take a look at this helpful video:

1. Measure Your Artwork Accurately

Precision is the foundation of all great craftsmanship. To create a frame that fits flawlessly, we need the exact dimensions of your piece. Here’s how to get it right:

  • Measure the artwork only. Do not include any existing mount, border, or old frame in your measurements. We need the precise height and width of the image itself.
  • Use a steel tape measure. Fabric or plastic tape measures can stretch over time, leading to inaccuracies. A rigid steel rule or tape measure provides the most reliable figures.
  • Double-check everything. Measure twice to be absolutely certain. A small error of a few millimetres can impact the final fit of your bespoke frame.

2. Understand Your Artwork’s Needs

Every piece of art is unique and may require special consideration. Is it a priceless family photograph, an original oil painting, or a vibrant modern poster? For valuable or sentimental items, consider conservation-grade materials like UV-protective glazing to prevent fading from sunlight. You should also note the artwork’s thickness. A deep canvas, for example, will require a different frame profile than a flat paper print.

3. Have a Vision (and a Budget) in Mind

A frame is the bridge between your artwork and your room’s decor. Think about the style of the space where it will hang. Are you aiming for a modern, minimalist look with a simple black metal frame, or a more traditional feel with an ornate wooden one? The materials used in framing have evolved over the long history of picture frames, offering endless possibilities. Having a rough budget in mind, whether it’s £50 or £250, will also help you navigate our beautiful material options, from premium solid oaks to more cost-effective contemporary finishes.

Our online frame designer puts the creative power directly in your hands. It’s an intuitive, visual journey where you become the artisan, guided through every choice from size and material to the final finish. We’ve broken down each stage of the process to ensure you feel confident in every decision. The goal is to translate the vision you have for your art into a beautifully finished, bespoke product, all while getting your instant picture framing quote online.

Step 1: Entering Dimensions and Artwork Details

The journey begins with the basics. Input the precise height and width of your artwork, as you measured earlier. You’ll then specify the type of piece you’re framing-whether it’s a cherished photograph, a textured canvas, or a fine art print. Many tools, including ours, allow you to upload a digital image of your artwork, giving you a real-time preview of how your final piece will look.

Step 2: Choosing Your Frame Moulding

This is where your style truly comes to life. Our extensive collection of mouldings can be filtered to match your exact needs:

  • Colour: From classic black and white to warm woods and contemporary metallics.
  • Style: Find the perfect match, whether it’s modern, traditional, ornate, or minimalist.
  • Material: Choose from premium, sustainably sourced wood or sleek, durable aluminium.

Pay close attention to the frame’s width (its profile) and see how it complements your art in the live visualizer.

Step 3: Selecting the Right Mount

A mount (also known as a matboard) provides a beautiful border between the artwork and the frame, preventing the art from touching the glass and adding visual breathing space. You can choose a single mount for a classic look, or a double or even triple mount to introduce depth and accent colours. Select colours that complement both your artwork and your chosen frame to create a harmonious, professional finish.

Step 4: Picking Your Glazing (Glass)

The final protective layer is crucial. For most projects, our premium acrylic glazing offers excellent clarity and is shatter-resistant. If your artwork will hang in a brightly lit room, consider an anti-reflective option to minimise glare. For irreplaceable or valuable pieces, we strongly recommend conservation UV-protective glazing. This high-grade material blocks harmful ultraviolet light, a standard championed by organisations like the Professional Picture Framers Association to prevent fading and preserve your art for generations.

What Really Affects Your Picture Framing Quote? Decoding the Price

Your final picture framing quote isn’t a mystery; it’s the transparent sum of your creative choices. Every decision you make, from the size of your art to the finish on the moulding, contributes to the bespoke piece you design. A professional online framing tool empowers you by updating the price with every single click, ensuring there are no hidden fees or surprises at checkout. Understanding these factors helps you balance your aesthetic vision with your budget effectively.

Let’s explore the four main drivers that shape your final quote, putting you in complete control of the craftsmanship.

Size: The Biggest Price Factor

It’s a simple rule: the larger your artwork, the more premium material is required for the frame, mount, and glazing. This makes the overall dimensions the most significant component of the total cost. A small A5 print will naturally be much more affordable to frame than a large A1 poster. It’s also worth noting that oversized pieces may incur higher, specialist delivery charges across the UK.

Frame Moulding: Material and Complexity

The frame itself is the bridge between your art and your room’s décor. Your choice of moulding has a direct impact on the price:

  • Material: Beautiful solid wood frames, such as oak and ash, are premium materials that cost more than high-quality, versatile options like MDF or polcore.
  • Complexity: A simple, narrow frame profile is a cost-effective choice, while wide, ornate, or hand-finished mouldings require more material and specialist craftsmanship, which is reflected in the price.

Mounts: Quantity and Quality

A mount (also known as a passe-partout) provides visual breathing space and draws the eye inward. Adding a mount increases the frame’s overall dimensions, which in turn increases the material cost. Opting for a dramatic double or triple mount will add further complexity and cost. Choosing a conservation-grade mountboard is a worthwhile investment, as it costs only slightly more but provides essential, acid-free protection to preserve your art for decades to come.

Glazing: From Standard to Specialist

Glazing protects your artwork from dust, moisture, and damage. While our standard high-clarity acrylic is an excellent baseline for safety and viewing, specialist options offer enhanced benefits. Upgrading to anti-reflective glazing provides a crystal-clear view without distracting glare, while UV-protective glazing is a crucial investment to safeguard your precious prints and photographs from fading. Getting a picture framing quote online allows you to instantly see how these premium choices affect the final cost.

Ready to see these factors in action? Explore our gallery of beautiful art prints and start designing your perfect frame today.

Picture Framing Quote Online: A 5-Step Guide to the Perfect Price

Why Get Your Online Quote from First4Frames?

In today’s digital world, getting a picture framing quote online is easier than ever, but not all services are created equal. Many online options sacrifice quality for speed, leaving you with a generic product that fails to do your artwork justice. At First4Frames Gallery, we bridge the gap between digital convenience and traditional, artisan skill. We believe that a bespoke frame is not just a border; it’s the bridge that connects your art to your space, and it deserves expert attention.

We’ve combined the simplicity of an online design tool with the passion and precision of professional framers. This ensures your experience is straightforward, your pricing is transparent, and the final result is a beautifully crafted piece you will cherish for years to come.

Expertise and Craftsmanship

Our digital-first approach is built on a solid foundation of hands-on experience. When you choose First4Frames Gallery, you’re choosing a team of passionate professionals dedicated to their craft. This commitment is reflected in every frame we create.

  • Decades of Experience: We bring over 20 years of professional framing expertise from our base here in Scotland.
  • Hand-Crafted in Scotland: Every single frame is meticulously hand-crafted to your exact specifications in our Falkirk workshop.
  • Premium Materials: We use high-quality, conservation-grade materials as standard to protect and preserve your artwork for a lifetime.

A Simple, Transparent Process

We designed our online tool to be completely intuitive. As you select your mount, choose your moulding, and specify your dimensions, you’ll see the price update in real-time. There are no hidden fees or surprise charges at checkout. The price you see is the final price you pay. This transparent approach to providing a picture framing quote online puts you in complete control, allowing you to design the perfect frame that fits both your aesthetic and your budget.

Support from Real People

Behind our website is a team of real, knowledgeable people who love what they do. If you’re unsure about which glaze to choose or need advice on the perfect mount colour to complement your print, we are here to help. We provide expert guidance to ensure the choices you make result in a final framed piece that you absolutely love. Experience the difference of working with professionals who are as passionate about your art as you are.

Ready to see your vision come to life? Start designing your perfect frame and get an instant quote today!

Your Perfect Frame is Just a Quote Away

As you’ve seen, getting a picture framing quote online doesn’t have to be a complex puzzle. By simply preparing your artwork’s measurements and understanding how your choice of mount, glazing, and moulding affects the final price, you are fully equipped to design the perfect bespoke frame. Our online tool makes the process transparent, putting you in complete control of creating a beautiful home for your art.

At First4Frames, we blend this digital convenience with true, time-honoured artistry. With over 20 years of experience, every single frame is hand-crafted with passion in our Falkirk workshop. We use only premium, conservation-grade materials to ensure your treasured piece is not just beautifully displayed, but also perfectly preserved for years to come.

The journey to a stunning display begins now. You have the knowledge and the tools at your fingertips. Ready with your measurements? Get your instant online quote now! We look forward to helping you create your masterpiece.

Frequently Asked Questions

Is the price I see in the online quote the final price I will pay?

Yes, the price shown in your picture framing quote online is comprehensive and transparent. It includes the cost of your chosen frame moulding, the mount, the backing board, and your selected glazing option. We believe in clarity and simplicity, so there are no hidden fees. The only additional cost is for delivery, which is calculated and clearly displayed at the final checkout stage before you commit to payment. This ensures you know the full cost upfront.

How accurate are the colours and textures in the online frame visualizer?

We’ve worked hard to ensure our online visualizer provides a beautiful and accurate representation of our frame finishes. However, colours can vary slightly depending on your screen’s calibration and lighting. The textures and wood grains shown are an excellent guide to the final look. For projects where a perfect colour match is essential, we recommend contacting our team. We’re passionate about getting every detail right for your bespoke frame and can provide further guidance.

What if my artwork is an unusual shape or needs a very deep frame?

Our online tool is perfect for quoting standard square and rectangular frames. For anything more unique, such as circular artwork, multi-aperture mounts, or pieces requiring a very deep box frame, our skilled artisans are here to help. These projects require a bespoke approach to ensure a perfect fit and finish. Please contact our friendly team directly by phone or email, and we will be delighted to provide a custom consultation and quote for your special piece.

How long does it take to receive my frame after I approve the quote?

Once you approve your quote and complete your order, our craftsmanship begins. Each frame is made to order in our UK workshop. Our standard turnaround time is typically 7-10 working days from the date of payment to dispatch. For more complex or large bespoke orders, this may be slightly longer. We will always keep you informed and provide an estimated delivery date, ensuring a reliable and speedy service for your professionally framed artwork.

Can I get a quote for framing something that isn’t flat, like a football shirt or medals?

Absolutely! We specialise in creating stunning 3D box frames for memorabilia like football shirts, medals, christening gowns, and other treasured objects. Due to the unique nature and depth of these items, they require a specialist consultation that isn’t covered by our instant online quote tool. Please get in touch with our bespoke framing experts. We’d love to discuss your project and provide a tailored quote to preserve and display your precious items beautifully.

What is the difference between standard and conservation framing materials?

Standard framing is a fantastic, cost-effective choice for posters, decorative prints, and photos. It provides a beautiful finish and good protection. Conservation framing, however, uses premium, acid-free materials and UV-protective glazing. This level of craftsmanship is essential for protecting valuable or sentimental fine art, limited edition prints, and heirlooms from fading and environmental damage, preserving them for generations to come. We recommend conservation materials for any piece you truly treasure.

Posted on

How to Choose the Right Size Picture Frame: A Complete Guide

How to Choose the Right Size Picture Frame: A Complete Guide

The excitement of finding the perfect artwork can quickly turn to confusion when faced with measurements, mounts, and a sea of frame sizes. The fear of making a costly mistake is real, and it can leave your treasured pictures languishing in a tube instead of taking pride of place on your wall. But it doesn’t have to be this complicated. Learning how to choose the right size frame is the most crucial step in transforming a simple print into a spectacular, professionally finished piece that you’ll be proud to display.

In this complete guide, we’ll demystify the entire process with our expert advice. We’ll walk you through everything from accurately measuring your artwork to understanding the essential role of a picture mount and decoding confusing terms. You’ll discover how to make a choice that not only fits perfectly but also beautifully enhances your picture, turning that framing challenge into a simple, enjoyable act of craftsmanship. Let’s embark on this journey together and give your art the beautiful home it deserves.

First Things First: Understanding the Three Key Measurements

Embarking on the journey to frame your art is an exciting step, but the secret to a spectacular result lies in precision. Before you fall in love with a particular style, getting your measurements right is the essential foundation. Understanding the difference between your artwork size, the mount aperture, and the final frame size will prevent any guesswork and ensure a perfect, professional fit. This is the most important part of learning how to choose the right size frame and guarantees your piece will look its absolute best.

To see these principles in action, this helpful video provides a clear visual guide:

How to Measure Your Artwork Accurately

To achieve a bespoke, gallery-quality finish, accuracy is paramount. Always begin by measuring the artwork itself, not the paper it is on, unless you want the border to show. For the most reliable results, follow these simple steps:

  • Use a steel tape measure, as fabric ones can stretch and give inaccurate readings.
  • Carefully measure the exact height and width of the image area you want to display.
  • Measure each dimension twice to confirm your numbers and avoid any small errors.
  • Note down your dimensions clearly, ideally in both millimetres (mm) for precision and inches for reference.

Frame Size vs. Aperture: What’s the Difference?

These two terms are often confused, but they refer to distinct measurements. The frame size relates to the inner dimensions of the frame itself-the size of the glass and backing board that will fit inside it. The aperture, on the other hand, is the opening or ‘window’ in the picture mount through which your artwork is viewed. To hold your art securely, the aperture should be slightly smaller than your artwork. A 5-10mm overlap on all sides is standard, preventing your picture from slipping through the opening.

The Crucial Role of the Picture Mount

A picture mount (or mat) is far more than just a decorative border; it is a key component of professional framing. It creates a visual space between the artwork and the frame, drawing the viewer’s eye inward. Crucially, it also separates your art from the glazing (the glass or acrylic), protecting it from potential damage caused by condensation. Whether you have a bespoke piece or one that fits common standard photo print sizes, a mount provides a beautiful finish. Remember, the width of the mount’s border adds to the overall dimensions, so you must factor this in when determining the final frame size you need.

Standard Sizes vs. Bespoke Framing: Which Path is Right for You?

Once you have carefully measured your artwork, you arrive at a crucial decision point. Do you opt for a convenient, ready-made frame, or invest in a bespoke service for a truly perfect finish? Both paths have their merits, and understanding the difference is a key part of how to choose the right size frame. Let’s explore the pros and cons to help you find the ideal solution for your art.

A Guide to Common Ready-Made Frame Sizes

Standard, or “off-the-shelf,” frames are manufactured to fit the most common photo and paper dimensions. In the UK, you’ll frequently find sizes designed for photographs like 6×4, 7×5, and 10×8 inches, as well as the international ‘A’ series for prints and documents (A4, A3, A2). If your art matches one of these dimensions, a standard frame can be a simple solution. Remember to account for a mount (also called a mat or passe-partout), which adds a border and requires a larger frame.

When is a Standard Size Frame the Best Choice?

A ready-made frame is often the most practical choice in several situations. It’s an excellent, cost-effective option when you need a frame quickly or are framing a piece of lower sentimental or monetary value. Consider a standard frame if:

  • You are framing standard-sized photos, posters, or certificates.
  • You are working with a tight budget.
  • You need a frame immediately for a last-minute gift.
  • You are happy with a more limited selection of styles and colours.

Why Bespoke Framing Guarantees a Perfect Result

For artwork that is unusually sized, valuable, or deeply personal, bespoke framing is the ultimate expression of care. A custom frame is crafted to the precise millimetre of your piece, ensuring a flawless, gallery-quality presentation. Our experts, who adhere to the highest standards of craftsmanship upheld by organisations like the Professional Picture Framers Association, provide a premium service. The key benefit of learning how to choose the right size frame with a bespoke service is the unlimited potential it unlocks-giving you complete control over the materials, colour, mount style, and glazing to create a truly unique and protective home for your art.

This level of personalisation is particularly meaningful when framing cherished photographs of loved ones to create a lasting tribute. While a beautiful frame honours a memory at home, services like Funera focus on creating a respectful and beautiful service to honour a life lived.

How to Choose the Right Size Picture Frame: A Complete Guide

The Art of Proportion: Matching Frame Size to Artwork and Style

Finding the perfect frame goes beyond simply matching the dimensions of your artwork. It’s an exercise in visual balance and harmony. The real secret behind how to choose the right size frame lies in understanding proportion-how the width of the mount and the thickness of the frame itself work together to complement and elevate the piece. A well-proportioned frame doesn’t just protect your art; it enhances its story and draws the viewer in, becoming the perfect bridge between your art and your decor.

Giving Your Art ‘Breathing Room’ with Mounts

A mount creates vital space between the artwork and the frame, preventing the glass from touching the art’s surface while adding visual separation. This ‘breathing room’ is crucial for creating a professional finish. For a balanced look, a general rule is that the mount should be significantly wider than the frame moulding. For a classic, gallery-style aesthetic, consider an off-centre or ‘weighted’ mount, where the bottom border is slightly wider, which gives the artwork a subtle visual lift. Understanding these basic principles is a great first step, and a comprehensive a guide to framing art can provide even more foundational knowledge on achieving the perfect balance.

Framing Small Art for a Big Impact

Don’t let a small piece of art get lost on your wall. Instead, turn it into a deliberate, spectacular focal point. Using an oversized frame with a very wide mount is a professional technique that creates drama and immediately draws the eye towards the centre, making a small print feel more significant and luxurious. For a contemporary touch, you could also:

  • ‘Float’ the artwork: Mounting the art on top of the mount board creates a subtle shadow and a striking 3D effect.
  • Create a gallery wall: Grouping several small, identically framed pieces creates a cohesive and powerful display.

See these professional techniques in action by exploring the beautiful examples in our online gallery.

How to Frame Large Art Without Overpowering It

When you’re deciding how to choose the right size frame for a large, statement piece, the philosophy is often “less is more.” A large painting or print already has a commanding presence, so a thick, ornate frame can feel overwhelming and compete for attention. Instead, opt for a relatively thin, simple frame that acts as a clean, crisp border. This keeps the focus squarely on the artwork itself. For very large pieces, a mount may not be necessary at all, allowing the art to extend to the edge. Most importantly, ensure your chosen frame is built with premium craftsmanship to support the weight safely and securely for years to come.

Beyond the Art: Choosing a Frame Size for Your Space

The perfect frame does more than just protect your artwork; it acts as a beautiful bridge between the piece and your room’s décor. When you consider the context of your space-the scale of the wall, the surrounding furniture, and the overall style-the right frame size can transform a picture into a stunning focal point. Understanding how to choose the right size frame for your wall is a key step in achieving a polished, professionally styled interior.

The 2/3 Rule: Scaling Your Frame to the Wall

A simple yet powerful interior design principle is the two-thirds rule. Aim for your artwork, whether a single statement piece or a curated gallery wall, to occupy roughly two-thirds to three-quarters of the available wall space. This prevents a small frame from looking lost and insignificant on a large wall, creating a sense of balance and intentionality that instantly elevates your room.

Hanging Art Above Furniture (Sofas, Beds, Tables)

When placing art above furniture like a sofa, bed, or console table, scale is crucial. Your framed art should be approximately two-thirds the width of the furniture it hangs over. To create a cohesive look, hang the piece so its bottom edge is 6-8 inches above the furniture. This creates a strong visual anchor, ensuring the art and furniture feel connected rather than floating apart.

Planning a Gallery Wall: Mixing and Matching Sizes

A gallery wall is a spectacular way to display a collection of treasured pieces. To create a harmonious composition, start by placing your largest frame first, often slightly off-centre, as an anchor. Arrange your smaller frames around it, maintaining a consistent spacing (usually 2-3 inches) between each one. A top tip: lay your entire arrangement on the floor first to perfect the layout before a single nail touches the wall.

A Final Checklist for Choosing the Perfect Frame Size

Feeling confident? Here is our simple checklist to guide you through the final steps for selecting a beautiful, perfectly-proportioned frame:

  • Step 1: Carefully measure your artwork’s height and width.
  • Step 2: Decide if you want a mount, and calculate its dimensions.
  • Step 3: Assess the wall space and apply the design rules for scale and placement.
  • Step 4: Choose a standard size for convenience or opt for a bespoke frame for a perfect fit.

If you’re still unsure or need bespoke advice for a tricky space, our team is always here to help. Need expert advice? Contact our framing specialists today!

The Final Piece: Finding Your Perfect Frame

Choosing a frame is about more than just measurements; it’s an art in itself. By understanding the key relationship between your artwork, the mat, and the frame, and considering the proportions of your space, you now have the knowledge for how to choose the right size frame with confidence. This ensures your treasured piece doesn’t just hang on a wall-it truly belongs.

For those special pieces that deserve nothing less than perfection, a bespoke solution is the ultimate expression of care. At First4Frames Gallery, we bring over 20 years of professional framing experience to every project. From our Falkirk workshop, our expert craftsmen use only high-quality, conservation-grade materials to create a beautiful, lasting home for your art. Let us handle the details with the precision and passion your artwork deserves.

Find the perfect fit with our bespoke framing service.

Embark on your framing journey today and give your art the spectacular presentation it was made for.

Frequently Asked Questions

What size frame do I need for an A4 picture?

For a standard A4 print (21cm x 29.7cm), you have two beautiful options. For a simple, contemporary look, choose an A4 frame where your artwork will fit perfectly edge-to-edge. If you desire a more classic, gallery-style presentation, we recommend using a larger frame, such as 30cm x 40cm, with a mount. This creates a professional border that draws the eye to the artwork and gives it space to breathe.

Should a picture frame be bigger than the picture?

In most cases, yes. Selecting a frame that is larger than your artwork allows for the inclusion of a mount. This beautiful border serves two key purposes: it creates visual separation between the art and the frame, enhancing its impact, and it protects your print by preventing it from touching the glass. While a frame that is the exact size of the picture offers a modern, ‘full-bleed’ effect, a larger frame with a mount provides a timeless, professional finish.

How do I measure for a frame if I want to include a mount?

First, carefully measure the exact height and width of your artwork. This measurement will be the ‘aperture’ size, or the opening, of the mount. Next, decide on your desired mount border width-for example, 5cm. To find the required frame size, add double the mount width to both the height and width of your artwork. For a 20x30cm print with a 5cm mount, you would need a 30x40cm frame.

How wide should a picture frame border (the mount) be?

The perfect mount width creates a harmonious balance between the art and the frame. As a general rule of thumb, the mount should be noticeably wider than the frame moulding itself-never narrower. A border of between 5cm and 8cm is a popular and well-proportioned choice for many standard-sized prints. For smaller artworks, a more generous mount can add presence, while larger pieces may suit a proportionally smaller border. It is an artistic choice that should ultimately complement the piece.

Is it better to choose a frame that matches the art or the room?

A truly perfect frame acts as a bridge between your artwork and your room’s décor, so it should ideally complement both. The frame’s primary role is to enhance the art, so its style and colour should harmonise with the piece first. However, it must also feel at home in your space. Consider the frame and mount as the elements that seamlessly integrate your chosen art into your existing interior design, creating a cohesive and polished look.

Can I put a small picture in a large frame?

Absolutely! Using an oversized frame with a wide mount is a spectacular way to give a small piece of art significant visual impact. This technique creates a dramatic, gallery-quality effect that turns a cherished photograph or a delicate sketch into a premium focal point. Deciding to give a small piece more presence is a creative answer to the question of how to choose the right size frame, making a confident and stylish statement on your wall.