That beautiful piece of art, treasured family photograph, or signed memorabilia deserves to be the centrepiece of your home. But the journey from unframed to perfectly displayed can feel daunting. Will it be protected? Which frame, mount, or glass is the right choice? Finding a local professional you can trust with your precious items is paramount. Here at First4Frames Gallery, we believe that expert Falkirk picture framing should be a simple, inspiring, and collaborative process. We combine decades of passion and craftsmanship to create bespoke solutions that not only protect your art but elevate it.
In this guide, we’ll walk you through our hassle-free service, demystifying the choices and showcasing how the perfect frame acts as a beautiful bridge between your artwork and your décor. Discover how our premium, custom framing can preserve your memories for a lifetime, giving you complete confidence and a spectacular result you’ll be proud to display. Embark on a journey with us to give your treasured items the presentation they truly deserve.
Key Takeaways
- Discover how professional framing protects your treasured items from damage in ways that standard, off-the-shelf frames cannot.
- Our expert Falkirk picture framing service extends beyond prints to beautifully display 3D objects like sports memorabilia and family heirlooms.
- Walk through our simple, collaborative consultation process designed to turn your vision into a perfectly finished masterpiece.
- Learn the importance of using conservation-grade materials to ensure your artwork is preserved and displayed beautifully for years to come.
Why Professional Picture Framing in Falkirk Matters
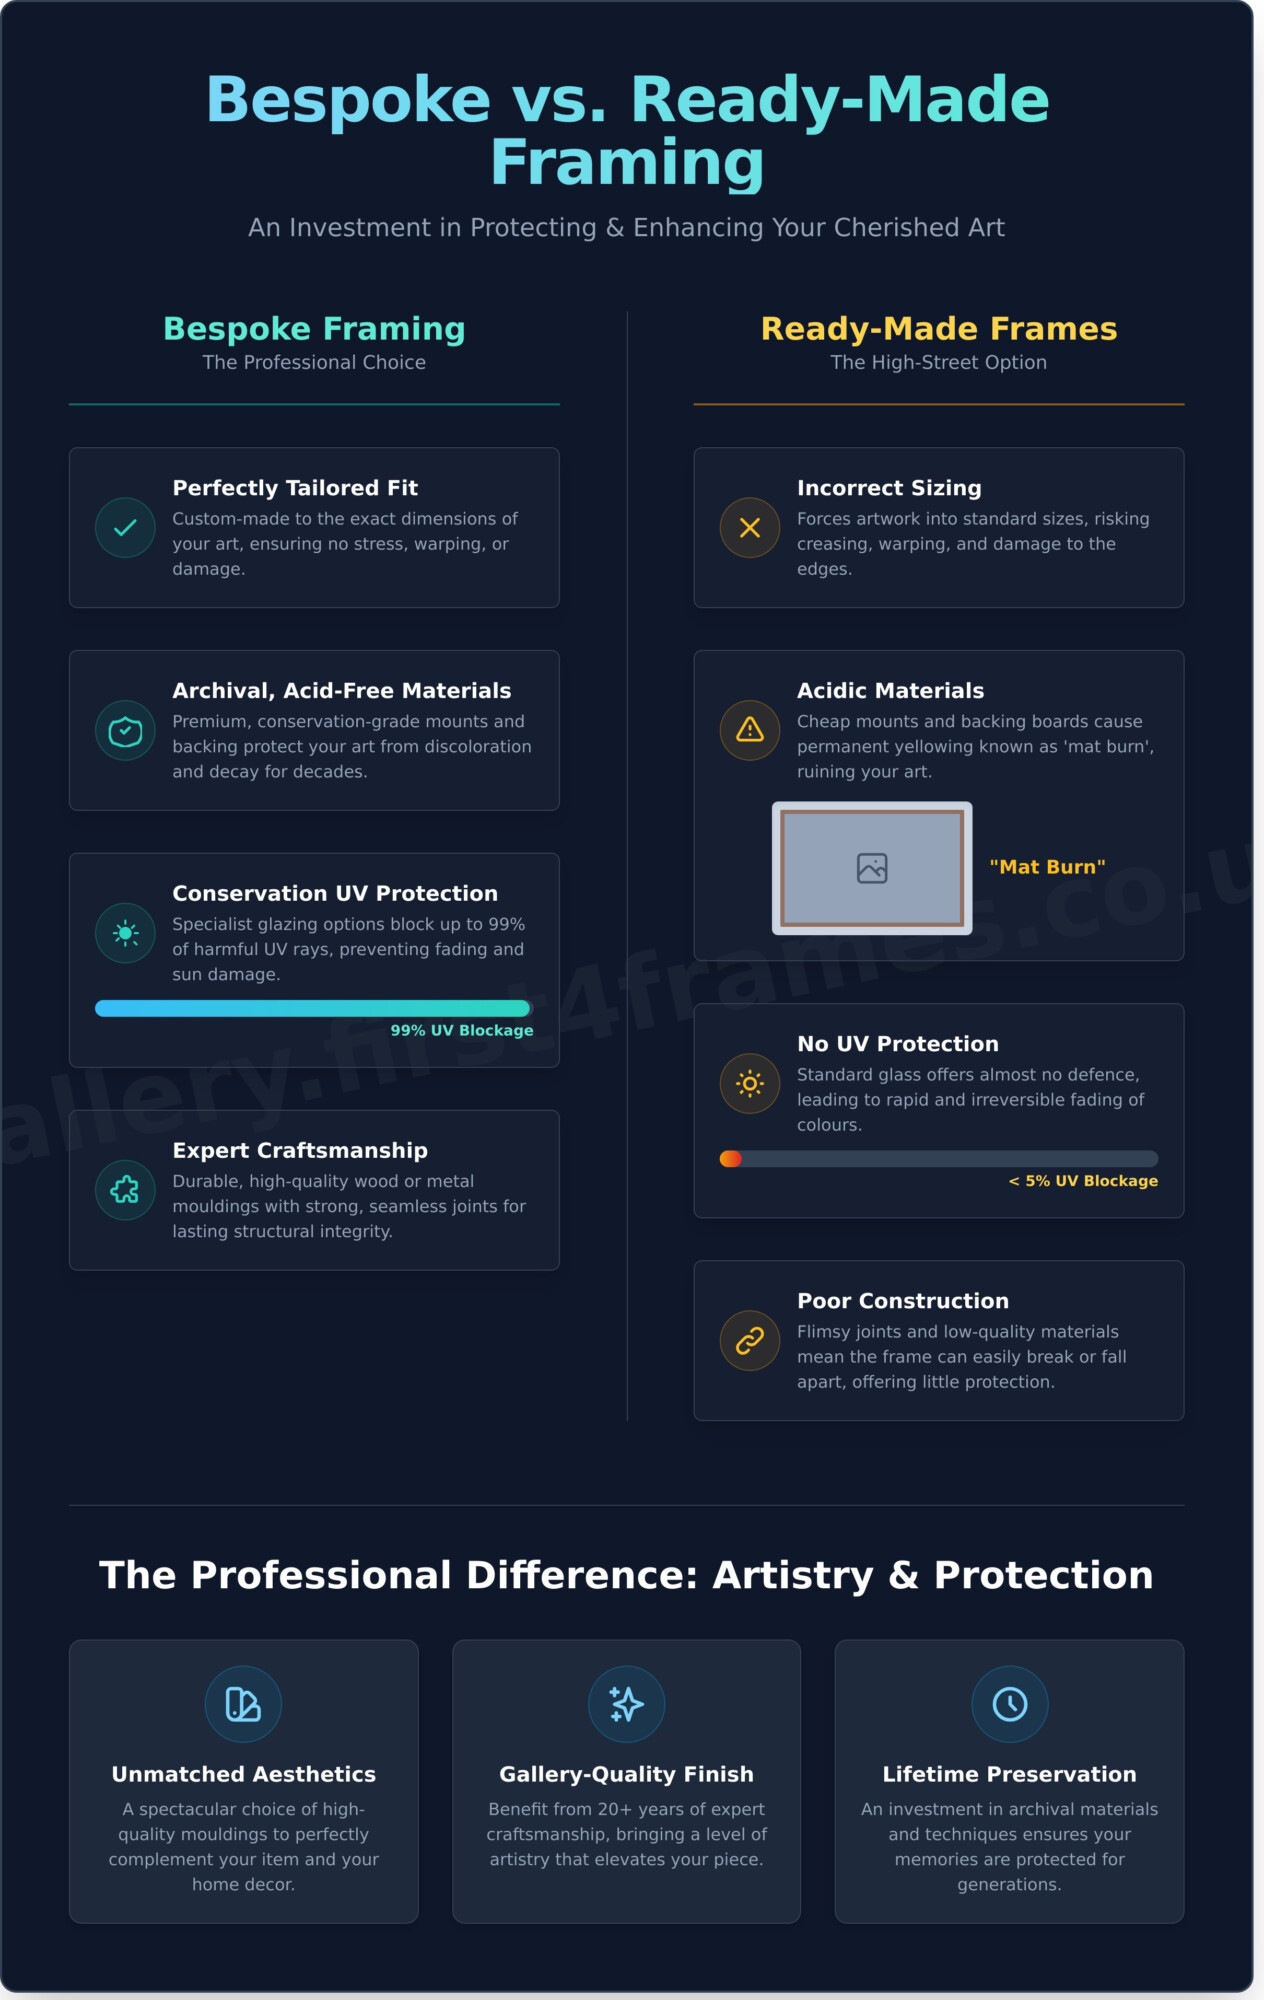
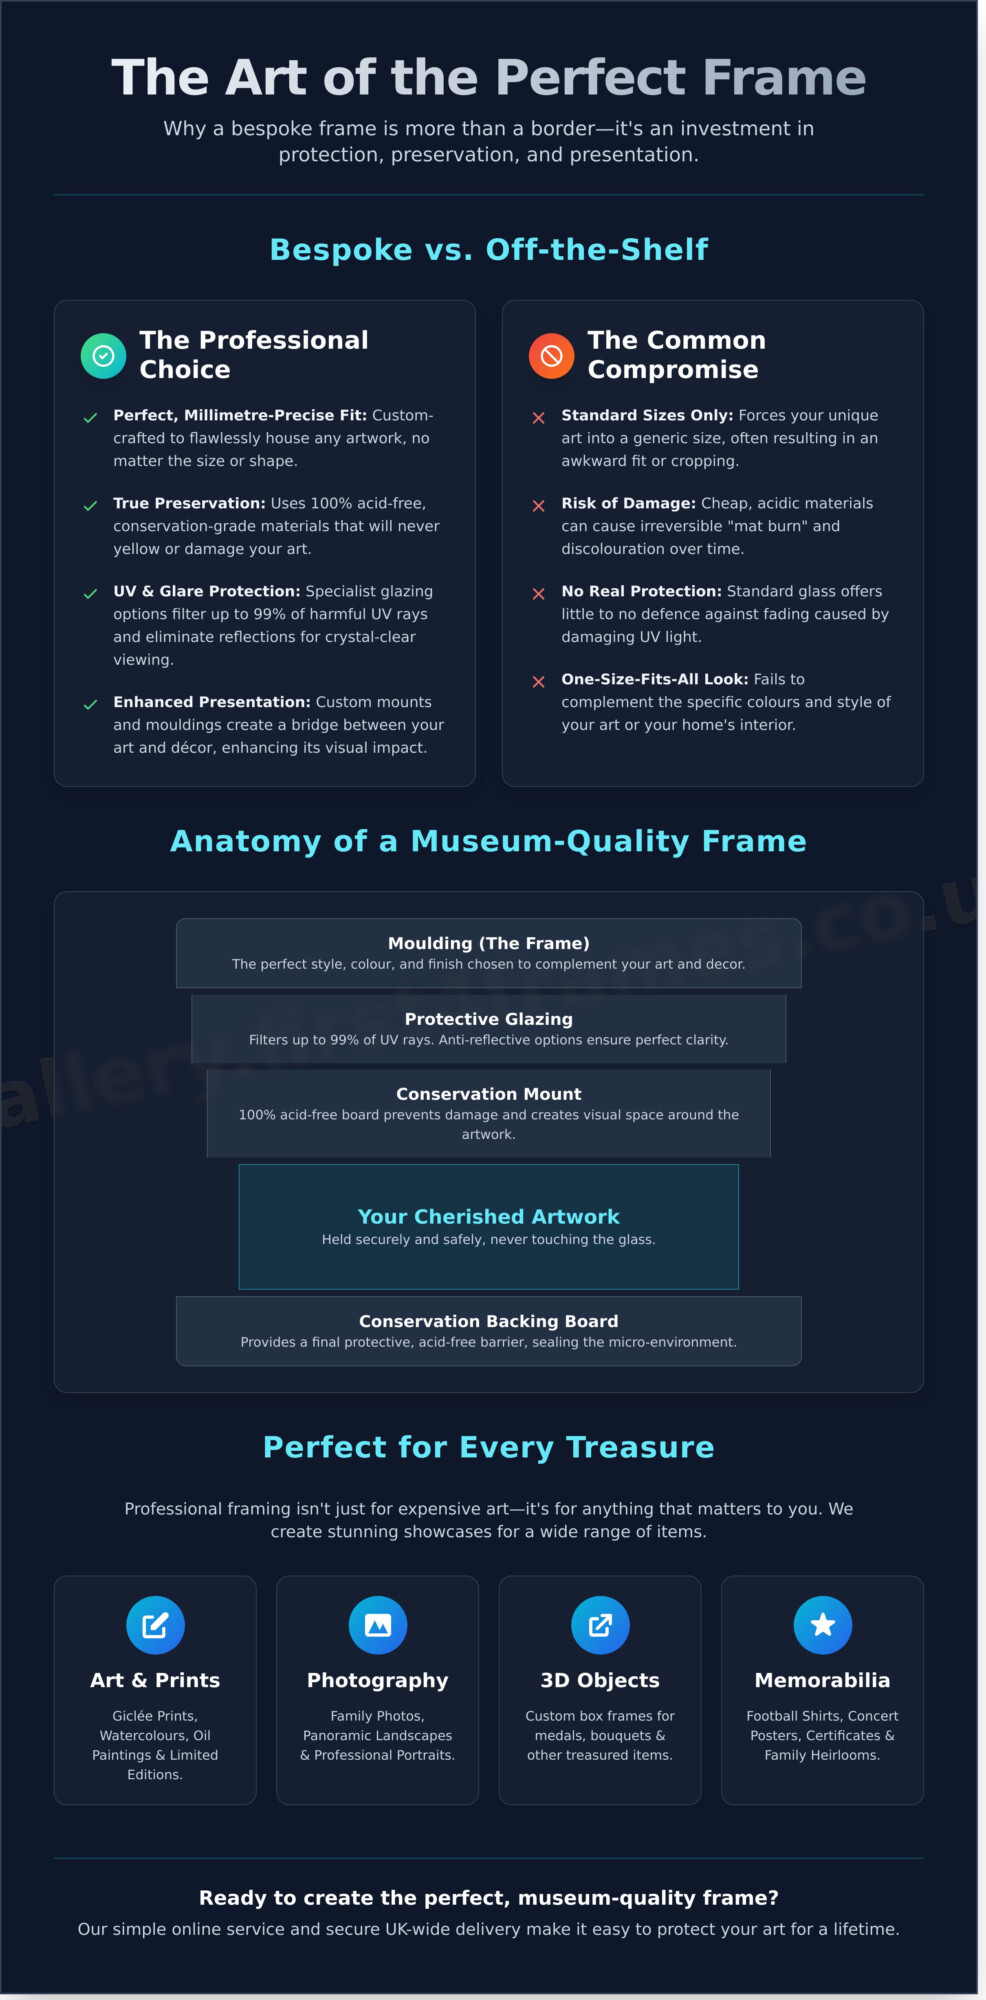
A treasured piece of art, a family photograph, or a hard-earned certificate deserves more than a standard, off-the-shelf frame. While convenient, these frames often lack the quality materials needed to protect your item long-term. Professional, bespoke framing is an investment-a crucial step in preserving your memories and enhancing their visual impact. The frame has a long and storied past, and understanding the history of the picture frame reveals its dual purpose: to protect and to present.
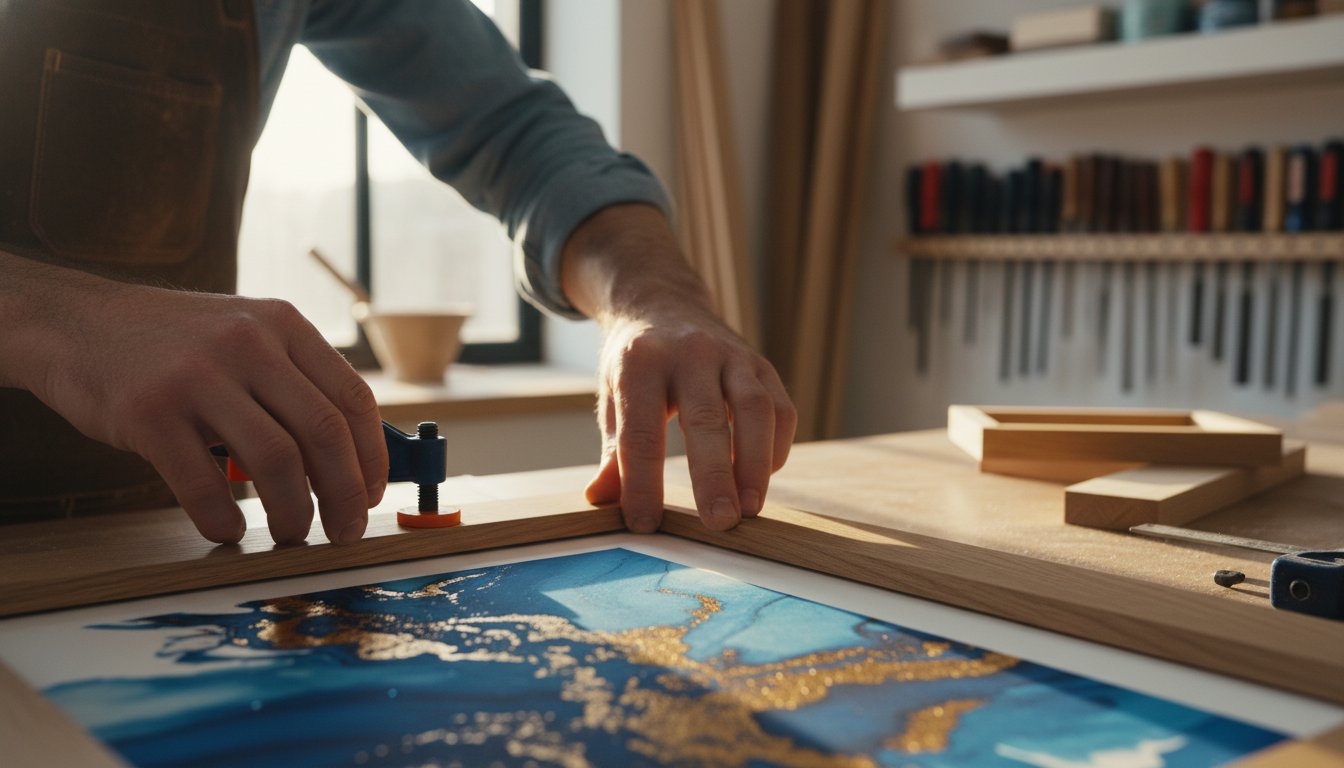
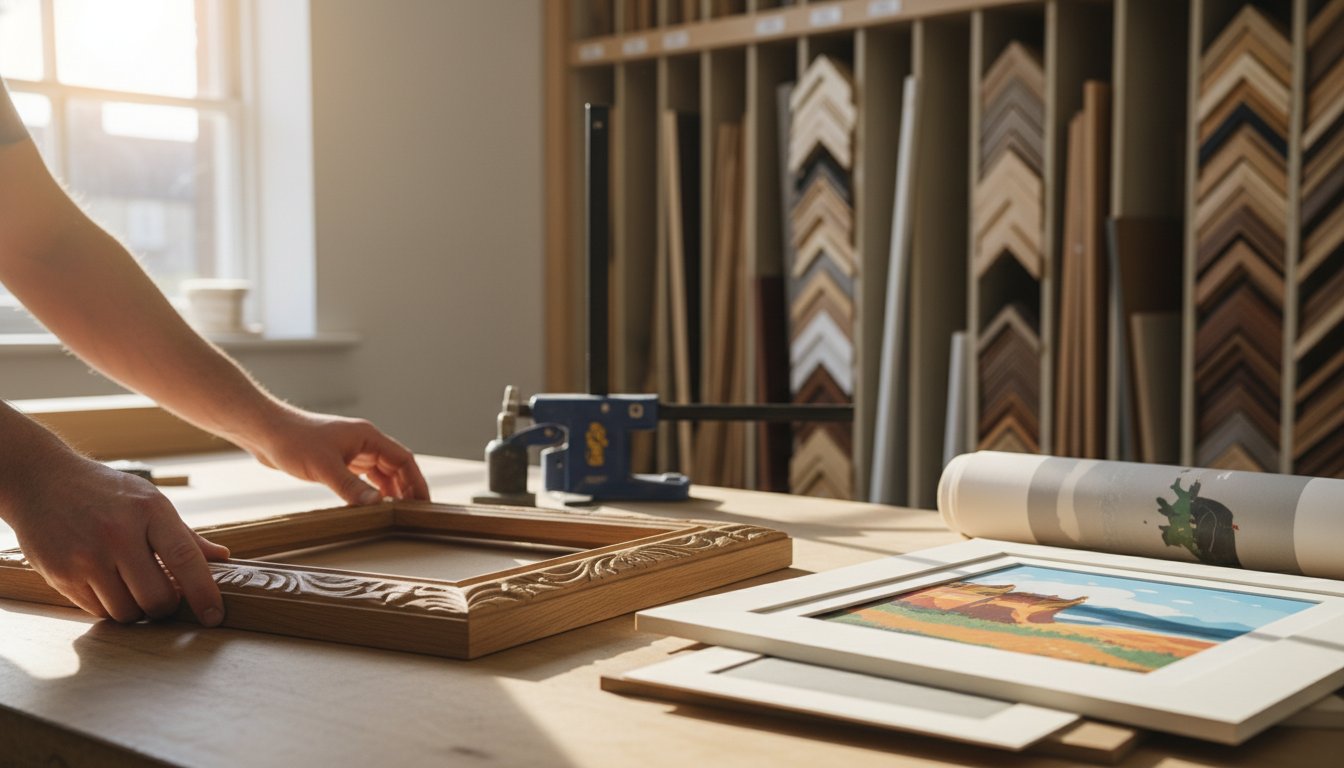
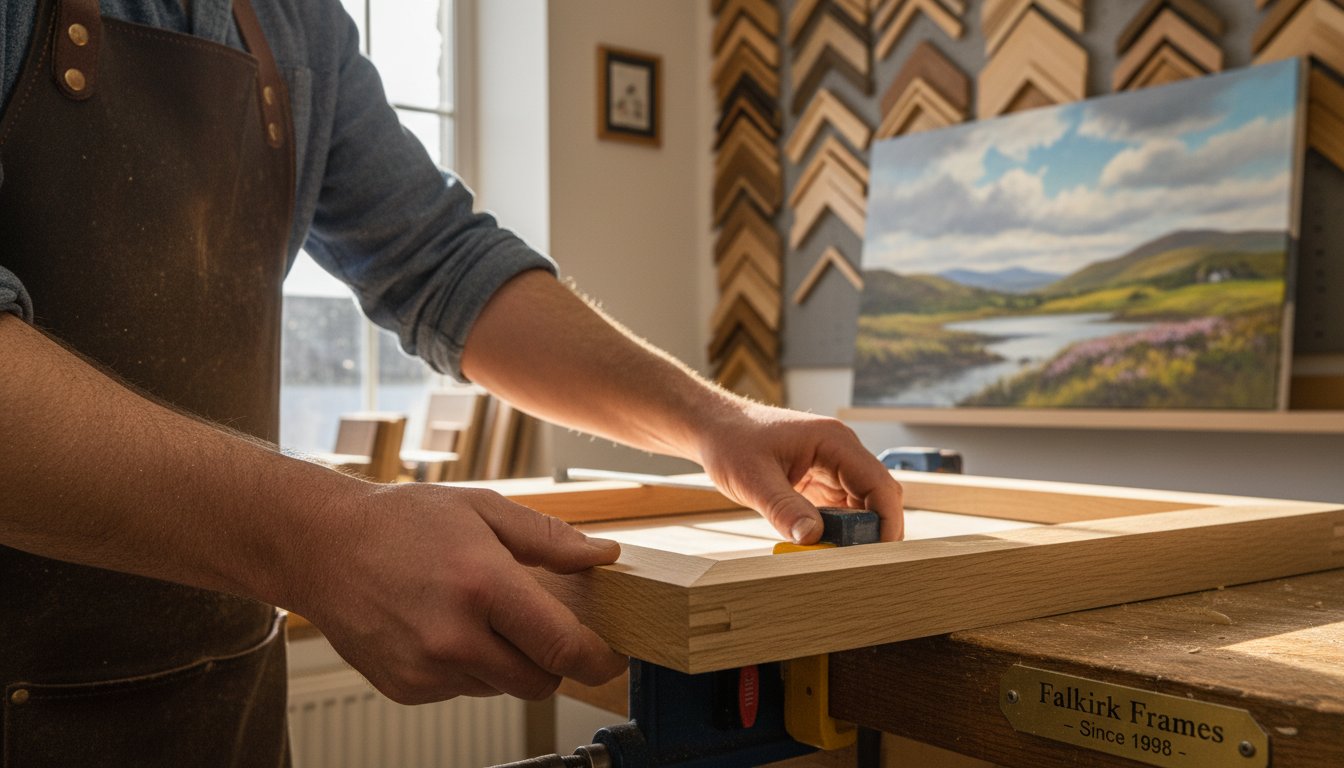
To see the craftsmanship involved, take a look at the work of a professional picture framer:
At First4Frames, we bring over 20 years of artisanal experience to every project. We understand that expert Falkirk picture framing is about the perfect marriage of conservation science and design artistry. It’s the difference between an item that simply hangs on a wall and one that truly comes to life, becoming a focal point in your home. Our passion is to provide a premium, bespoke service that ensures your piece looks spectacular for generations.
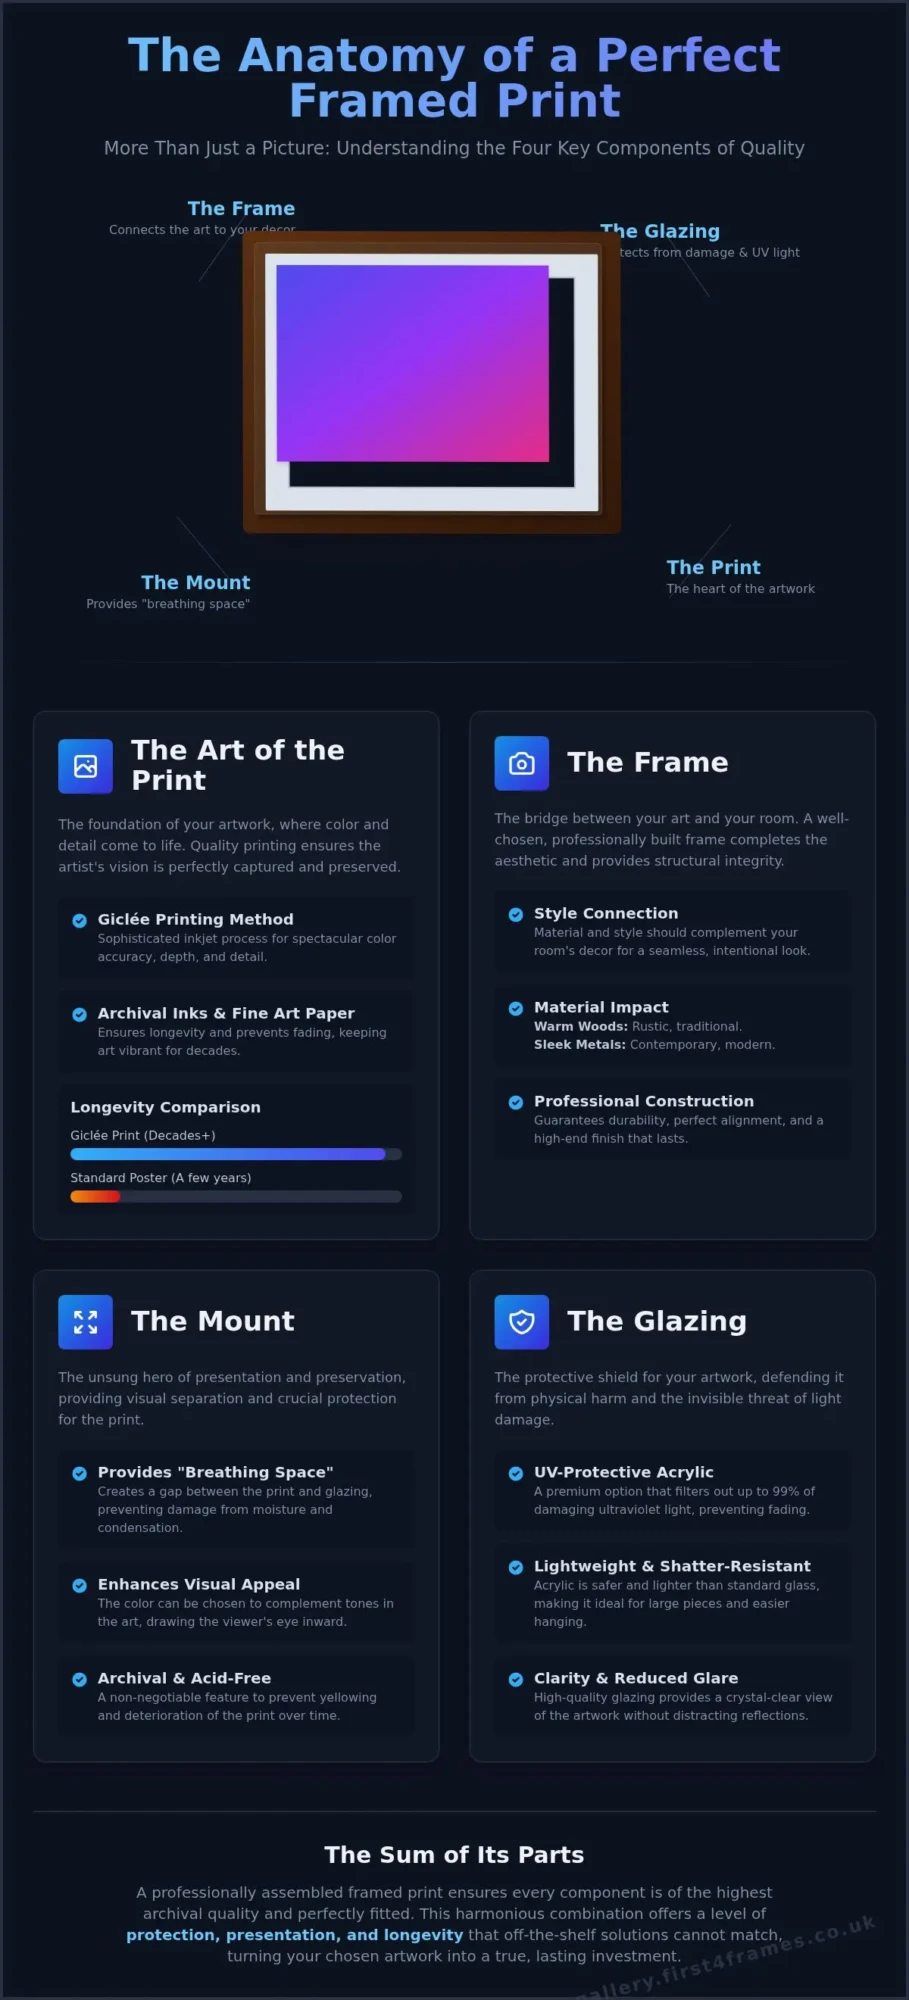
Preservation: Protecting Your Art for a Lifetime
Your artwork is vulnerable to environmental damage over time. Our conservation-grade materials offer a vital line of defence, far superior to those found in standard frames. We use:
- Acid-free mounts and backing boards to prevent the ‘browning’ and discolouration that can permanently damage paper and photographs.
- UV-protective glass that acts like a sunscreen for your art, blocking up to 99% of harmful ultraviolet rays that cause colours to fade.
- Professional sealing techniques to create a stable micro-environment inside the frame, keeping out damaging dust, humidity, and insects.
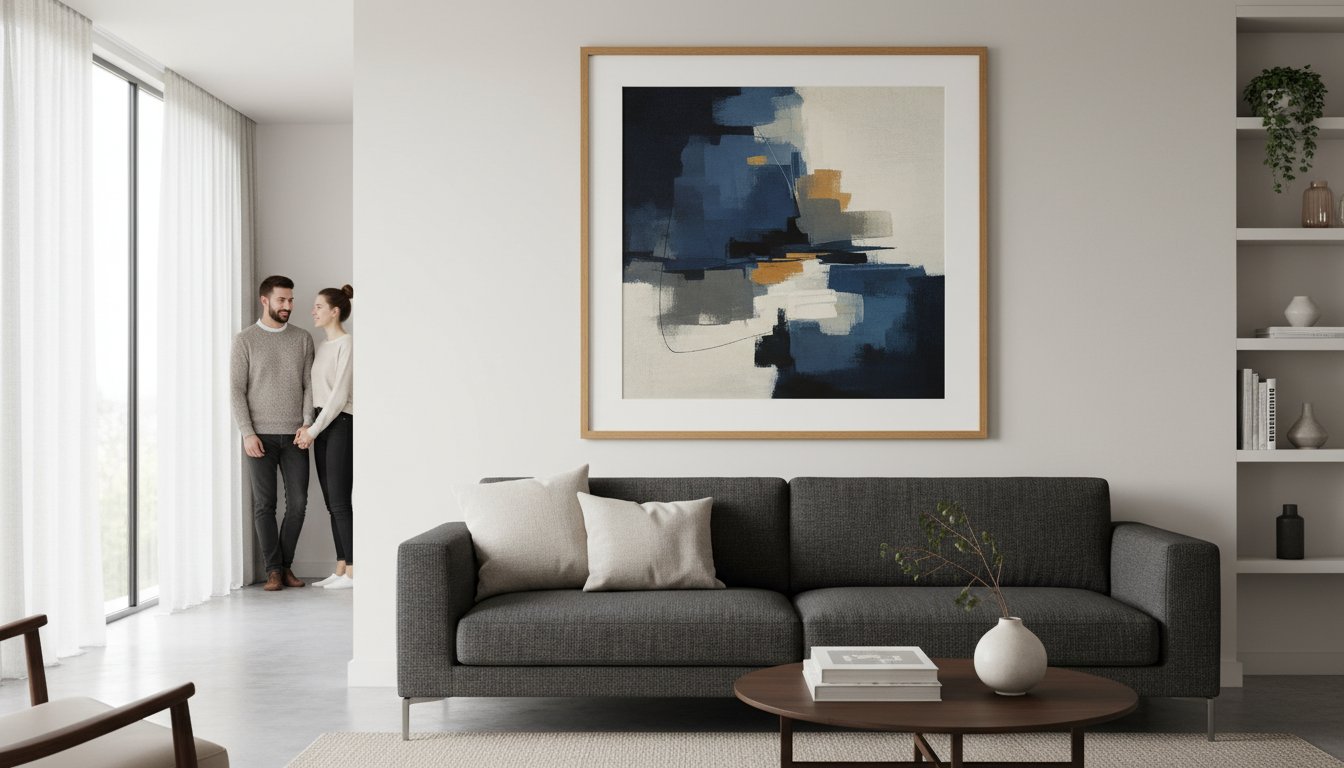
Presentation: The Art of a Perfect Finish
A bespoke frame does more than protect; it elevates. The right choice in moulding, colour, and mount proportions creates a beautiful, cohesive finish. We help you select a frame that not only complements the artwork but also harmonises with your interior decor. A well-proportioned mount draws the viewer’s eye towards the subject, creating visual balance and breathing room. In essence, the frame becomes the perfect bridge between your artwork and your room, tying everything together perfectly.
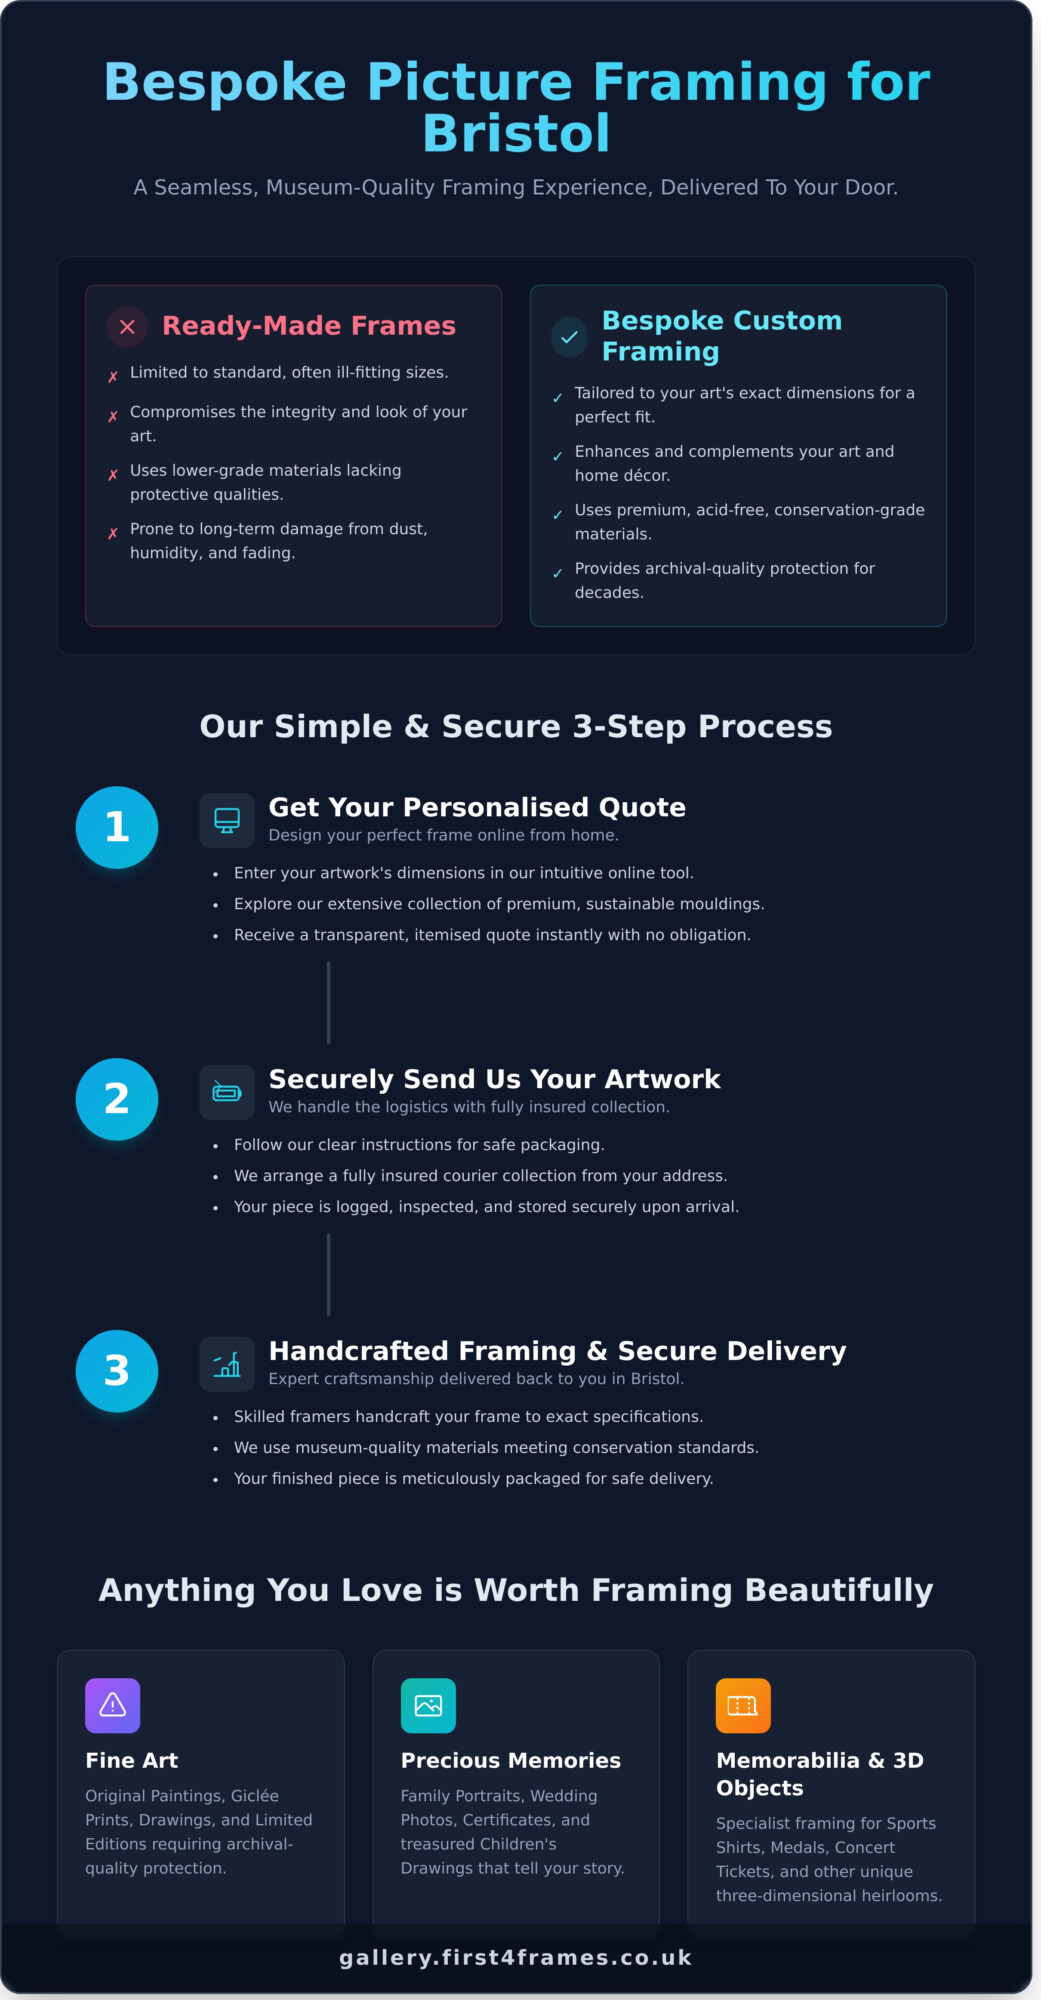
Our Bespoke Framing Services: For Every Kind of Treasure
At First 4 Frames, we believe every treasured item deserves to be presented beautifully. Our bespoke Falkirk picture framing service is built on a foundation of passion, precision, and decades of expertise. From a child’s first drawing to a large-scale corporate art piece, we handle every project with the utmost care. We proudly serve both individual collectors and commercial clients, offering a premium framing solution that turns your valued items into spectacular displays.
Fine Art Prints & Paintings
We specialise in framing original artwork, ensuring its beauty and longevity are preserved. Whether you have one of our own spectacular Giclée prints, a delicate watercolour, or a limited edition piece, we have the perfect solution. We offer advanced options like float mounting to elegantly display the deckled edges of fine art paper. Our choice of conservation-grade materials and UV-protective glazing is crucial for protecting artwork from light damage, keeping your investment safe for years to come.
Photographs & Certificates
Transform your cherished memories and achievements into timeless displays. From precious family portraits and wedding photographs to academic degrees and professional certificates, we ensure every piece is mounted with absolute precision. Our techniques guarantee your photos remain perfectly flat without the use of damaging adhesives. For a truly unique display, consider a custom multi-aperture frame, allowing you to create a beautiful, handcrafted collage of your favourite moments.
Memorabilia & 3D Object Framing
Some treasures can’t be pressed flat. Our expertise extends to the intricate world of 3D object framing. We create stunning shadow boxes and deep-rebate ‘box frames’ to display everything from signed football shirts and military medals to baby shoes and other cherished keepsakes. We use specialised, non-damaging mounting techniques to secure your items, ensuring they can be removed in their original condition if ever needed. Let us turn your memorabilia into a spectacular piece of personal history.
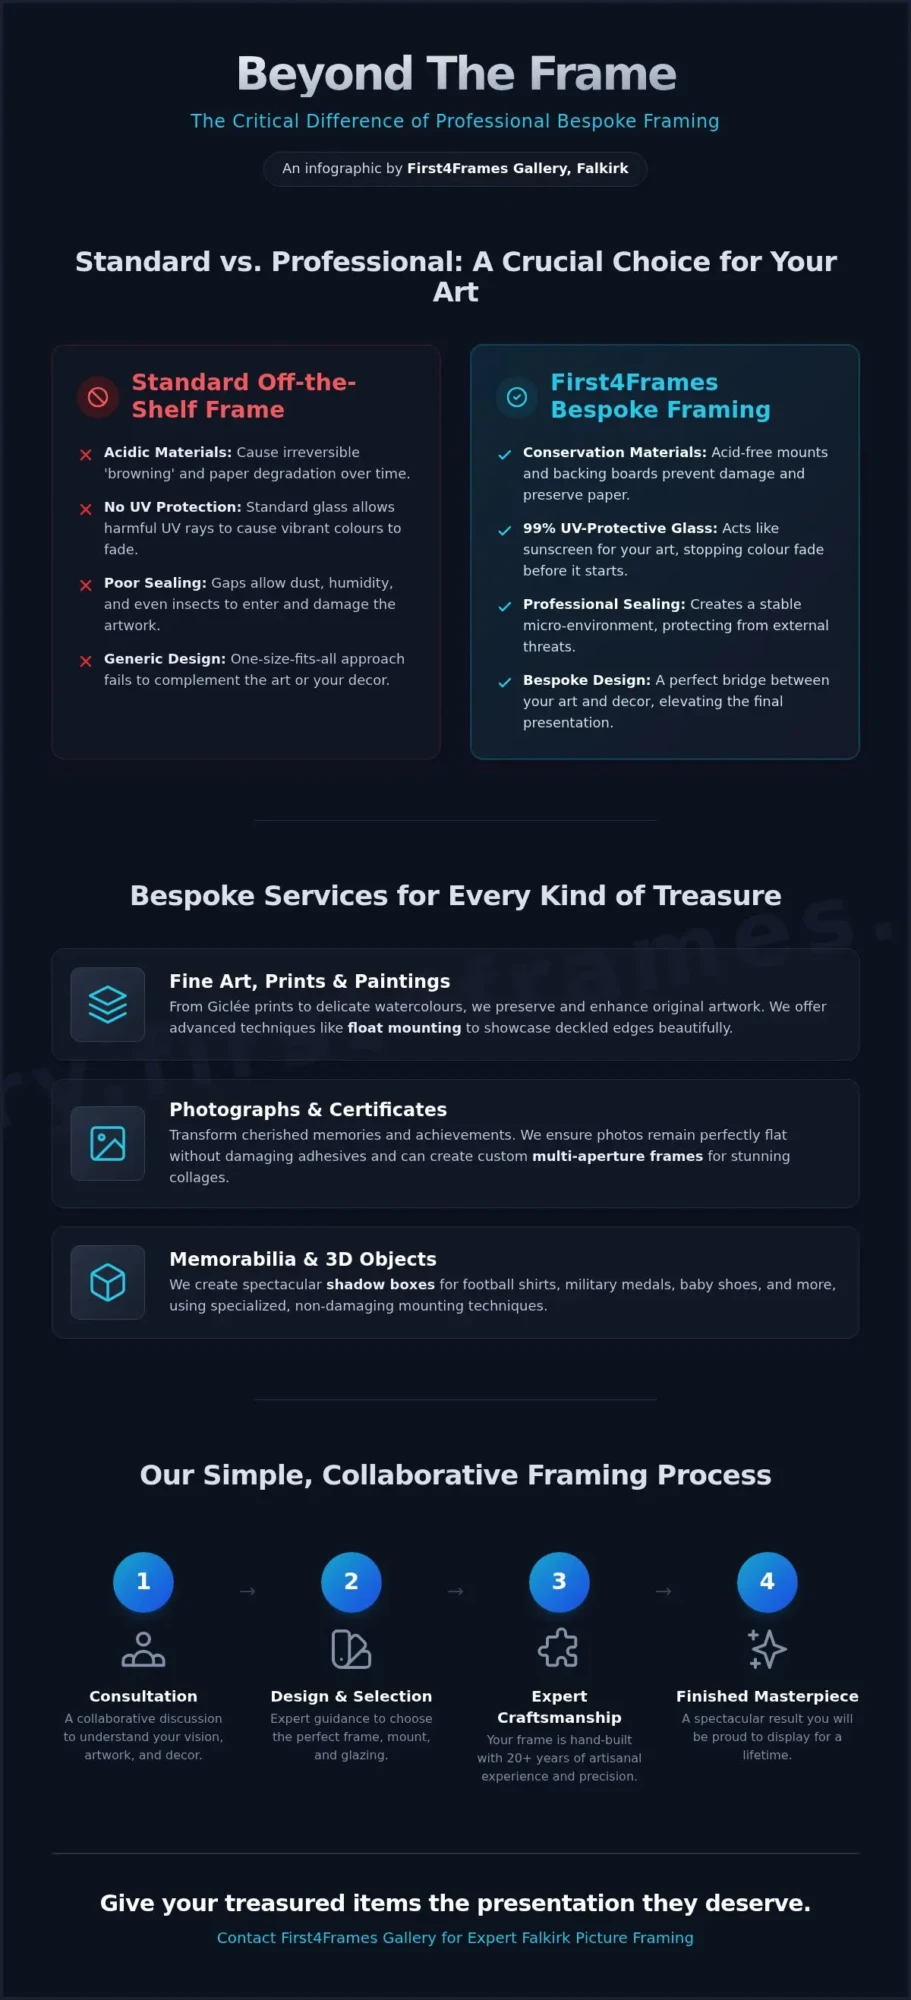
Your Framing Consultation: The First4Frames Process
Embarking on a custom framing journey can feel daunting, but at First4Frames, we make it a simple and inspiring experience. Our one-to-one consultation is designed to guide you through the creative process, transforming your cherished item into a beautifully finished masterpiece. We believe expert advice should be accessible to all, which is why our consultations are always complimentary and without obligation. Whatever your style or budget, our Falkirk picture framing service is tailored completely to you.
Step 1: Visit Our Falkirk Workshop
Your journey begins when you bring your artwork, photograph, or memorabilia to our welcoming workshop on Grahams Road. Our friendly team will sit down with you for a personal consultation to understand your vision, discuss where the piece will hang, and carefully assess your item. This initial conversation is all about listening to your ideas and needs, ensuring we create something you’ll love.
Step 2: Designing Your Perfect Frame
This is where your vision truly comes to life. We’ll guide you through our extensive collection of premium materials, helping you find the perfect combination to complement both your art and your home décor. You can explore:
- Frame Mouldings: A vast selection from ornate and classic to sleek and contemporary, sourced from the finest suppliers.
- Mount Boards: Hundreds of colours and textures to create depth, add a border, and draw the eye to your artwork.
- Glazing Options: Choose from standard glass, anti-reflective for perfect clarity, or conservation-grade UV-protective glass to preserve your piece for years to come.
Need some inspiration? You can see examples of our finished work in our online gallery.
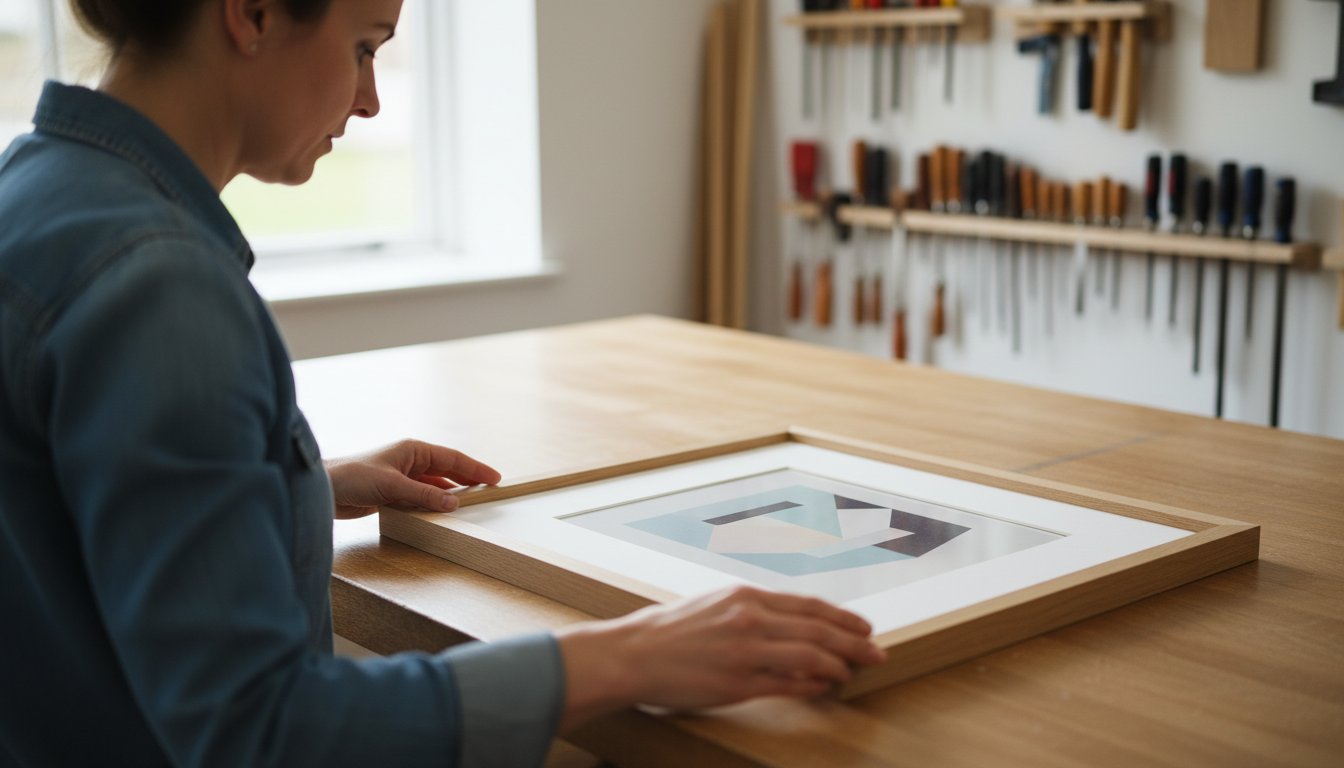
Step 3: Expert Craftsmanship & Collection
Once you’re happy with the design, our skilled framers get to work in our on-site workshop. We combine traditional techniques with modern precision to craft every frame to the highest standard. Our commitment to quality reflects the best practices advocated by bodies like the Professional Picture Framers Association (PPFA), ensuring a flawless finish. As soon as your bespoke Falkirk picture framing is ready, we’ll contact you. You’ll collect your artwork beautifully protected and ready-to-hang, complete with all necessary fittings.
Meet Your Local Falkirk Framers
At the heart of every great frame is a craftsman’s passion. Here in Falkirk, we are more than just a business; we are your local artisans, dedicated to the art of presentation. We believe that a frame does more than just hang on a wall-it acts as a bridge between your art and your living space, protecting memories and elevating aesthetics. Our workshop is a hub of creativity and precision, where traditional techniques meet modern technology. When you choose us for your Falkirk picture framing needs, you’re choosing a personal, dedicated service from experts who genuinely care about your art.
Our commitment extends beyond the workshop floor. We thrive on helping our clients bring their visions to life, offering friendly advice and creative solutions for everything from family photos to large-scale original canvases. Your satisfaction is the true measure of our success, and we take immense pride in every piece that leaves our studio.
Our Commitment to Quality Materials
A beautiful frame begins with exceptional materials. We meticulously source premium, sustainable woods and high-grade mouldings to ensure your frame not only looks spectacular but provides lasting durability. To truly protect your art, we exclusively use conservation-standard, acid-free mountboards that safeguard against discolouration and environmental damage. In our professional workshop, this commitment to quality is matched by our investment in precision equipment, guaranteeing flawless joins and perfect cuts every time.
Visit Us on Grahams Road, Falkirk
We warmly invite you to visit our workshop to see our craftsmanship firsthand and explore our extensive range of options. There is no substitute for seeing the textures and colours in person. We are conveniently located in the heart of Falkirk, and our friendly team is always on hand for a no-obligation consultation.
- Our Location: 47A Grahams Road, Falkirk, FK1 1LA
- Easy Parking: Convenient parking is available right outside the workshop.
- Opening Hours: We are open Monday to Friday, from 9:00 AM to 5:00 PM.
- Consultations: Walk-ins are always welcome! Come and chat with us about your project.
Planning your project has never been easier. Get directions or call us today to plan your visit and let’s create something beautiful together.
Your Memories, Perfectly Framed in Falkirk
As we’ve explored, choosing the right frame is an art in itself-a way to protect, enhance, and celebrate the pieces that matter most to you. From family photographs to fine art, the right bespoke frame transforms an item into a treasured display. The key is combining your personal style with expert craftsmanship and the highest quality materials to ensure your memories are preserved beautifully for years to come.
Our passion for exceptional Falkirk picture framing is built on a foundation of trust and expertise. With over 20 years of framing experience, we are dedicated to providing a service that is both personal and professional. In our local Falkirk workshop, you’ll find hundreds of frame and mount options and our promise to use conservation-grade materials as standard for every project.
Are you ready to see the difference professional framing can make? We invite you to visit our Falkirk workshop for a free, no-obligation framing consultation. Let’s work together to create something truly special.
Frequently Asked Questions
How much does custom picture framing cost in Falkirk?
The cost of bespoke framing is unique to each project, depending on the size of your artwork, the style of frame moulding, the type of mount, and the glass selected. A simple frame for a small photograph might start from around £40, while a large, intricate piece with conservation-grade materials could be £200 or more. We provide a complimentary, no-obligation quote during your consultation, ensuring we find the perfect, premium solution that beautifully suits your art and your budget.
How long does bespoke framing take?
Our standard turnaround time for bespoke framing is typically 7 to 14 days. This allows our skilled artisans the time to apply their meticulous craftsmanship to every detail, from cutting the materials to the final assembly. If you require your frame for a specific date or special occasion, please let us know. We will always do our best to accommodate your deadline without compromising the exceptional quality of our work.
Can you frame my own artwork, or do I have to buy a print from you?
Absolutely! We are passionate about framing the art and objects that are special to you. Whether it’s an original painting, a family photograph, a limited-edition print, or your child’s first masterpiece, we would be honoured to help you protect and display it. Our core service is providing expert Falkirk picture framing for your personal items. Simply bring your piece to our workshop, and we can begin designing its perfect new home together.
What’s the difference between standard glass and UV-protective glass?
Standard picture framing glass offers excellent clarity and protection from dust and handling. However, it does not block the harmful ultraviolet (UV) light that causes colours in artwork to fade over time. UV-protective glass is specially coated to filter out up to 99% of these damaging rays. We highly recommend it for preserving original art, signed prints, and any irreplaceable items, ensuring their vibrancy and value are protected for decades to come.
Do I need to make an appointment for a framing consultation?
While you are always welcome to visit our workshop, we do recommend booking an appointment for a framing consultation. Scheduling a time ensures you have our undivided attention to explore our wide range of beautiful frame and mount options. This dedicated time allows us to fully understand your vision and provide expert guidance, guaranteeing a relaxed, thorough, and inspiring design experience from the very start.
Can you help me frame something unusual, like a sports shirt or medals?
Yes, we specialise in creating stunning shadow box frames for all kinds of 3D objects and memorabilia. From football shirts and military medals to concert tickets and christening gowns, our bespoke service can preserve and display your most treasured memories. We use conservation mounting techniques to ensure your items are kept safe and secure, transforming them into a spectacular piece of wall art that tells a story.