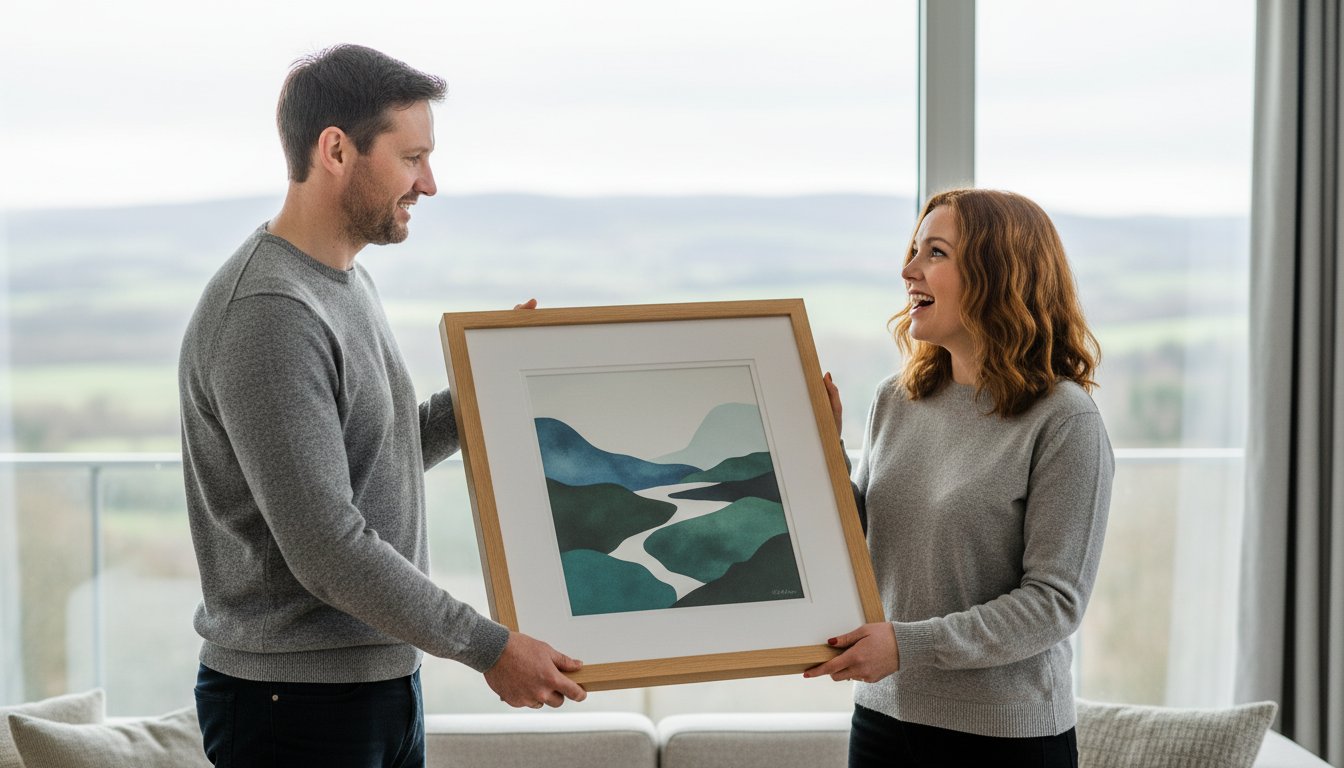
That signed shirt tucked away in your wardrobe isn’t just a piece of memorabilia; it’s a moment of sporting history frozen in time. Leaving it in a drawer or, worse, a cheap off-the-shelf frame is a risk you don’t have to take with such a precious item.
We know the thought of getting it framed can be daunting. You worry about needles, glue, or the colours fading behind the wrong type of glass. It’s a piece of your history, and the fear of it being damaged is completely understandable. This guide will show you exactly how our professional football shirt framing in Glasgow transforms your cherished jersey into a spectacular, gallery-grade display, ensuring its legacy is protected and beautifully showcased for decades. We’ll demystify the entire process, from choosing the perfect conservation materials to creating a bespoke design that does your shirt justice.
In the paragraphs that follow, we will walk you through our damage-free mounting techniques, explain the crucial differences in glazing for long-term UV protection, and reveal how our expert craftsmanship turns your sporting memories into a stunning work of art for your wall.
Key Takeaways
- Understand the crucial difference between a standard frame and a professional preservation system designed to protect your shirt’s fabric and signatures.
- Discover why off-the-shelf frames often fail to fit correctly and how a bespoke approach to football shirt framing glasgow provides a superior, gallery-grade finish.
- Follow a simple 3-step guide to prepare your shirt for framing, ensuring it looks its absolute best before the process begins.
- Learn what to look for in a professional football shirt framing glasgow service, from acid-free mounting to the deep-seated box frames that create a stunning 3D effect.
Why Professional Football Shirt Framing is an Investment, Not a Cost
That signed shirt from a cup final, the vintage top from a title-winning season, or the jersey your child wore for their first team. These aren’t just pieces of polyester; they’re tangible memories. Thinking of professional framing as a simple “cost” misses the point entirely. It’s a bespoke preservation system designed to protect both the financial and sentimental value of your memorabilia for decades to come.
This passion for iconic apparel isn’t limited to the sports field; it extends to the worlds of film and pop culture, where a t-shirt can be just as much a collector’s item. For those interested in high-quality designs from these fandoms, you can learn more about McLaren Tee Hub.
To see the care and technique that goes into this craft, the video below offers a great look at the professional process:
The temptation to use an off-the-shelf frame is understandable, but the long-term risks are significant. DIY framing often involves materials that actively damage your shirt over time. The cheap adhesives and acidic backing cards found in standard frames can cause irreversible yellowing and fabric decay. Signatures penned in marker can fade to invisibility within just a few years when exposed to direct sunlight without UV protection. For Glasgow fans with treasured Rangers, Celtic, or Scotland national shirts, these risks are too great. This is why a bespoke service for football shirt framing in Glasgow isn’t a luxury; it’s essential guardianship.
At First4Frames, we call our approach the “Gallery Difference.” We apply the same meticulous, fine art standards to sports memorabilia that we do to a priceless painting. Your shirt is handled with archival-quality materials and techniques, ensuring its story and condition are preserved perfectly.
Preserving Value and Sentiment
A professionally framed shirt is a protected asset. The market for an investment in sporting memorabilia has grown significantly, and a pristine, well-preserved item will always command a higher resale value than one that’s faded or damaged. Our methods focus on protecting delicate fabrics from the specific challenges of the Scottish climate, like moisture and dust. We use conservation-grade, acid-free mountboard and options for 99% UV-protective glazing to shield your memorabilia from the elements. In short, conservation framing is the gold standard for using archival-quality materials and reversible techniques to protect sports jerseys for future generations.
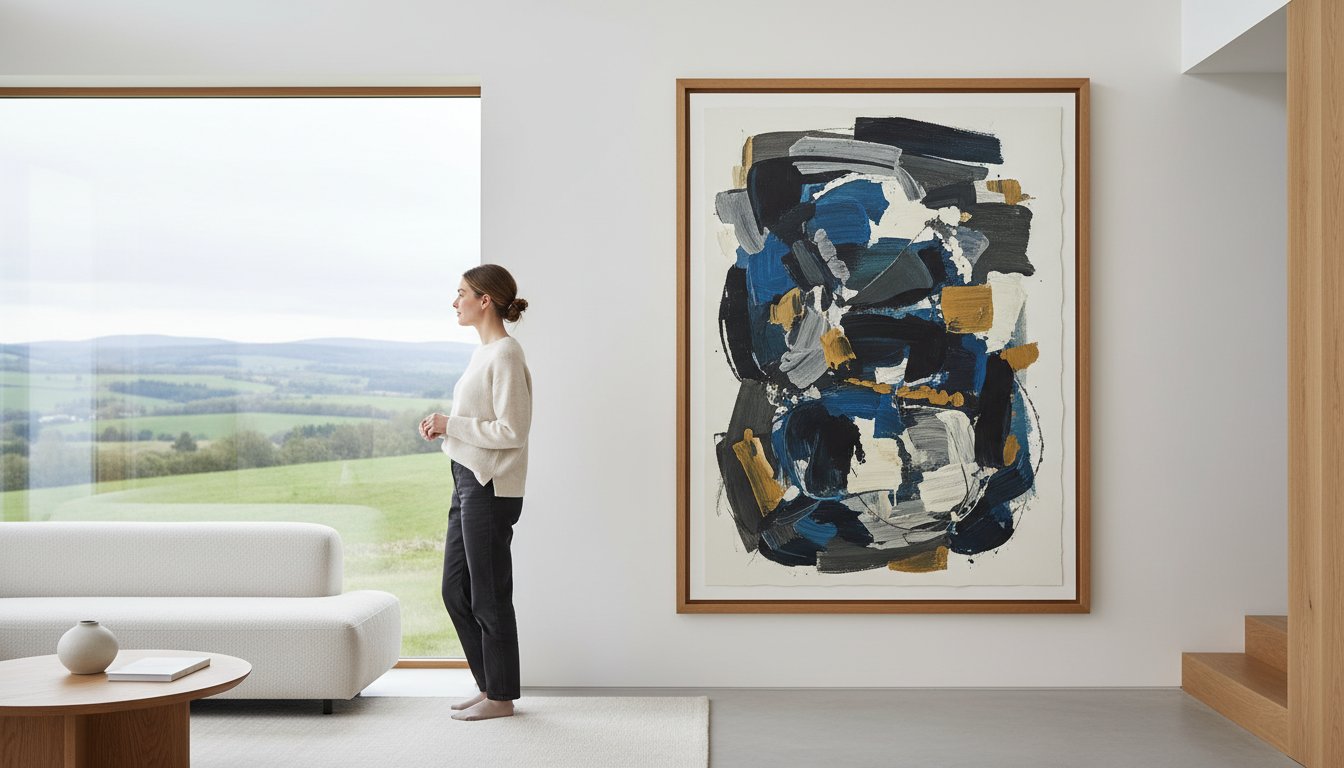
The Emotional Impact of a Gallery Display
Let’s be honest, that legendary shirt deserves better than the back of a wardrobe. A professional frame elevates it from a stored keepsake to a stunning centrepiece in your home or office. We see the frame as a beautiful “bridge” between your home décor and your sporting passion, integrating your history into your living space. We’ve had the privilege of turning a father’s match-worn Partick Thistle shirt from the 1970s into a cherished family heirloom for his son, and framing a young fan’s first signed Celtic top as a spectacular 18th birthday gift. It’s about honouring the memory and making it a visible part of your life.
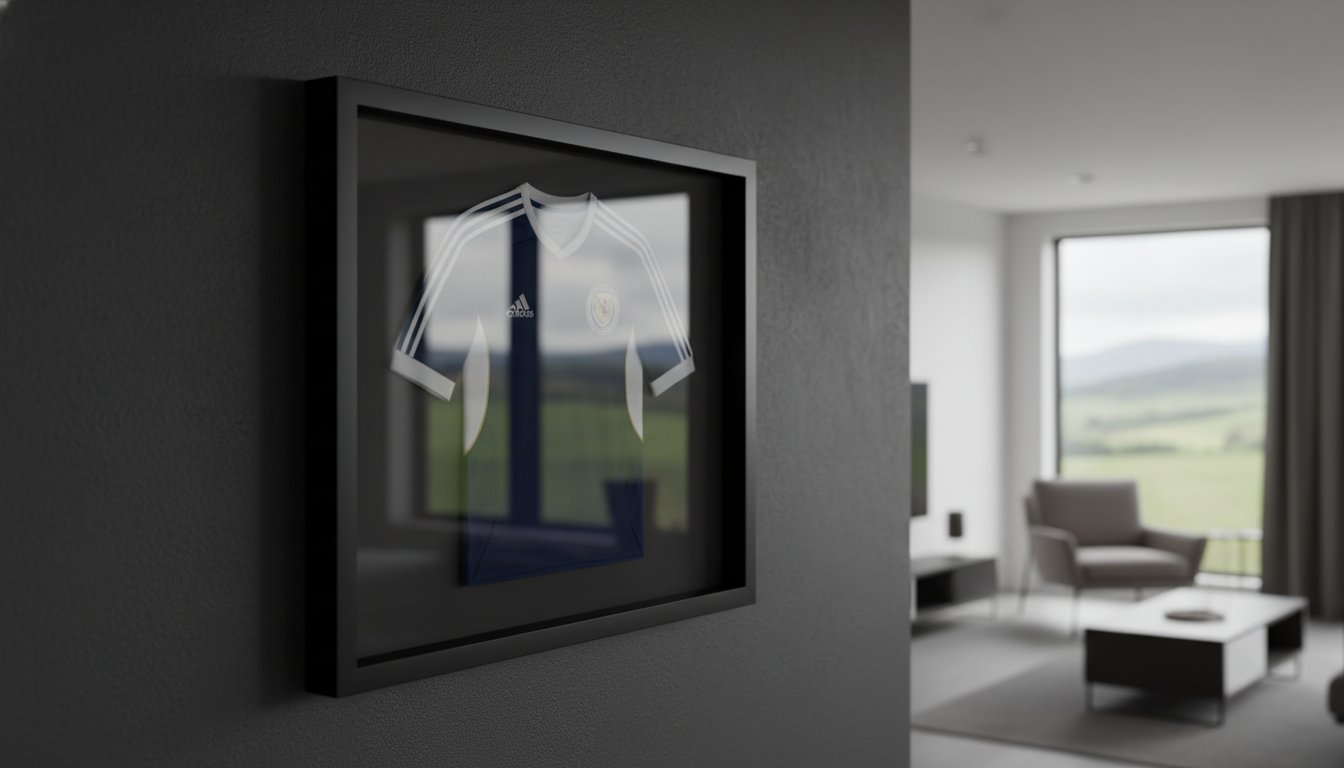
The Anatomy of a Gallery-Grade Sports Frame
There’s a world of difference between a standard clip-frame and a professional, gallery-grade display. One simply covers your shirt; the other preserves it. A truly bespoke frame is a meticulously engineered conservation system, designed to protect your memorabilia for decades. It’s not just a border. It’s a bridge to the memory itself, built from premium materials and expert craftsmanship.
The foundation of any quality display is a deep-seated box frame. This creates a crucial air gap, typically between 20mm and 40mm, between the fabric and the glazing. This space is vital. It prevents the shirt from being flattened against the glass, which can trap moisture and lead to mould growth, and it protects delicate elements like embroidered badges and vinyl player names from being crushed.
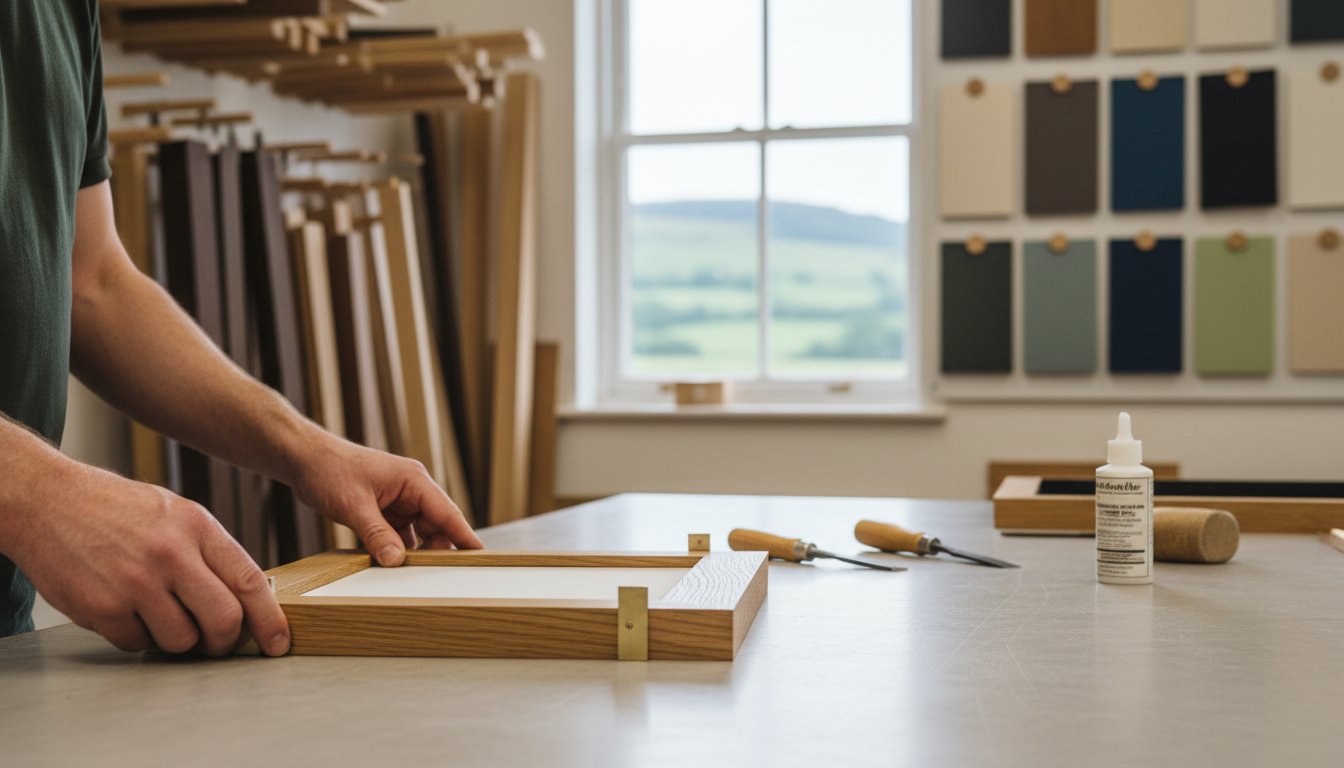
Behind the scenes, the materials we use are just as important. Every mount board we use is acid-free, with a neutral pH between 7.5 and 9.5. Standard cardboard contains a chemical called lignin, which degrades over time, releasing acids that cause the tell-tale yellow staining known as “mat burn” on fabrics and signatures. Our commitment to archival quality aligns with established preventive conservation guidelines for textiles, ensuring no harmful chemicals ever leach into your jersey’s fibres.
Crucially, our methods are 100% reversible. We will never use glue, tape, or staples on your prized possession. These shortcuts cause irreversible damage and destroy the value of a shirt. Instead, we carefully stitch the jersey onto its acid-free backboard using a fine, colour-matched cotton thread. This technique secures the shirt perfectly while ensuring it can be removed in the future in its original condition. This professional approach to football shirt framing in Glasgow allows you to tell a complete story, incorporating items like match tickets, photos, medals, or a custom-engraved plaque to capture the full context of that glorious moment.
Choosing the Right Glass for Your Display
The glazing is your shirt’s first line of defence. Sunlight is the single greatest threat to signatures and fabric colours, and choosing the right glass is non-negotiable for proper preservation.
- Standard Float Glass: A clear, basic option suitable for items in rooms with no direct sunlight.
- UV-Protective Artglass: This is our standard recommendation for any signed item. It blocks up to 99% of harmful ultraviolet rays, preventing the fading that can render a priceless signature invisible in just a few years.
- Anti-Reflective Glass: For the ultimate viewing experience, this ‘invisible’ glass reduces reflections to less than 1%. It ensures that annoying glare doesn’t get in the way of admiring every detail.
- Safety Glass (Acrylic): A shatter-resistant and lightweight alternative, perfect for high-traffic areas, commercial spaces, or a child’s bedroom.
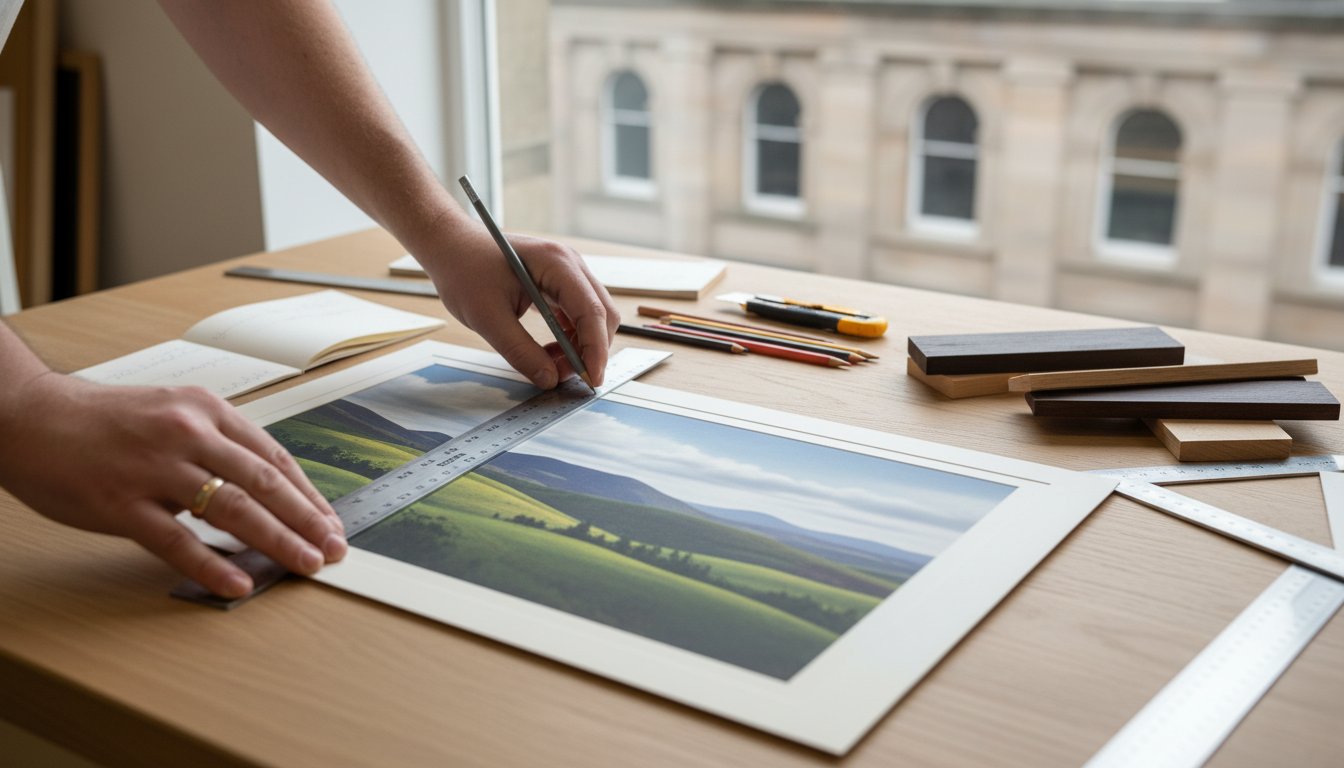
Bespoke Mounts and Colour Matching
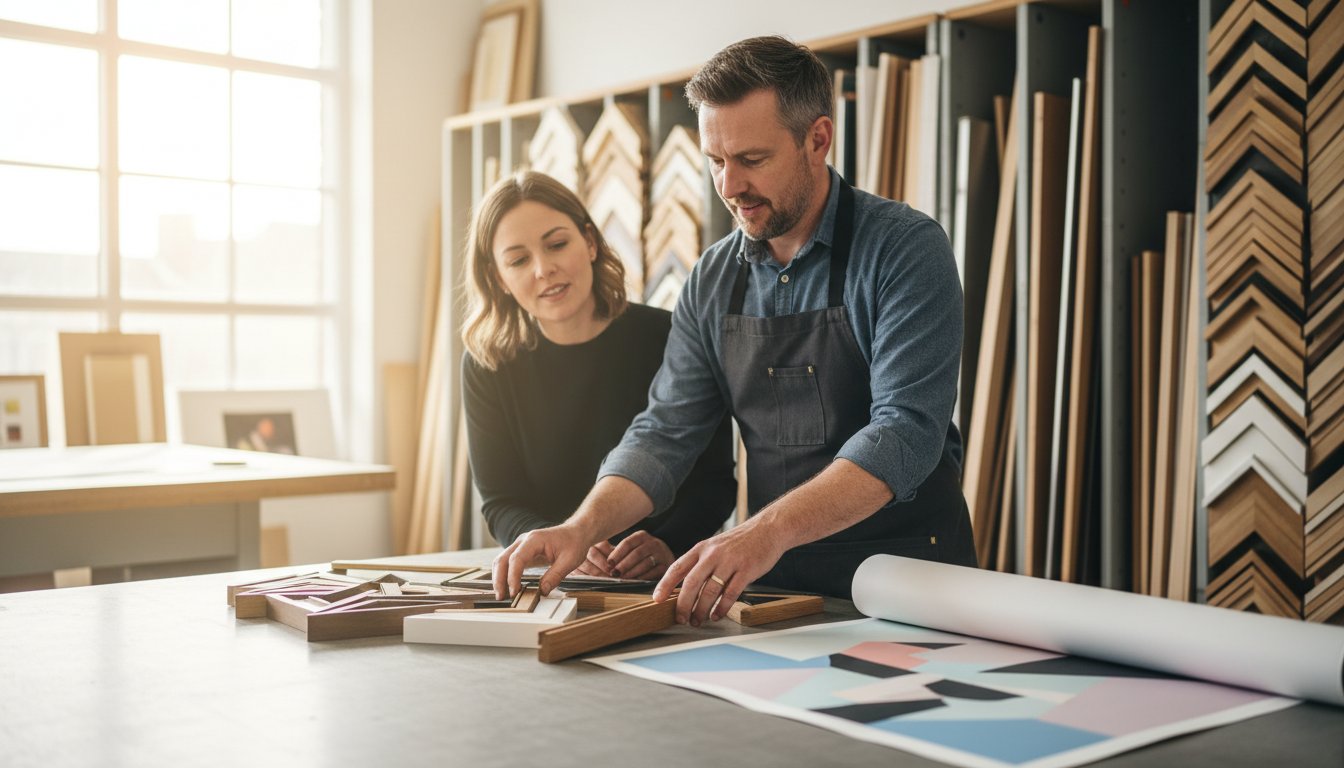
The mount is where artistry meets precision. We use computerised mount cutters (CMCs) to achieve flawless, crisp lines and create custom shapes that perfectly frame badges, sponsors, or sleeve patches. For a truly premium finish, a double mount adds incredible depth. By using a primary team colour for the main mount and a secondary colour for the narrow inner “reveal,” we make the shirt pop. We can even match the frame itself to the era of the shirt; a classic dark wood for a retro 1980s kit or a sleek, minimal black moulding for a modern jersey. Every detail is considered. You can see these principles in action by browsing our gallery of completed projects.
Glasgow Bespoke Framing vs. Off-the-Shelf Solutions
You’ve secured that treasured shirt, a piece of sporting history that means the world to you. The next step is displaying it. It’s tempting to search online, find a generic “shirt frame” for £40, and have it delivered tomorrow. We call this the “Amazon Trap”—a quick fix that often leads to long-term regret. An off-the-shelf frame is designed for a generic item, not your specific piece of memorabilia. It’s the difference between a tailored suit and one bought from a hanger; one is made to fit, the other forces the fit.
Your jersey is more than just fabric; it’s a story. Choosing the right frame is crucial to telling that story properly and preserving it for generations. Let’s break down why a custom solution is the only real choice for a valuable shirt.
The Problem with Standard Sizes
Football shirts are not standard. A 1990s Umbro top has a completely different cut, collar, and sleeve length than a modern, athletic-fit Castore jersey. A “one-size-fits-all” frame fails to account for this, leading to unsightly bunching around the shoulders or stretched fabric at the seams. The result is a display that looks amateurish and can even damage the shirt by putting stress on the material. With bespoke football shirt framing in Glasgow, we build the frame and mount around your specific jersey, ensuring a perfect, crease-free presentation every time.
Quality You Can Touch
When you visit our Falkirk gallery, you immediately feel the difference. Our frames are crafted from solid wood mouldings, not the flimsy plastic or compressed MDF that dominates the mass market. You can feel the reassuring weight and see the quality of the grain. This isn’t just about aesthetics; it’s about durability. Our frames won’t warp or discolour. It’s this commitment to premium materials that has earned us over 200 five-star customer reviews and makes us the preferred choice for Glasgow customers seeking true craftsmanship.
The value of speaking to an expert who understands the culture cannot be overstated. A framer who knows the significance of a Jota Champions League shirt or a classic ‘9-in-a-row’ jersey brings a level of passion and understanding to the project that an online checkout process simply can’t match. We treat your memorabilia with the reverence it deserves.
Ultimately, the choice comes down to a simple cost-benefit analysis. A cheap frame might save you £100 upfront, but it risks causing irreversible harm. Many off-the-shelf options use acidic backing boards that can yellow your shirt’s fabric within a few years. They often encourage using pins or adhesives that create permanent holes and stains. Our process, in contrast, uses acid-free, archival materials and reversible stitching techniques that align with professional conservation framing standards. This method ensures your shirt is not only beautifully displayed but also perfectly preserved. Spending more now is an investment that protects the financial and sentimental value of your shirt for a lifetime.
How to Prepare Your Shirt for Framing in 3 Steps
Transforming your treasured football shirt from a piece of memorabilia into a work of art is a journey we love to share. To ensure the final result is nothing short of spectacular, a little preparation goes a long way. Following these three simple steps will guarantee your shirt is ready for its bespoke frame, creating a perfect tribute to your sporting memories.
This process is the first chapter in your shirt’s new story. Let’s make it a great one.
Step 1: Inspect Your Shirt
Before any framing begins, take a moment to carefully inspect your shirt. Look for any small marks, grass stains, or loose threads. A match-worn shirt tells a story through its imperfections, and we can preserve that authenticity. However, if there’s a particular mark you’d prefer to hide within a fold, it’s crucial to identify it now. Check for the integrity of any signatures; if they are faded, we can use specialist UV-protective glass to prevent further deterioration. A quick 5-minute check ensures there are no surprises and that we display your shirt exactly as you envision it.
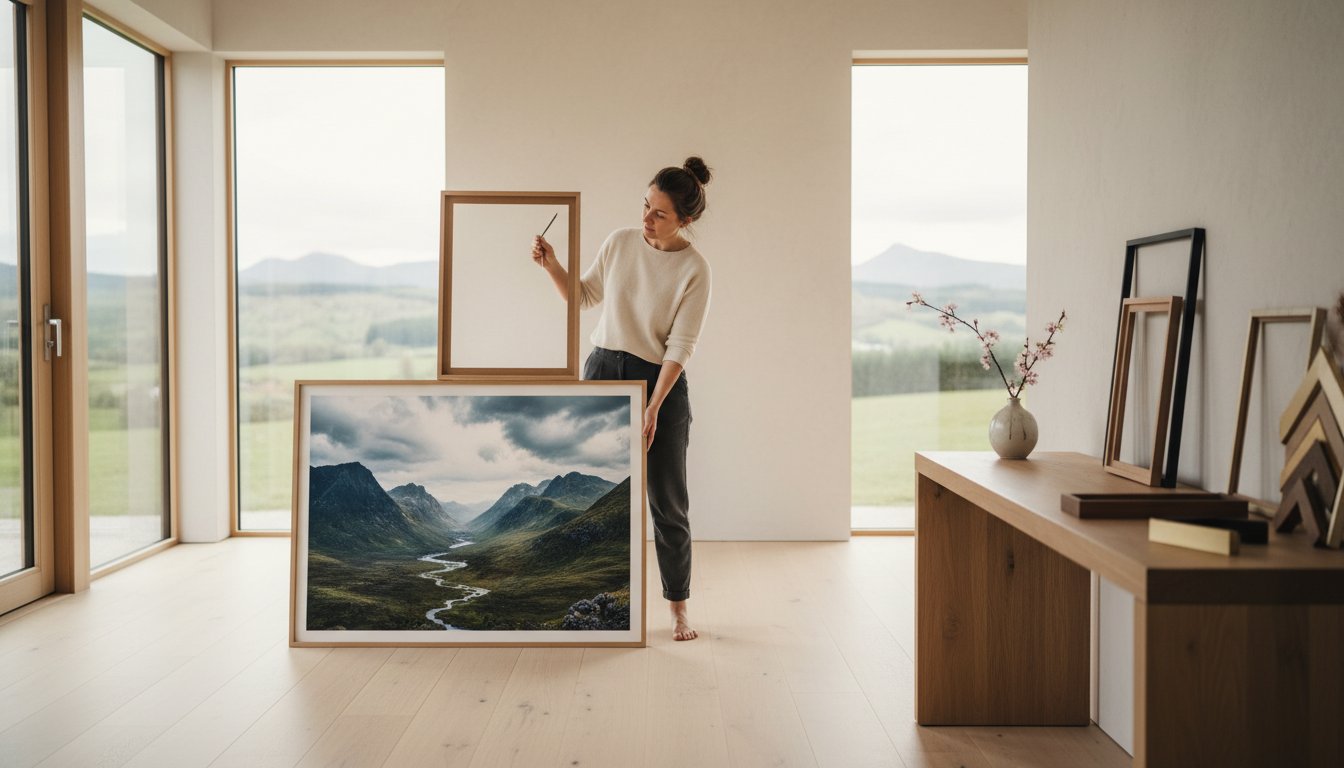
Step 2: Decide on Your Display Style
How do you want your shirt to look on the wall? This is where your personal taste comes to life. The two primary styles we offer provide very different aesthetics:
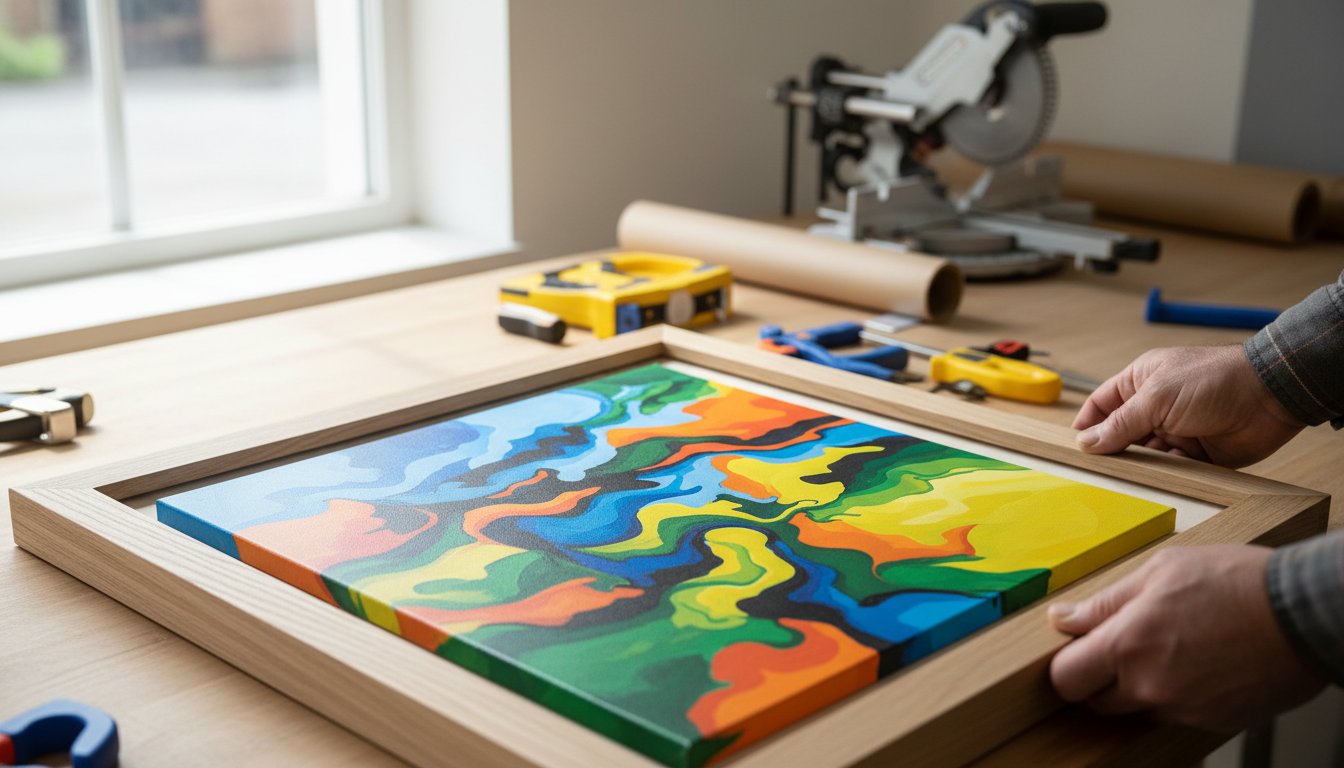
- The Flat Lay: This classic approach involves pressing the shirt and laying it flat against the mount board. It offers a clean, graphic look that is perfect for displaying the full shirt, including the sleeves. It’s an excellent choice for shirts with multiple signatures across the front and back.
- The 3D Form: For a more dynamic and lifelike presentation, we can mount the shirt on a custom-shaped form. This gives the jersey depth and body, making it appear as if it’s being worn. This style is incredibly effective for showcasing the player’s name and number on the back, giving it a powerful presence.
You also need to decide which side to feature. Do you want to showcase the iconic sponsor from a 1990s Celtic top, or is it the legendary “Gascoigne 8” on the back of a Rangers shirt that holds the magic? For those with a special pair of shirts, like a home and away top from a title-winning season, we can create stunning multi-shirt displays that tell an even bigger story.
Step 3: Gather Your Supporting Cast
A shirt is the star, but other items can complete the narrative. Think about what else tells the story of that specific match or season. Did you keep the ticket stub from the final? Do you have a photo of you or a family member at the game? Medals, programmes, or even a player’s signature on a separate card can be incorporated into the frame design.
Gathering these items beforehand allows us to design a truly bespoke layout. For clients seeking premier football shirt framing glasgow, bringing these extra elements to our Falkirk gallery allows our craftsmen to create a comprehensive and deeply personal piece of sporting history.
Finalizing the Details and Getting Here
The final touches are what elevate a framed shirt into a personal monument. Consider the text for a small, elegant plaque. We can include key details like the match, date, and final score (e.g., “Scottish Cup Final, Hampden Park, 25th May 2019”). Before you visit, it’s a great idea to measure your intended wall space. Use a tape measure to check the height and width available; this helps us recommend the perfect frame size for your room.
When you’re ready, transport your shirt safely. Fold it neatly and place it in a clean, dry bag. The journey from Glasgow to our Grahams Road gallery in Falkirk is straightforward, and taking this small step ensures your shirt arrives in perfect condition. Ready to start the process? Book your no-obligation consultation today and let’s preserve your legacy.
Why First4Frames Gallery is Glasgow’s Trusted Framing Partner
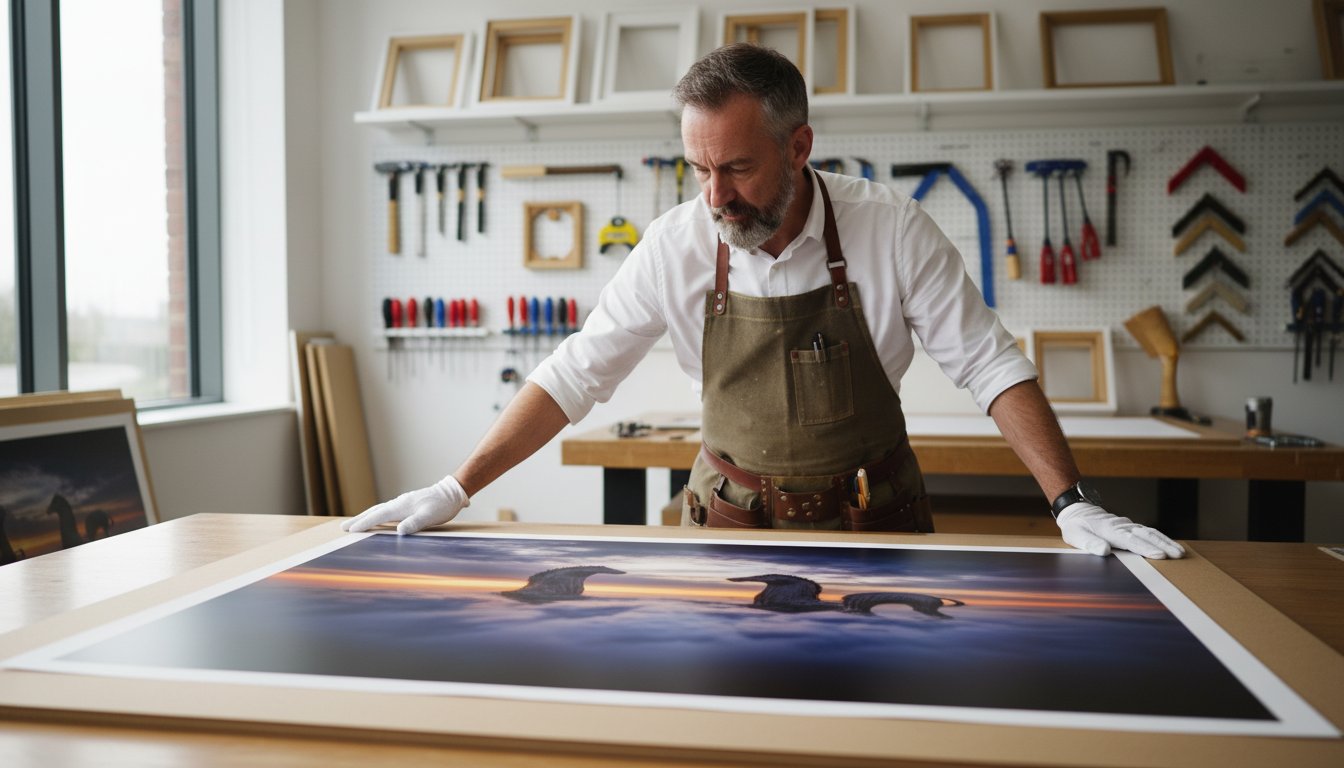
Choosing the right framer for your cherished football shirt is about more than just finding a service; it’s about entrusting a piece of your history to a true artisan. At First4Frames, we’ve spent over two decades earning the trust of art collectors and sports fans alike. Our unique identity as both a fine art gallery and a bespoke framing workshop gives us a perspective you won’t find anywhere else, blending artistic vision with technical precision.
Based in Falkirk, just a short and simple drive from the city centre, we offer a hassle-free experience for Glasgow residents seeking exceptional quality. We are proud to be a genuine “one-stop-shop” for all your wall art needs. This means you can browse our gallery for inspiration, get expert advice on conservation, and commission a completely bespoke frame, all under one roof. We make professional framing accessible and straightforward.
A Legacy of Excellence
Our roots are deeply embedded in the world of fine art. For over 20 years, we’ve collaborated with some of Scotland’s most celebrated artists, framing their work for major exhibitions and private collections. This experience isn’t separate from our memorabilia framing; it defines it. We apply the same museum-grade conservation principles to every project. This includes using acid-free mount boards to prevent discolouration and offering 99% UV-protective glass to stop signatures and colours from fading. We treat your shirt with the same care and reverence we would a Jack Vettriano original, because to you, it’s just as priceless.
This commitment to archival quality is matched by our reputation for a speedy, bespoke service. We understand you’re excited to see your memorabilia displayed, so we’ve perfected our process to deliver stunning results without unnecessary delays. Every frame is hand-built in our Falkirk workshop, tailored to your exact specifications, ensuring a perfect fit and a flawless finish for your prized jersey.
This unique blend of artistic sensibility and technical skill is what makes our approach to football shirt framing glasgow residents trust. We don’t just put your shirt in a box. We create a display that protects its value, enhances its visual impact, and serves as a timeless tribute to your sporting passion.
Start Your Framing Journey Today
The best way to appreciate the quality of our craftsmanship is to see it for yourself. We invite you to take the short drive from Glasgow to our Falkirk gallery. It’s a world away from a generic high-street framer. Here, you can feel the weight of our hundreds of premium mouldings, from classic hardwoods to sleek, modern profiles. You can see the difference between standard glazing and our anti-reflective museum glass, and discuss your vision with our expert team who live and breathe art and framing.
We’ll guide you through the exciting options to make your piece truly unique:
- Choosing the perfect mount colours to complement your team’s crest.
- Adding inset photos or ticket stubs to tell a richer story.
- Designing a custom engraved plaque to immortalise the match or season.
Ready to get started? Getting a bespoke quote is simple. Bring your shirt to the gallery, or contact us with your ideas, and we’ll provide a detailed, no-obligation estimate. Let us help you transform your treasured jersey into a spectacular centrepiece.
For inspiration and to see examples of our work, please explore our online gallery.
View our Memorabilia Framing Gallery
Give Your Sporting Legacy the Display It Deserves
Your football shirt is more than just fabric; it’s a collection of memories and a piece of sporting history. Choosing a bespoke, gallery-grade frame is an investment in preserving the colour, signature, and story of your shirt for decades. It’s the definitive step up from a standard, off-the-shelf solution that simply can’t offer the same level of protection or aesthetic quality.
At First4Frames, we bring over 20 years of expert craftsmanship to every project. Our passion for memorabilia preservation has made us the trusted choice for professional football shirt framing glasgow residents rely on, a fact backed by our excellent customer ratings. We are specialists in ensuring your prized jersey is protected from UV damage and presented perfectly.
Ready to transform your shirt from the back of the wardrobe into a stunning centrepiece for your home or office? Get a Bespoke Quote for Your Football Shirt Framing and let’s create something spectacular together.
Frequently Asked Questions
How much does it cost to frame a football shirt in Glasgow?
Our professional football shirt framing service starts at £120. The final price depends on your specific choices, including the frame style, mount colours, and type of glazing selected. Adding extras like custom plaques or photographs will also affect the cost. We provide a clear, no-obligation quote for every bespoke project, ensuring there are no surprises. This investment guarantees your treasured shirt is preserved with premium, conservation-grade materials for decades to come.
Will framing damage my signed football shirt?
No, our conservation framing methods are designed to protect your shirt, not harm it. We never use damaging glues, tapes, or staples. Instead, we use a specialised, reversible stitching technique onto an acid-free backboard. This process is completely safe for the fabric and any signatures. It ensures your shirt is held securely without causing any stress or permanent alteration, preserving its condition and value for the future.
How long does the bespoke framing process take?
The entire bespoke framing process typically takes between 10 and 14 working days from the moment you drop off your shirt. This timeframe allows our skilled craftsmen to give your memorabilia the meticulous attention it deserves. During peak periods, such as after a major tournament or cup final, this may be slightly longer. We will always give you a precise completion date when you place your order with us.
Can you frame other sports items like rugby shirts or medals?
Yes, we can frame a wide variety of sporting memorabilia. While football shirts are a speciality, our team has over 20 years of experience framing rugby jerseys, cricket bats, marathon medals, running vests, boxing gloves, and more. Our 3D box frames are perfect for displaying bulkier items. If you have a unique piece of sporting history you want to preserve, bring it in and we’ll design the perfect display solution for it.
Do you offer UV-protective glass for sports frames?
Absolutely. We highly recommend upgrading to our 99% UV-protective conservation glass for any signed or valuable memorabilia. This premium glazing is essential for preventing the fading of signatures and fabric colours caused by prolonged exposure to natural and artificial light. It acts as a vital shield, ensuring your shirt’s vibrant colours and the player’s autograph remain sharp and clear for years, protecting your investment.
Is it better to show the front or the back of the football shirt?
The best way to display your shirt depends entirely on its key features and your personal preference. If the shirt has a prominent signature on the front, we recommend showing that side. However, if it’s a classic shirt famous for the player’s name and number, displaying the back creates a spectacular visual. We can discuss the options with you to help create the most impactful and meaningful display for your specific shirt.
Can I include photos and a plaque in my football shirt frame?
Yes, adding photos and a custom plaque is a fantastic way to elevate your display and tell a richer story. We can incorporate match day tickets, certificates of authenticity, or your favourite photos alongside the shirt. We also offer custom-engraved metal plaques to detail a specific match, player achievement, or a personal message. These bespoke elements transform your framed shirt into a truly unique piece of personal history.
Where is your gallery located for Glasgow customers?
Our workshop and gallery are conveniently located in the Finnieston area of Glasgow, making it easy for you to drop off your shirt and discuss your framing options in person. We invite you to visit us to see examples of our craftsmanship and browse our extensive range of frame and mount choices. It’s the perfect place to get inspired for your own **football shirt framing in Glasgow** and see the quality we deliver first-hand.