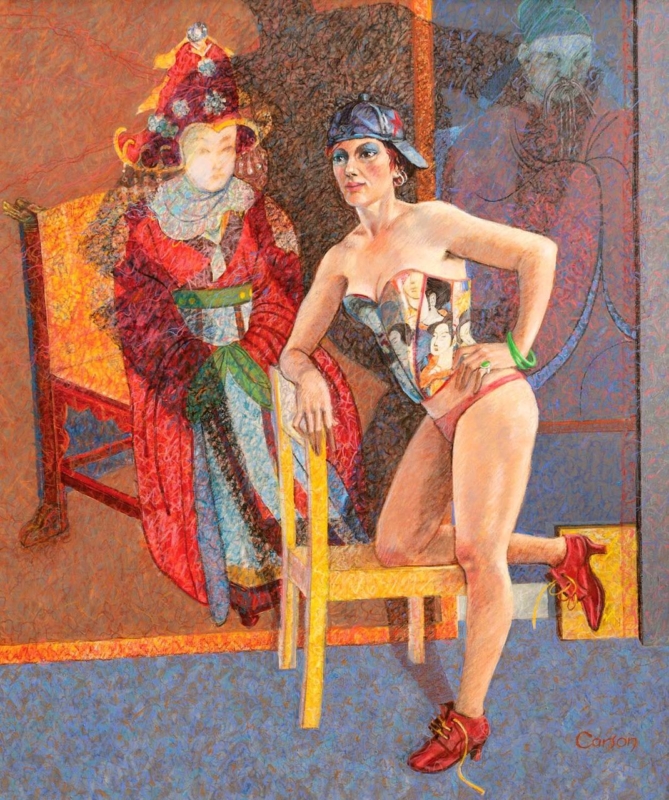
Portrait wall art for a reading alcove can make a small corner feel intentional without taking useful space from books, lighting, or a comfortable chair. Eastern Princess by Fred Carson has a compact portrait format that suits a narrow wall. Its figurative presence gives the alcove a point of character beyond the shelves themselves.
Position portrait wall art for a reading alcove at seated eye level
Use the view from the chair
Sit down before marking the wall. The artwork should be comfortable to look at without craning upward. If it hangs beside the chair, keep enough distance from the lamp and shelving for its outline to stay clear.
A reading corner often collects objects quickly: stacked books, bookmarks, a side table, and a lamp all add visual information. One focused artwork is usually stronger than several small prints in this setting. It gives the eye somewhere to rest when a page is put down.
Keep the lower frame edge clear of the chair back.
Check that the reading lamp illuminates pages without reflecting in the glazing.
Use one nearby colour echo rather than matching the whole palette.
Leave the adjacent shelf arrangement simple.
The artwork should define the pause between chapters, not compete with every book on the shelf.
Give the compact portrait a precise outer edge
A smaller work relies on clarity. Colour-managed Giclée reproduction protects the relationship between figure, colour, and background, while bespoke framing supplies enough definition to hold the wall. First 4 Frames completes the presentation by hand in its Falkirk workshop.
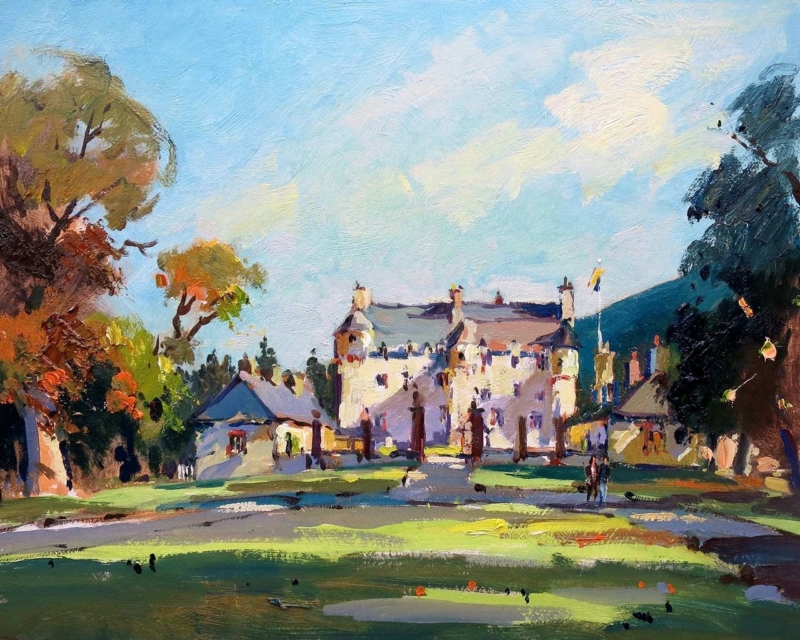
Scottish heritage wall art for a traditional study works best when the subject brings real history but the room remains comfortable for present-day use. Traquair House, Early Autumn by Joseph Maxwell Stuart offers architecture, landscape, and early autumn atmosphere together. It can sit naturally with books and timber without requiring tartan accessories or staged antiques.
Balance Scottish heritage wall art for a traditional study with the room
If the study is dark
Use a lighter mount and leave clear wall around the frame. Place the work near the reading zone, but angle lamps so reflected bulbs do not obscure the house or landscape.
If the study is pale
A deeper frame can connect the picture with a desk or bookcase. Repeat one autumn colour in leather, wool, or a single object rather than throughout the room.
The artwork can work above a low cabinet, beside a reading chair, or on the wall opposite the desk. Do not force it into a narrow shelf gap. The architecture needs enough breathing space to feel like a destination rather than another item catalogued among the books.
Keep the heritage reference current
Pair the framed print with useful contemporary lighting and clear work surfaces. The historical subject then adds depth while the room remains practical, personal, and easy to use.
Keep architectural and autumn detail distinct
Stone, foliage, and soft seasonal light require tonal control. Colour-managed Giclée production preserves those relationships, and bespoke hand finishing gives the print a substantial presentation suited to a book-lined room. All of that work is completed in-house in Falkirk.
As Scottish heritage wall art for a traditional study, Traquair House, Early Autumn adds history and atmosphere while leaving the room grounded in everyday life.
Winter tree wall art for a minimalist hallway can stop a pared-back entrance feeling stark without filling it with extra furniture. Winter Trees by Rikki O’Neill introduces natural rhythm in a compact square format. It adds something to pause over while allowing the route through the home to remain visually clear.
Let winter tree wall art for a minimalist hallway provide the detail
Start with the quietest wall
Choose the wall seen on arrival or at the end of the passage. A compact work needs enough viewing distance to register as a complete composition. Avoid placing it among switches, alarms, and crowded coat hooks.
Repeat shape, not decoration
Use the branches and vertical forms as a cue for one slim lamp, a simple bench, or narrow timber detailing. There is no need to add baskets of logs, artificial leaves, or woodland ornaments. Restraint allows the image to carry the natural reference by itself.
Stand at the front door and identify the first clear sightline.
Mark the square outline with removable paper.
Walk the hallway to confirm shoulder clearance.
Test evening light for glare before hanging.
Use framing to give a small work enough definition
A compact image can disappear if its presentation is too tentative. A carefully judged mount and frame create separation from the wall, while colour-managed Giclée production keeps the finer contrasts of the trees visible. First 4 Frames completes that work by hand in its Falkirk workshop.
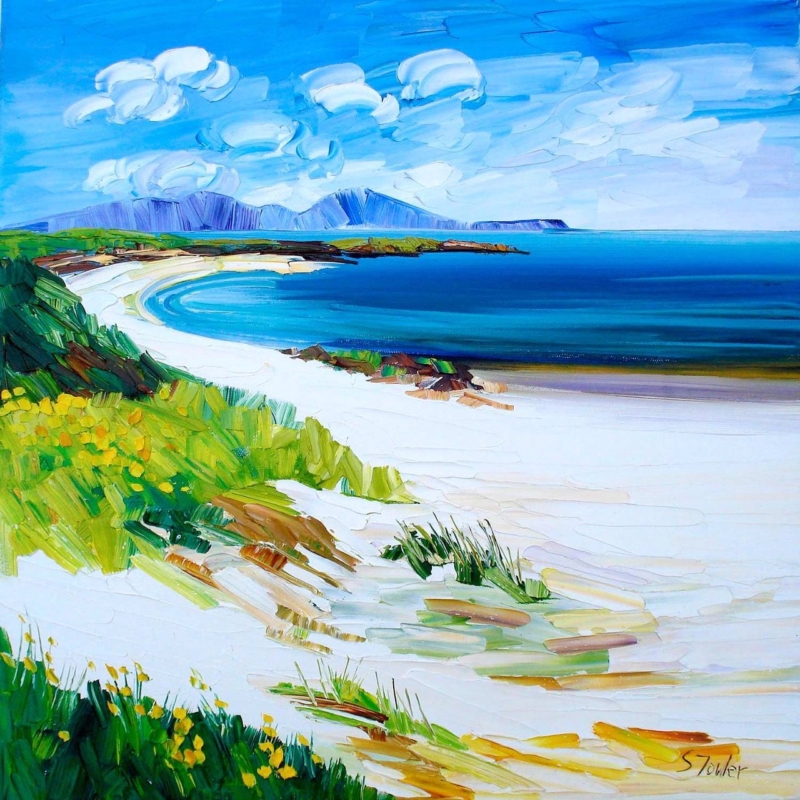
Square coastal wall art for a small dining area can create a sense of openness without requiring a long, uninterrupted wall. Traigh Iar, North Uist by Sheila Fowler brings the atmosphere of North Uist into a balanced square format. That proportion is especially useful beside a compact table, between doorways, or above a narrow side cabinet.
Size square coastal wall art for a small dining area from the table
What to check
Why it matters
Seated sightline
The picture should read comfortably across the table rather than feeling hung for people who are standing.
Wall width
Leave visible wall at both sides so the square shape looks deliberate.
Chair clearance
Keep the lower edge beyond the reach of chair backs and passing shoulders.
Window reflection
Check the glazing at breakfast and in evening light before fixing the final position.
A coastal subject can visually extend a tight corner, but it should not trigger a full seaside theme. Let the artwork provide the location and atmosphere. Plain ceramics, timber, linen, and one restrained blue or green accent are enough to connect it with the room.
A small dining space benefits from visual distance, not from more decorative objects competing for its limited surfaces.
Preserve the coastal colour in changing dining light
Coastal tones can lose their separation when reproduction is uncontrolled. Colour-managed Giclée printing keeps subtle shifts clear, while bespoke in-house framing gives the square composition a confident outer edge. The available sizes also allow the wall, not a standard assumption, to determine the final scale.
As square coastal wall art for a small dining area, Traigh Iar, North Uist supplies space, place, and a polished focal point without overcrowding the room.
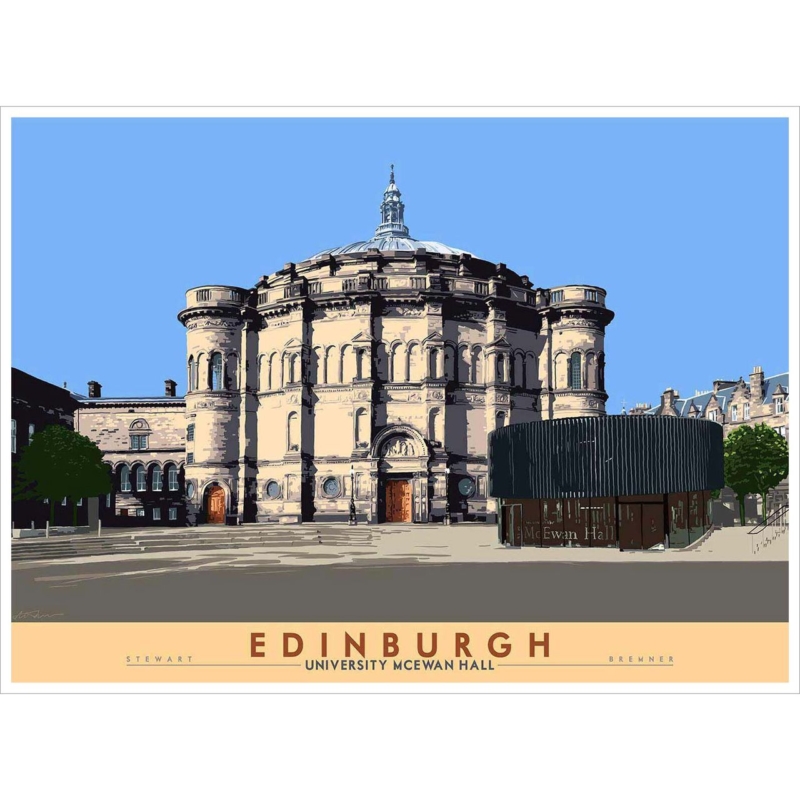
Edinburgh graduation wall art gift ideas feel more personal when they recognise the setting as well as the qualification. Edinburgh: University McEwan Hall by Stewart Bremner centres on a building closely associated with university ceremonies. It therefore carries a specific memory that a generic congratulatory print cannot provide.
Choose an Edinburgh graduation wall art gift with a lasting connection
For a new graduate
The framed print can move from a first flat to a later home without losing its meaning. It marks a real place, yet it does not need names, dates, or novelty wording to remain relevant.
For an alumnus
Given later, the same subject can reconnect someone with ceremonies, friendships, and years spent in Edinburgh. That makes it suitable for a milestone birthday or career change too.
Consider where the recipient is likely to display it. Above a desk, the architecture can quietly recall work already completed. In a hallway or sitting room, it becomes a conversation about Edinburgh rather than an overtly academic display. Leave enough clear wall around the horizontal composition, especially at the larger available size.
Choose the size by measuring the actual wall, not by guessing from a screen.
Relate the frame to one established furniture tone.
Add a handwritten message separately, so the artwork itself stays timeless.
Keep certificates nearby only if the arrangement has enough breathing space.
Give the graduation memory a properly finished presentation
Architectural detail rewards precise reproduction. First 4 Frames uses colour-managed Giclée production and completes the framing in-house in Falkirk. The hand-finished result gives the gift suitable substance while keeping the subject, rather than the occasion, at the centre.
As an Edinburgh graduation wall art gift, Edinburgh: University McEwan Hall combines memory, place, and everyday display value in one considered piece.
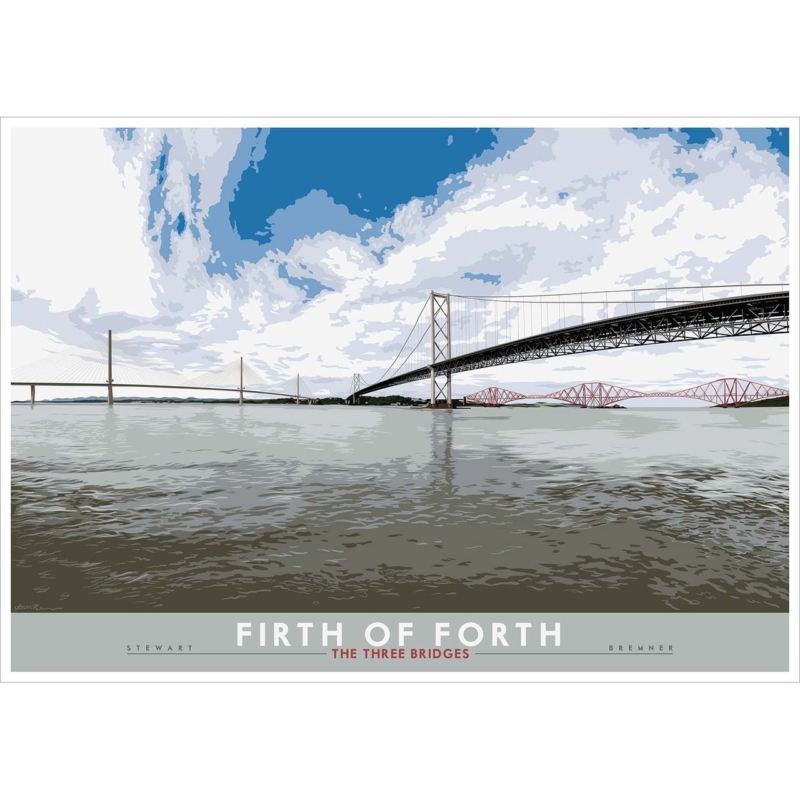
wall art for a civil engineering office can reflect the discipline’s combination of analysis, scale, and public purpose without turning the workplace into a display of technical diagrams. Firth of Forth: the Three Bridges by Stewart Bremner offers a clear alternative. It brings three generations of bridge design into one broad view. This gives a Scottish practice or project team a strong sense of place and an immediate architectural subject.
Why wall art for a civil engineering office should feel relevant
Generic office art may fill a blank wall, but it rarely says much about the people working there. A recognisable feat of infrastructure creates a more meaningful connection. The bridges can prompt conversation with visitors, graduates, and project partners. Meanwhile, calm water and open sky stop the subject from feeling like another working document.
This image is especially useful because the three structures are visible together. Their different profiles show how engineering answers evolve with materials, transport needs, and construction methods. The artwork does not need explanatory text to communicate that progression. Its strong silhouettes make the idea clear from across the room.
Choose the wall according to how the office is used
Office location
What the artwork contributes
Placement check
Client meeting room
A confident local talking point
Keep it visible from the main seats
Open project area
A visual horizon beyond screens and plans
Avoid monitor glare on the glazing
Reception
An immediate link to Scottish infrastructure
Relate the frame to the desk width
Partner’s office
A composed subject with professional relevance
Leave clear space around the finished frame
Avoid placing the picture in a crowded print zone beside pinboards, safety notices, or project programmes. Those materials change regularly and ask for close reading. Give the artwork its own wall section, where it can offer distance and visual rest. That pause is particularly valuable in a workspace filled with detailed information.
Use the landscape format to create a clear horizon
The print is available at 594 x 420 and 840 x 594 millimetres before framing. Both sizes have a generous horizontal emphasis. The smaller option may suit a private office or compact meeting room. The larger can hold a substantial wall in reception or a shared studio, provided there is enough surrounding space.
Judge the finished dimensions against nearby furniture rather than the empty wall alone. Above a credenza or meeting-room console, the frame should relate comfortably to the width below it. On a freestanding wall, use a paper template to check the view from the entrance and the seats used most often.
Connect the palette to architectural materials
Slate grey water, pale cloud, blue sky, and restrained red make the image easy to use with common office finishes. Grey carpet tiles and white walls gain a clearer focal point. Black metal furniture can connect to the dark road bridge. One small red detail can echo the rail bridge without turning the room into a branded colour exercise.
A slim black frame can reinforce the graphic outlines and suit a contemporary fit-out. A natural timber moulding can introduce warmth where glass, metal, and technical furniture dominate. Whichever direction you choose, avoid an unnecessarily heavy frame. The broad sky and water are part of the composition’s calm, and the presentation should preserve that openness.
From strong graphic design to careful in-house framing
First 4 Frames uses colour-managed Giclée production and completes bespoke framing in-house in Falkirk. That quality-led approach keeps the fine bridge lines clear and gives the finished piece enough presence for a professional setting. For wall art for a civil engineering office with structural interest and a genuine Scottish connection, view the framed Firth of Forth: the Three Bridges print.
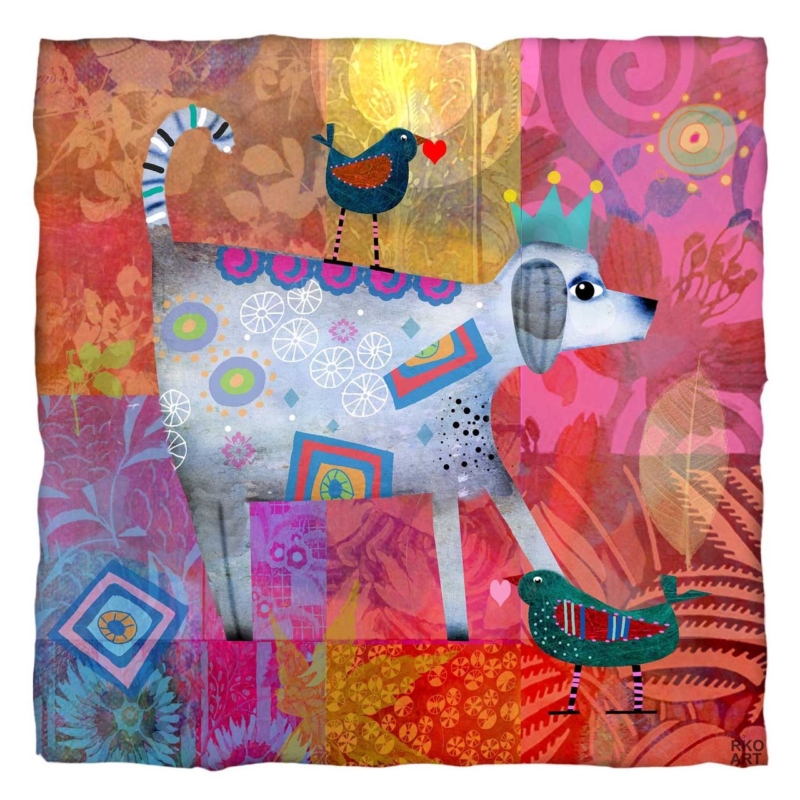
colourful wall art for a dog grooming salon can help a practical reception area feel friendly before a customer reaches the desk. The right piece should celebrate dogs without relying on slogans or making the room look like a collection of pet accessories. Doggie by Rikki O’Neill offers a useful balance. Its crowned dog, patterned coat, small birds, and rich patchwork colour give the business personality while remaining a complete, self-contained composition.
Why colourful wall art for a dog grooming salon matters
Owners may arrive with a wet, nervous, or excitable dog. They need the space to feel organised, but not clinical. Artwork gives the eye a positive place to settle while staff confirm an appointment or discuss a coat. A cheerful image can also make the reception feel more individual than a room furnished only with wipe-clean surfaces and product displays.
Doggie is clearly connected to the business, yet it avoids a literal grooming scene. The pale dog has a wonderfully alert expression, while the tiny crown and surrounding birds introduce gentle humour. Layered leaves, circles, stripes, and blocks of pink, red, blue, and gold keep the square image interesting without requiring several separate decorations.
Choose a position that remains practical
A salon wall has to work hard. Leads, coats, retail shelves, appointment boards, and cleaning stations all need clear positions. Place framed art where customers can see it, but away from a dog’s first shake after coming in from the rain. The wall behind a reception desk, above a low bench, or beside the collection point can work well.
Check the queueing route. Keep the frame away from corners where leads and bags may brush against it.
Avoid the busiest work zone. Steam, spray, loose hair, and repeated cleaning make the grooming area less suitable than reception.
Use secure fixings. A commercial space needs a stable installation appropriate to the wall construction.
Test the customer view. Sit on the waiting bench and stand at the desk before settling the final height.
Let one square image organise the colour
The available print size is 265 x 265 millimetres before framing. That compact square format suits a smaller reception, a narrow wall beside the desk, or a defined section above a bench. It can provide a clear focal point without using wall area needed for notices and practical information.
There is no need to copy every colour in the artwork. Choose one or two quieter notes for the room. A blue chair, a coral planter, or a warm timber counter can make a connection. Keep retail packaging and notice holders visually ordered, so the layered image feels lively rather than adding to general busyness.
Match the frame to the salon, not to the novelty
Salon finish
Useful framing direction
Result
White walls and pale flooring
Warm timber or a restrained coloured edge
Adds warmth without losing freshness
Dark reception desk
Slim dark moulding
Connects the art to the fitted furniture
Bright brand colours
Simple neutral frame
Prevents the scheme from competing
Natural, calming interior
Light timber
Softens the vivid patchwork palette
Avoid choosing a highly decorative frame simply because the subject is playful. The illustration already supplies pattern and humour. A well-proportioned moulding gives it a clear boundary and helps the result feel like professional artwork rather than a temporary shop sign.
A friendly detail with a professional finish
First 4 Frames produces colour-managed Giclée prints and completes bespoke framing in-house at its Falkirk workshop. That hand-finished presentation is useful in a customer-facing business. It supports the many fine patterns and bright colour shifts while giving the piece a clean, ready-to-display finish.
What if the reason your picture hangs crooked has nothing to do with your wall hooks? You can measure meticulously, but if hanging wire has slackened or factory brackets are misaligned, your artwork will inevitably tilt forward or drift off-centre. Learning the craft of adjusting the hanging hardware on a frame is the true secret to keeping any piece sitting securely and beautifully flush against the wall.
We know how frustrating it feels when a treasured print refuses to hang straight, especially when cheap fittings threaten to split delicate moulding or fail under the weight of authentic glass. In this guide, you will discover how to safely reposition D-rings, balance wire tension, and calculate proper weight support for your favourite pieces. Here is our practical, step-by-step walkthrough to achieving a secure, perfectly level finish every single time.
Key Takeaways
Understand the mechanics of D-rings, heavy-duty strap hangers, and wire tension to protect your walls and eliminate frame drift.
Master adjusting the hanging hardware on a frame using the proven one-third measurement rule to keep your artwork balanced and completely flush.
Safely calculate weight distribution for substantial timber profiles glazed with authentic 2mm float glass rather than lightweight synthetic alternatives.
Discover when to save time by choosing bespoke, ready-to-hang wall art fitted with workshop-grade hardware tailored specifically to your piece.
Identifying Frame Hardware: D-Rings, Wire, and Brackets Explained
Every well-crafted display relies entirely on what sits hidden behind the moulding. Before adjusting the hanging hardware on a frame, you need to understand the mechanical role each fitting plays. Proper selection protects your plasterwork, maintains level lines, and ensures your artwork hangs safely for years. As professional framers know, accurate hardware placement prevents tilt and structural frame joint separation entirely. Investing time in fitting the right components to your bespoke picture frames safeguards both your walls and your art.
Common Hardware Types and Their Ideal Weight Capacities
Different frame profiles and glazing weights demand specific load-rated fittings:
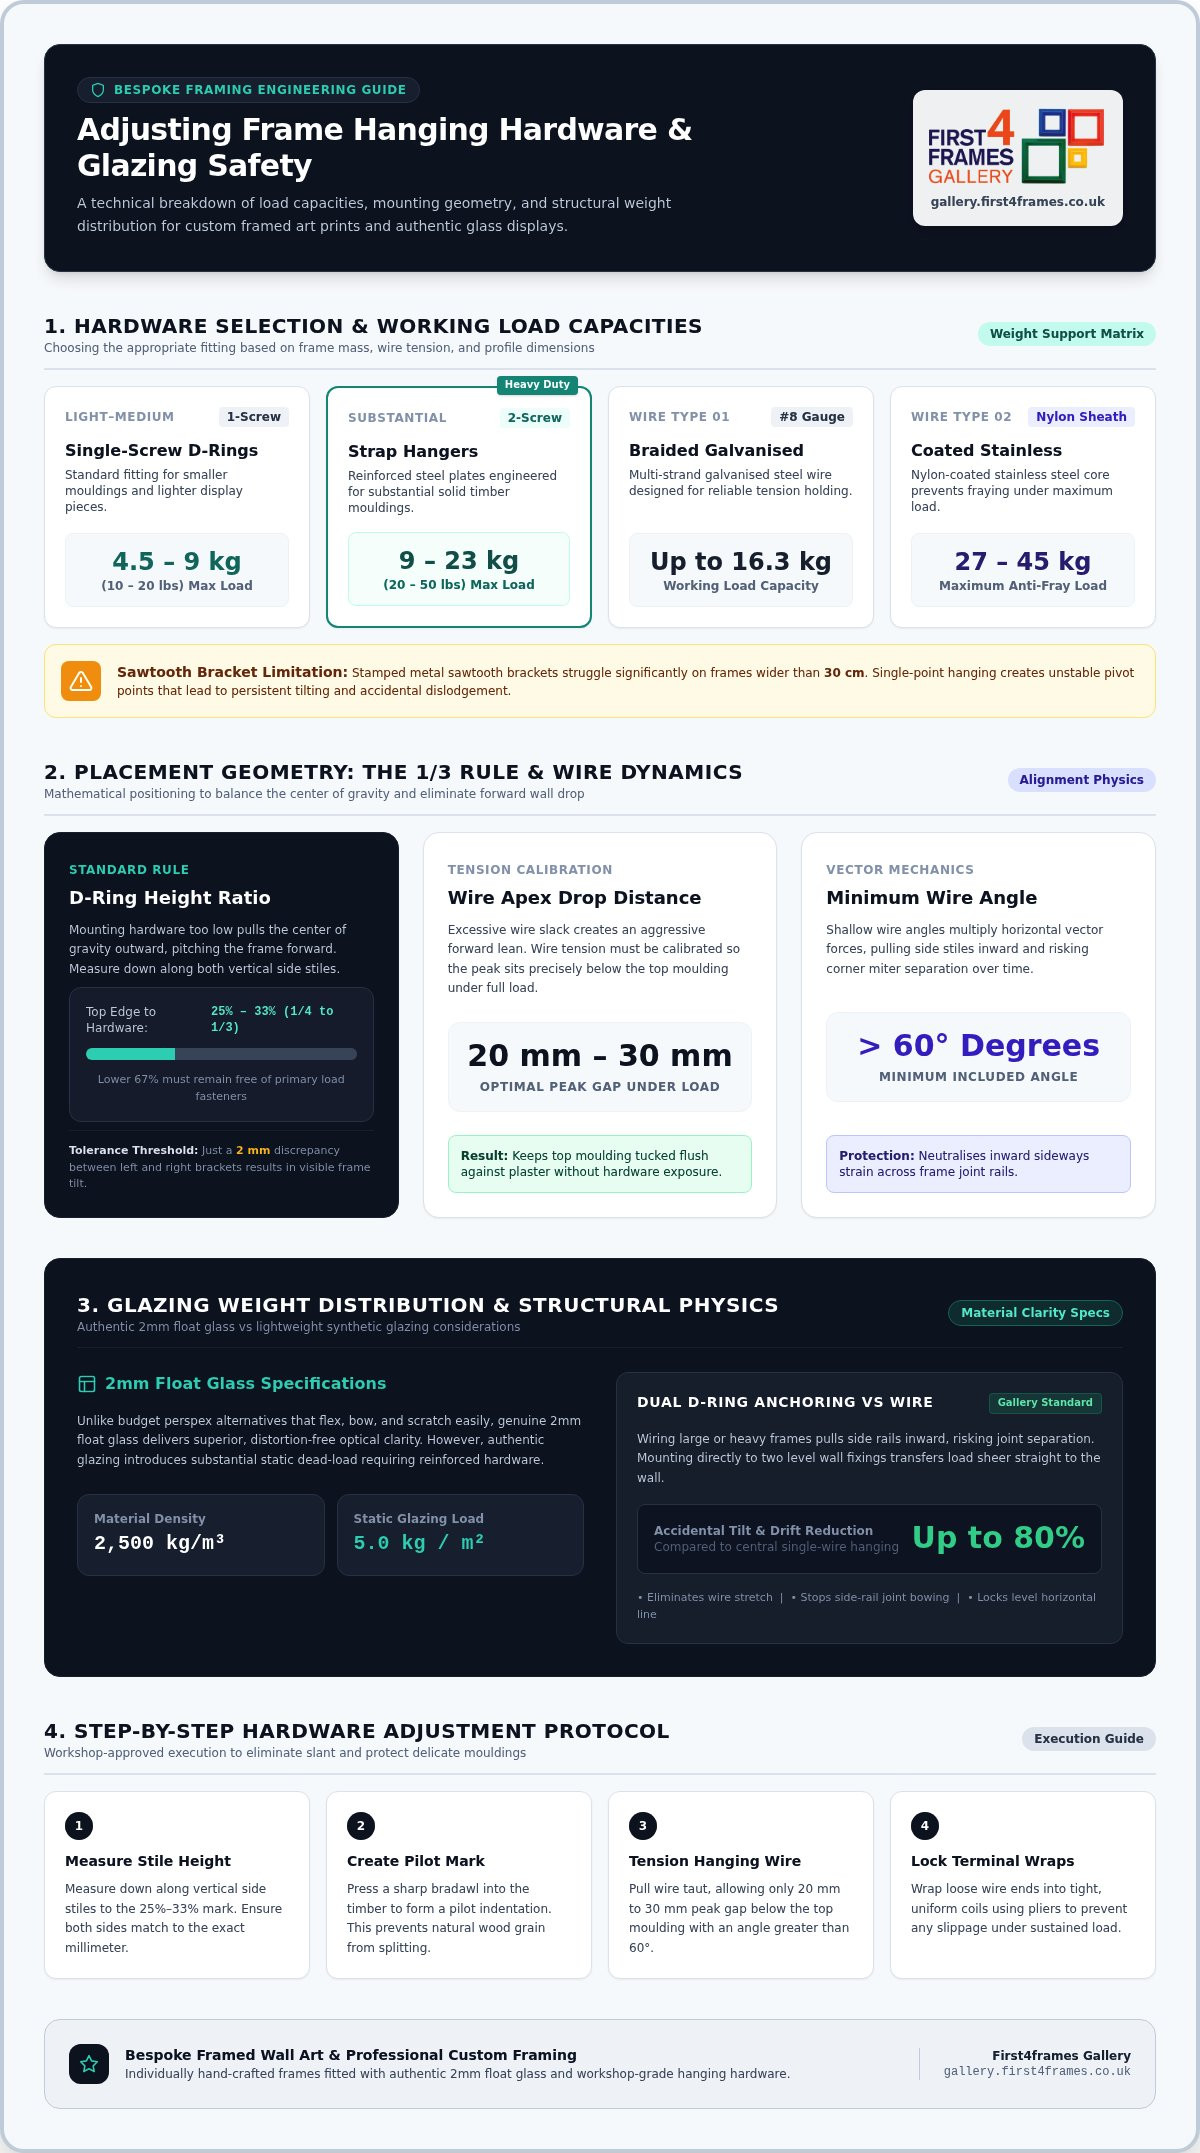
Single-screw D-rings: Rated for small to medium pieces weighing up to 4.5-9 kg (10-20 lbs).
Two-screw heavy-duty strap hangers: Ideal for substantial wooden mouldings, safely bearing 9-23 kg (20-50 lbs).
Braided vs. plastic-coated steel wire: Braided galvanised wire supports working loads up to 16.3 kg (#8 gauge), while nylon-coated stainless steel supports 27-45 kg without fraying.
Sawtooth brackets: Stamped metal brackets struggle on pieces wider than 30 cm, as single-point hanging causes unstable pivot points.
Budget off-the-shelf mouldings often rely on pressed tin loops or tiny nails tapped into soft composite backing. Over time, downward tension forces these weak fasteners loose, risking wall gouges or catastrophic falls. Misaligned factory brackets also guarantee persistent tilting, as even a two-millimetre height discrepancy produces a noticeably crooked picture. For lasting stability, adjusting the hanging hardware on a frame by replacing flimsy factory fixings with solid, screw-anchored steel D-rings is essential.
Step-by-Step Guide to Adjusting the Hanging Hardware on a Frame
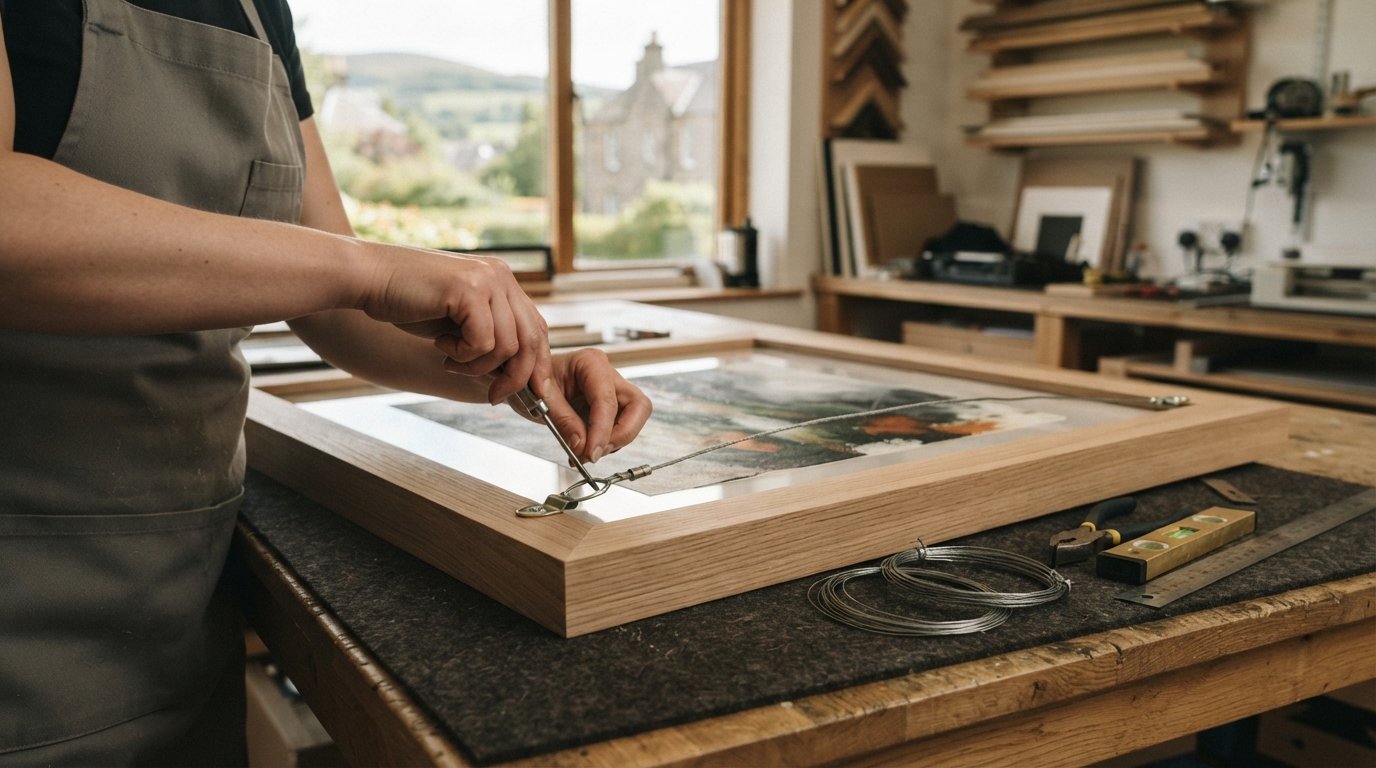
When adjusting the hanging hardware on a frame, you don’t need a full carpentry workshop. A steel tape measure, a sharp bradawl, and a precision screwdriver are plenty. Most hanging frustrations come down to uneven anchor points or excessive wire slack rather than poor wall fixings. By adjusting the hanging hardware on a frame directly, you can restore perfect alignment without drilling unnecessary holes in your plaster.
Repositioning D-Rings to Eliminate Slanted Artwork
Measure down along both vertical side stiles, placing your D-rings between one-quarter and one-third (25% to 33%) of the distance from the top edge. Hardware placed lower pulls the centre of gravity outwards, creating an unsightly forward drop. Once your marks match to the nearest millimetre, press a bradawl into the timber to form a pilot indentation. This simple step prevents the wood grain from splitting as you drive the screws home securely.
Shortening and Tensioning Hanging Wire to Stop Forward Tilt
Loose hanging wire is the main reason framed pictures lean away from the wall. To correct this issue:
Unwind the terminal wraps carefully without kinking the inner steel strands.
Pull the wire taut, leaving just enough slack so the peak sits 20 mm to 30 mm below the top moulding under tension.
Maintain an included wire angle greater than 60 degrees to prevent inward sideways strain on the frame rails.
Secure the loose ends with tight, uniform wraps using pliers so the wire cannot slip under load.
If you prefer ready-balanced artwork without the workshop tinkering, browse our curated bespoke framed wall art collection for pieces crafted to hang flush right out of the box.
Securing Heavy Frames: Weight Distribution and Glazing Safety
Solid timber mouldings and archival backing create significant structural mass, especially when paired with authentic glazing. Unlike budget perspex that flexes and scratches easily, premium 2mm float glass delivers distortion-free optical clarity. However, with a density of 2,500 kg/m³ (5.0 kg per square metre), real glass adds considerable static load. When adjusting the hanging hardware on a frame carrying genuine glass, proper weight distribution becomes non-negotiable.
Hanging Directly from D-Rings Versus Using Cross Wires
Wiring wide or heavy frames pulls the side rails inward, risking joint separation over time. Gallery testing shows mounting directly onto two level wall fixings via D-rings reduces accidental drift and tilt by up to 80% compared to a single central wire loop. By resting the frame directly onto two wall anchors, you eliminate wire stretch and keep the load sheer against the wall. For comprehensive display guidance, explore our expert insights on custom picture framing to safeguard your display.
Protecting Float Glass and Frame Mouldings During Adjustments
Never carry out hardware adjustments while a frame rests on a bare floor or hard table. Place a soft, folded woollen blanket on your workbench before laying the frame face down. This cushions the moulding profile and relieves uneven pressure points that could otherwise fracture the 2mm float glass. Double-check screw lengths before adjusting the hanging hardware on a frame to ensure fasteners never penetrate through to the front rebate.
Eliminate Hanging Headaches with Professional Ready-to-Hang Framing
While mastering DIY adjustments solves immediate problems, true display perfection begins at the craft bench. Cheap, mass-produced store frames rely on standard dimensions and flimsy stamped brackets that often pull away from soft synthetic mouldings. In contrast, choosing hand-made bespoke framed wall art ensures your display arrives precisely weighted, balanced, and ready to hang on your wall immediately. You skip the delicate hassle of adjusting the hanging hardware on a frame entirely.
Why Bespoke Custom Framing Offers Superior Balance and Longevity
Every bespoke piece from First4Frames Gallery is individually crafted to order in our Falkirk workshop. Rather than relying on generic fixings, we calculate the exact centre of gravity for each piece, fitting heavy-duty D-rings paired with crystal-clear 2mm float glass. Reinforced timber corner joints prevent bowing, whilst multi-layer bespoke packaging ensures professional UK couriers deliver your finished artwork completely pristine and ready for mounting.
Design Your Display Online with Digital Wall Visualisers
Curating your home gallery should feel inspiring, not intimidating. Through modern online picture framing tools, you can:
Use an interactive wall art visualiser to visualise art on your wall before ordering.
See artwork before you buy to verify scale, frame widths, and mount colours.
Choose your frame online and design your framed artwork alongside fine art photography prints or contemporary art prints.
Select custom framed art prints celebrating coastal wall art, landscape wall art, and evocative Scottish landscape art from famous artists and best-selling artists.
Whether you require a full art print framing service, want to upload personal digital pictures through our print and frame workflow, or need custom dimensions, professional framing bypasses tricky hardware woes. Explore our curated selection of bespoke ready-to-hang art to display your collection with effortless confidence.
Transform Your Walls with Perfectly Balanced Framed Art
Taking time to get your fittings right transforms how your collection looks in your home. By mastering adjusting the hanging hardware on a frame, you’ll correct forward tilt, balance wire tension, and safely anchor heavy timber mouldings. Whether you reposition D-rings or switch to direct dual-point wall fixings, precision alignment keeps your favourite pieces hanging level and flush.
If you want to avoid workshop guesswork entirely, choosing expertly hand-crafted framing makes all the difference. Every bespoke frame from our Falkirk workshop is built to order with individually fitted hardware and glazed with crystal-clear 2mm float glass rather than cheap perspex. Arriving in multi-layer protective packaging via professional UK couriers, your artwork is ready to mount with total confidence. Find perfectly balanced, ready-to-hang framed art today and give your living space the striking display it deserves.
Frequently Asked Questions
How do I stop a picture frame from tilting forward from the wall?
Shorten your picture hanging wire and reposition your mounting hardware higher up the frame rails. When wire has too much slack or D-rings sit below the upper third, gravity pulls the top forward. Tighten the steel wire so it deflects only 20 mm to 30 mm beneath the top moulding, or mount directly to hooks. Adding small felt pads to the lower corners also keeps the frame perfectly flush.
Where should D-rings be placed on the back of a picture frame?
Position D-rings precisely one-quarter to one-third of the total frame height down from the top edge. Measuring along both side stiles within this range creates an ideal centre of gravity. If placed too low, the artwork tilts away from the wall; placed too high, the hanging hooks become visible. For flawless balance, measure accurately to the millimetre before adjusting the hanging hardware on a frame.
Can you adjust hardware on a frame without removing it from the wall?
No, you should always take the frame down from the wall before attempting hardware adjustments. Trying to tighten screws or reposition brackets while the piece is suspended risks gouging your plaster or dropping the frame. Lay the piece face down on a soft, padded blanket instead. This workshop precaution protects delicate mouldings and authentic glazing, such as 2mm float glass, from unexpected pressure cracks or scratches.
Why is my picture frame still crooked when the wall hooks are level?
A crooked frame despite level wall fixings almost always indicates misaligned brackets or uneven wire knots on the frame itself. Even a two-millimetre discrepancy between left and right D-rings produces a noticeable tilt. When adjusting the hanging hardware on a frame, use a steel ruler to ensure both fittings sit at identical heights from the top edge, and verify that the hanging wire hasn’t slipped on one side.
Is it better to hang a heavy frame using picture wire or D-rings directly?
Direct hanging from two D-rings is far superior and safer for heavy or oversized frames. Stringing heavy glass-glazed artwork with wire exerts intense inward tension on side rails, which can pull timber corner joints apart over time. Resting D-rings directly onto two level wall anchors distributes static weight evenly, prevents wire stretch, and reduces accidental tilting by up to 80% compared to single-point hanging.
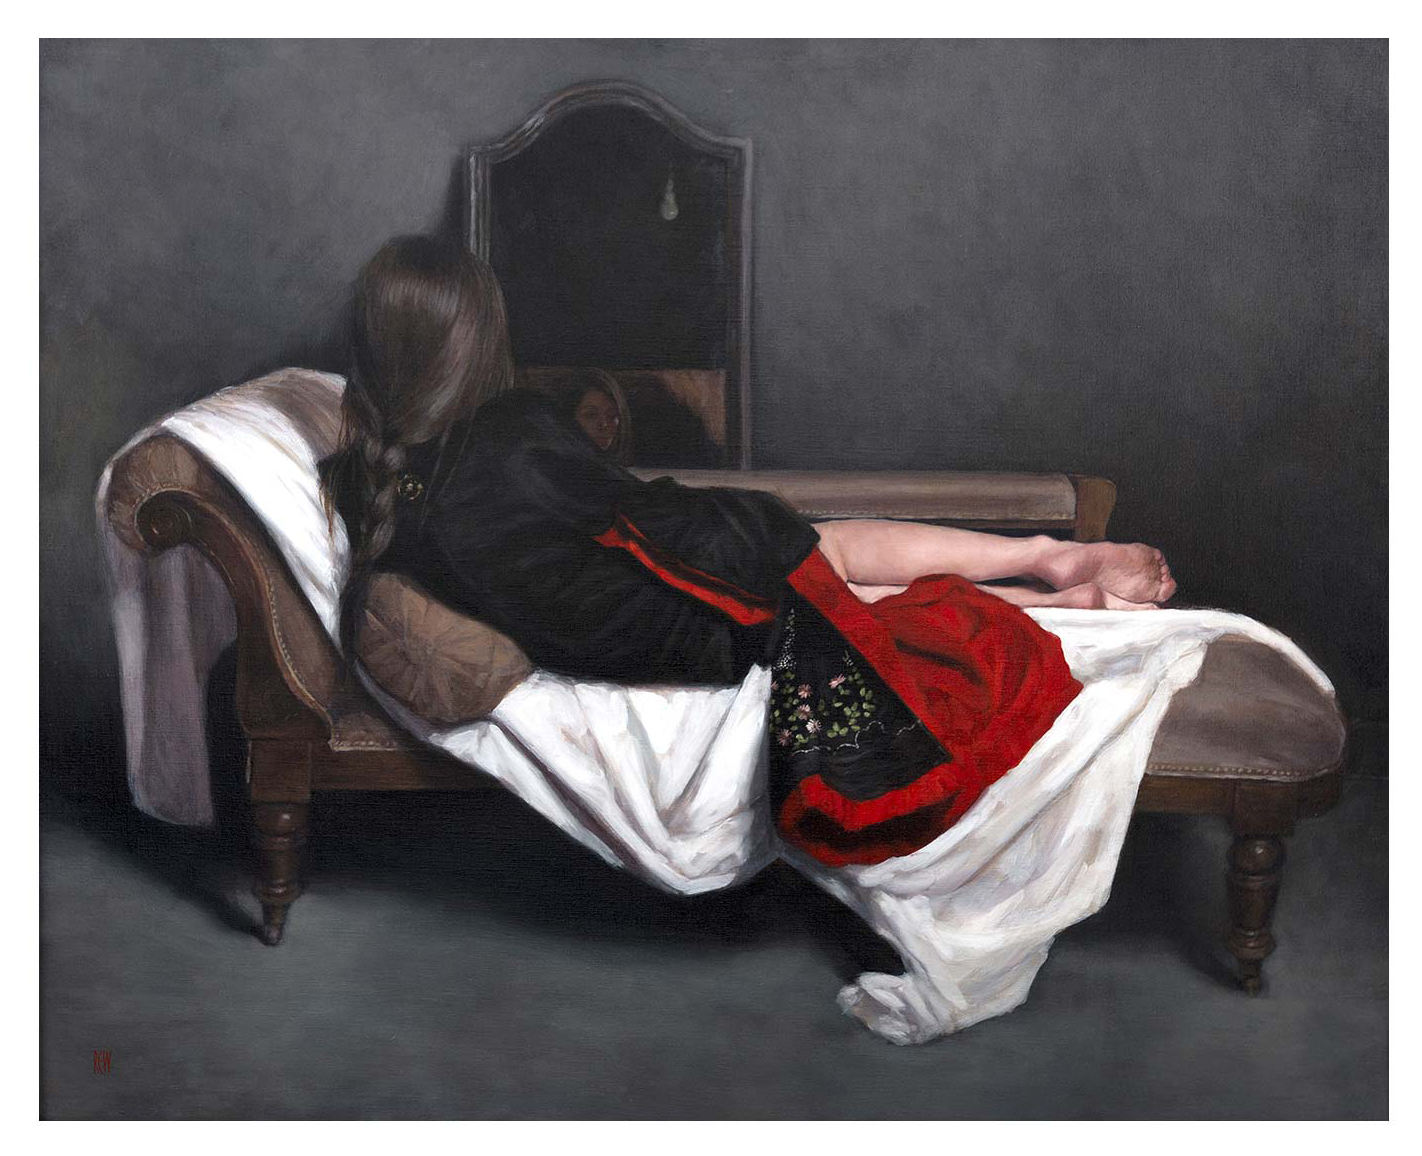
Figurative wall art for a dressing room can do more than repeat the room’s concern with appearance. Dark Reflections by Stephanie Rew shows a woman reclining in a black and red dress, with white drapery and a small upright mirror revealing her reflection. That layered viewpoint turns looking into part of the subject rather than simple decoration.
Test figurative wall art for a dressing room against the real mirror
The direct view
From the doorway, the figure and small painted mirror should read as one composition. Give the framed work its own wall space instead of surrounding it with jewellery hooks, photographs, or fashion prints.
The reflected view
Stand at the dressing mirror and notice whether the artwork appears behind you. A partial reflection can be intriguing, but a harsh lamp or cluttered clothes rail reflected beside it will weaken the effect.
The evening view
Use soft, accurate lighting for dressing, then angle it away from the picture glass. The red, black, and white palette should retain separation after dark rather than collapsing into one shadowed area.
The room already contains a working mirror; the artwork can provide the more imaginative reflection.
Dark tonal transitions and pale fabric reveal the value of controlled reproduction. Colour-managed Giclée printing protects subtle separation, while bespoke in-house framing gives this limited-edition piece a precise, hand-finished edge.
As figurative wall art for a dressing room, Dark Reflections brings poise, ambiguity, and a considered conversation between painted and real reflections.
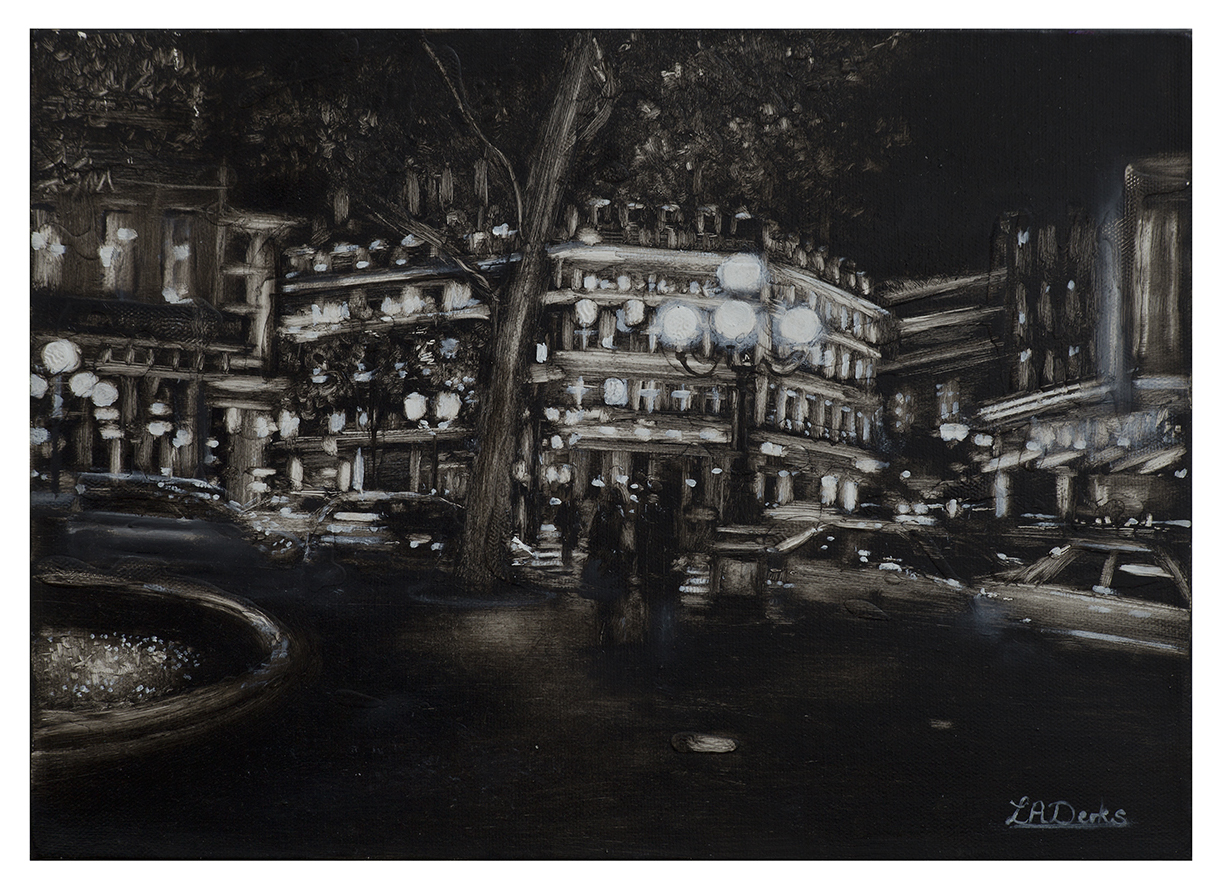
Paris night wall art for a hallway can give a connecting space greater depth when daylight fades. Passage to Hotel Du Louvre by Lesley Anne Derks layers cars, buildings, trees, and figures around a luminous urban passage. The composition creates somewhere for the eye to travel, which is valuable in a corridor that might otherwise feel narrow or purely functional.
Align Paris night wall art for a hallway with the route through the home
1. Start at the entrance
Stand where the hallway is first seen. A position at the far end can turn the Paris street into a visual destination. On a side wall, allow enough distance for the full scene to be understood rather than passed at shoulder range.
2. Follow the light after sunset
Switch on wall lights and lamps in their usual sequence. The framed glazing should not catch a hard reflection that erases the painted glow. A light placed to one side can reveal the work more gently than a fitting directly opposite.
3. Keep the passage physically clear
Choose a frame depth that suits a busy route, and avoid hanging above furniture that already narrows the walkway. The artwork creates visual complexity; the floor and nearby wall can remain simple.
Night scenes rely on separation between deep shadow and small areas of light. Colour-managed Giclée production retains that tonal range, while a bespoke frame gives the limited-edition print definition in changing hallway light.
As Paris night wall art for a hallway, Passage to Hotel Du Louvre offers movement, light, and perspective that make the journey through the home feel more memorable.