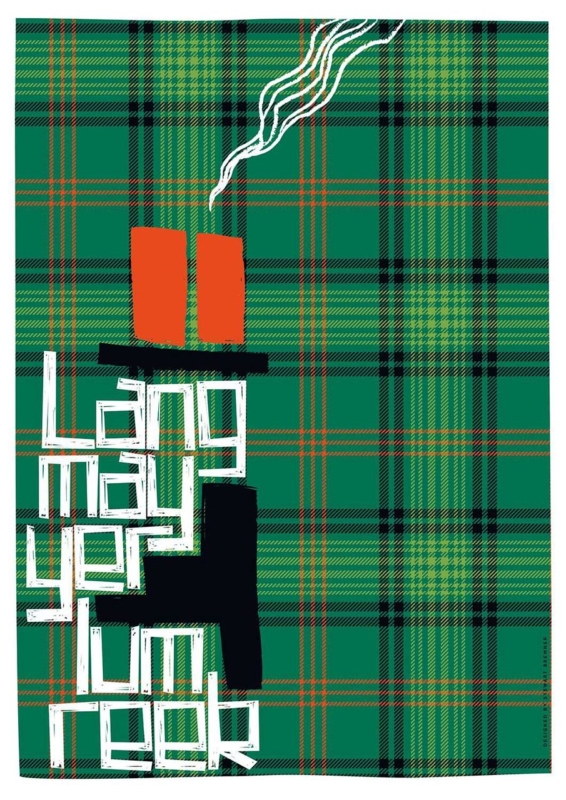
typography prints can feel personal and lasting when their words belong to a real tradition rather than a passing slogan trend. Lang May Yer Lum Reek gives the decision a specific subject, proportion and finish to test.
Give typography prints room to speak clearly
Lang May Yer Lum Reek is a traditional good wish for a household. That makes it appropriate near an entrance, dining space or hearth. Let the phrase welcome people in its own right instead of surrounding it with several competing signs.
Choose 420 × 594 mm
The smaller portrait size can suit a hall console or wall beside a doorway. Mark the final frame so handles and switches remain separate.
Choose 594 × 840 mm
The larger option can anchor a sociable room. Give it viewing distance and avoid placing another text-led object directly beside it.
Use one phrase as the focal point.
Keep coats, keys and mantel objects from obscuring the words.
Check the sightline from the door and from a seat.
Choose a frame for the room, not a novelty theme.
A familiar saying becomes more generous when the wall gives it time and space to be read.
Frame typography prints as artwork, not signage
Letterforms need clean edges, balanced contrast and a stable portrait presentation. Colour-managed Giclée production keeps the design articulate at both sizes. Bespoke framing completed in-house gives the words the substance of wall art rather than temporary signage.
Typography prints can carry humour, memory and hospitality without turning a home into a slogan display. Lang May Yer Lum Reek offers one warm wish; measured placement lets it last.
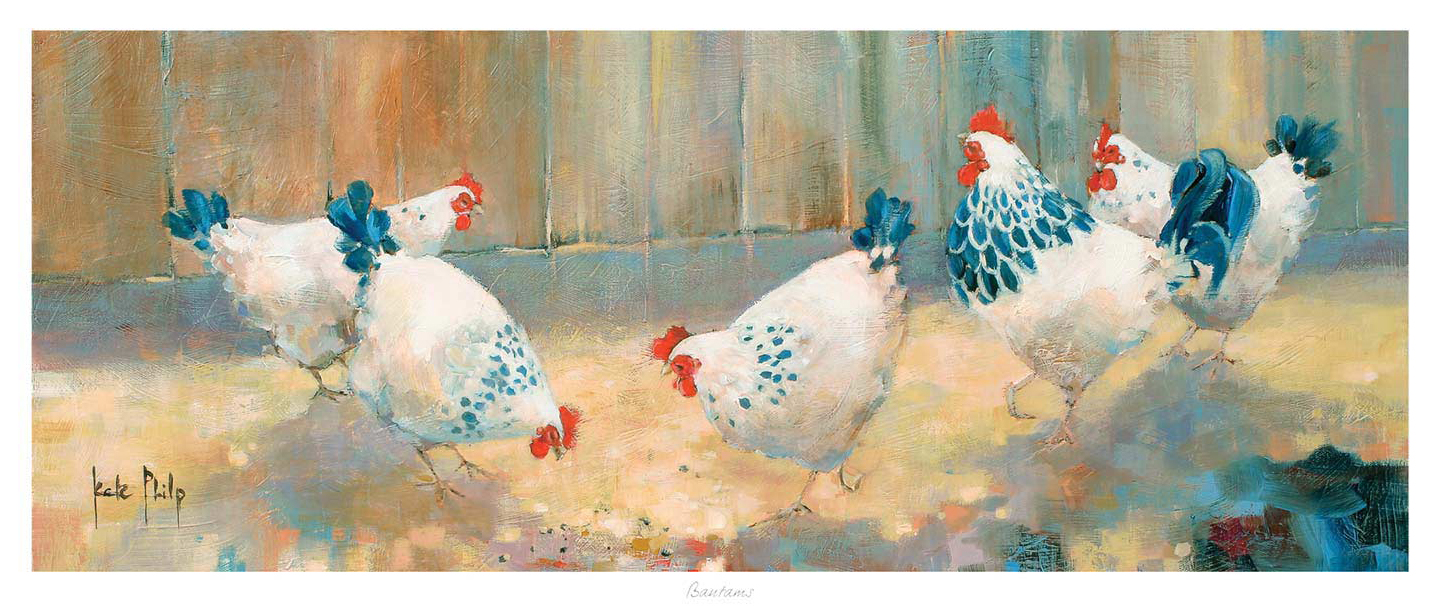
panoramic wall art for a long kitchen wall can solve a familiar decorating problem: plenty of width, limited height and no obvious place for a conventional portrait or square picture. Bantams by Kate Philp uses a broad group of white bantams, warm ground and loose painted texture to follow that horizontal space naturally. It gives the kitchen energy and rural character without needing a crowded collection of small frames.
Start with the usable strip, not the whole wall
A long kitchen wall is rarely completely empty. Doors, sockets, switches, shelves and tall units divide it into smaller zones. Measure the uninterrupted area where the frame can hang safely. Then record the height above a bench, radiator or run of units. The available strip may be wide but shallow, making a panoramic composition more comfortable than a standard landscape format.
Use masking tape to mark the finished outer dimensions, including the frame and mount. View the outline from the kitchen entrance and from the place where people sit or prepare food most often. The artwork should relate to the visible furniture line without ending exactly at every cabinet edge. A little asymmetry usually feels more relaxed than perfect alignment with the joinery.
Why panoramic wall art for a long kitchen wall feels settled
Wall condition
What the wide format does
What to check
Above a long worktop
Echoes the horizontal line without adding several separate frames
Steam, splashes and small appliances
Beside a dining table
Connects the eating area to the wider kitchen
Chair clearance and seated sightlines
Across a passage wall
Draws the eye along the room and makes the route feel intentional
Door swings and safe walking width
Over low storage
Balances a broad cabinet while leaving useful display space
Lamp height and reflected light
One wide picture also reduces visual interruption. A gallery wall needs repeated spacing and several secure fixings. In a practical kitchen, those separate edges can compete with cupboard doors, handles and open shelving. A single panoramic work creates one calm boundary while still offering rhythm through the birds moving across the image.
Keep the bantams characterful rather than themed
Chicken imagery can quickly become a rustic motif if it is repeated on textiles, signs and tableware. Let the artwork carry the subject on its own. The birds have enough expression and movement to bring humour, while the blue-green, cream and warm ochre paint makes the print useful as part of a broader colour scheme.
Natural timber, painted cabinetry, stone and simple ceramics all suit the loose handling of the image. There is no need to add checked fabric, wire baskets or other farm references. In a contemporary kitchen, the panoramic shape can look especially clean above flat-fronted units. In a more traditional room, it can provide a lighter counterpoint to heavier cupboards and an Aga.
Protect art from the working parts of the kitchen
Avoid direct heat and steam. Do not hang the frame immediately above a hob, kettle or sink.
Check the preparation zone. Leave enough height to move appliances and clean the worktop comfortably.
Control strong sunlight. Position the print away from prolonged direct exposure where possible.
Use secure fixings. A wide frame needs support appropriate to its weight and the wall construction.
Plan easy care. Choose a position where the glazing and frame can be reached without climbing over units.
If the only open wall is beside the cooking area, measure how far steam and grease travel during ordinary use before committing to the position. A dining end, passage wall or space above low storage is often more suitable. The artwork should make the kitchen feel finished without becoming vulnerable to the room’s busiest tasks.
Frame a wide composition without making it heavy
A restrained timber moulding can echo the warm background and connect with natural worktops. A slim painted frame can sharpen the blue-green marks in a cleaner kitchen. Because the print is wide, an unnecessarily bulky moulding may dominate the shallow wall space. A measured mount provides separation while preserving the lively painted edges and the sense of movement across the flock.
First 4 Frames uses colour-managed Giclée production and completes bespoke framing in-house at its Falkirk workshop. Accurate printing preserves the soft whites, bright combs and cooler painted marks. Hand-finished framing can then be sized and presented for the exact wall rather than treating an unusual panoramic format as an afterthought.
Well-chosen panoramic wall art for a long kitchen wall turns an awkward strip of space into a deliberate part of the room. View the framed Bantams print for a lively wide composition that brings warmth and movement to the kitchen without adding clutter.
imaginative wall art for a children’s library should do more than fill a blank wall. It can give young readers a place to pause, notice details and invent a story before they open a book. All Aboard by Matylda Konecka presents a snowy town beneath a deep blue sky, where unusual travellers, birds and a towering ladder turn an ordinary street into an unfolding adventure. Nothing is explained too quickly, which makes the scene especially useful in a shared reading space.
Why a library benefits from art with an unfinished story
Recognisable book characters can create instant excitement, but they arrive with a story already attached. An independent image leaves more room for each child to decide what is happening. Who is climbing the ladder? Where are the winged figures going? Why does one traveller pull a small cart through the snow? Questions like these encourage observation without turning the artwork into a formal lesson.
The picture can also serve children of different ages. A younger visitor may follow the bright red coat and enormous bird. An older reader may notice the old buildings, changing scale and quieter figures in the distance. Staff can return to the same image for conversation, creative writing or a simple settling activity, yet the artwork still works when nobody is directing attention towards it.
How imaginative wall art for a children’s library supports reading
Close looking: layered characters reward a second and third glance.
Open questions: the scene invites ideas without requiring one correct answer.
Visual vocabulary: children can describe scale, weather, movement, architecture and mood.
Independent storytelling: an unfamiliar world gives every reader permission to invent.
A calmer welcome: one substantial image creates focus more effectively than many small signs.
These benefits do not require the library to become a classroom. The print can simply establish an imaginative tone near a reading area. Occasional prompts on a removable card can suggest a question, while the frame and artwork remain free of permanent educational text. That keeps the display useful after a topic or school term has changed.
Choose a position children can actually explore
Hang the centre lower than you would in an adult-only corridor, but keep the frame safely clear of chair backs, book trolleys and busy corners. A wall beside a reading circle, low display shelf or small seating bay gives children enough time to look. Avoid placing the picture directly behind a service desk, where equipment and notices may hide its lower details.
Test the wall from a child’s seated height as well as from the entrance. The deep blue sky and pale snow need even light, not a narrow spotlight that produces glare. If the room has large windows, choose a position away from direct sun and check reflections at several points during the day. The scene should remain legible when the library is bright and when winter afternoons become darker.
Let the picture lead the colour scheme lightly
The indigo sky, warm windows and red coat offer useful accents, but they should not become a decorating formula. A blue seat cushion or one red book display can make a quiet connection. Neutral shelving and clear signage will prevent the area from feeling overstimulating. The print already contains movement, pattern and several small surprises, so it benefits from uncluttered wall around the frame.
A simple dark moulding can hold the night sky and define the busy composition. A warm timber frame may connect more naturally with wooden shelves and tables. A pale mount gives the characters breathing room and helps the scene remain distinct from a strongly painted wall. For a public setting, discuss suitable glazing, fixings and cleaning requirements as part of the framing decision.
Give the library an image that can grow with its readers
First 4 Frames uses colour-managed Giclée production and completes bespoke framing in-house at its Falkirk workshop. That careful process keeps subtle figures visible within the dark sky and snowy street. Hand-finished presentation also gives a busy library a durable, coherent focal point rather than another temporary display.
Effective imaginative wall art for a children’s library makes curiosity feel welcome. View the framed All Aboard print for a winter scene that can prompt new observations and new stories each time young readers return.
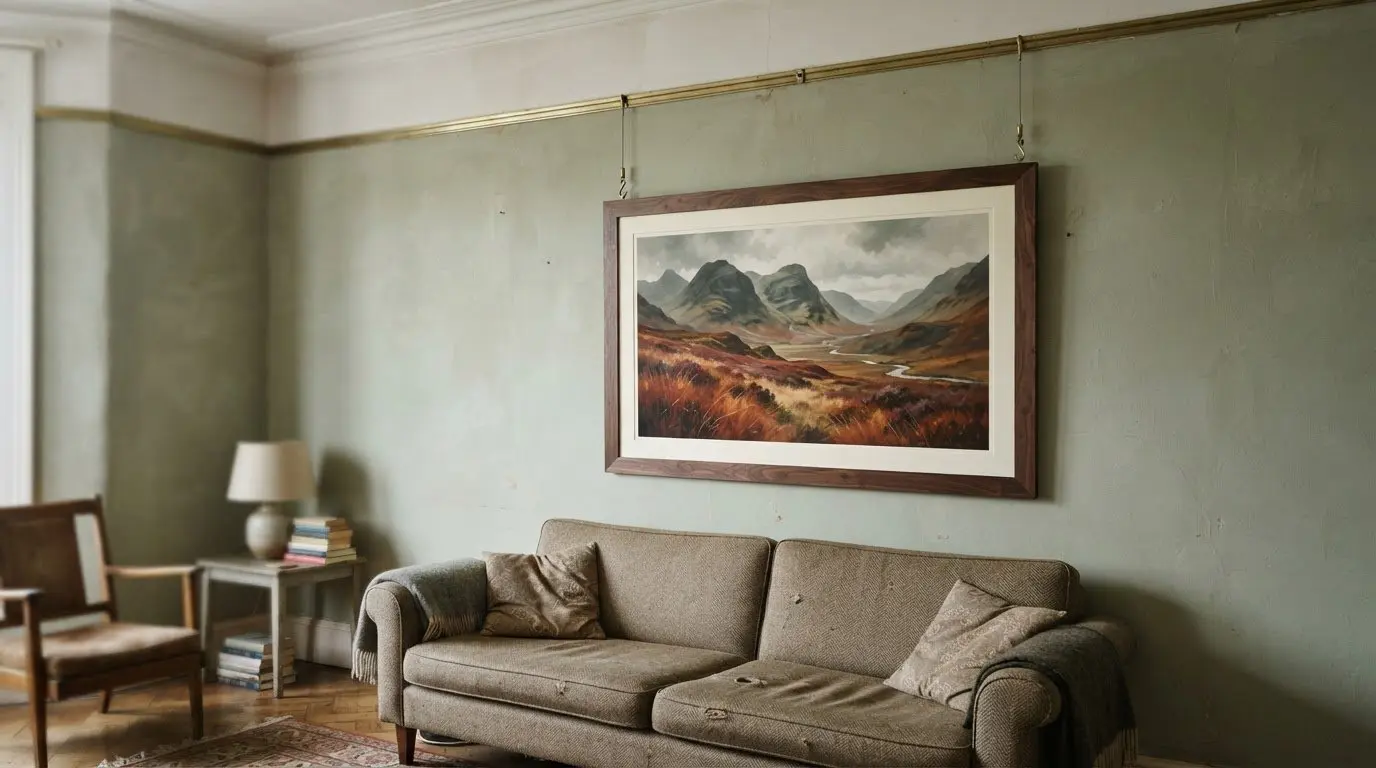
Is it safe to hang a heavy frame over a sofa? It can be, provided the fixings suit both the frame’s weight and the wall. Before hanging it, check the support behind the wall and plan the artwork’s position in the room.
Planning the display can be part of the pleasure. A wall art visualiser can help you Visualise art on your wall and See artwork before you buy. Consider Coastal wall art, Landscape wall art or Scottish landscape art, alongside Contemporary art prints, Photography prints, Fine art and pieces by Best-selling artists or Famous artists. Choose your frame online to Design your framed artwork and create Bespoke framed wall art that feels at home above the sofa.
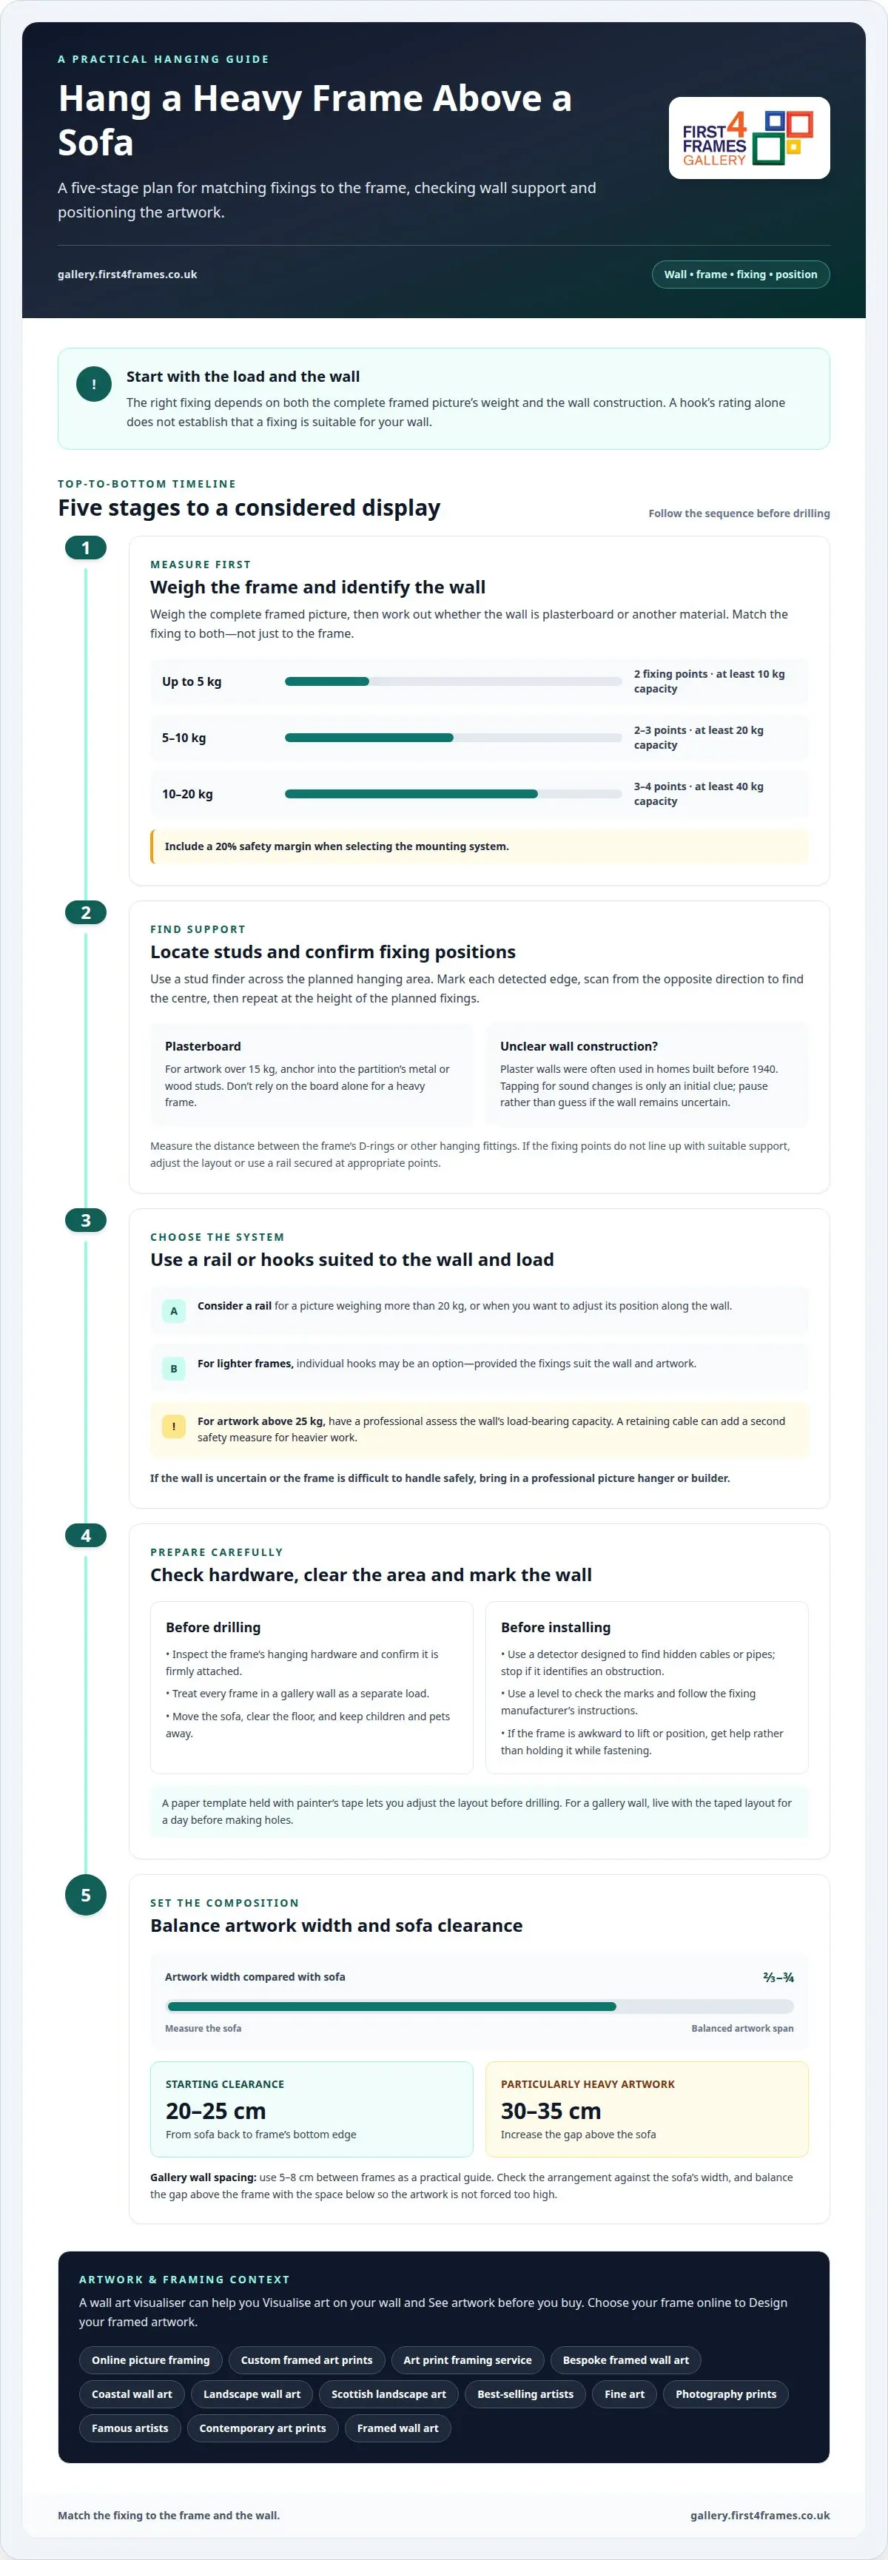
Whether you’re exploring online picture framing, custom-framed art prints or an art print framing service, think about how the finished piece will sit in the room. Framed wall art should complement the sofa without crowding the wall. The steps below explain how to assess plasterboard, find studs, choose a rail or hooks, and plan clearance for a balanced display.
Key Takeaways
Match the hanging system to both the frame’s weight and the wall construction before you begin.
Learn when a rail offers a practical alternative to individual hooks for a heavy frame.
Find suitable fixing points and prepare the wall to help keep the artwork securely supported.
Set the frame’s position above the sofa for a considered balance between safe hanging and visual appeal.
How to choose between a rail system and individual hooks for my picture above the sofa?
First check the frame’s weight and the wall material, then choose suitable fixings. Next, plan the artwork’s width and height in relation to the sofa.
Assess artwork weight and wall material
Weigh the complete framed picture, then identify whether the wall is plasterboard or another material. For a picture up to 5 kg, use two fixing points with a minimum expected load capacity of 10 kg. For 5-10 kg, use 2-3 points rated for at least 20 kg; for 10-20 kg, use 3-4 points rated for at least 40 kg. Choose fixings compatible with the wall, not just the frame.
Choose a rail or suitable hooks
Consider a rail for a picture weighing more than 20 kg, or when you want to adjust its position along the wall. Above 15 kg on plasterboard, anchor into the partition’s metal or wood studs; a retaining cable can add a second safety measure for heavier work. For lighter frames, individual hooks may be an option, but choose fixings suited to the wall and artwork. Include a 20% safety margin when selecting the mounting system.
Consider falling-frame risks and safety standards
Secure fixings carefully above a sofa, where a falling frame could strike someone sitting below or a child or pet nearby. The appropriate fixing depends on the wall and load; a hook’s rating is not itself a statement about UK building regulations. For artwork above 25 kg, have a professional assess the wall’s load-bearing capacity. Bring in a professional picture hanger or builder if the wall is uncertain or the frame is difficult to handle safely.
Plan the width, height and clearance
Measure the sofa before positioning the frame: artwork spanning two-thirds to three-quarters of its width usually creates a balanced arrangement. Leave 20-25 cm between the sofa back and frame as a starting point, increasing this to 30-35 cm for particularly heavy artwork. Check the ceiling too; the gap above the frame should look balanced with the space below, rather than forcing the artwork too high.
Can a heavy picture be fixed to a plasterboard partition above a sofa?
Yes, if the fixings engage suitable support and are rated for the artwork’s load. Is it safe to hang a heavy frame over a sofa when the wall is plasterboard? It depends on the wall’s construction, the frame’s weight and where the fixings can be secured.
Prepare framed artwork for secure hanging
Measure the complete frame and inspect its hanging hardware before lifting it above the sofa. Check that the fittings are firmly attached and positioned to keep the artwork level. Treat every frame in a gallery wall as a separate load; don’t assume one fixing will support neighbouring pieces. A paper template held in place with painter’s tape lets you adjust the layout before drilling.
Choose a safe plasterboard hanging approach
Locate the partition’s metal or wood studs before choosing fixings. For artwork weighing more than 15 kg on plasterboard, anchor directly into those studs. Don’t rely on the board alone for a heavy frame; both wall material and fixing position affect support. If the planned fixing points don’t align with suitable support, adjust the layout or use a suitable rail system.
Lay out a gallery wall with space for each frame and its fixings. Keep gaps consistent, using 5-8 cm between frames as a practical guide, and check the arrangement against the sofa’s width. Tape paper templates to the wall and live with the layout for a day before making holes. This gives you time to adjust height and spacing without moving fixings repeatedly.
Before drilling, ask yourself: is it safe to hang a heavy frame over a sofa with this wall and these fixings? Check that each fixing is secure and the frame sits level. If the frame is awkward to lift or position, get help rather than trying to hold it steady while fastening the fittings.
Finding studs and preparing the wall
Identify the wall construction before choosing where to drill. Plaster walls were often used in homes built before 1940, so don’t assume every wall is plasterboard. Check the surface and listen for changes in sound as you tap gently, but treat this only as an initial clue. A stud finder can help distinguish framing from the spaces between supports.
Use a stud finder across the planned hanging area, following the device instructions and moving steadily. Mark each detected edge, then scan from the opposite direction to narrow down the stud’s centre. Repeat at the height of the planned fixings. A second scan can help identify inconsistent readings before you install anything.
Check the fixing positions against the frame’s hardware. Measure the distance between the D-rings or other hanging fittings, then transfer those positions to the wall, aligning them with the stud centres you marked. If the frame’s fixing points don’t line up with suitable support, adjust the layout or use a hanging rail secured at appropriate points.
Prepare the area before drilling: move the sofa, clear the floor, and keep children and pets away. Use a detector designed to find hidden cables or pipes before making holes, and stop if it identifies an obstruction. Choose a drill bit and fixings suited to the wall, and follow the fixing manufacturer’s instructions.
Check the alignment before installing the fixings. Use a level to make sure the marks are even, then check the frame’s planned height above the sofa. Keep the marked stud locations visible as you work, and don’t enlarge a hole if doing so would go against the fixing instructions. If the wall’s construction is unclear, pause rather than guess.
Recommended clearance between the sofa and frame
Measure from the sofa back to the frame’s bottom edge, not from the seat cushion. Aim for 20-25 cm as a general clearance; particularly heavy artwork benefits from 30-35 cm. Mark the proposed lower edge with masking tape, then view it from the usual seat before drilling. This lets you assess the height in the room rather than relying on a measurement alone.
Size the artwork against the sofa’s total width. A balanced arrangement usually spans between two-thirds and three-quarters of the sofa. For a 2-metre-wide sofa, artwork around 1.6 metres wide leaves about 20 cm on each side. Measure the complete frame, including its outer edges, so the finished pieces fit the furniture rather than just the wall.
Check the space between the frame and ceiling before setting the final height. As a visual guide, the gap above the artwork should be about double the gap between the frame and sofa. If the lower gap is under 15 centimetres and the ceiling gap is the same or smaller, the artwork may look oversized for that wall. Adjust the height or choose a narrower piece.
Plan multiple pieces as one arrangement, measuring the outside edges and the gaps between frames. A spacing of 5-8 cm helps a gallery wall read as a connected display; gaps wider than about 20 cm between two pieces can make them feel undersized above the sofa. Tape paper templates in place, then review the layout from across the room. Browse framed artwork for your sofa wall to explore options at different scales.
First4Frames Gallery: Ready-to-Hang Framed Art
First4Frames Gallery offers Ready-to-Hang Framed Art for a finished look above your sofa. Each frame is handmade to order using quality materials, with 2 mm float glass glazing. For a particular wall or artwork size, Custom Picture Framing lets you select a bespoke frame suited to the piece.
Choose artwork with the sofa’s width and the planned clearance in mind, and make sure the fixings suit the complete framed weight. A ready-to-hang frame still needs secure fixings matched to your wall. Giclée fine art prints offer another way to bring art into the room, with a frame selected to complement the print.
Knowing whether it’s safe to hang a heavy frame over a sofa is just one part of shaping a room you’ll enjoy living in. Artwork can set the mood, tie together colours already in the space or become a focal point. Let the wall’s proportions guide your choice, then consider which subject and finish suit your furniture.
Picture the finished arrangement before choosing. A calm landscape creates a different atmosphere from a bold contemporary print, while a carefully selected frame helps connect the artwork to the room. The right piece does more than fill empty wall space: it can make the seating area feel more personal and complete.
There’s no single safe weight limit for plasterboard; the fixing method and support determine what it can hold. As a guide, a picture up to 5 kg calls for two fixing points rated for at least 10 kg in total. For 5-10 kg, use 2-3 points rated for at least 20 kg. These figures are minimum expected load capacities, not a substitute for suitable wall support.
How often should the fixings of a picture installed above a sofa be checked?
Visually inspect the fixings monthly, looking for movement, looseness or a frame that has begun to tilt. Carry out a more thorough check every 6 months. Check the wall around each fixing as well as the frame hardware, since movement or damage can affect how securely the picture hangs. If you notice a change, take the picture down carefully before inspecting or replacing the fixing.
How to find a stud?
Use a stud finder across the planned hanging area, following its instructions and marking where it detects a stud. Scan from both directions to identify the edges and centre, then repeat at the height of the planned fixings. A second reading helps you avoid relying on one uncertain mark. Before drilling, use a suitable detector to check for hidden cables or pipes, and stop if it indicates an obstruction.
What is the minimum distance that should be maintained between a sofa and a heavy picture?
For particularly heavy artwork, leave 30-35 cm between the sofa back and the frame’s bottom edge. Measure from the top of the sofa back, not the seat cushion, and check the clearance from the usual sitting position. This larger gap gives the arrangement breathing room, but the frame still needs to sit at a height that works with the wall and ceiling.
How heavy can a picture frame be hung safely above a sofa?
There’s no universal maximum weight that applies to every wall. Above 20 kg, a rail system is recommended; above 25 kg, have a professional assess the wall’s load-bearing capacity. The frame’s weight, wall construction, fixing points and rated capacity all matter. A secure arrangement depends on the whole installation, not simply the frame weight or the number printed on one fixing.
What wall fixings are suitable for a heavy frame on plasterboard, brick or plaster walls in the UK?
Choose fixings designed for the specific wall material and frame load. For artwork over 15 kg on plasterboard, anchor directly into the partition’s metal or wood studs. Brick and plaster walls also require fixings suited to their construction; don’t assume plasterboard anchors are interchangeable. Check the fixing’s rated capacity and installation instructions, and seek a professional assessment for artwork over 25 kg.
Glasgow wall art can communicate local identity in a workplace more naturally than a slogan, map graphic or generic city skyline. Kelvingrove gives that decision a real subject, proportion and finish to assess.
Use Glasgow wall art to establish place professionally
Kelvingrove is recognisable to residents, visitors and many clients with a connection to the city. In a meeting room, that shared reference can make the space feel grounded. It also gives people something specific to notice before a conversation begins.
From the meeting table
Place the framed work where it remains visible above seated heads and screens. Test glare with ceiling lights and blinds in normal positions.
From the video call
Check the camera crop. The picture should look intentional, not cut off or positioned like an oversized logo.
Choose one landmark rather than a wall of city references.
Keep printed branding on another surface.
Relate the frame to the table, doors and architectural lines.
Use controlled lighting so fine illustration remains readable.
The artwork can also suit a Glasgow practice operating elsewhere. It provides a quiet connection to origin without expecting every visitor to know a corporate story. The named building does the work honestly.
Present Glasgow wall art with workplace-level craftsmanship
Architectural line and tonal detail are often viewed closely in a meeting room. Colour-managed Giclée production keeps the drawing precise. Hand-finished framing completed in-house gives it a polished finish appropriate for clients and staff.
Glasgow wall art can make a professional room feel local without becoming promotional. Kelvingrove supplies the shared place; a clear sightline and exact frame give it workplace authority.
large coastal wall art needs to hold the room when windows turn dark and artificial light becomes part of the composition. Sunset over Arran gives that decision a real subject, proportion and finish to assess.
Test large coastal wall art after sunset
Evening condition
What to check
Floor lamps
Make sure bright shades do not reflect across the view.
Low furniture
Relate the full frame to the sofa or sideboard below.
Television nearby
Keep changing screen light from competing with the sunset.
Warm bulbs
Check that amber light does not flatten coastal tones.
Robert Kelsey’s west-coast subject already provides atmosphere. Avoid model boats, ropes or repeated shell motifs. A plain sofa, natural timber and one controlled colour echo can connect the picture without turning place into a theme.
Judge scale from the occupied room
Mark the final framed outline above the furniture, then sit in every regular seat. A large piece should feel generous from the doorway and comfortable at close range.
Should sunset colours be repeated?
Only sparingly. One muted connection may help, but matching every warm tone can make the room staged. Let the artwork remain the source of evening colour.
Finish large coastal wall art for changing light
Sunset transitions, water and distant land rely on tonal continuity. Colour-managed Giclée production protects that range. Bespoke framing completed in-house gives the limited edition a stable, hand-finished presence for a principal wall.
Large coastal wall art should remain compelling when real daylight disappears. Sunset over Arran brings the glow; careful lighting and disciplined styling let it shape the evening room.
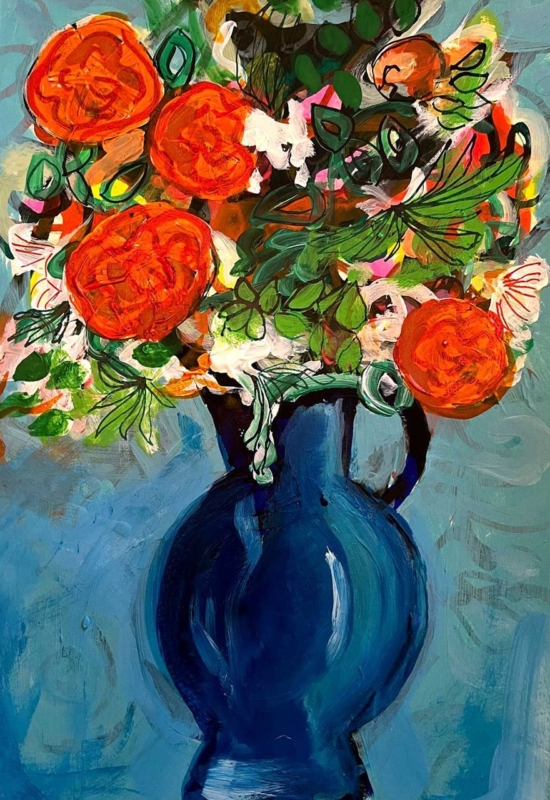
meaningful gift wall art feels personal when the subject connects with the recipient’s life rather than carrying a generic inscription for one day. Red Roses gives that decision a real subject, proportion and finish to assess.
Choose meaningful gift wall art through a real connection
Red Roses can suit a keen gardener, someone with a favourite variety, or a person whose home already uses the flower’s richer colour. Ask what the subject means to them. A genuine association gives the picture more staying power than a conventional message.
Choose the artwork for the recipient, not only the occasion.
Check whether 189 × 275, 350 × 500 or 560 × 780 mm suits their wall.
Include the likely frame size when discussing placement discreetly.
Keep the product details with the presentation.
The portrait format can work beside a dressing table or above a narrow cabinet. The largest print needs a clearer wall and more viewing distance. Do not assume the most generous gift must be the largest option.
A personal art gift does not need the recipient’s name printed on it; the thought can live in the choice.
Give meaningful gift wall art a lasting finish
Petal colour and quieter surrounding spaces deserve accurate reproduction. Colour-managed Giclée printing keeps the red nuanced rather than flat. Hand-finished framing completed in-house turns the print into a substantial gift ready for a considered place.
Meaningful gift wall art should remain relevant after cards and wrapping have gone. Red Roses offers a specific subject, while the right scale and bespoke finish make the thought durable.
wall art for a narrow wall between windows must fit the complete gap, including curtains, handles and the finished frame rather than paper dimensions alone. L’altra Sponda gives that decision a real subject, proportion and finish to assess.
Measure wall art for a narrow wall between windows precisely
Measure the clear plaster between both window trims.
Open curtains or blinds to their normal position.
Mark the full frame around the 120 × 280 and 240 × 560 mm options.
Stand at the entrance and seated viewpoint.
Check window reflections after dark.
L’altra Sponda’s vertical proportion can turn the wall pier into a purposeful pause. The smaller size suits a compact room. The larger option gives more authority, but its outer frame must leave visible wall on both sides.
Protect the edges
Allow curtains to move without rubbing the frame. Check projecting handles and the route used when cleaning the glass.
Control the symmetry
Centre the finished object on the usable pier. Do not move it off the architectural line to compensate for uneven curtains.
Avoid adding a stack of smaller frames. That can make the gap look narrower and create more reflected edges. One well-proportioned piece lets the windows remain the larger feature.
Frame wall art for a narrow wall between windows as one object
A slim composition exposes alignment errors and weak edge definition. Colour-managed Giclée production keeps the image articulate. In-house bespoke framing gives the unusual proportion stability without consuming unnecessary wall width.
Wall art for a narrow wall between windows should look chosen for the architecture, not squeezed into a leftover gap. L’altra Sponda offers the right rhythm; measuring makes it convincing.
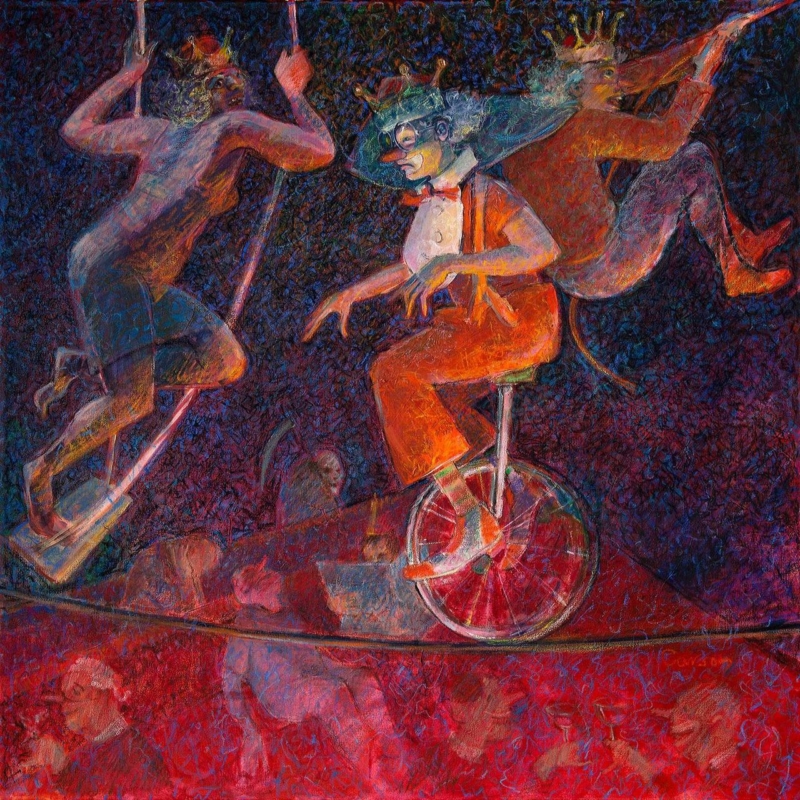
contemporary art prints work well in a sociable corner when they invite different readings instead of supplying one decorative answer. In the Court of Clowns gives that decision a real subject, proportion and finish to assess.
Let contemporary art prints invite interpretation
In the Court of Clowns suggests characters, performance and hierarchy without requiring a circus palette. Place it where two chairs or a small sofa encourage people to pause. The picture can begin a conversation while the furniture does its practical job.
Keep the supporting scene quiet
A patterned rug, bright cushions and theatrical ornaments may compete with the work. Choose one subtle colour connection and leave the remaining surfaces calm.
Decision
Useful test
265 mm square
Try it in a close corner with one chair and a focused lamp.
500 mm square
Mark the full frame above a wider pair of seats.
Viewing height
Sit down before setting the centre.
Lighting
Check evening glare from every lamp.
Must the frame look overtly modern?
No. A very thin frame can feel underweight, while an elaborate moulding can turn ambiguity into theatre. Compare finishes against the complete room.
Finish contemporary art prints without explaining them away
An open-ended image depends on tonal and colour detail that remains available for close looking. Colour-managed Giclée printing supports that detail. Hand-finished bespoke framing gives the square work presence without prescribing its meaning.
Contemporary art prints can make a small conversation area memorable. In the Court of Clowns supplies the question; restrained surroundings leave room for different answers.
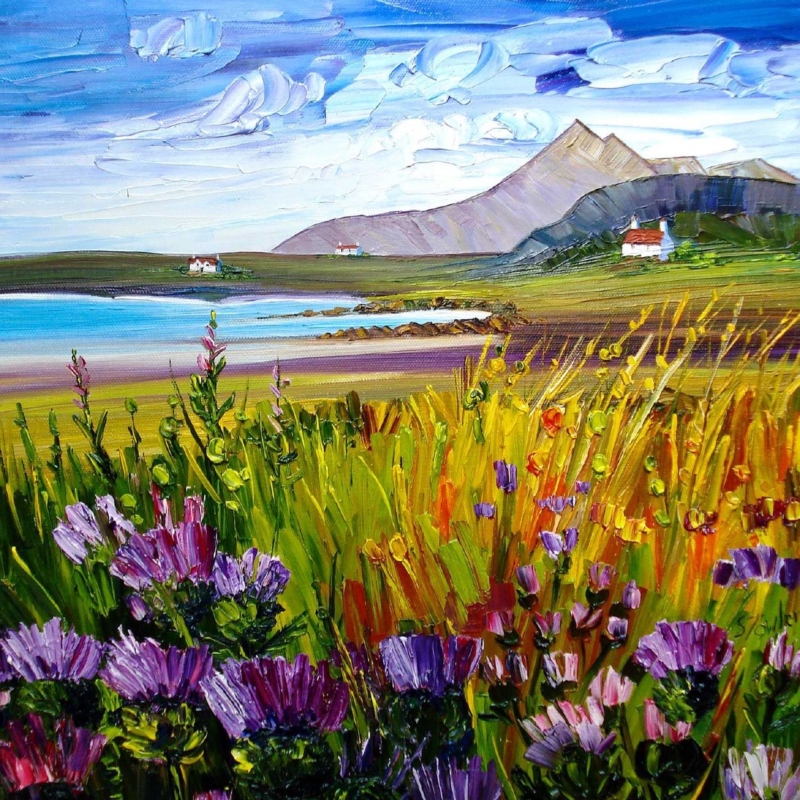
Isle of Skye prints can express the island through plants as convincingly as through a mountain or shoreline view. Wild Thistles, Skye gives that decision a real subject, proportion and finish to assess.
Choose Isle of Skye prints beyond the expected panorama
Wild Thistles, Skye shifts attention towards resilient Scottish plants. It suits a room where a sweeping scenic view would feel predictable. The botanical subject still carries place, yet it can sit naturally beside contemporary furniture and plain textiles.
Use the 265 mm square
The smaller print can make an intimate focal point above a compact cabinet or beside a reading chair. Mark the finished frame, not only the paper size.
Use the 500 mm square
The larger option can hold a wider wall. Give its square outline space instead of surrounding it with several small flower pictures.
Repeat one purple or green note, not the full palette.
Keep dried flowers and tartan accessories away from the display.
Check daylight so reflections do not hide finer marks.
Let the named place provide the Scottish connection.
A botanical island picture can feel rooted in Scotland without turning the room into a Highland theme.
Frame Isle of Skye prints to preserve botanical detail
Thistle heads, stems and surrounding colour need clear separation at either square size. Colour-managed Giclée production retains those relationships. Bespoke framing completed in-house gives the composition a firm boundary without making it formal.
Isle of Skye prints can describe more than a famous horizon. Wild Thistles brings island character through close observation, while edited colour and careful framing keep it fresh.