Posted on

Bespoke Photo Frames London: Artisan Quality, Delivered to Your Door

Bespoke Photo Frames London: Artisan Quality, Delivered to Your Door

That beautiful piece of art you love, the one-of-a-kind print, or that cherished family photograph – it deserves more than a standard, ill-fitting frame from a high street shop. The search for truly high-quality bespoke photo frames London can be frustrating, leaving you overwhelmed by choice and worried about who to trust with your treasured items. It’s a common dilemma: you want a perfect, protective frame, but finding a skilled artisan—whether for framing or for fine foods from a specialist like The Artisan Butcher—can feel like an impossible task.

But what if you could bypass the hassle entirely? Imagine commissioning a museum-quality, handcrafted frame from our Scottish workshop and having it delivered securely to your door. In this article, we’ll guide you through our simple, expert-led process. Discover how to choose the perfect materials to create a stunning final product that not only protects your artwork but acts as a beautiful bridge between the piece and your home’s decor. Your search for the perfect frame ends here.

Key Takeaways

  • Understand how a bespoke frame goes beyond standard sizes to perfectly complement and enhance the visual impact of your artwork.
  • Discover our seamless remote process for ordering the bespoke photo frames London residents love, bringing Scottish craftsmanship directly to your door.
  • Learn to confidently choose the right frame mouldings, mounts, and glazing to protect and display your most cherished pieces.
  • Explore creative framing ideas for more than just photographs, turning personal memorabilia and unique objects into stunning displays.

Why a Bespoke Frame is the Ultimate Investment for Your Art

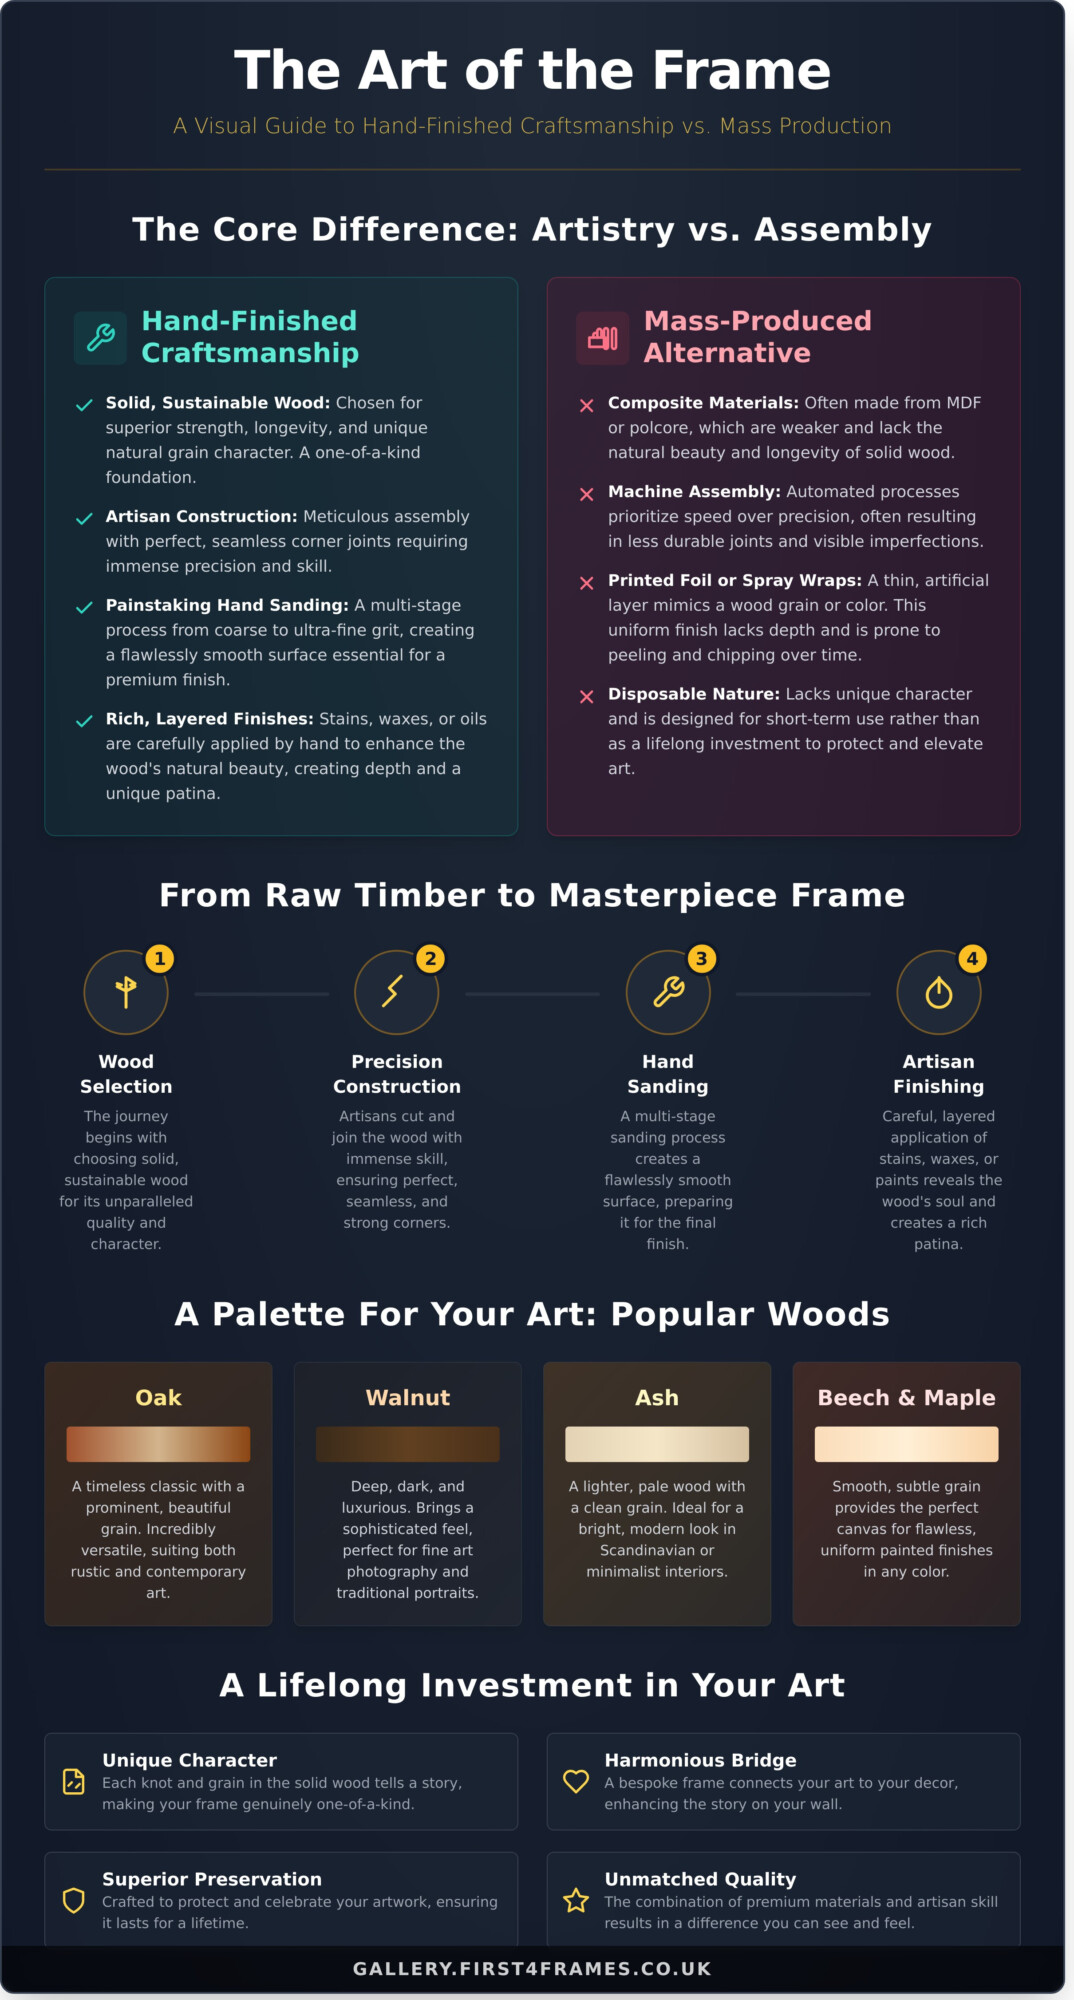
A standard, off-the-shelf frame forces your precious art into a pre-determined box. A bespoke frame, however, is meticulously crafted to fit your art perfectly. This is a crucial distinction that transforms a simple photograph or print into a genuine centrepiece. It guarantees a flawless fit for any piece, whether it’s an unconventionally sized canvas or a cherished family portrait, enhancing its visual impact and honouring its unique character.

To see the care and precision that goes into custom framing, this video offers a wonderful insight:

The Art of Presentation: More Than Just a Border

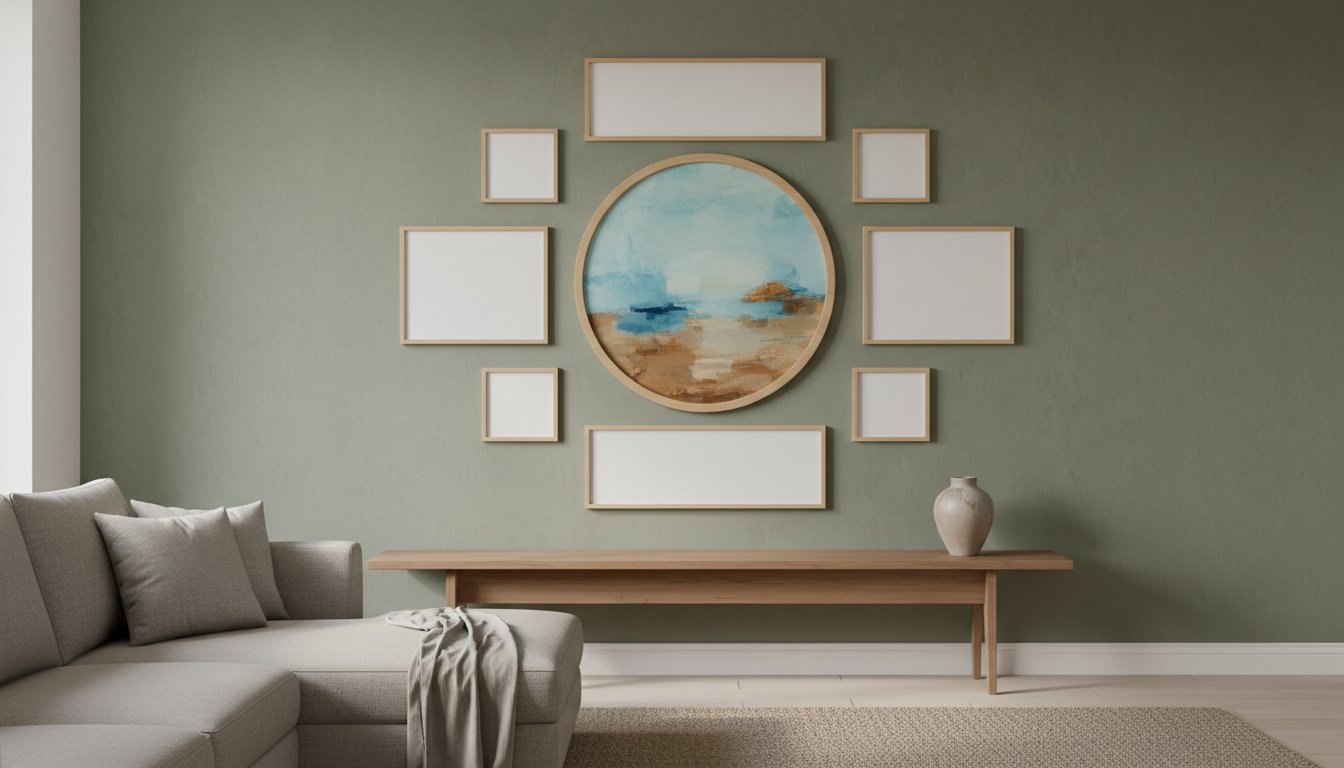
A truly great frame doesn’t overpower the art; it elevates it. Think of it as the perfect bridge between the artwork and your room’s decor. The right colour, finish, and style can harmonise with your interior design, making the piece feel intentional and perfectly placed. We also use premium mounts to give the artwork ‘breathing space’, which draws the viewer’s eye inward towards the image and adds a professional sense of depth and dimension. This tailored approach is the hallmark of the quality bespoke photo frames London artisans provide.

Preservation and Protection for a Lifetime

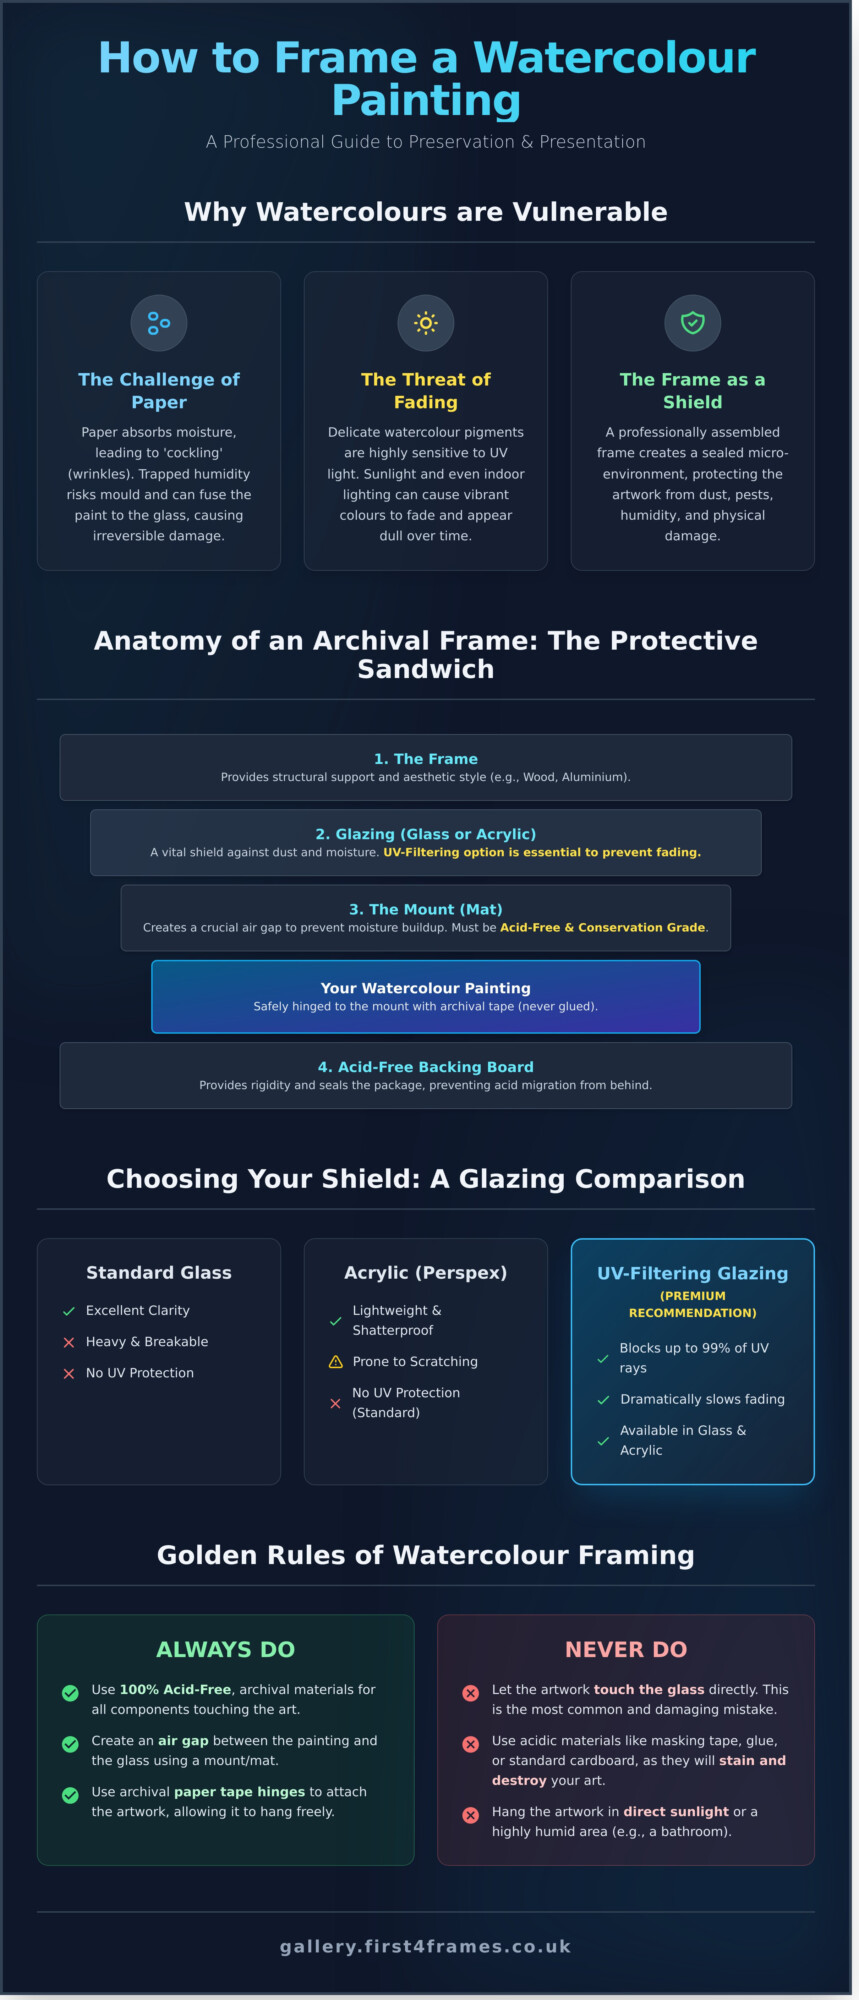
A beautiful exterior is only half the story. The materials used inside the frame are vital for protecting your art for decades to come. Unlike mass-produced frames that often use damaging acidic materials, a professional bespoke frame provides true, conservation-grade protection. This commitment to preservation has deep roots in the long history of picture frames, where protecting the art has always been a core function.

  • Acid-Free Mounts: We use only acid-free, conservation-grade mount boards. This prevents the dreaded ‘mat burn’-a permanent yellow or brown stain caused by acids in cheap materials leaching into your artwork over time.
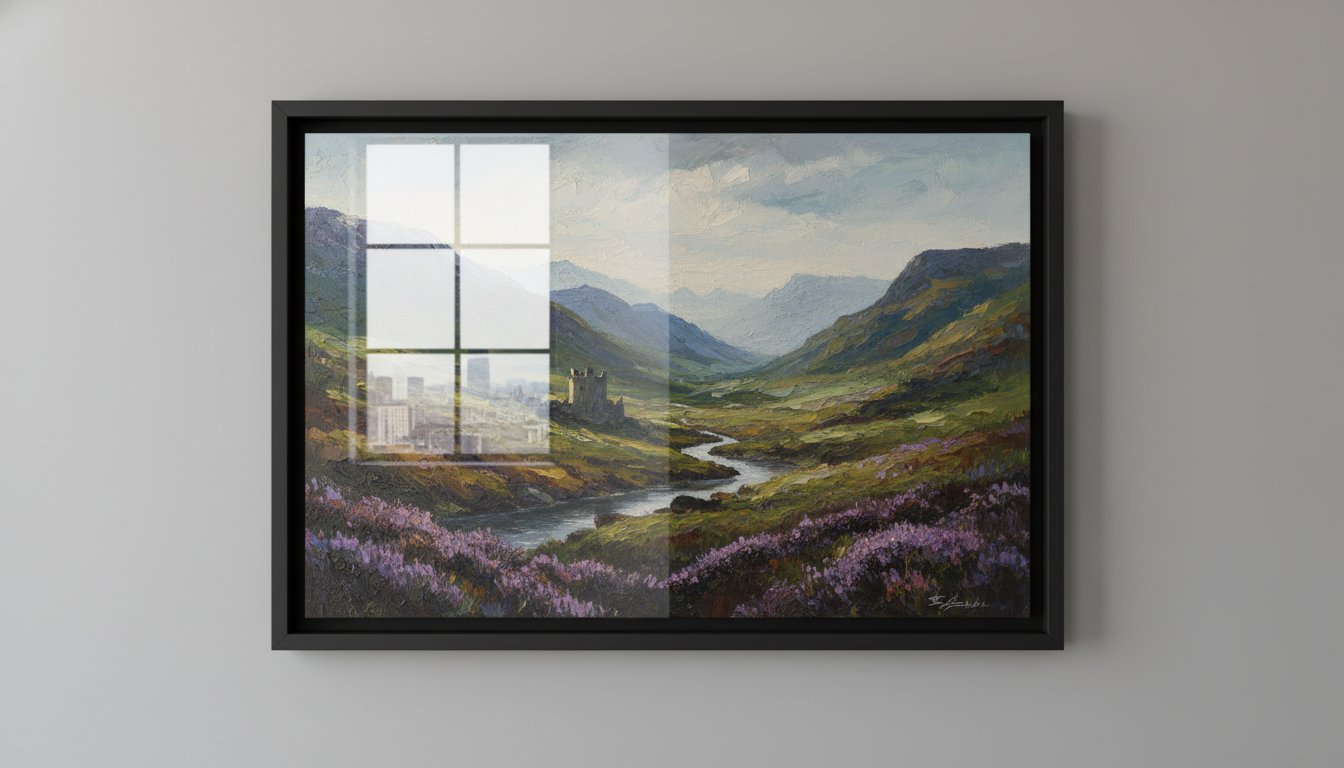
  • Specialist Glazing: Standard glass offers minimal protection from harmful ultraviolet (UV) light, the primary cause of fading. We provide specialist glazing options with up to 99% UV protection, acting like a permanent sunscreen for your art.
  • Professional Sealing: The back of every frame is expertly sealed to create a robust barrier against dust, humidity, and even insects, ensuring the environment inside the frame remains stable and pristine.

When you invest in a handcrafted frame, you are choosing longevity and superior quality. A mass-produced alternative may look passable at first, but its low-grade materials will inevitably degrade, potentially harming the art within. Our commitment to expert craftsmanship ensures your frame is not just a beautiful container, but a permanent and protective home for your most treasured pieces.

Our Process: Seamless Bespoke Framing for London Clients

We believe that distance should never be a barrier to exceptional craftsmanship. Our goal is to make acquiring premium bespoke photo frames in London a simple and rewarding experience. We have refined a remote process that brings our workshop’s expertise directly to you, combining personal consultation with digital precision to guarantee your complete satisfaction-all from the comfort of your home. Your treasured artwork is safe with us, handled with care and transported via our fully insured, specialist courier service from start to finish.

Step 1: The Virtual Consultation

Your journey begins with a personal conversation. During a friendly phone or video call, you’ll discuss your artwork and vision with one of our framing experts. We provide professional guidance on everything from frame styles and mount colours to the perfect proportions that will make your piece sing. To get started, simply send us digital photos of your art or its precise measurements, and we’ll take it from there.

Step 2: Choosing Materials & Digital Mock-ups

We bridge the digital gap by bringing the materials to you. After our consultation, we’ll post physical samples of our premium frame mouldings and mount boards directly to your London address. This allows you to see and feel the quality and match colours perfectly with your decor. You will also receive a detailed digital mock-up, showing exactly how your finished piece will look. This ensures you can finalise every detail with absolute confidence before our artisans begin their work.

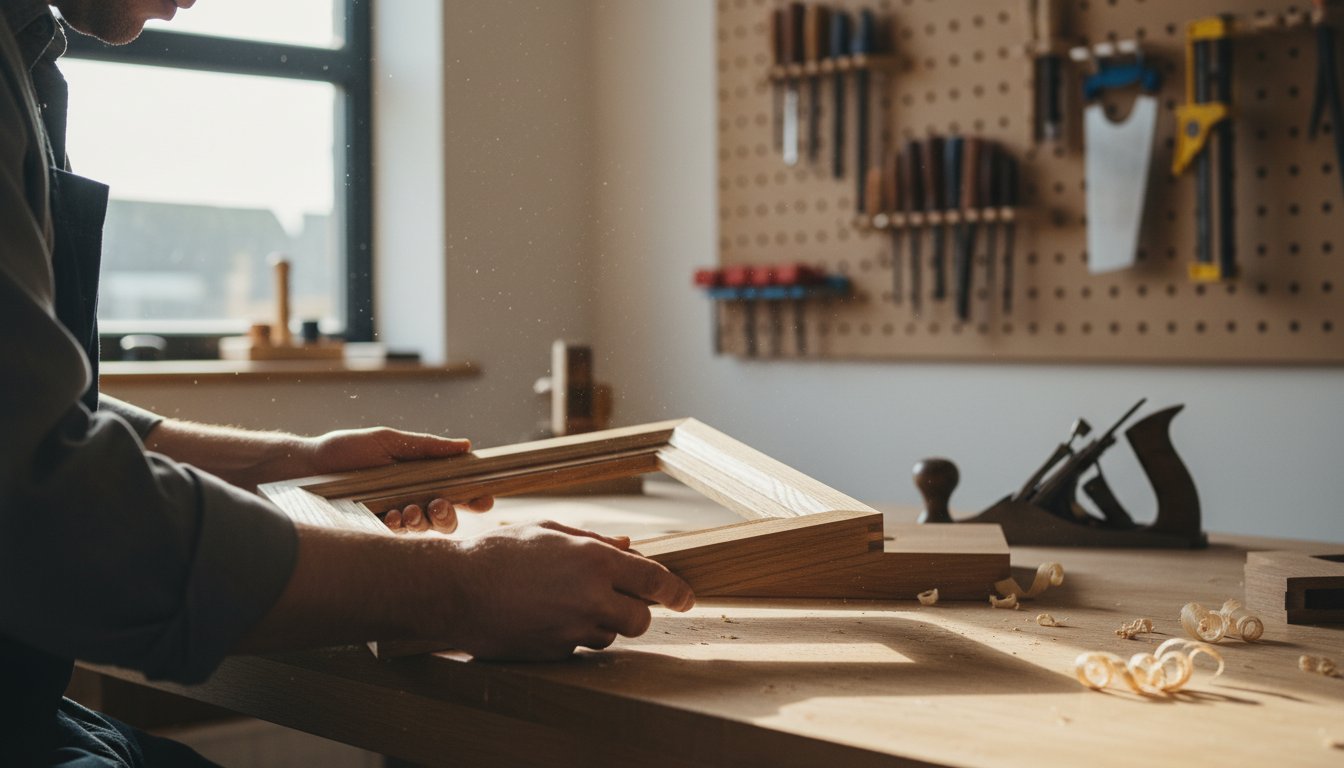
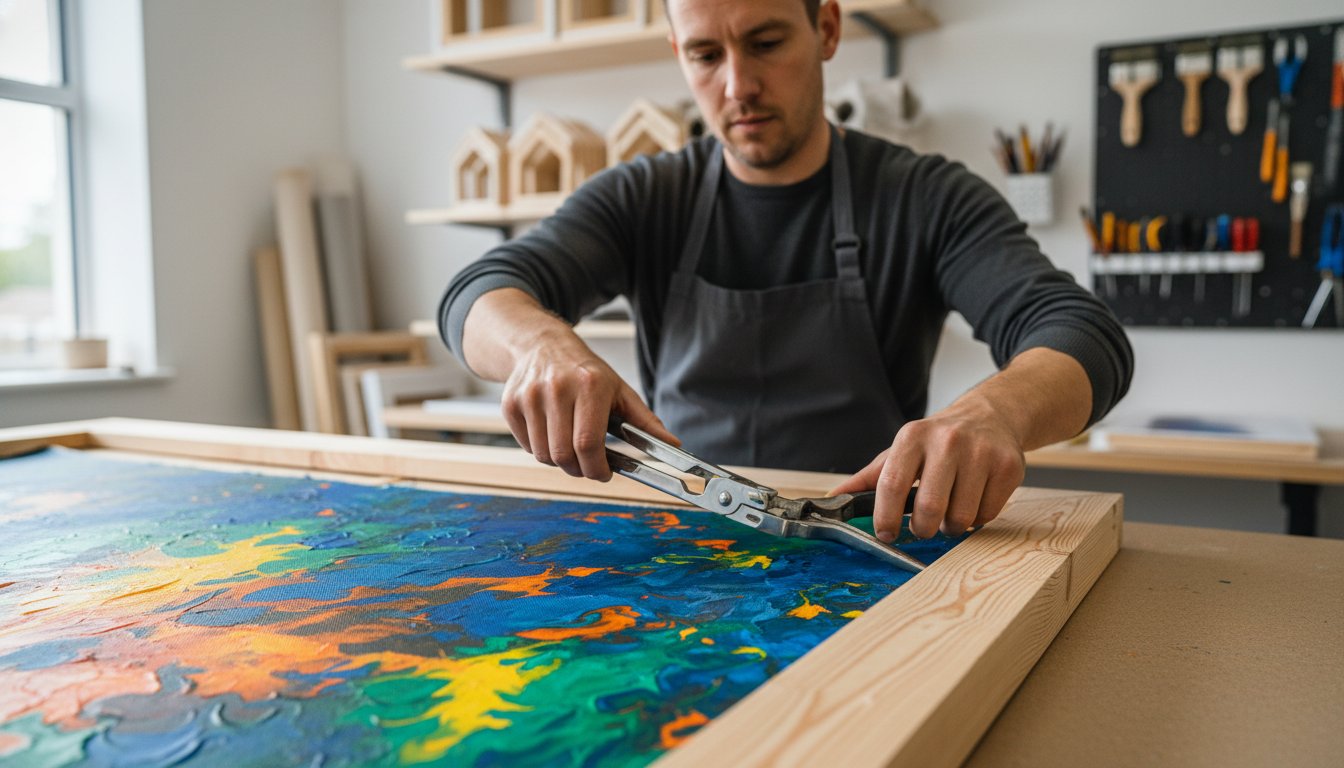
Step 3: Handcrafting & Secure Delivery

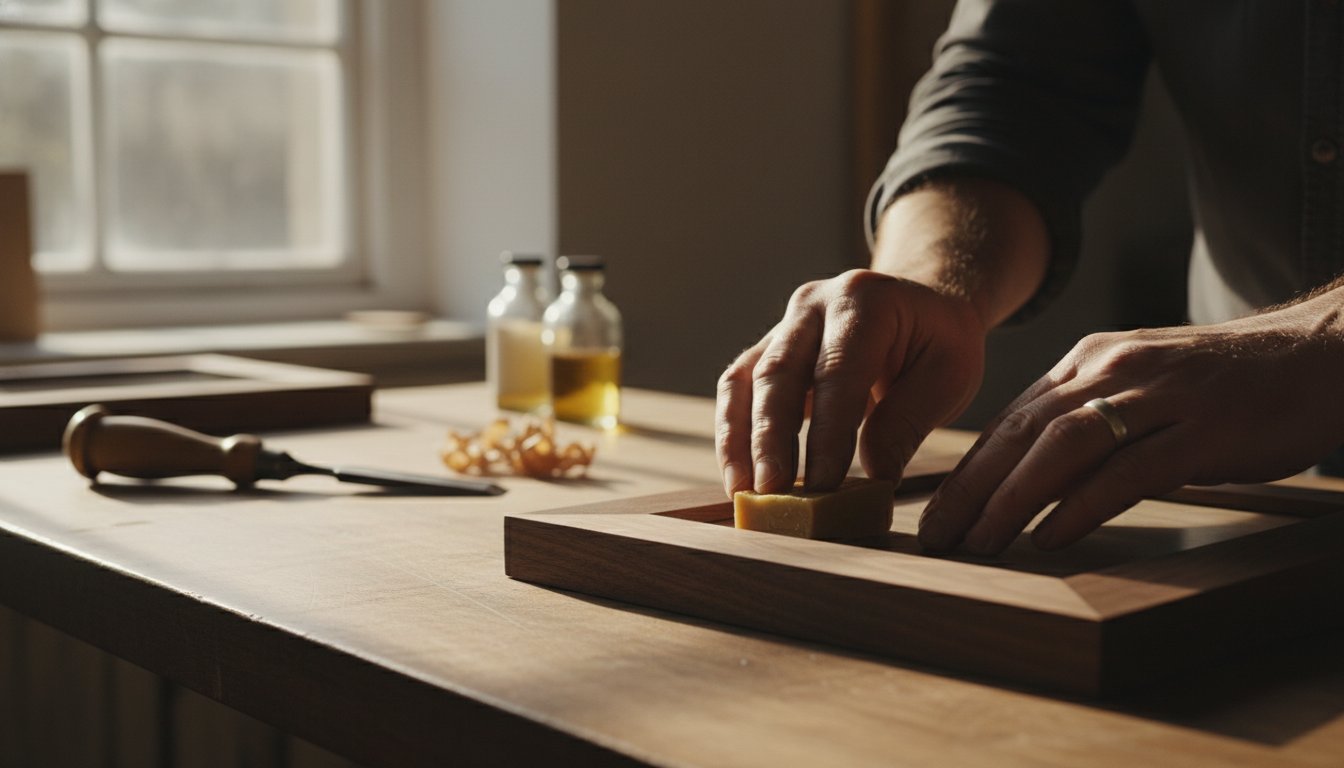
With your approval, our master craftspeople get to work in our Falkirk, Scotland workshop. Each frame is meticulously handcrafted using traditional techniques and the finest materials, reflecting skills honed over years and rooted in principles similar to those found in professional frame conservation. Once complete, we use specialist packaging designed for the safe transit of glazed artwork. Your finished piece is then dispatched via a secure, insured courier, arriving at your door perfectly finished and ready to hang.

An infographic comparing bespoke photo frames London to standard off-the-shelf frames, highlighting benefits such as acid-free mounts, specialist glazing, professional sealing, and a seamless 3-step remote process for framing artwork.

A Guide to Frame Mouldings, Mounts, and Glazing

Creating the perfect frame is a journey of artistic discovery, where every choice contributes to the final masterpiece. Understanding the core components-the moulding, mount, and glazing-empowers you to make decisions that not only protect your artwork but elevate it. Let’s demystify these key elements of craftsmanship.

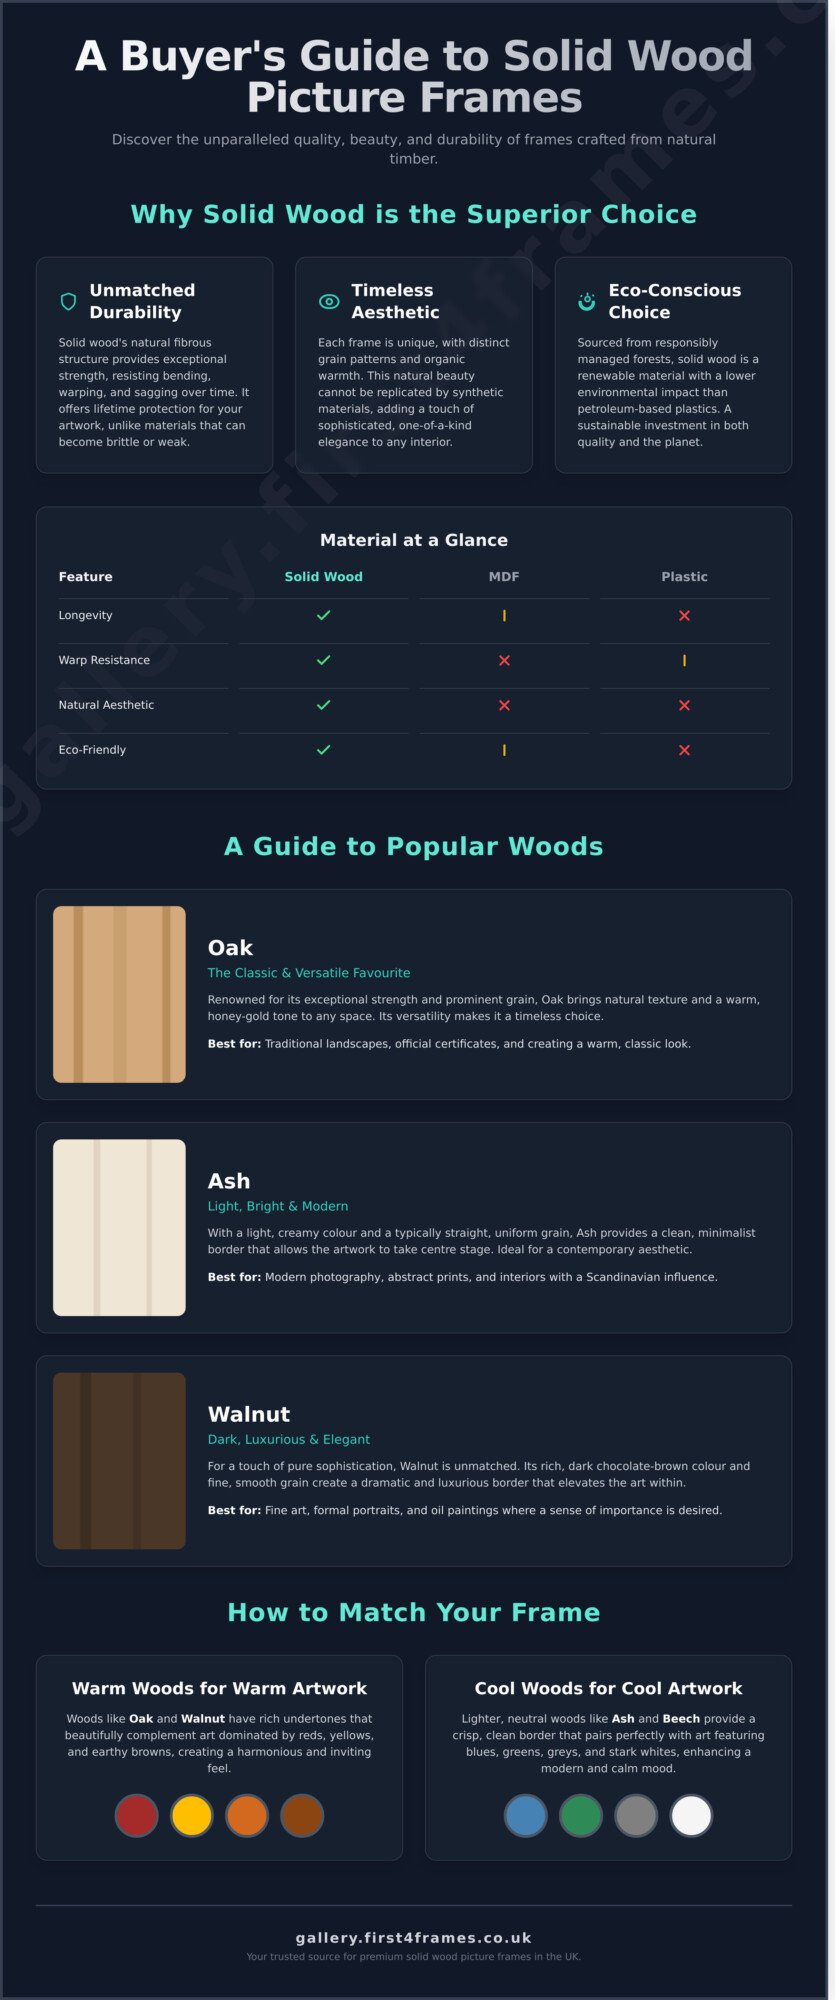
Choosing the Right Moulding (The Frame Itself)

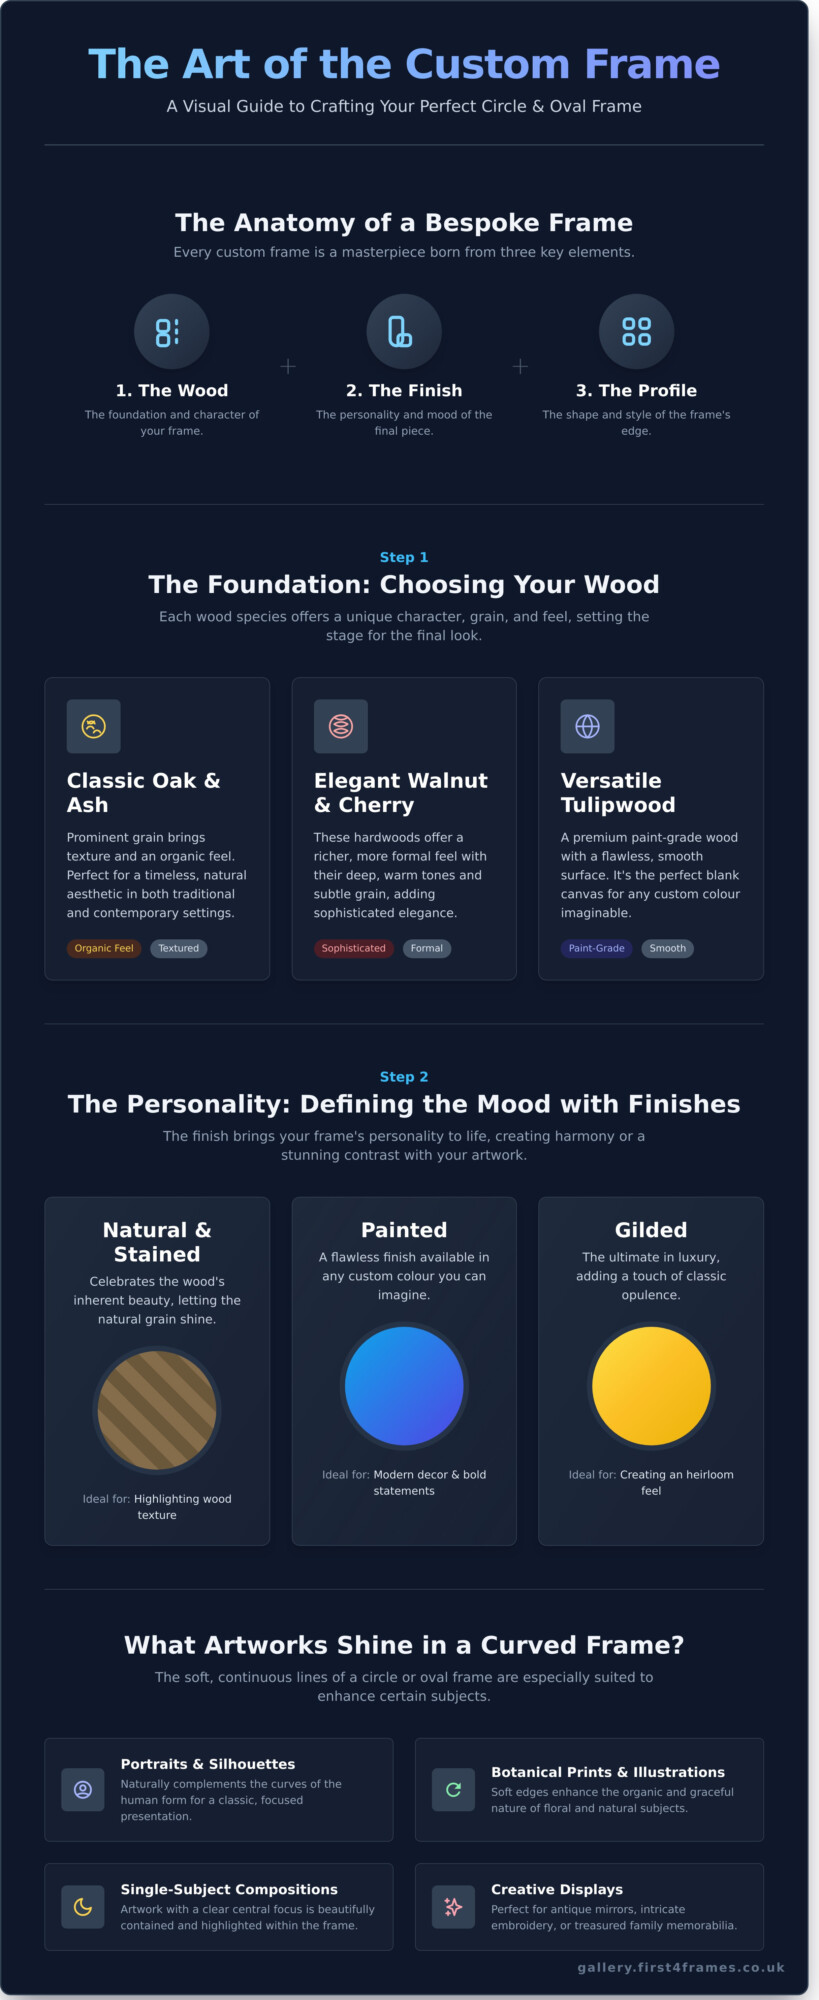
The moulding is the very foundation of your frame’s character. When selecting from the diverse options for bespoke photo frames London artisans provide, the material is your starting point. Natural woods offer timeless appeal: Oak provides a warm, classic feel with its prominent grain; Ash offers a lighter, contemporary look; and Walnut delivers a deep, luxurious finish for a touch of sophistication. Beyond natural wood, painted and stained finishes can be tailored to match any colour scheme precisely. The frame profile also plays a crucial role; simple, clean lines best complement modern art and photography, while more ornate profiles honour the tradition of classical pieces. The frame itself is an art form, a tradition celebrated in collections of artisan quality frames that demonstrate centuries of dedicated craftsmanship.

Selecting the Perfect Mount

A mount, or mat, is the elegant border between the frame and your artwork. Its primary purpose is to create visual breathing space and prevent the artwork from touching the glass. A single mount offers a clean, classic presentation. For added depth and a more formal look, a double mount-using two layers with a slight reveal of the bottom colour-is a spectacular choice. While neutral whites and creams are timeless, don’t be afraid to use colour. A bold mount can draw out specific tones in your picture, and textured options can add a subtle layer of luxury.

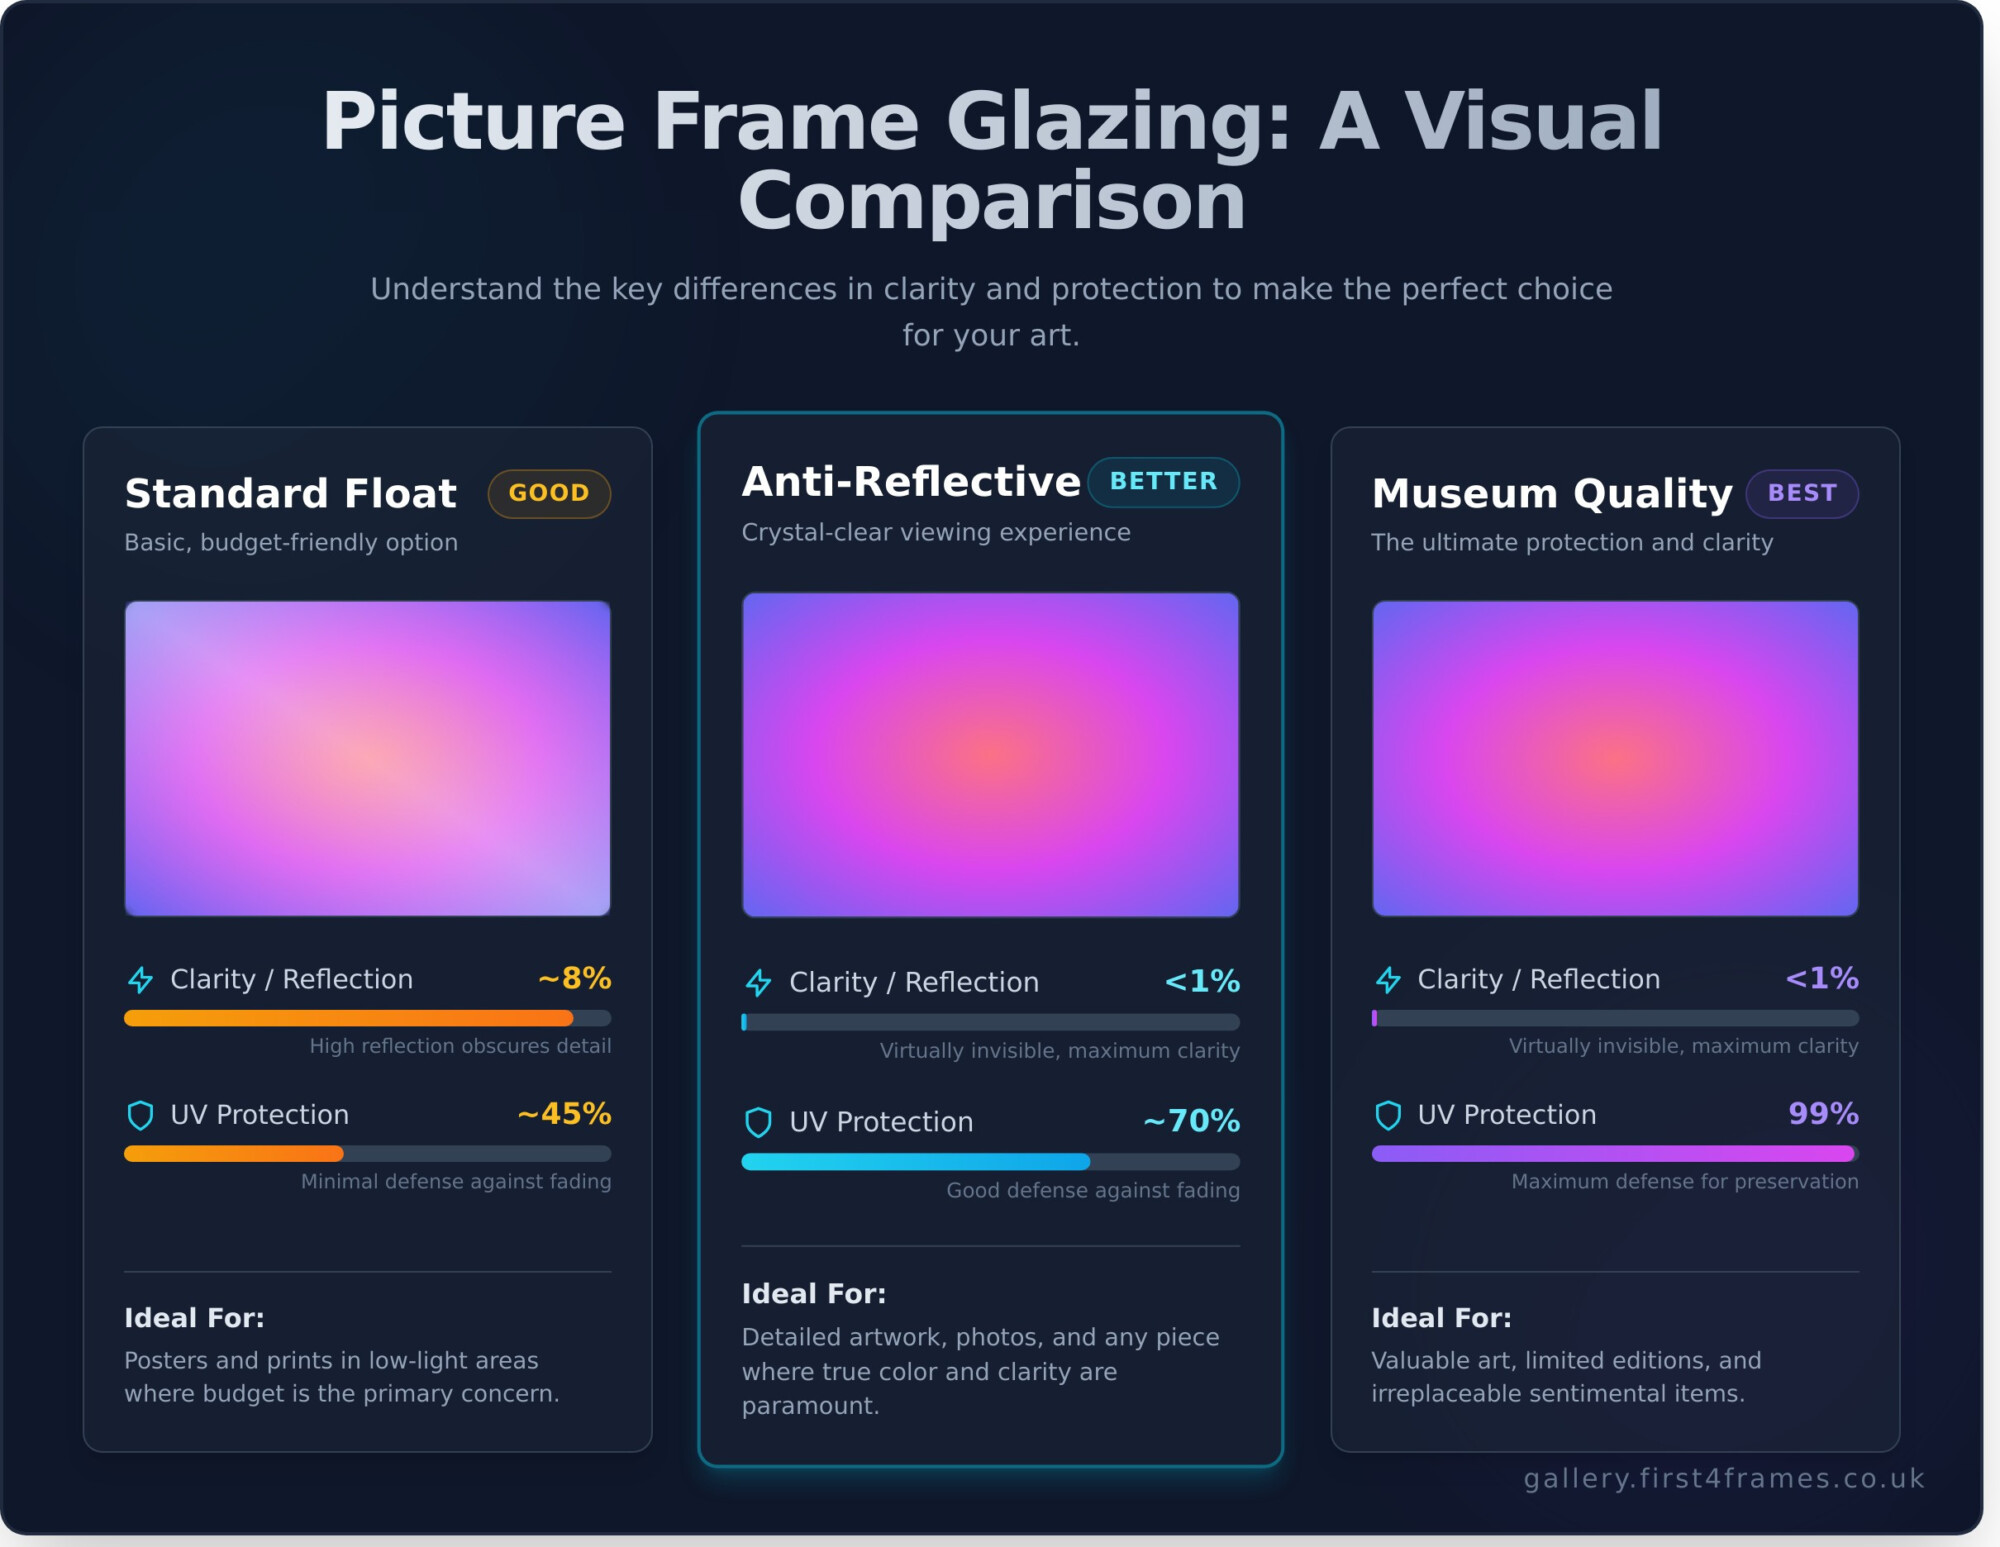
Understanding Your Glazing (Glass) Options

Glazing is the final, protective shield for your cherished piece. The right choice depends on your artwork’s value, placement, and your viewing preference. We offer a premium selection to ensure your art is perfectly preserved and presented.

  • Standard Picture Glass: A cost-effective and clear option that provides basic protection, though it can produce reflections in brightly lit rooms.
  • Anti-Reflective Glass: This specialist glass is treated to minimise glare and reflections, offering a crystal-clear view of your artwork from any angle.
  • UV-Protective & Museum Glass: The ultimate choice for valuable or sentimental pieces. This premium glazing blocks up to 99% of harmful UV rays, preventing fading and preserving your art for generations to come.

See how these elements come together to create stunning results in our online gallery of custom framing projects.

Beyond Photographs: Custom Framing for Every Treasure

A beautiful frame does more than just protect a picture; it elevates it. While we are passionate about photographs, our bespoke framing service in London is designed to preserve and showcase anything you hold dear. From priceless art to personal mementos, our craftsmanship turns your treasured items into spectacular displays that tell your unique story. We believe every cherished piece deserves a perfect presentation.

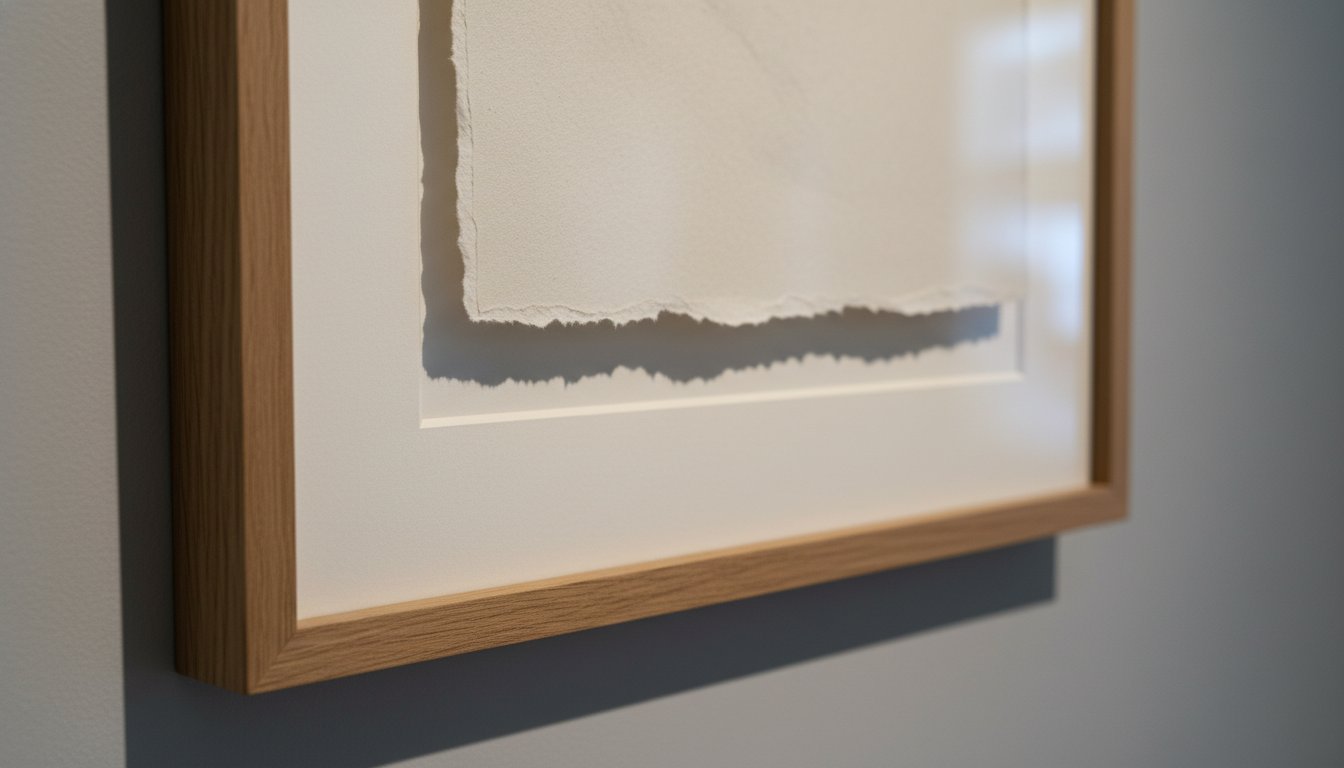
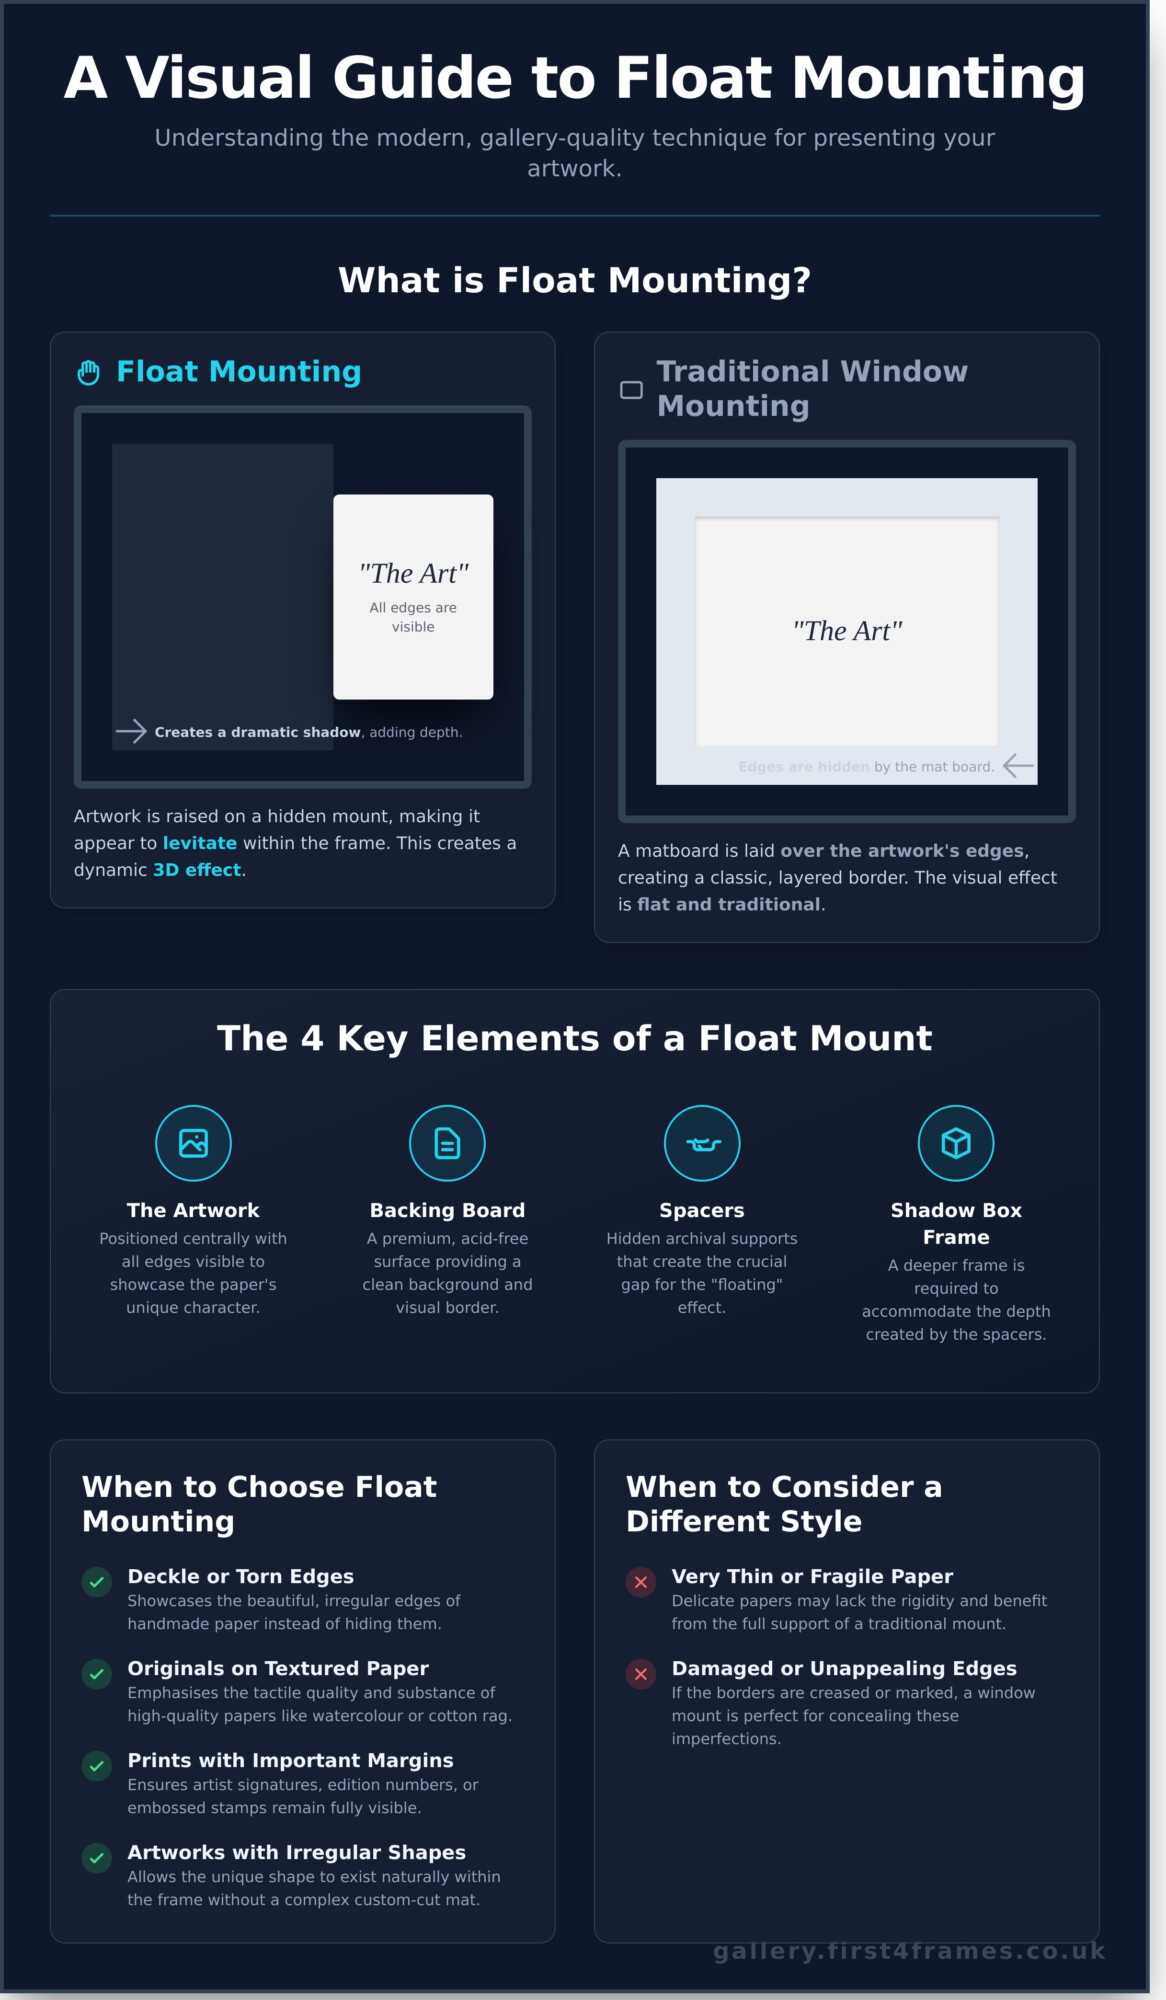
Fine Art Prints and Original Paintings

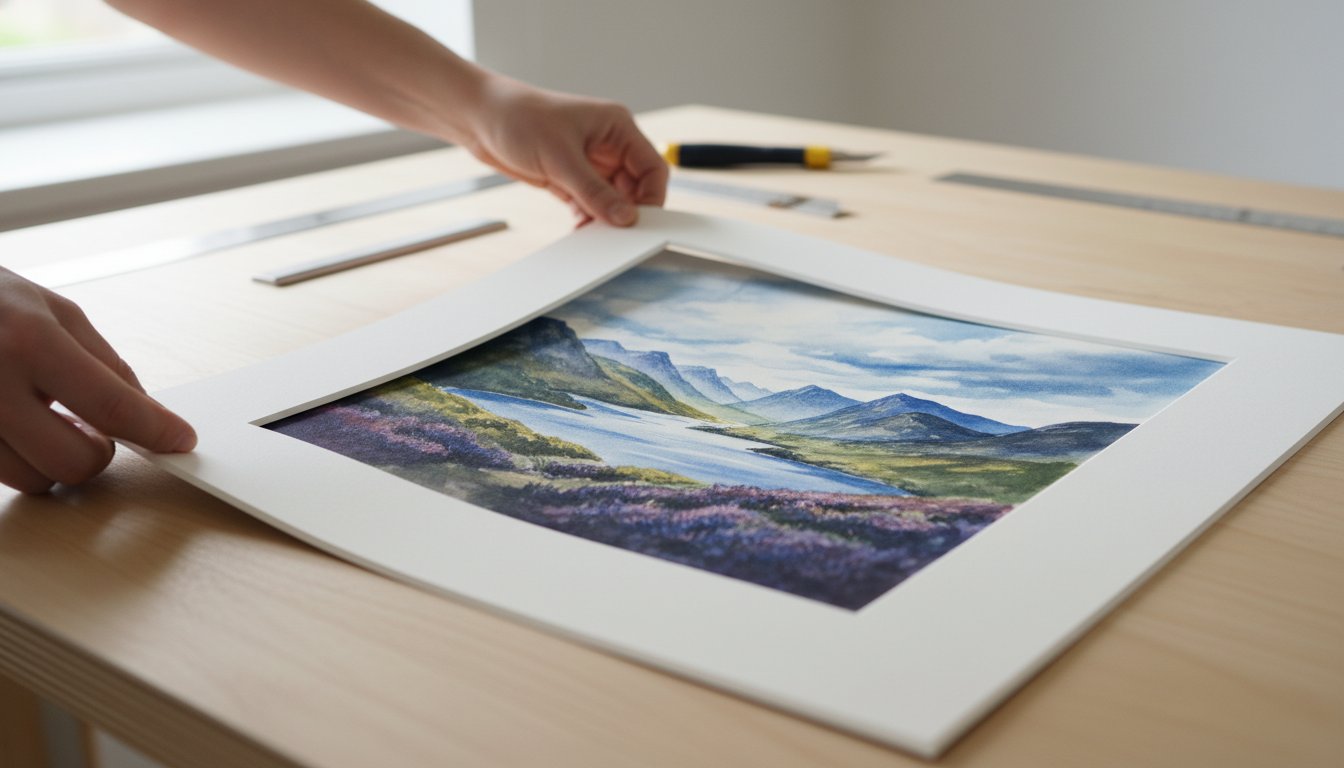
Your fine art deserves a frame that complements its beauty without overpowering it. We specialise in framing delicate watercolours, high-quality Giclée prints, and original oil paintings on canvas. For a contemporary, gallery-style finish, we often recommend tray frames (or floater frames) that make the artwork appear to float. Our experts ensure every piece, especially those on fragile paper, is mounted with archival-quality materials to preserve its integrity for years to come.

Memorabilia and 3D Objects

Some memories are three-dimensional. Our expertise in bespoke photo frames London extends to creating stunning deep box frames for your most cherished objects. Whether it’s a signed sports shirt, military medals, or souvenirs from a once-in-a-lifetime trip, we use secure, non-damaging mounting techniques to display them perfectly. Let us transform your precious keepsakes from a box in the attic into a breathtaking piece of wall art that sparks conversation.

Certificates, Maps, and Documents

Celebrate your achievements and interests with professional framing that commands respect. We provide premium framing for university degrees, corporate awards, and other important documents, making them ideal for display in London offices, studies, and boardrooms. We also have extensive experience in handling and preserving fragile items like antique maps and vintage posters, protecting them from environmental damage while highlighting their historic character and charm.

Your imagination is the only limit. If an item holds meaning for you, it is worthy of a beautiful, bespoke frame. Don’t let your treasures hide away; let’s work together to give them the presentation they deserve.

Have something unusual you’d like to frame? Challenge our framers with your project!

Elevate Your Art with Expert Bespoke Framing

Choosing a frame is the final, crucial step in honouring your art. A custom frame is a vital investment, protecting your precious photographs and keepsakes while elevating them into spectacular display pieces. From selecting the perfect archival-quality mount and glazing to finding a moulding that acts as the perfect bridge between your art and your decor, every detail matters in creating a finished masterpiece.

With over 20 years of professional framing experience, our passion is bringing this vision to life. All our bespoke photo frames London clients receive are handcrafted with meticulous care in our dedicated Scottish workshop. As specialists in conservation framing for fine art, we ensure your cherished memories are preserved for generations to come, giving you complete peace of mind.

Ready to give your art the stunning presentation it truly deserves? Let our expert team guide you through a simple, inspiring process. Start Your Free Online Framing Consultation Today and let’s begin the journey of creating something truly beautiful for your space.

Frequently Asked Questions

How do I safely send my own artwork to you from London?

We make the process simple and secure. Once your order is placed, we can arrange a collection from your London address with a trusted courier like DPD or Royal Mail Special Delivery. We advise placing your artwork between two sturdy pieces of cardboard and wrapping it securely. For delicate or high-value pieces, a hard-sided portfolio or tube is best. Rest assured, your art is in safe, professional hands from the moment it leaves you.

Can I really get the right frame without seeing it in person?

Absolutely. We understand the importance of getting it just right. Our website features high-resolution images and detailed descriptions of all our premium mouldings and mounts. Our online frame designer allows you to upload a photo of your art to visualise the final result, giving you a clear and accurate preview. Our team of experts is also on hand to offer personalised advice, ensuring you find the perfect frame to complement your artwork and your home.

What is the typical turnaround time for a bespoke frame delivered to London?

Our passion for craftsmanship is matched by our efficiency. For most bespoke photo frames London orders, our workshop turnaround is typically 5-7 working days. Once your beautiful frame is complete, we dispatch it using a next-day courier service directly to your London address. You will receive tracking information as soon as it’s on its way, so you know exactly when to expect your professionally framed piece. Please allow a little extra time for more complex projects.

Is it more expensive than using a local London framer?

You may be pleasantly surprised. Because we operate from a dedicated workshop rather than a high-street location, we avoid expensive London overheads. This allows us to invest in premium, conservation-grade materials and pass the savings directly on to you. We offer exceptional craftsmanship and the convenience of home delivery at a highly competitive price, often proving more cost-effective without ever compromising on the spectacular quality your artwork deserves.

What happens if my frame arrives damaged?

Your satisfaction is our highest priority. In the unlikely event your frame arrives damaged, please contact our customer service team within 48 hours with photos of the issue. We will immediately arrange to collect the damaged item free of charge and will craft and send a perfect replacement at no extra cost to you. We take immense care in our packaging, but we stand by our commitment to delivering a flawless product to your door, hassle-free.

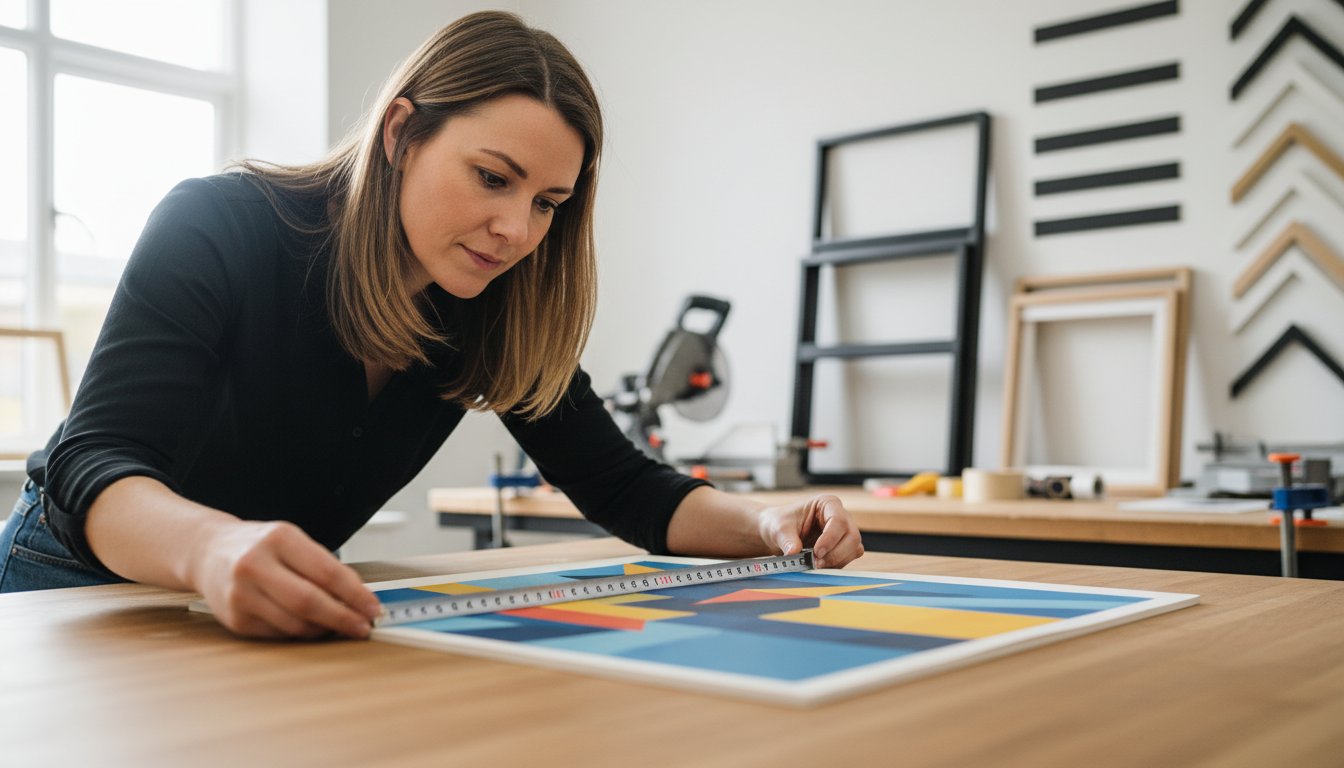
How do I measure my artwork accurately for a bespoke frame?

Getting the perfect fit is simple. Lay your artwork on a flat, clean surface and use a firm steel measuring tape for the best accuracy. Measure the exact height and width of the image you want to be visible. Do not add any extra for clearance – our expert framers handle that for you! For precision, we recommend measuring in a couple of places and using the smallest measurement. Just enter these two dimensions into our online designer, and we’ll do the rest.

Posted on

Hand-Finished Picture Frames UK: A Guide to True Craftsmanship

Hand-Finished Picture Frames UK: A Guide to True Craftsmanship

Have you ever stood before a beautifully framed piece of art and wondered what sets it apart? The choice can feel overwhelming, especially when deciding how to best protect and display a piece you love. You might question if the higher price tag is justified, or what ‘hand-finished’ really means. When searching for hand finished picture frames uk, you’re not just looking for a border; you’re seeking a bridge between your art and your home, a piece of craftsmanship that enhances the story on the wall.

This guide is here to demystify the entire process. We will pull back the curtain on the meticulous techniques that define a truly bespoke frame, from selecting the perfect sustainable wood to applying the final, delicate layer of wax or paint. Embark on this journey with us to discover the immense value and artistry involved, and feel confident in choosing a spectacular, premium frame that will protect and celebrate your artwork for a lifetime.

Key Takeaways

  • Understand the true artistry that separates a genuinely hand-finished frame from a mass-produced alternative.
  • Learn how to select the perfect wood and finish to create a beautiful, harmonious bridge between your art and your decor.
  • Discover why a bespoke frame is a lifelong investment in preserving and enhancing your art, not just an expense.
  • Follow a clear guide to confidently commission the best hand finished picture frames UK artisans have to offer for your masterpiece.

What Truly Defines a ‘Hand-Finished’ Picture Frame?

In a world of mass production, the term ‘hand-finished’ signifies a profound difference-a commitment to artistry over assembly. A truly hand-finished frame isn’t just put together by a person; it’s meticulously crafted, with every stage receiving the care and attention of a skilled artisan. It’s the very opposite of a disposable, factory-made item, offering a unique character that elevates the artwork it holds.

To see the level of precision involved in creating a frame from scratch, this video offers a fantastic look into the process:

This dedication to craftsmanship is what sets premium hand finished picture frames uk apart. The journey from raw timber to a beautiful, gallery-ready frame involves a series of deliberate, skilled actions that simply cannot be replicated by a machine. It’s a difference you can both see and feel.

The Material Difference: Solid Wood vs. Composite

It all begins with the foundation. We use solid, sustainable wood, chosen for its superior strength, longevity, and unique character. Unlike MDF or polcore-composite materials often wrapped in a printed foil that can peel or chip over time-solid wood possesses a natural grain. Each knot and whorl tells a story, ensuring your frame is genuinely a one-of-a-kind piece.

Construction & Craftsmanship: The Artisan’s Touch

The artisan’s touch is most evident in the construction. Achieving perfect, seamless corner joints requires immense precision and skill. After assembly, the frame undergoes a multi-stage sanding process entirely by hand, moving from a coarse to an ultra-fine grit. This painstaking preparation creates a flawlessly smooth surface, which is essential for achieving a premium, lasting finish.

The Finish Itself: More Than Just a Coat of Paint

Finally, the finish is where the frame’s soul is revealed. This isn’t a quick, uniform spray of paint. Hand-finishing involves carefully applying stains, waxes, or oils to enhance the wood’s natural beauty. This hands-on approach, a continuation of a long craft tradition (you can learn more about the history of picture frames and their evolution), builds colour in layers, creating a depth and richness that factory processes can’t match. The result is a frame with a unique patina and a warm, inviting character.

Exploring Wood Types & Finishes: A Palette for Your Art

The soul of a truly beautiful frame lies in its material. The choice of wood and its finish is not just a detail; it’s a crucial decision that defines the relationship between the art, the frame, and your space. Think of it as the artist’s final brushstroke. When you invest in the quality craftsmanship behind our hand finished picture frames uk, you are choosing a piece of bespoke furniture for your art, designed to protect and elevate it for years to come.

A Guide to Popular Frame Woods

Each timber possesses a unique character and grain, offering a different personality to frame your picture. We source only the best sustainable woods, with a few favourites standing out for their beauty and versatility:

  • Oak: A timeless classic. Known for its prominent, beautiful grain, oak is incredibly versatile, suiting everything from rustic to contemporary settings.
  • Walnut: Deep, dark, and luxurious. Walnut brings a sophisticated and premium feel, perfect for fine art photography and traditional portraits.
  • Ash: A lighter, pale wood with a clean grain. Ash is ideal for creating a bright, modern look that complements Scandinavian or minimalist interiors.
  • Beech & Maple: With their smooth, subtle grain, these woods provide the perfect canvas for painted finishes, allowing for a flawless, uniform colour.

Common Finishing Techniques Explained

The finish is where our artisans apply their expertise, a skill honed through dedication to the craft. This is the stage that transforms raw timber into a masterpiece, a process celebrated by institutions like The King’s Foundation through its traditional craftsmanship training programmes. Each technique imparts a distinct character:

This same dedication to heritage skills can be seen in other specialized craft sectors. For example, Mary Collings Church Furnishings has been applying traditional manufacturing techniques to ecclesiastical items for over half a century, showcasing the versatility and timeless appeal of expert woodworking.

  • Staining: Enhances the wood’s natural beauty, deepening its colour while allowing the inherent grain to remain the star of the show.
  • Waxing & Oiling: A traditional method that provides a soft, natural lustre. This finish protects the wood and gives it a tactile, warm feel.
  • Hand Painting: Offers limitless possibilities. From a solid, opaque colour matched to your decor to a gently distressed finish for a vintage feel.
  • Gilding: The application of gold or silver leaf for a spectacular, traditional look that adds a touch of opulence and grandeur.

Matching the Frame to Your Artwork

A great frame should never compete with the art; it should complete it. It acts as a bridge, seamlessly connecting the artwork to your room’s decor. Here are a few guiding principles:

  • Use warm, rich woods like Oak or Walnut to complement the tones in traditional oil paintings or classic prints.
  • Choose clean, simple profiles in Ash or a painted finish for modern photography, abstract art, and graphic prints.
  • Consider the dominant colours in your art. A frame’s stain or paint colour can be chosen to pick out and enhance a subtle hue within the piece.

Feeling unsure? Our passion is helping you find that perfect match. Need advice? Talk to our framing experts for a personal consultation.

An infographic compares hand-finished picture frames UK with mass-produced alternatives, highlighting materials, craftsmanship, finishes, wood types, and the unique benefits of investing in hand-finished art frames.

The Process: From Raw Timber to Masterpiece Frame

Ever wondered what transforms a simple piece of wood into a frame worthy of your most treasured art? It’s a journey of skill, patience, and meticulous attention to detail. This isn’t an automated assembly line; it’s a hands-on process where every decision matters. The dedication required reflects a standard of quality championed by organisations like the Guild of Master Craftsmen, which recognises the UK’s finest artisans. Let’s step into the workshop and see how it’s done.

Step 1: Selecting and Milling the Timber

It all begins with the wood. We carefully select beautiful, sustainable timbers like Ash, Oak, or Beech, ensuring each piece has the right character and strength. This raw timber is then milled in our workshop, where it’s cut and shaped into specific frame profiles. A master framer pays close attention to the wood’s grain, planning the cuts so the pattern flows seamlessly and consistently around the finished frame, creating a sense of natural harmony.

Step 2: Perfecting the Corners and Construction

The hallmark of a quality frame is its corners. Each length of the profile is cut to a precise 45-degree angle. These mitred corners are then joined using professional-grade wood glue and secured with v-nails shot into the back. The frame is placed in clamps to dry, ensuring a bond that is stronger than the wood itself. This robust structure is then carefully sanded, creating a perfectly smooth, raw canvas ready for the final, transformative stage.

Step 3: The Finishing Touch

This is where true artistry comes to the fore. Whether it’s a rich stain, a delicate wax, or a bespoke paint colour, the finish is applied by hand in multiple thin layers. Between each coat, the surface is ‘cut back’-lightly sanded-to remove any imperfections and achieve a flawless, deep lustre. This patient process is what distinguishes the best hand finished picture frames uk artisans offer. After a final buff and a rigorous quality inspection, the frame is ready for glazing and fitting, a true masterpiece built to last a lifetime.

Why Invest in a Hand-Finished Frame? The Lifelong Benefits

When you see the price difference between a mass-produced frame and a hand-finished one, it’s natural to ask: is it truly worth it? The answer is a resounding yes. Viewing a hand-finished frame not as an expense, but as a long-term investment, reveals its profound value. This investment is built on three essential pillars: unmatched durability, superior protection for your art, and a unique aesthetic that elevates your space.

Unmatched Durability and Longevity

Unlike factory-made frames often constructed from composite materials, our hand finished picture frames UK artisans use premium solid wood. This robust foundation is naturally resistant to warping and environmental shifts common in British homes. The meticulous, hand-applied finishes-whether wax, stain, or paint-do more than create a beautiful surface; they seal and protect the timber, ensuring it lasts for decades. This is a frame built to become an heirloom, protecting and presenting your art for generations to come.

Superior Protection for Your Artwork

A beautiful frame is only half the story; its primary role is to preserve what’s inside. A hand-finished frame provides the perfect housing for conservation-grade materials that offer unparalleled protection. This includes:

  • Acid-Free Mounts: Preventing the yellowing and discolouration known as ‘mat burn’ that can permanently damage your artwork over time.
  • UV-Protective Glazing: A crucial shield against the harmful effects of sunlight, which can cause colours to fade dramatically.
  • Structural Integrity: The sturdy, expertly joined corners of a handmade frame offer far greater physical protection against accidental knocks and falls.

Pairing your art with these materials ensures it remains as vibrant as the day it was created.

A Unique Aesthetic Statement

Perhaps the most compelling benefit is the sheer beauty and individuality of a hand-finished frame. Because each piece of wood is unique and every finish is applied by a skilled craftsperson, no two frames are ever exactly alike. This allows you to create a truly bespoke piece that perfectly complements your artwork and your home’s décor. The frame ceases to be a simple border; it becomes the essential bridge between your room and the artwork, enhancing its story and drawing the viewer in. It’s an integral part of the art, a testament to quality craftsmanship that elevates the perceived value of the piece it holds. Discover the transformative effect for yourself in our online gallery.

How to Commission Your Hand-Finished Frame in the UK

Embarking on a bespoke framing project is an exciting journey. It’s a creative partnership between you and a skilled artisan, designed to create a final piece that is much more than the sum of its parts. Finding the right partner is the first and most crucial step to ensuring your artwork is presented perfectly.

What to Look For in a Framer

When searching for a specialist in hand finished picture frames uk-wide, it’s important to look beyond a simple price list. A truly professional framer will be proud to share their craft. Look for these key indicators of quality:

  • A Rich Portfolio: Ask to see examples of their previous hand-finished work. This demonstrates their skill, consistency, and stylistic range.
  • Material Transparency: Inquire about their wood sourcing and sustainability practices. Premium, responsibly sourced timber is the foundation of a lasting frame.
  • A Proper Consultation: A bespoke service should involve a real conversation. Avoid framers who rely solely on an online form; a true consultation allows for nuance and expert guidance tailored to your specific piece.

The Consultation Process: Bringing Your Vision to Life

The consultation is where your vision and the framer’s expertise meet. This collaborative discussion is designed to explore every detail. We will discuss your artwork, your interior design style, and the specific room where the piece will be hung to ensure the frame acts as a perfect bridge between the art and its environment. You’ll be able to view and feel wood samples, explore different finish options, and receive professional guidance on crucial elements like mount proportions and specialist glazing that protects your art from UV damage.

Why Choose First4Frames Gallery for Your Project

At First4Frames Gallery, we believe that exceptional framing is born from passion and experience. With decades of expertise rooted in Scottish craftsmanship, we offer a complete bespoke service, guiding you from the initial idea to the final, beautiful delivery. We source only the best, sustainable materials to ensure your frame is not only spectacular today but remains a treasured part of your home for generations.

We are dedicated to making the process of commissioning beautiful, hand finished picture frames uk a simple and inspiring experience. Let us help you do justice to your art.

Start your bespoke framing journey with us today.

Elevate Your Art with True British Craftsmanship

A hand-finished frame is far more than a simple border; it is a bespoke piece of craftsmanship designed to be the perfect bridge between your art and your space. As we’ve explored, the journey from raw, sustainable timber to a finished masterpiece involves immense skill, precision, and a deep appreciation for detail. This commitment ensures your artwork is not just protected, but beautifully enhanced for a lifetime of enjoyment.

Choosing from the exceptional hand finished picture frames uk artisans create is an investment in quality and heritage. At First4Frames, we pour over 20 years of framing expertise into every piece we craft. Based in Falkirk and serving the entire UK, our passion is pairing your art with the perfect, sustainably sourced frame it deserves.

Ready to give your art the spectacular finish it warrants? Discover the art of bespoke, hand-finished framing with First4Frames.

Frequently Asked Questions

How much more does a hand-finished frame cost than a standard one?

A hand-finished frame is an investment in true craftsmanship. While a standard, off-the-shelf frame might cost £20-£50, a hand-finished equivalent typically starts from £75-£95 and can increase with size and complexity. The price for the premium hand finished picture frames uk customers choose reflects the many hours of skilled work, premium materials, and the unique, multi-layered finish that cannot be replicated by a machine. It’s a bespoke piece designed to last a lifetime.

How long does it take to have a hand-finished picture frame made?

Patience is key to perfection. The creation of a hand-finished frame is a meticulous process involving consultation, precise construction, and the careful application of multiple layers of finish, each requiring time to cure. Typically, you can expect a lead time of 2-4 weeks from confirming your order to completion. This ensures every detail is perfect and the finish is durable, beautiful, and exactly as you envisioned, making the wait worthwhile for a truly artisanal product.

Can you create a custom finish to match my furniture or decor?

Absolutely. This is one of the greatest advantages of choosing a hand-finished frame. We can create a completely custom finish to achieve perfect harmony with your interior. Whether you provide a paint colour code, a fabric swatch, or a photograph of your furniture, our artisans can expertly mix pigments and apply techniques to create a frame that seamlessly integrates with your existing decor. It’s the ultimate way to create a cohesive and professionally styled look in your home.

What is the difference between ‘bespoke’ and ‘hand-finished’?

These terms describe two different aspects of customisation, though they often go together. ‘Bespoke’ refers to the size and dimensions of the frame; it is made-to-measure to fit your artwork perfectly, rather than being a standard size. ‘Hand-finished’ refers to the surface treatment-the colour, texture, and protective layers are all applied by a skilled craftsperson by hand. A frame can be one or the other, but our finest work is often both for a truly unique result.

Where do you source the wood for your frames?

We believe a spectacular frame begins with exceptional materials. We source our solid woods, such as Oak, Ash, and Beech, from reputable timber merchants in the UK and Europe who are committed to sustainable forestry. By prioritising suppliers with FSC (Forest Stewardship Council) certification, we ensure our beautiful frames are not only built to last but are also created with environmental responsibility at their core, honouring both the art and its natural origins.

Can I get a hand-finished frame for a canvas painting?

Of course. We create stunning hand finished picture frames uk artists and collectors adore for canvas paintings. The most popular style is the ‘floater’ or ‘tray’ frame, where the canvas appears to levitate within the frame with a small gap around the edges. This contemporary style respects the artwork’s integrity by showing its sides. We can hand-finish these floater frames in any colour or style to perfectly complement your painting and its surroundings.

Posted on

Custom Circle and Oval Frames: A Complete Guide

Custom Circle and Oval Frames: A Complete Guide

When you picture a framed piece of art, your mind likely defaults to a classic rectangle. But what if your artwork is calling for something different, something with softer lines and a more unique character? Perhaps you’ve dismissed the idea, worried that a round frame might look dated or that the process would be too complicated and costly. The truth is, the right frame is the perfect bridge between your art and your decor, and premium custom circle and oval frames offer a spectacular way to make a truly personal statement.

At First4Frames Gallery, we are passionate about beautiful, bespoke craftsmanship. In this complete guide, we’ll demystify the entire journey, from concept to creation. We will explore the stunning aesthetic benefits of curved frames, guide you through the available materials and finishes, and show you exactly how to measure your piece with confidence. Prepare to discover how to commission the perfect frame that will transform your art into an extraordinary centrepiece for your home.

Key Takeaways

  • Learn how the curved lines of a circular or oval frame can soften your interior design and create a captivating focal point.
  • Discover the key customisation options, from wood types to unique finishes, to ensure your frame perfectly complements your artwork.
  • Our step-by-step guide demystifies the process, showing you how simple it is to commission beautiful custom circle and oval frames.
  • Gain confidence with practical tips on hanging, styling, and budgeting for your unique frame to ensure it looks stunning in your space.

Why Choose a Circle or Oval Frame? Thinking Beyond the Rectangle

In a world dominated by straight lines and sharp corners-from our walls and windows to our furniture-introducing a curve can be a breath of fresh air. A frame is the essential bridge between your artwork and your décor, and choosing a non-rectangular shape is a powerful design statement. Opting for bespoke custom circle and oval frames allows you to soften a room’s aesthetic, create an undeniable focal point, and add a touch of timeless elegance that a standard frame simply cannot match.

To see the beautiful craftsmanship involved in creating these unique shapes, take a look at the video below:

The Unique Aesthetic: Creating Softness and Focus

A round or oval frame immediately breaks the visual monotony of a space. Its gentle, continuous lines draw the eye inward, naturally guiding the viewer’s attention directly to the heart of the artwork. This effect makes it perfect for highlighting a specific subject. Whether you are aiming for a vintage, classic, or even a whimsical feel, the curved silhouette provides a sense of intimacy and charm that makes the piece feel special and distinct.

A Nod to Tradition: From Victorian Portraits to Modern Heirlooms

Oval frames have a rich history, most notably gaining popularity in the 18th and 19th centuries for portraiture and mirrors. This classic shape carries an inherent sense of elegance and nostalgia, instantly elevating a piece to feel like a cherished heirloom. While the history of Picture frame shapes is diverse, the oval has remained a symbol of sophistication. Today, these traditional forms are being reimagined in modern interiors, creating a beautiful contrast between classic and contemporary styles.

What Artworks Shine in a Curved Frame?

While any piece can be enhanced with the right frame, some artworks are particularly well-suited to a curved presentation. Our custom circle and oval frames provide the perfect showcase for:

  • Portraits and Silhouettes: The shape naturally complements the curves of the human face and form, creating a classic and focused presentation.
  • Botanical Prints & Delicate Illustrations: The soft edges of the frame enhance the organic and graceful nature of floral and natural subjects.
  • Single-Subject Compositions: Artwork with a clear central focus, from a single animal to an abstract shape, is beautifully contained and highlighted within a circle or oval.
  • Creative Displays: Think beyond prints! These frames are perfect for showcasing antique mirrors, intricate embroidery, or treasured family memorabilia.

A Guide to Customisation: Materials, Styles, and Finishes

Creating the perfect bespoke frame is a journey of artistic discovery, where every choice contributes to the final masterpiece. A frame is more than just a border; it is the bridge between your art and your interior, a carefully crafted combination of three key elements: the wood, the finish, and the profile. Understanding these components empowers you to design a piece that not only protects your art but elevates it, turning a simple picture into a spectacular focal point.

Choosing the Right Wood: From Classic Oak to Sleek Walnut

The foundation of any premium frame is the wood itself. Each species brings a unique character and grain, setting the stage for the final look. The beauty of creating custom circle and oval frames is that the continuous curve of the wood is always on display.

  • Classic Oak & Ash: For a timeless, natural aesthetic, the prominent grain of Oak or Ash brings texture and an organic feel, perfect for both traditional and contemporary settings.
  • Elegant Walnut & Cherry: These hardwoods offer a richer, more formal feel with their deep, warm tones and subtle grain, adding a touch of sophisticated elegance.
  • Versatile Tulipwood: As a premium paint-grade wood, Tulipwood provides a flawless, smooth surface, making it the perfect canvas for any custom colour you can imagine.

Finishes That Define the Mood: Natural, Painted, or Gilded

The finish is where your frame’s personality truly comes to life. It can be used to create harmony with your artwork or a stunning contrast that demands attention. We offer a finish to suit every piece and every home.

  • Natural & Stained: A clear wax or a carefully selected stain celebrates the wood’s inherent beauty, allowing the natural grain to remain the star of the show.
  • Custom-Painted: From subtle neutrals to bold, dramatic hues, a painted finish offers limitless possibilities. We can match any colour to seamlessly integrate the frame with your decor.
  • Gilded & Ornate: For a touch of classic luxury, a gilded finish in gold or silver leaf provides a truly opulent look, ideal for traditional portraits, mirrors, and fine art.

Understanding Frame Profiles: From Simple Curves to Ornate Details

A frame’s profile is its cross-sectional shape-the contours and curves that give it depth and character. This detail has a powerful impact on how the artwork is viewed. The concept of using a frame to draw attention to a subject has deep roots, with the ancient origins of picture frames found in Romano-Egyptian mummy portraits, demonstrating a long history of this beautiful craft.

  • Minimalist Profiles: Simple, gently rounded profiles offer a clean, contemporary aesthetic that allows the artwork to take centre stage without distraction.
  • Decorative & ‘Scooped’ Profiles: More traditional profiles often feature a ‘scoop’-a concave curve that draws the viewer’s eye inward, directly towards the art. These add a wonderful sense of depth and detail to custom circle and oval frames.

Infographic titled The Art of the Custom Frame explains how to craft perfect bespoke circle and oval frames, detailing choices for wood types, finishes, and art styles, with icons and short descriptions for each step in the process.

The Bespoke Process: How Your Custom Frame is Made

Embarking on a bespoke framing journey might seem complex, but our process is designed to be a simple, collaborative, and rewarding experience. We believe that creating the perfect frame is a partnership between your vision and our expertise. From the initial measurement to the final polish, we guide you at every stage, ensuring you feel confident and inspired as we bring your unique frame to life.

Step 1: Consultation and Measuring Your Artwork

The journey begins with the essentials: understanding your art and your space. We’ll guide you on how to measure your piece accurately-for a circle, we need the diameter at its widest point; for an oval, both the height and width. This is more than just a measurement; it’s a conversation. We discuss your vision, the artwork’s character, and where it will be displayed to ensure the final frame is a perfect complement to your home.

Step 2: Design, Material, and Glazing Selection

This is where your creativity truly shines. Together, we explore our extensive collection of premium materials to find the ideal wood, profile, and finish that acts as the perfect bridge between your art and your décor. We also help you select the right glazing to protect and enhance your piece:

  • Standard Glass: For a clear, classic finish.
  • Anti-Reflective Glass: To minimise glare and maximise clarity.
  • UV-Protective Glass: To safeguard your artwork from fading over time.

We’ll also consider mounts and other finishing touches for a truly professional result.

Step 3: The Craftsmanship in Our Falkirk Workshop

Once the design is finalised, our skilled artisans in our Falkirk workshop begin their meticulous work. Crafting seamless custom circle and oval frames requires a unique blend of traditional techniques and modern precision. Every curve is expertly shaped and every joint is flawlessly finished, transforming high-quality, conservation-grade materials into a frame that is both beautiful and built to last. This is where our passion for craftsmanship truly comes to life.

Step 4: Final Fitting and Finishing Touches

The final step is where your artwork and its new frame become one. We handle your piece with the utmost care, fitting it securely within its new bespoke home. A final, rigorous quality check ensures every detail is perfect, from the smooth finish to the secure backing. Your unique, ready-to-hang masterpiece is then carefully prepared for you to cherish for years to come.

Ready to start your project? Contact our experts today.

Practical Advice for Displaying Your Round and Oval Frames

Once you’ve commissioned your perfect bespoke frame, the final, exciting step is displaying it with the confidence it deserves. A uniquely shaped frame can transform a space, but it often comes with questions about cost, hanging, and styling. Here is our expert advice to ensure your beautiful new frame looks its absolute best.

What Influences the Cost of a Custom Shaped Frame?

The artisan craftsmanship required for custom circle and oval frames is more intricate than for standard rectangular ones. Bending and joining wood into a perfect curve is a highly skilled process. The final price is influenced by several key factors:

  • Size: A larger diameter requires more premium materials and labour.
  • Wood Choice: Hardwoods like oak will differ in cost from softer woods or custom-painted finishes.
  • Profile Complexity: An ornate, detailed moulding is more complex to shape than a simple, minimalist one.

We encourage you to view your frame not as a simple accessory, but as a long-term investment in protecting and elevating a piece of art you love.

Tips for Securely Hanging Your Frame

Due to their shape, round and oval frames hang best with specific fittings. We recommend using two D-rings attached to the back of the frame, roughly at the ’10-to-2′ clock positions. A strong picture cord is then strung between them, allowing the frame to hang securely from a single, well-anchored wall hook. This method prevents the frame from tilting or spinning. For maximum visual impact, hang your piece at eye level (around 57 inches from the floor) or use it to create a focal point above a piece of furniture like a console table or headboard.

Creating a Cohesive Look: Mixing Shapes on a Gallery Wall

A circular or oval frame can be a spectacular anchor for a gallery wall, breaking up the monotony of straight lines. To create a balanced and harmonious display, let your shaped frame be the hero. Place it centrally or slightly off-centre and build your arrangement of rectangular frames around it. Tie the collection together by using a consistent element-such as a similar frame material, colour palette, or artistic theme-to create a visual bridge between the different pieces. A cohesive look feels intentional and professionally curated.

For more beautiful examples and inspiration, we invite you to view our gallery.

Bring Your Vision to Life with Bespoke Framing

Choosing a frame is about more than just protection; it’s about presentation and personality. As we’ve seen, circular and oval frames offer a wonderfully elegant alternative to sharp corners, creating a softer, more focused viewing experience. By understanding the bespoke process and the rich variety of materials and finishes available, you are perfectly equipped to commission a piece that truly complements your art and your home.

At First 4 Frames, our passion is bringing these unique visions to life. With over 20 years of bespoke framing experience, we combine time-honoured techniques with premium, conservation-grade materials. Every one of our custom circle and oval frames is meticulously hand-crafted in our Scottish workshop, ensuring a spectacular, lasting finish for your treasured artwork.

Are you ready to create a stunning focal point for your space? Discuss your unique framing project with our Falkirk-based experts. We look forward to helping you create a future heirloom.

Frequently Asked Questions

Are custom oval and circle frames more expensive than rectangular ones?

Due to the intricate craftsmanship involved, custom circle and oval frames are typically priced higher than standard rectangular styles. The process requires specialised techniques and precision cutting, which results in more material waste. However, this investment ensures you receive a truly unique, handcrafted piece that provides a spectacular display for your art, making it a worthwhile centrepiece for any room.

How do I correctly measure my round or oval artwork for a frame?

Measuring for your bespoke frame is a simple, precise process. For circular artwork, measure the diameter-the widest distance from edge to edge, passing through the centre. For an oval piece, you will need two measurements: the height at its tallest point and the width at its widest point. We always recommend measuring twice to ensure perfect accuracy before placing your order so our artisans can craft a frame that fits flawlessly.

What is the typical turnaround time for a bespoke shaped frame?

Our passion is craftsmanship, and perfection takes a little time. The typical turnaround for a bespoke circular or oval frame is between 7 to 10 working days from order confirmation to dispatch. This allows our expert framers to give your piece the dedicated attention it deserves, ensuring every detail is finished to our premium standards before it begins its journey to you. We believe the spectacular result is always worth the wait.

Can you put a mount inside a circular or oval frame?

Absolutely! A professionally cut mount can be a beautiful addition. It creates a visual space between the artwork and the frame, drawing the viewer’s eye inward and adding a layer of depth and sophistication. We create bespoke mounts to perfectly follow the curve of your frame, providing a seamless and elegant border for your piece. It’s the perfect way to elevate your art and give it a professional, gallery-quality finish.

What kind of art looks best in a round frame?

The soft, continuous lines of a round frame are incredibly versatile. They are particularly stunning for portraits, creating an intimate, focused feel reminiscent of classical miniatures. Botanical illustrations, detailed still life scenes, and even abstract pieces with circular motifs look spectacular. Ultimately, these unique frames offer a beautiful way to break from tradition and turn any piece into an unforgettable focal point in your home.

Do you offer different types of glass for custom frames?

Yes, we offer a selection of premium glazing options to protect and enhance your artwork. Our standard offering is a high-quality 2mm float glass, perfect for most environments. For rooms with significant light, we recommend our anti-reflective glass to minimise glare and improve clarity. To preserve your fine art for a lifetime, our UV-protective glass is the ideal choice, blocking harmful rays that can cause fading over time.

Posted on

Solid Wood Picture Frames UK: A Complete Buyer’s Guide

Solid Wood Picture Frames UK: A Complete Buyer's Guide

Choosing the perfect frame can feel as challenging as creating the art itself. You want something that not only protects your cherished piece but elevates it, acting as a beautiful bridge between your artwork and your décor. But with so many options, it’s easy to feel lost. How do you tell the difference between timeless oak and elegant ash? How can you be sure you’re investing in premium quality, not a cheap veneer destined to warp? The search for the best solid wood picture frames UK artisans craft can leave you with more questions than answers, turning an exciting purchase into a source of worry.

This is where your journey to confidence begins. In this complete buyer’s guide, we demystify the world of bespoke framing. We will explore the unique character of different woods, help you identify the hallmarks of true craftsmanship, and show you how to choose a finish that harmonises perfectly with your art. By the end, you’ll feel empowered to select a durable, spectacular frame that protects your art and brings you joy for years to come, sourced from trusted UK professionals.

Why Choose a Solid Wood Frame? The Benefits of Natural Quality

When it comes to showcasing your cherished art or photographs, the frame you choose does more than just hold the picture; it becomes part of the experience. While materials like MDF, plastic, or veneers offer a budget-friendly option, a solid wood frame is an investment in unparalleled quality and timeless beauty. It acts as the perfect bridge between your artwork and your room’s decor, protecting and elevating the piece within.

To appreciate the level of craftsmanship that goes into a quality wooden frame, this video provides a fantastic insight into the techniques used by UK artisans:

Unmatched Durability and Longevity

A key benefit of solid wood is its exceptional structural integrity. Unlike MDF, which can sag under its own weight over time, or plastic that can become brittle, solid wood offers lasting strength. The natural fibres provide a robust structure that resists bending and warping, especially in the variable UK climate. Expertly joined corners ensure the frame remains square and secure, protecting your artwork for a lifetime. The principles of robust construction have been central throughout the history of picture frames, and solid wood remains the superior material for creating an heirloom piece that can be passed down through generations.

The Timeless Aesthetic of Natural Wood

Each solid wood frame is genuinely one-of-a-kind. The unique grain, knots, and subtle variations in colour tell the story of the tree it came from, bringing an organic warmth and texture into your home that simply cannot be replicated by synthetic materials. Whether you choose the rich, dark tones of walnut or the light, clean lines of ash, a wooden frame possesses a classic elegance. This versatility allows it to complement both traditional and modern interiors, adding a touch of sophisticated, natural beauty to any space.

An Eco-Conscious and Sustainable Choice

Making a sustainable choice is more important than ever. The best solid wood picture frames UK suppliers source their timber from responsibly managed, sustainable forests where new trees are planted to replace those harvested. As a natural and renewable material, wood has a significantly lower environmental impact than petroleum-based plastics. For those seeking even more character, frames made from reclaimed wood offer a beautiful and eco-friendly alternative, giving old timber a new purpose and a unique story to tell on your wall.

The frame is the bridge between your artwork and your décor, and the choice of material is where the magic begins. When selecting from the beautiful range of solid wood picture frames UK artisans offer, the type of timber you choose defines the final character of your piece. Each wood has a unique colour, grain pattern, and density, contributing a distinct personality that can either complement or transform the art it holds. Let’s explore some of the most popular choices.

Oak: The Classic and Versatile Favourite

Renowned for its exceptional strength and durability, Oak is a timeless choice. It boasts a distinctive, prominent grain that brings natural texture and warmth to any room. Its honey-gold tones are incredibly versatile, suiting everything from traditional landscape paintings to official certificates. For a different feel, Oak can be finished in several ways:

  • Natural Oak: For a warm, classic look that celebrates the wood’s inherent beauty.
  • Limed Oak: A whitened finish that softens the grain for a coastal or rustic feel.
  • Dark Stained Oak: Offers a more formal, traditional appearance.

Ash: Light, Bright, and Modern

If you’re aiming for a clean, contemporary aesthetic, Ash is an outstanding option. With its light, creamy colour and a typically straight, uniform grain, Ash provides a minimalist border that allows the artwork to take centre stage. Its bright feel is perfect for modern photography, abstract prints, and interiors with a Scandinavian influence. This flexible wood provides a crisp, understated frame without overwhelming the picture.

Walnut: Dark, Luxurious, and Elegant

For a touch of pure sophistication, Walnut is unmatched. Its rich, dark chocolate-brown colours and fine, smooth grain create a dramatic and luxurious border. Positioned as a premium choice, a Walnut frame elevates fine art, formal portraits, and oil paintings, adding depth and a sense of importance. Its deep, elegant tone provides a powerful contrast that draws the eye directly to the artwork within.

Other Woods to Consider: Pine and Beech

While less common for premium bespoke framing, other woods serve specific purposes. Pine is a softer, more cost-effective wood, often chosen for its rustic charm and distinctive knots. Beech, with its pale cream colour and fine, straight grain, offers a subtle and uniform alternative to Ash, perfect for a gentle, understated finish.

How to Match a Wood Frame to Your Art and Interior Style

Choosing the right frame is an art in itself. The perfect frame doesn’t just protect your artwork; it enhances it. Think of a frame as the crucial bridge between your art and your room’s decor, creating a beautiful, harmonious display. It should complement the piece without overpowering it, drawing the eye inward and allowing the art to take centre stage. The goal is to create a specific mood, whether that’s calm and cohesive or bold and dynamic.

Matching Wood Tones with Artwork Colours

A simple way to create balance is by matching the temperature of the wood to the tones in your artwork. While there are no strict rules, these principles are a great starting point:

  • Warm Woods for Warm Art: Woods with rich, warm undertones like Oak and Walnut beautifully complement art dominated by reds, yellows, and earthy browns.
  • Cool Woods for Cool Art: Lighter or neutral woods like Ash, or frames with a painted finish, work wonderfully with cool-toned art featuring blues, greens, and greys.
  • Use Contrast Carefully: A dark, dramatic frame can make a light or minimalist piece pop, creating a striking focal point. Just be careful not to overwhelm the artwork.

As a rule of thumb, avoid matching your frame colour precisely to the most dominant colour in the art, as this can flatten the overall look.

Considering Your Room’s Decor and Furniture

Your frame should feel at home in its surroundings. For a cohesive look, try matching the frame’s wood or finish to other wooden furniture in the room, like a coffee table or sideboard. Alternatively, use the frame as a deliberate accent piece-a black frame in a neutral room, for instance, adds a touch of modern sophistication. The wide variety of solid wood picture frames UK buyers can choose from allows for perfect styling, from a rustic solid oak frame in a country cottage to a sleek ash profile in a contemporary city flat. If you’re unsure where to start, our experts can help you choose the perfect frame.

Frame Proportions: Getting the Width Right

The width of the frame profile should be in proportion to the artwork itself. Delicate watercolours or fine-line drawings often suit thinner, more elegant frames that don’t distract from the intricate details. In contrast, large, bold abstract paintings or impactful photographs can handle a wider, more substantial frame that gives them the presence they deserve. A mount can also be a powerful tool, adding breathing space between the art and the frame to achieve the perfect visual balance. With bespoke framing, you have complete control to ensure the proportions are absolutely perfect for your piece.

An infographic titled “A Buyer’s Guide to Solid Wood Picture Frames” explains the benefits, material comparisons, wood types (oak, ash, walnut), and tips for matching solid wood picture frames UK with your décor.

Finishes, Mounts, and Glazing: The Details That Matter

Choosing the perfect solid wood frame is a wonderful start, but the true artistry of bespoke framing lies in the details. The finish, mount, and glazing work together as a complete package to protect your artwork and elevate its presentation from simply ‘hung’ to truly ‘showcased’. These elements are where professional craftsmanship makes all the difference, ensuring your piece is not only beautiful today but preserved for years to come. When you invest in premium solid wood picture frames uk artisans create, these choices are paramount.

Choosing a Finish: Natural, Stained, or Painted?

The finish is the frame’s personality. It dictates how the wood interacts with your artwork and your room’s décor. Each choice offers a distinct aesthetic:

  • Natural or Waxed: This minimalist approach celebrates the wood’s inherent beauty. A clear wax finish protects the timber while allowing the natural colour and intricate grain of woods like oak or ash to shine through.
  • Stained: A wood stain alters the colour-deepening it to a rich walnut or warming it to a honeyed pine-while keeping the beautiful grain visible. It offers a classic, sophisticated look.
  • Painted: For a contemporary or bold statement, a painted finish provides limitless possibilities. From timeless blacks and whites to custom colours that pick out an accent in your artwork, it creates a clean, modern edge.

The Role of the Picture Mount

More than just a border, the picture mount (or mat) is a crucial component. It creates vital breathing room, a visual pause that draws the eye inward towards the art itself. Critically, it also serves a protective function by preventing the artwork from making direct contact with the glazing, which can cause damage over time from moisture and adhesion.

While crisp, off-white mounts are a classic choice for their neutrality, coloured mounts can be used to complement or contrast with the artwork for a more dramatic effect. We always recommend using conservation-grade, acid-free mounts to ensure your art is protected from yellowing and degradation.

Selecting the Right Glazing (Glass)

The final protective layer, glazing, shields your art from dust, moisture, and damage. Standard picture glass is a cost-effective option, but for treasured pieces, upgrading is a wise investment.

  • Anti-Reflective Glass: Minimises glare and reflections, offering a crystal-clear view of your artwork without distraction. Perfect for rooms with bright, direct lighting.
  • UV-Protective Glass: Essential for preserving original art, limited edition prints, and precious photographs. This specialist glass blocks up to 99% of harmful ultraviolet rays, the primary cause of fading.
  • Acrylic (Perspex): A lightweight and shatterproof alternative to glass, making it ideal for very large frames or for pieces that will be hung in high-traffic areas or children’s rooms.

Understanding these details is key to creating a perfectly finished piece. To see how these elements combine to create spectacular results, we invite you to explore our online gallery.

Expertly Crafted in the UK: The First4Frames Difference

Choosing the perfect frame is a journey, and we believe the destination should be a piece that lasts a lifetime. While mass-produced frames have their place, nothing compares to the quality and character of bespoke craftsmanship. From our workshop in Falkirk, Scotland, our small team of passionate artisans pours over two decades of experience into every single frame, transforming your art into a spectacular centrepiece.

Bespoke Service Tailored to You

We see framing as a partnership. Our process begins with understanding your vision, whether you’re purchasing one of our fine art prints or looking to frame a cherished item of your own. We offer a truly bespoke service, capable of creating frames to any size or specification. As your one-stop-shop for premium prints and framing, we ensure a seamless experience from consultation to the finished, professionally framed product arriving at your door. See our craftsmanship in action in our online gallery.

Our Commitment to Quality Materials

The foundation of a beautiful frame is exceptional material. We meticulously source high-quality, sustainable solid woods, ensuring each piece has the strength and natural beauty to complement your artwork. We build the finest solid wood picture frames UK customers can trust by pairing these timbers with conservation-grade mounts and backing boards to protect your art from discolouration. Using precision cutting and joining techniques, we create flawless corners and a robust build that stands the test of time, offering professional quality you can see and feel.

Caring for Your Solid Wood Frame

A solid wood frame is an investment, much like a piece of fine furniture. With the right care, its beauty will endure for generations. We recommend these simple steps to keep your frame in perfect condition:

  • Dust regularly: Use a dry, soft, lint-free cloth to gently wipe away dust.
  • Avoid harsh chemicals: Never use furniture polish, abrasive cleaners, or solvents, as they can damage the wood’s finish.
  • Protect from the elements: To prevent fading and warping, hang your frame away from direct sunlight and areas of high humidity, such as bathrooms.

Embrace Timeless Quality with Your Perfect Frame

As we’ve explored, a solid wood frame is more than just a border-it’s a timeless investment that protects and enhances your cherished artwork. By carefully considering the type of wood, the finish, and the mount, you can create a beautiful bridge between your art and your interior style. When searching for the best solid wood picture frames uk artisans have to offer, choosing genuine, handcrafted quality makes all the difference to the finished piece.

At First4Frames, we pour over 20 years of professional framing experience into every piece we create. Handcrafted with passion in our Falkirk workshop from premium, sustainably sourced solid woods, each frame is a testament to our dedication. We’re here to help you find the perfect, beautiful showcase for your memories and masterpieces.

Ready to bring your vision to life? Explore our bespoke solid wood framing service today.

Frequently Asked Questions

How can you tell if a picture frame is real solid wood?

To identify a genuine solid wood frame, first examine the grain. Real wood has a unique, non-repeating grain pattern that flows over the edges. In contrast, a veneer or foil-wrapped MDF frame may have a repetitive, printed pattern. Solid wood also feels heavier and more substantial than its synthetic counterparts. Look closely at the corners; the grain should look consistent and natural, not like a wrapped surface with a seam.

What is the most durable type of wood for a picture frame?

For exceptional durability, hardwoods are the premium choice. Oak and ash are two of the most robust options available. Oak is renowned for its density and strength, making it highly resistant to dents and scratches, perfect for a frame that will last a lifetime. Ash is similarly tough and resilient, offering a beautiful finish that stands up to the test of time. Both woods provide a sturdy, high-quality home for your treasured artwork.

Is oak or ash a better choice for picture frames?

Neither is definitively “better”-the perfect choice depends on your personal style and the artwork itself. Oak has a prominent, traditional grain that adds a sense of warmth and character to a room. It’s a classic choice for a timeless feel. Ash, on the other hand, typically has a lighter colour and a straighter, more subtle grain, lending itself to a more modern, minimalist aesthetic. Consider which wood’s personality best complements your art and decor.

Do solid wood picture frames warp over time?

High-quality, professionally crafted solid wood picture frames are highly resistant to warping. Warping is typically caused by significant fluctuations in humidity and temperature. At First4Frames, we use properly seasoned, premium timber to ensure maximum stability. To guarantee your frame’s longevity, we recommend avoiding hanging it in areas of high moisture, such as bathrooms, or directly above a heat source like a radiator. This will keep your frame looking perfect for years to come.

Should my picture frames match the wood of my furniture?

There’s no strict rule, so you can choose what best suits your space. Matching your frames to your furniture creates a very cohesive and harmonious look. However, a contrasting wood can create a beautiful, dynamic focal point. For example, a dark walnut frame can stand out elegantly against light oak furniture. Think of the frame as the bridge between your artwork and your room; its job is to complement both, whether through matching or contrasting.

How much more expensive are solid wood frames compared to MDF?

Solid wood is a premium material, and its price reflects its superior quality and longevity. You can typically expect to pay between 30% and 70% more for solid wood compared to a standard MDF frame of a similar size. For instance, where a small MDF frame might cost around £20, a comparable solid oak or ash frame could range from £30 to £40. This investment ensures you receive a piece of genuine craftsmanship that will protect and enhance your art for decades.

What is the best way to clean a wooden picture frame?

Keeping your wooden frame beautiful is simple. For regular maintenance, gently dust it with a soft, dry microfibre cloth. If you need a deeper clean, slightly dampen the cloth with water, but avoid soaking it. It’s crucial to steer clear of harsh chemical cleaners, silicone-based furniture polishes, and abrasive materials, as these can damage the wood’s natural finish over time. Always wipe gently and ensure the frame is completely dry afterwards.

Posted on

Float Mounting for Artwork: A Complete Guide to This Modern Framing Style

Float Mounting for Artwork: A Complete Guide to This Modern Framing Style

Have you ever admired a piece of art that seems to hover within its frame, casting a soft, captivating shadow? This modern, gallery-quality display can truly elevate a piece, but the terminology can be confusing. If you’re unsure what ‘float mounting’ means, if it’s the right choice for your treasured print, or how it differs from traditional framing, you’ve come to the right place. We believe understanding the beautiful technique of float mounting for artwork should be simple and inspiring, not a source of worry about potential damage.

As passionate artisans with decades of experience, we want to give you the confidence to make the perfect choice. In this complete guide, we’ll demystify the process, exploring what float mounting is and when to use it for a spectacular effect. You’ll discover how our bespoke, archival-quality craftsmanship not only creates a stunning display but also protects your art for years to come. Prepare to see your art in a whole new, professional light.

What is Float Mounting? A Modern Approach to Framing

Imagine your artwork not just displayed, but truly presented. Float mounting is a premium framing technique where your art is raised on a hidden, archival-quality mount. This elevates the piece away from the backing board, making it appear as if it is levitating or ‘floating’ within the frame. This subtle separation creates a soft, dramatic shadow beneath the artwork, adding a spectacular sense of depth and drawing the viewer’s eye directly to the piece itself.

To see this beautiful technique in action, watch this helpful demonstration from the experts:

This modern approach stands in beautiful contrast to traditional window mounting. In a window mount, a bespoke matboard is cut with an aperture and laid over the edges of the artwork, creating a classic border. While a standard picture framing mat serves to protect and frame the image, float mounting celebrates the entire piece, edges and all. For a quick comparison, see our table below.

Feature Float Mounting Window Mounting
Artwork Edges Completely visible and celebrated Overlapped and hidden by the mat
Visual Effect Dynamic 3D effect with a shadow Flat, layered, and traditional
Best For Original art, textured paper, modern interiors Photographs, prints, classic decor

The Key Elements of a Float Mount

The magic of float mounting lies in a few essential components working in perfect harmony:

  • The Artwork: Positioned centrally with every edge visible, showcasing the paper’s unique character.
  • The Backing Board: A premium, acid-free surface that provides a clean background and a visual border around the art.
  • The Spacers: Hidden supports, often made from archival foam board, that create the crucial gap between the art and the backing.
  • The Frame: A deeper frame, known as a ‘shadow box’, is required to accommodate the depth created by the spacers.

Why It’s a Favourite for Galleries and Artists

The preference for float mounting for artwork in professional galleries and studios comes down to respect for the art. This method offers a contemporary and sophisticated presentation that treats the artwork as a physical object, not just an image. It honours the craftsmanship by highlighting the unique qualities of the paper itself-be it a delicate, deckled edge on watercolour paper or the rich texture of a handmade print. It’s a statement that the art, in its entirety, is the hero.

When to Choose Float Mounting for Your Artwork

Float mounting is a spectacular way to present a piece, but its modern, gallery-style finish isn’t the perfect fit for every single artwork. This bespoke technique, which shouldn’t be confused with other display methods as detailed in this helpful guide on Float mounting vs. floater frames, is all about celebrating the artwork as an object. The decision hinges on the unique characteristics of your piece-its paper, the condition of its edges, and its overall style. This guide will help you determine if it’s the ideal choice to create that stunning, three-dimensional effect you’re looking for.

Ideal Candidates for Float Mounting

This premium presentation style truly shines when paired with specific types of art. It turns the entire piece, paper and all, into the star of the show. Consider this method if your artwork has:

  • Deckle or Torn Edges: The feathered, irregular edges of handmade paper are a beautiful feature. Float mounting showcases this unique texture rather than hiding it behind a window mount.
  • Originals on Heavy, Textured Paper: For works on high-quality, heavyweight paper (like watercolour or cotton rag), floating the art emphasises its tactile quality and substance.
  • Prints with Important Margins: If an artist’s signature, edition number, or an embossed stamp sits in the margin, float mounting ensures these vital details remain visible and part of the overall presentation.
  • Artworks with an Irregular Shape: Instead of commissioning an awkward, custom-cut window mount, floating an unusually shaped piece allows it to exist naturally within the frame.

When to Consider a Different Framing Style

While beautiful, float mounting for artwork isn’t a universal solution. In some cases, a traditional window mount provides better aesthetic or physical support. You might prefer a different style if:

  • The paper is very thin or fragile: Delicate papers, like those from old books or certain rice papers, may lack the rigidity to be float mounted and benefit from the full support of a traditional mount.
  • The edges are damaged or unappealing: If the borders of your artwork are creased, stained, or simply not intended to be seen, a window mount is perfect for creating a clean, crisp finish.
  • A classic aesthetic is preferred: Float mounting offers a contemporary look. For a more traditional or formal presentation, the classic elegance of a window mount is often a better match.
  • You are working to a tighter budget: As a more labour-intensive, bespoke process, float mounting typically costs more than standard mounting. It’s a premium service with a price tag to match.

The Professional Process: How a Float Mount is Constructed

Creating a genuine float mount is a meticulous craft that blends precision engineering with art conservation. It’s far more than simply sticking a picture to a board; it’s a bespoke technique designed to enhance and protect your piece. We use only premium, archival-grade materials to ensure your artwork is preserved without damage for decades to come. Understanding the craftsmanship involved highlights why trusting a professional framer is essential for any valuable or sentimental artwork.

Step 1: Preparing the Foundation

The process begins with a solid, stable base. We cut a sheet of high-quality, acid-free mountboard to the final dimensions of your chosen frame. Centred on this backing, we then secure a smaller, hidden ‘riser’-typically made from conservation-grade foam board. This riser is the hidden hero of the float mount, providing the crucial elevation that lifts your artwork away from the backboard and creates the signature shadow effect.

Step 2: Hinging the Artwork

This is where true conservation expertise comes into play. The artwork is carefully positioned and attached to the riser using a time-honoured method known as ‘T-Hinging’. We use delicate, strong Japanese paper and a reversible, pH-neutral wheat starch paste. This secure method is central to professional float mounting for artwork and is completely reversible, meaning the hinges can be removed by a conservator in the future without leaving any residue or causing damage. These principles are core to all archival framing, including advanced museum mounting techniques.

Step 3: Creating Space and Assembling

To complete the floating effect and protect the art’s surface, we fit spacers to the inside edge of the frame’s rebate. These spacers create a vital air gap between the artwork and the glazing (the glass or acrylic). This gap prevents moisture transfer and stops the art from ever touching the glass, which could cause irreversible damage over time. Finally, the glazing, the mounted artwork, and the backing are all carefully layered and secured within the frame, ready to display.

An infographic titled A Visual Guide to Float Mounting explains float mounting for artwork versus traditional window mounting, key elements of float mounts, and considerations for choosing this elegant presentation method.

Key Benefits: Why Float Mounting is Worth It

While the visual appeal of float mounting is undeniable, its benefits extend far beyond a beautiful first impression. This premium technique is a thoughtful investment, offering a perfect marriage of superior aesthetics and professional-grade preservation. It’s a method designed to honour the art, allowing the piece to be the undisputed star of the show while ensuring it’s protected for decades to come. By respecting the integrity of the artwork and presenting it in its entirety, it provides a viewing experience that is both spectacular and sincere.

Unmatched Visual Impact

The defining feature of float mounting is the breathtaking 3D effect it creates. By elevating the artwork from the backing board, it casts a soft shadow that adds depth and a dynamic quality to the entire presentation. This clean, gallery-style aesthetic is perfectly suited to modern interiors, offering a minimalist frame that doesn’t compete with the art. The artwork’s own edges-whether crisp and clean or beautifully deckled-become an integral part of the composition.

Complete and Unobstructed View

Unlike traditional window mounts that cover the perimeter of your print, the great advantage of float mounting for artwork is that it leaves the piece completely visible. This means crucial details are never hidden from view. You can fully appreciate:

  • The artist’s signature
  • Edition numbers on limited prints
  • Embossments or watermarks from the printmaker
  • The unique texture and quality of the fine art paper

This method celebrates the artwork as a complete object, not just an image.

Superior Archival Protection

At First4Frames Gallery, our craftsmanship is rooted in conservation. Float mounting is an excellent choice for archival protection because the artwork never makes direct contact with the glazing (glass or acrylic). This crucial separation prevents potential moisture damage or the image adhering to the surface over time. We use only 100% acid-free, conservation-grade materials to prevent yellowing and degradation, and our non-invasive hinging technique can be safely reversed by a professional, protecting the long-term value of your piece.

To see how this beautiful technique transforms a piece of art, explore some stunning examples in our online gallery.

Your Artwork, Expertly Float Mounted by First4Frames

Achieving the perfect float mount is more than a technical process; it’s an art form that demands a passion for creativity and an expert’s eye for detail. With over 20 years of experience in bespoke picture framing, our team at First4Frames understands how to make your art the undeniable focal point of any room. We combine time-honoured craftsmanship with the finest archival materials to ensure your piece is not just displayed, but beautifully preserved. Trust us to transform your artwork into a stunning, gallery-worthy centrepiece that will be cherished for a lifetime.

Our Bespoke Consultation Process

Your vision is the starting point for everything we do. Our friendly, personalised consultation process is designed to bring that vision to life. We take the time to understand your artwork and what you want to achieve with its display. Our experts will:

  • Discuss your artwork’s unique characteristics and your personal style.
  • Guide you through our extensive collection of premium frame mouldings and backing colours to find the perfect combination.
  • Advise on whether float mounting for artwork is the ideal technique to create the dramatic, 3D effect you desire for your specific piece.

Commitment to Quality and Craftsmanship

We treat every piece of art that enters our workshop with the care and respect it deserves. From our dedicated workshop in Falkirk, our skilled framers employ professional conservation techniques to protect your art from environmental damage and ensure its longevity. Every frame is meticulously constructed, creating a bespoke home for your artwork that is built to last. This commitment to quality is the cornerstone of our service, giving you complete peace of mind.

Ready to give your art the display it deserves? Get a bespoke framing quote today.

Elevate Your Art with Expert Float Mounting

As we’ve explored, float mounting offers a stunning, contemporary way to display your cherished pieces. This technique creates a beautiful shadow effect that makes your art appear to levitate within the frame, drawing the eye directly to the unique edges and texture of the work. It’s the perfect choice for adding depth and a modern, gallery-quality feel to your home.

When you’re ready to experience the unique beauty of float mounting for artwork, trust the passionate experts. With over 20 years of professional framing experience, our team at the First4Frames workshop in Falkirk, Scotland, handles every piece with meticulous care. We use only archival, conservation-grade materials to create a bespoke frame that not only looks spectacular but also protects your art for a lifetime.

Ready to give your art the presentation it truly deserves? Explore our bespoke framing services and get a personalised quote.

Frequently Asked Questions About Float Mounting

Does float mounting cost more than standard framing?

Yes, float mounting typically costs more than standard framing. This is because the process requires more specialist materials, such as spacers to create the floating effect and often a deeper, more premium frame profile. The craftsmanship involved is also more detailed and time-consuming. While the exact price varies, you can generally expect to invest a little more for this spectacular, three-dimensional finish, but the stunning result is well worth it for a treasured piece.

Will float mounting damage my original artwork?

When carried out by a professional, float mounting is a completely safe and archival method that will not damage your artwork. We use conservation-grade, acid-free materials and specialised hinging techniques to secure the art to the backing board. This process is fully reversible, ensuring your piece is preserved in its original condition. Entrusting your art to an expert guarantees its protection and a beautiful, lasting display that honours the piece.

Can you float mount a canvas painting?

Absolutely! While the technique is slightly different, you can achieve a beautiful floating effect with a canvas. This is typically done using a ‘floater frame’. The stretched canvas is set into a deep frame, leaving a small, uniform gap all around the edge. This creates the illusion that the canvas is suspended within the frame, offering a clean, contemporary finish that allows the entire painted surface, including the sides, to be visible.

What is a ‘deckle edge’ and why is it good for float mounting?

A ‘deckle edge’ is the beautifully feathered, untrimmed edge found on high-quality, handmade paper. It’s a sign of true craftsmanship. This unique detail is why float mounting for artwork is such a perfect choice for these pieces. A traditional window mount would hide these gorgeous, irregular edges, but float mounting elevates the paper, turning the deckle edge into a celebrated feature of the final, stunning presentation.

How deep does a frame need to be for float mounting?

To create a successful float mount with a noticeable 3D effect, the frame needs a sufficient internal depth, known as the ‘rebate’. We recommend a frame with a rebate of at least 25mm. This depth is necessary to accommodate the backing board, the spacers that lift the artwork, the artwork itself, and the protective glazing on top. This ensures there is enough space to create that beautiful shadow and sense of dimension.

Is the artwork permanently stuck down in a float mount?

No, in a professionally executed float mount, your artwork is never permanently stuck down. We use a conservation method involving acid-free ‘T-hinges’ made from Japanese paper. These are applied only to the top edge of the artwork, allowing it to hang naturally and respond to environmental changes without buckling. This technique is completely reversible, meaning the artwork can be safely removed from the frame in the future without any damage.

Posted on

How to Frame a Watercolour Painting: A Professional Guide

How to Frame a Watercolour Painting: A Professional Guide

That beautiful watercolour painting deserves a place of honour on your wall, but the thought of framing it can be daunting. The delicate paper, the vibrant pigments-it’s natural to worry about the artwork wrinkling, the colours fading, or choosing the wrong materials for your precious piece. This is precisely why understanding how to frame a watercolour painting correctly is not just a skill, but an act of preservation and celebration.

Consider this your professional guide, where our passion for craftsmanship meets practical, clear advice. We will bridge the gap between your art and its perfect presentation, giving you the confidence to do it yourself or the knowledge to choose a professional framer. We’ll walk you through the essential steps, from selecting premium archival mounts and UV-protective glass to ensuring your art is perfectly secure. By the end, you’ll have the secrets to create a spectacular, lasting display that protects your treasured artwork for a lifetime.

Why Framing Watercolours Requires Special Care

Watercolour paintings possess a unique, luminous quality, where light seems to glow from within the paper itself. This delicate beauty, however, is also their greatest vulnerability. Unlike robust oil or acrylic paintings on canvas, watercolours on paper are incredibly susceptible to damage from their environment. Understanding how to frame a watercolour painting correctly is not just about aesthetics; it’s a crucial act of preservation to protect your beautiful artwork for generations to come.

To see these principles in action, take a look at this helpful guide:

The Challenge of Watercolour Paper

At its core, watercolour paper is a natural fibre that breathes. It absorbs and releases moisture from the air, causing it to expand and contract. In a humid environment, this can lead to a wavy, wrinkled effect known as ‘cockling’. This is why a watercolour painting should never be placed in direct contact with the frame’s glass. Trapped moisture can lead to mould growth and can even cause the paint to permanently fuse to the glass, causing irreversible damage.

Protecting Delicate Pigments from Fading

The transparent pigments used in watercolour are notoriously sensitive to light. The ultraviolet (UV) rays in sunlight and even some indoor lighting can break down the chemical bonds in the colours, causing them to fade and appear dull over time. A vibrant crimson can become a pale pink, and a rich blue can wash out completely. A professional framing solution includes UV-protective glazing, which acts as a vital shield, blocking up to 99% of harmful rays without compromising the view of your artwork.

The Frame’s Role: More Than Just a Border

A well-chosen frame does more than just complement your artwork; it creates a complete, protective micro-environment. This sealed package provides the essential structure to hold the glazing, mount, and backing board securely in place. This approach aligns with established art conservation principles, which emphasize creating a stable environment to shield the art from physical damage, dust, humidity, and insects. It is the foundation of any professional guide on how to frame a watercolour painting.

The Essential Components for Framing a Watercolour

Properly framing a watercolour is about more than just aesthetics; it’s about preservation. Think of the final assembly as a protective, archival sandwich, with your beautiful artwork nestled safely in the middle. Each layer has a specific job, and understanding them is the key to knowing how to frame a watercolour painting for lifelong enjoyment. The single most important rule is to use archival, acid-free materials at every stage to protect your art from damage and discolouration over time.

The Mount (or Mat): Creating Essential Airspace

The mount, often called a mat in the US, is the elegant cardboard border that sits between the frame and your artwork. Its primary job is practical: it creates a crucial air gap that prevents the watercolour paper from touching the glazing. This stops moisture condensation from causing mould and prevents the delicate paint from sticking to the surface. Aesthetically, a well-chosen mount provides visual breathing room, drawing the viewer’s eye inward to the heart of the painting. Always insist on acid-free, conservation-grade mountboard to avoid ‘mat burn’-a permanent yellowing stain caused by acid leaching into the artwork.

The Glazing: Your Artwork’s Shield

Glazing is the clear barrier that protects your art from dust, moisture, and, most importantly, light. Watercolours are particularly susceptible to fading, so choosing the right shield is vital. Your main options include:

  • Standard Glass: Offers excellent clarity but can be heavy and reflective.
  • Acrylic (Perspex): Much lighter and shatterproof, making it safer for larger pieces or shipping.
  • UV-Filtering Options: Available in both glass and acrylic, this is our premium recommendation. It blocks up to 99% of harmful ultraviolet rays, acting as a powerful sunscreen for your art and dramatically slowing the fading process.

The Frame & Backing Board: Structure and Support

The frame itself provides the structure and style, with materials like natural wood or sleek aluminium offering different finishes to complement your artwork and decor. Behind your art sits the backing board, the final layer of the protective sandwich. This board provides rigidity and seals the entire package from dust and pests. Just like the mount, it must be an acid-free foam core or conservation backing board. This final layer is critical for long-term preservation, a principle detailed in the National Gallery of Art’s guide to paper conservation, as it prevents harmful acids from migrating into the artwork from behind.

Step-by-Step Guide: How to Assemble Your Watercolour Frame

Ready to bring all the elements together? This is where the magic happens and your creative vision truly comes to life. Assembling your frame requires a delicate touch and a clean workspace, but following these steps will ensure a professional, gallery-quality result that protects your beautiful artwork for years to come. This is the most hands-on part of learning how to frame a watercolour painting.

Step 1: Preparing Your Artwork and Workspace

First, ensure your painting is perfectly flat. If the paper has buckled slightly, you can gently flatten it by placing it between two sheets of acid-free paper under a smooth, heavy board for a day or two. Prepare a large, clean, and dust-free surface to avoid any debris getting trapped in the frame. Gather your essential tools:

  • Acid-free archival tape (paper gummed tape is ideal)
  • A sharp craft knife
  • Measuring tape
  • A soft, lint-free microfibre cloth

Step 2: Hinging the Artwork to the Mount

Never be tempted to glue or tape your watercolour directly to the backing board. Paper needs space to breathe, expanding and contracting with changes in humidity. Permanently fixing it will cause buckling and irreversible damage. In fact, professional Library of Congress guidelines on preservation stress that allowing for this natural movement is crucial for the artwork’s longevity.

The correct method is ‘T-hinging’. Attach two small tabs of archival tape to the top edge of the back of your artwork, sticky-side down, with half the tape on the art and half hanging off. Lay the artwork in position on the back of the mount board, and then place another piece of tape across each tab to form a ‘T’, securing it to the mount. This creates a strong yet flexible hinge, allowing the art to hang naturally.

Step 3: Assembling the Frame ‘Sandwich’

The assembly process is all about layering correctly. Lay your frame face down on your clean surface. Carefully clean both sides of your glazing (glass or acrylic) with a microfibre cloth to remove any dust or fingerprints. Place it inside the frame’s rebate. Next, gently lower your mounted artwork, face down, onto the glazing. Finish the stack by placing the backing board on top. Secure the ‘sandwich’ in place by pressing down the flexible tabs or, for a more secure fit, by using a point driver to insert framer’s points.

Step 4: Finishing Touches and Hanging

For a truly professional finish that shows exceptional craftsmanship, seal the gap between the frame and the backing board with framing tape. This creates a robust barrier against dust, insects, and humidity, offering premium protection for your art. Finally, attach your hanging hardware. Measure one-third of the way down from the top of the frame on both sides and screw in your D-rings. Thread a picture cord between them, tying secure knots and leaving just enough slack for it to hang neatly on a picture hook.

Feeling unsure about the process? Sometimes, the best approach is to trust an expert to achieve that perfect, lasting result. Let our experts handle the framing for you.

Infographic titled How to Frame a Watercolour Painting, outlining watercolour vulnerabilities, archival frame anatomy, glazing choices, proper frame backing, and essential dos and don’ts for how to frame a watercolour painting.

Aesthetic Choices: How to Choose the Perfect Frame and Mount

With the technical essentials covered, we can now turn to the most exciting part: the artistic choices. A frame does more than protect; it acts as a beautiful bridge between your artwork and your room’s décor, enhancing the piece and drawing the viewer’s eye. This is where the thoughtful consideration in how to frame a watercolour painting truly pays off. Before you begin, always consider where the finished piece will hang-the colours and style of the room should help guide your creative decisions.

Matching the Frame to Your Watercolour’s Style

The golden rule is to complement, not compete. The delicate, often translucent nature of watercolour means the artwork can easily be overpowered by a heavy or distracting frame. Your goal is to find a perfect partner for the painting.

  • For modern or abstract pieces: A simple, clean-profile frame often works best. Think thin black, crisp white, or a light natural wood like oak to maintain a contemporary feel.
  • For traditional landscapes or portraits: You can explore frames with more character. A warm, natural wood or a classic frame with subtle, soft gold or silver detailing can beautifully echo the painting’s timeless quality.

Selecting the Right Mount Colour and Size

The mount (also known as a mat) provides essential breathing space, preventing the glass from touching the artwork and giving the piece visual impact. For a truly professional finish, the mount is non-negotiable.

Colour: While brilliant white can be too stark against the soft paper, a classic off-white or pale cream is a failsafe choice that allows the watercolour’s own colours to shine. For a more harmonious, bespoke look, consider choosing a mount in a very subtle, muted tone pulled directly from the painting itself-a soft grey from a sky, for instance, can be spectacular.

Width: Be generous with your mount width. A wider mount of at least 2.5 to 3 inches often gives a more professional, gallery-style look that elevates the artwork and gives it presence on the wall.

Considering Single vs. Double Mounts

For a touch of pure elegance, a double mount is an exceptional choice. This technique involves layering two mounts, with the bottom one visible as a very thin border (or ‘reveal’) of colour around the artwork. This subtle detail is a hallmark of high-quality, bespoke framing. Using an inner mount that picks up an accent colour from the painting-a deep blue from the sea or a rich terracotta from a roof-is a masterful way to add depth and tie the entire presentation together. It’s this level of craftsmanship that transforms a framed picture into a cherished piece of art.

For inspiration on pairing frames and mounts, explore the beautifully curated pieces in our online gallery.

DIY vs. Professional Framing: When to Call an Expert

After carefully selecting your materials and preparing your artwork, the final decision is whether to frame it yourself or entrust it to an expert. The right choice depends on the artwork’s value, your confidence, and your desired finish. The DIY approach to how to frame a watercolour painting can be a satisfying project, but for treasured pieces, a professional touch is invaluable.

The Pros and Cons of a DIY Approach

Assembling a frame yourself can be cost-effective, especially for practice pieces or inexpensive prints. It offers a hands-on connection to the finished product. However, the risks are significant. One slip can damage your art, and off-the-shelf frames from high-street shops often lack the essential conservation-grade materials. They rarely include UV-protective glazing or acid-free mounts, leaving your watercolour vulnerable to fading and discolouration over time.

When You Should Always Use a Professional Framer

While DIY has its place, certain situations demand the skill and resources of a professional. Consider this your checklist for when to call in an expert:

  • The Artwork is Valuable: If the piece has significant monetary or sentimental value, professional framing is non-negotiable. It’s an investment in its preservation.
  • It Requires Conservation Materials: To protect your art for a lifetime, you need archival-quality mounts, backing boards, and UV-filtering glazing.
  • The Size is Unconventional: Custom sizes require bespoke frames that you simply cannot find ready-made.
  • You Desire a Flawless Finish: For a truly spectacular, gallery-quality result that enhances the artwork, nothing beats the precision and craftsmanship of a professional.
  • You Need Design Guidance: A professional framer acts as a design consultant, helping you choose the perfect frame and mount combination to complement both the art and your decor.

What to Expect from Our Bespoke Framing Service

At First4Frames Gallery, we believe that framing is an art in itself. Our bespoke service begins with a personal consultation where we listen to your vision. We guide you through our extensive collection of premium, conservation-grade materials, from beautiful solid wood mouldings to museum-quality glazing. Our expert craftspeople then bring it all together with meticulous attention to detail, ensuring your watercolour is not just protected, but beautifully presented. We handle every piece with the care it deserves, delivering a perfect finish every time. Start your bespoke framing journey with us today.

The Perfect Finish for Your Watercolour Masterpiece

Framing a watercolour is about more than just aesthetics; it’s a vital step in preserving its delicate beauty for a lifetime. From choosing the right conservation-grade materials to selecting a mount and frame that elevates the art, you now have the knowledge to give your piece the protection it deserves. Understanding how to frame a watercolour painting is the final, crucial brushstroke in its journey from paper to pride of place on your wall.

For those special pieces that demand a flawless, professional finish, our team is here to help. With over 20 years of professional framing experience, we use only the finest conservation-grade, acid-free materials. Our friendly Falkirk team offers expert design advice to create a truly bespoke frame that acts as the perfect bridge between your artwork and your home.

Ready to give your art the beautiful, lasting home it deserves? Explore our bespoke framing services for your artwork.

Frequently Asked Questions

Do you really need a mount for a watercolour painting?

Absolutely. A mount is essential for professionally framing a watercolour. Its most important job is to create a small air gap between the painting’s surface and the glass. This prevents moisture from being trapped against the artwork, which can lead to mould or the paint sticking to the glass. A mount also provides a beautiful visual border, allowing the artwork to breathe and drawing the viewer’s eye inward, enhancing the overall impact of your piece.

Can you frame a watercolour without glass to avoid glare?

We strongly advise against framing any watercolour without glass. The delicate paper and water-soluble pigments are highly vulnerable to irreversible damage from dust, humidity, and airborne pollutants. Glazing is the only way to protect your art from these elements and from fading caused by UV light. To combat glare, you can opt for premium anti-reflective or museum-grade glass, which offers crystal-clear viewing while providing vital protection for your treasured artwork.

What is the best way to stop my watercolour paper from buckling inside the frame?

The key to preventing buckling, or ‘cockling’, is correct mounting. Your artwork should be attached to an acid-free backing board using a ‘T-hinge’ method with archival tape along the top edge only. This allows the paper to hang naturally and expand or contract with humidity changes without warping. Taping the artwork down on all four sides is a common mistake that restricts this movement, which is what causes the paper to buckle and ripple over time.

What’s the difference between standard framing and ‘conservation framing’?

The difference lies in the quality and longevity of the materials. Standard framing may use mounts and backing boards with acidic cores that can cause your artwork to yellow and deteriorate. Conservation framing exclusively uses acid-free, archival-quality materials for everything that touches the art, including the mount, backing, and tapes. This professional method, often paired with UV-protective glass, is designed to preserve the beauty and value of your fine art for generations to come.

How much does it cost to get a watercolour professionally framed?

In the UK, the cost for professional framing depends on several factors: the artwork’s size, your choice of frame moulding, the type of mount, and the glazing. For a small, simple piece, you might expect to pay between £60 and £90. For a larger painting with a bespoke frame, a double mount, and specialist anti-glare glass, the cost could be £150 to £300 or more. Think of it as a crucial investment in protecting and showcasing your beautiful art.

What kind of tape should I use to mount my watercolour painting?

It is vital to use only archival, acid-free tape. Everyday tapes like masking tape or Sellotape contain acids that will leech into the paper, causing irreversible yellow stains and damage. For a secure and safe mount, always choose a gummed archival paper or linen tape. This is the professional standard and a crucial step in how to frame a watercolour painting to conservation levels, ensuring your artwork remains pristine within its frame.

Posted on

How to Choose the Right Size Picture Frame: A Complete Guide

How to Choose the Right Size Picture Frame: A Complete Guide

The excitement of finding the perfect artwork can quickly turn to confusion when faced with measurements, mounts, and a sea of frame sizes. The fear of making a costly mistake is real, and it can leave your treasured pictures languishing in a tube instead of taking pride of place on your wall. But it doesn’t have to be this complicated. Learning how to choose the right size frame is the most crucial step in transforming a simple print into a spectacular, professionally finished piece that you’ll be proud to display.

In this complete guide, we’ll demystify the entire process with our expert advice. We’ll walk you through everything from accurately measuring your artwork to understanding the essential role of a picture mount and decoding confusing terms. You’ll discover how to make a choice that not only fits perfectly but also beautifully enhances your picture, turning that framing challenge into a simple, enjoyable act of craftsmanship. Let’s embark on this journey together and give your art the beautiful home it deserves.

First Things First: Understanding the Three Key Measurements

Embarking on the journey to frame your art is an exciting step, but the secret to a spectacular result lies in precision. Before you fall in love with a particular style, getting your measurements right is the essential foundation. Understanding the difference between your artwork size, the mount aperture, and the final frame size will prevent any guesswork and ensure a perfect, professional fit. This is the most important part of learning how to choose the right size frame and guarantees your piece will look its absolute best.

To see these principles in action, this helpful video provides a clear visual guide:

How to Measure Your Artwork Accurately

To achieve a bespoke, gallery-quality finish, accuracy is paramount. Always begin by measuring the artwork itself, not the paper it is on, unless you want the border to show. For the most reliable results, follow these simple steps:

  • Use a steel tape measure, as fabric ones can stretch and give inaccurate readings.
  • Carefully measure the exact height and width of the image area you want to display.
  • Measure each dimension twice to confirm your numbers and avoid any small errors.
  • Note down your dimensions clearly, ideally in both millimetres (mm) for precision and inches for reference.

Frame Size vs. Aperture: What’s the Difference?

These two terms are often confused, but they refer to distinct measurements. The frame size relates to the inner dimensions of the frame itself-the size of the glass and backing board that will fit inside it. The aperture, on the other hand, is the opening or ‘window’ in the picture mount through which your artwork is viewed. To hold your art securely, the aperture should be slightly smaller than your artwork. A 5-10mm overlap on all sides is standard, preventing your picture from slipping through the opening.

The Crucial Role of the Picture Mount

A picture mount (or mat) is far more than just a decorative border; it is a key component of professional framing. It creates a visual space between the artwork and the frame, drawing the viewer’s eye inward. Crucially, it also separates your art from the glazing (the glass or acrylic), protecting it from potential damage caused by condensation. Whether you have a bespoke piece or one that fits common standard photo print sizes, a mount provides a beautiful finish. Remember, the width of the mount’s border adds to the overall dimensions, so you must factor this in when determining the final frame size you need.

Standard Sizes vs. Bespoke Framing: Which Path is Right for You?

Once you have carefully measured your artwork, you arrive at a crucial decision point. Do you opt for a convenient, ready-made frame, or invest in a bespoke service for a truly perfect finish? Both paths have their merits, and understanding the difference is a key part of how to choose the right size frame. Let’s explore the pros and cons to help you find the ideal solution for your art.

A Guide to Common Ready-Made Frame Sizes

Standard, or “off-the-shelf,” frames are manufactured to fit the most common photo and paper dimensions. In the UK, you’ll frequently find sizes designed for photographs like 6×4, 7×5, and 10×8 inches, as well as the international ‘A’ series for prints and documents (A4, A3, A2). If your art matches one of these dimensions, a standard frame can be a simple solution. Remember to account for a mount (also called a mat or passe-partout), which adds a border and requires a larger frame.

When is a Standard Size Frame the Best Choice?

A ready-made frame is often the most practical choice in several situations. It’s an excellent, cost-effective option when you need a frame quickly or are framing a piece of lower sentimental or monetary value. Consider a standard frame if:

  • You are framing standard-sized photos, posters, or certificates.
  • You are working with a tight budget.
  • You need a frame immediately for a last-minute gift.
  • You are happy with a more limited selection of styles and colours.

Why Bespoke Framing Guarantees a Perfect Result

For artwork that is unusually sized, valuable, or deeply personal, bespoke framing is the ultimate expression of care. A custom frame is crafted to the precise millimetre of your piece, ensuring a flawless, gallery-quality presentation. Our experts, who adhere to the highest standards of craftsmanship upheld by organisations like the Professional Picture Framers Association, provide a premium service. The key benefit of learning how to choose the right size frame with a bespoke service is the unlimited potential it unlocks-giving you complete control over the materials, colour, mount style, and glazing to create a truly unique and protective home for your art.

This level of personalisation is particularly meaningful when framing cherished photographs of loved ones to create a lasting tribute. While a beautiful frame honours a memory at home, services like Funera focus on creating a respectful and beautiful service to honour a life lived.

The Art of Proportion: Matching Frame Size to Artwork and Style

Finding the perfect frame goes beyond simply matching the dimensions of your artwork. It’s an exercise in visual balance and harmony. The real secret behind how to choose the right size frame lies in understanding proportion-how the width of the mount and the thickness of the frame itself work together to complement and elevate the piece. A well-proportioned frame doesn’t just protect your art; it enhances its story and draws the viewer in, becoming the perfect bridge between your art and your decor.

Giving Your Art ‘Breathing Room’ with Mounts

A mount creates vital space between the artwork and the frame, preventing the glass from touching the art’s surface while adding visual separation. This ‘breathing room’ is crucial for creating a professional finish. For a balanced look, a general rule is that the mount should be significantly wider than the frame moulding. For a classic, gallery-style aesthetic, consider an off-centre or ‘weighted’ mount, where the bottom border is slightly wider, which gives the artwork a subtle visual lift. Understanding these basic principles is a great first step, and a comprehensive a guide to framing art can provide even more foundational knowledge on achieving the perfect balance.

Framing Small Art for a Big Impact

Don’t let a small piece of art get lost on your wall. Instead, turn it into a deliberate, spectacular focal point. Using an oversized frame with a very wide mount is a professional technique that creates drama and immediately draws the eye towards the centre, making a small print feel more significant and luxurious. For a contemporary touch, you could also:

  • ‘Float’ the artwork: Mounting the art on top of the mount board creates a subtle shadow and a striking 3D effect.
  • Create a gallery wall: Grouping several small, identically framed pieces creates a cohesive and powerful display.

See these professional techniques in action by exploring the beautiful examples in our online gallery.

How to Frame Large Art Without Overpowering It

When you’re deciding how to choose the right size frame for a large, statement piece, the philosophy is often “less is more.” A large painting or print already has a commanding presence, so a thick, ornate frame can feel overwhelming and compete for attention. Instead, opt for a relatively thin, simple frame that acts as a clean, crisp border. This keeps the focus squarely on the artwork itself. For very large pieces, a mount may not be necessary at all, allowing the art to extend to the edge. Most importantly, ensure your chosen frame is built with premium craftsmanship to support the weight safely and securely for years to come.

An infographic titled How to Choose the Right Size Frame guides you through key measurements, how to measure accurately, differences between standard and bespoke options, and tips for achieving balanced or weighted mounts.

Beyond the Art: Choosing a Frame Size for Your Space

The perfect frame does more than just protect your artwork; it acts as a beautiful bridge between the piece and your room’s décor. When you consider the context of your space-the scale of the wall, the surrounding furniture, and the overall style-the right frame size can transform a picture into a stunning focal point. Understanding how to choose the right size frame for your wall is a key step in achieving a polished, professionally styled interior.

The 2/3 Rule: Scaling Your Frame to the Wall

A simple yet powerful interior design principle is the two-thirds rule. Aim for your artwork, whether a single statement piece or a curated gallery wall, to occupy roughly two-thirds to three-quarters of the available wall space. This prevents a small frame from looking lost and insignificant on a large wall, creating a sense of balance and intentionality that instantly elevates your room.

Hanging Art Above Furniture (Sofas, Beds, Tables)

When placing art above furniture like a sofa, bed, or console table, scale is crucial. Your framed art should be approximately two-thirds the width of the furniture it hangs over. To create a cohesive look, hang the piece so its bottom edge is 6-8 inches above the furniture. This creates a strong visual anchor, ensuring the art and furniture feel connected rather than floating apart.

Planning a Gallery Wall: Mixing and Matching Sizes

A gallery wall is a spectacular way to display a collection of treasured pieces. To create a harmonious composition, start by placing your largest frame first, often slightly off-centre, as an anchor. Arrange your smaller frames around it, maintaining a consistent spacing (usually 2-3 inches) between each one. A top tip: lay your entire arrangement on the floor first to perfect the layout before a single nail touches the wall.

A Final Checklist for Choosing the Perfect Frame Size

Feeling confident? Here is our simple checklist to guide you through the final steps for selecting a beautiful, perfectly-proportioned frame:

  • Step 1: Carefully measure your artwork’s height and width.
  • Step 2: Decide if you want a mount, and calculate its dimensions.
  • Step 3: Assess the wall space and apply the design rules for scale and placement.
  • Step 4: Choose a standard size for convenience or opt for a bespoke frame for a perfect fit.

If you’re still unsure or need bespoke advice for a tricky space, our team is always here to help. Need expert advice? Contact our framing specialists today!

The Final Piece: Finding Your Perfect Frame

Choosing a frame is about more than just measurements; it’s an art in itself. By understanding the key relationship between your artwork, the mat, and the frame, and considering the proportions of your space, you now have the knowledge for how to choose the right size frame with confidence. This ensures your treasured piece doesn’t just hang on a wall-it truly belongs.

For those special pieces that deserve nothing less than perfection, a bespoke solution is the ultimate expression of care. At First4Frames Gallery, we bring over 20 years of professional framing experience to every project. From our Falkirk workshop, our expert craftsmen use only high-quality, conservation-grade materials to create a beautiful, lasting home for your art. Let us handle the details with the precision and passion your artwork deserves.

Find the perfect fit with our bespoke framing service.

Embark on your framing journey today and give your art the spectacular presentation it was made for.

Frequently Asked Questions

What size frame do I need for an A4 picture?

For a standard A4 print (21cm x 29.7cm), you have two beautiful options. For a simple, contemporary look, choose an A4 frame where your artwork will fit perfectly edge-to-edge. If you desire a more classic, gallery-style presentation, we recommend using a larger frame, such as 30cm x 40cm, with a mount. This creates a professional border that draws the eye to the artwork and gives it space to breathe.

Should a picture frame be bigger than the picture?

In most cases, yes. Selecting a frame that is larger than your artwork allows for the inclusion of a mount. This beautiful border serves two key purposes: it creates visual separation between the art and the frame, enhancing its impact, and it protects your print by preventing it from touching the glass. While a frame that is the exact size of the picture offers a modern, ‘full-bleed’ effect, a larger frame with a mount provides a timeless, professional finish.

How do I measure for a frame if I want to include a mount?

First, carefully measure the exact height and width of your artwork. This measurement will be the ‘aperture’ size, or the opening, of the mount. Next, decide on your desired mount border width-for example, 5cm. To find the required frame size, add double the mount width to both the height and width of your artwork. For a 20x30cm print with a 5cm mount, you would need a 30x40cm frame.

How wide should a picture frame border (the mount) be?

The perfect mount width creates a harmonious balance between the art and the frame. As a general rule of thumb, the mount should be noticeably wider than the frame moulding itself-never narrower. A border of between 5cm and 8cm is a popular and well-proportioned choice for many standard-sized prints. For smaller artworks, a more generous mount can add presence, while larger pieces may suit a proportionally smaller border. It is an artistic choice that should ultimately complement the piece.

Is it better to choose a frame that matches the art or the room?

A truly perfect frame acts as a bridge between your artwork and your room’s décor, so it should ideally complement both. The frame’s primary role is to enhance the art, so its style and colour should harmonise with the piece first. However, it must also feel at home in your space. Consider the frame and mount as the elements that seamlessly integrate your chosen art into your existing interior design, creating a cohesive and polished look.

Can I put a small picture in a large frame?

Absolutely! Using an oversized frame with a wide mount is a spectacular way to give a small piece of art significant visual impact. This technique creates a dramatic, gallery-quality effect that turns a cherished photograph or a delicate sketch into a premium focal point. Deciding to give a small piece more presence is a creative answer to the question of how to choose the right size frame, making a confident and stylish statement on your wall.

Posted on 1 Comment

Anti-Reflective Glass for Picture Frames: The Ultimate Guide

Anti-Reflective Glass for Picture Frames: The Ultimate Guide

You’ve found the perfect piece of art, a beautiful photograph or a treasured print, and you’ve had it professionally framed. Yet, when you hang it on the wall, all you see is the reflection of your window or the ceiling light. This common frustration is why selecting the right glazing is so crucial, and where premium anti-reflective glass for picture frames can completely transform your experience. It eliminates that distracting glare, allowing the vibrant colours and fine details of your artwork to shine through with spectacular clarity.

But what exactly is this specialist glass, and how does it differ from standard or non-glare options? In this ultimate guide, we’ll demystify the world of picture framing glass. We will explore the technology, compare your choices, and explain the vital role it plays in protecting your art from UV damage and fading. You’ll discover how to make the perfect choice, ensuring your treasured pieces are protected and displayed to perfection for years to come.

What is Anti-Reflective Glass? (And Why It’s Not ‘Anti-Glare’)

You’ve found the perfect piece of art, chosen a beautiful bespoke frame, and hung it in just the right spot. But instead of admiring the intricate details and vibrant colours, you see a distracting reflection of your window, your lamp, or even yourself. Standard picture frame glass can act like a mirror, forcing you to find the ‘perfect angle’ just to see the artwork properly. This is where the magic of anti-reflective glass comes in, offering a crystal-clear viewing experience that makes the glass seem to disappear entirely.

To see the remarkable difference for yourself, this short video demonstration is incredibly helpful:

The Problem: How Glare and Reflections Ruin the View

Any light source in a room can create a mirror-like effect on standard framing glass. This unwanted reflection obscures the fine details your chosen artist worked so hard to create, dulls the richness of the colours, and creates a visual barrier between you and the art. It pulls you out of the picture, forcing your eyes to fight past the glare instead of immersing yourself in the image. True appreciation requires an uninterrupted view, something standard glass simply cannot provide.

Anti-Reflective vs. Anti-Glare: The Critical Difference

While often used interchangeably, these two types of glass are fundamentally different. Understanding this distinction is key to making the right choice for your artwork.

  • Anti-Glare Glass: This glass has a micro-etched surface designed to scatter light. While this reduces sharp reflections, the etching process slightly blurs the image, reducing its sharpness and clarity. It’s a more affordable option, but it comes at the cost of image fidelity.
  • Anti-Reflective (AR) Glass: This is a premium, high-tech solution. Instead of an etched surface, it features a micro-thin optical coating that allows over 99% of light to pass through. Think of it like a professional camera lens versus an uncoated one; the coating enhances light transmission for a sharper, more vibrant result.

For fine art, where every detail and colour matters, anti-reflective glass is the superior choice for unparalleled clarity.

How Does the Magic Work? The Science of AR Coatings

The technology behind anti-reflective glass is a marvel of optical physics. The glass is coated with incredibly thin, transparent layers that are precisely engineered to manipulate light waves. As light hits the surface, these coatings cause the reflected light waves to cancel each other out. If you are interested in the technical details, you can learn more about how anti-reflective coatings work and the science of destructive interference. This is the same technology trusted for high-end eyeglasses and professional photography lenses. The result for your artwork is a viewing experience so clear and intimate, it feels as though there is nothing between you and the print. This is why we believe premium anti-reflective glass for picture frames is an essential investment for protecting and showcasing treasured art.

The Spectrum of Glazing: From Standard Float to Museum Quality

Choosing the right glazing is like selecting the perfect lens for a camera-it determines how clearly you see the picture. The glass or acrylic in your frame does more than just protect from dust; it manages reflection and shields your art from harmful light. To help you make the perfect choice for your artwork, we’ve broken down the options into a simple “good, better, best” guide that shows where anti-reflective glass for picture frames fits into the bigger picture.

Glazing Tier Clarity (Reflection) UV Protection Ideal For
Good: Standard Float ~8-10% Reflection ~45% UV Block Budget-friendly framing, posters, and prints in low-light areas.
Better: Anti-Reflective <1% Reflection ~70% UV Block Detailed artwork, family photos, and any piece where clarity is paramount.
Best: Museum Quality <1% Reflection 99% UV Block Valuable art, limited editions, and irreplaceable sentimental items.

Good: Standard Float Glass

This is the entry-level glazing you’ll find in most off-the-shelf frames. It offers basic protection from dust and physical contact but comes with significant drawbacks. Its surface reflects around 8% of light, creating noticeable glare that can obscure the details of your artwork. Furthermore, with only about 45% UV protection, it offers minimal defence against the fading effects of sunlight, making it suitable only for general-purpose framing where budget is the main concern.

Better: Anti-Reflective (AR) Glass

Here is where your viewing experience is truly transformed. Anti-reflective glass for picture frames is engineered to be virtually invisible. By using a sophisticated optical coating to reduce reflections to less than 1%, it removes the distracting glare, allowing the true colours, textures, and fine details of your art to take centre stage. It’s a spectacular upgrade that makes it feel like there’s nothing between you and the artwork. Standard AR glass also provides a better defence against fading, blocking around 70% of UV rays.

Best: Museum Glass & Optium Museum Acrylic

For treasured, valuable, or sentimental pieces, there is no substitute for museum-grade glazing. This is the pinnacle of protection and presentation, combining the incredible clarity of an anti-reflective coating with 99% UV filtering. This level of protection is the standard used by museums and professional conservators to safeguard irreplaceable works from fading and light damage. As detailed in this comprehensive conservation guide to framing glass, blocking UV radiation is critical for long-term preservation. For a shatter-resistant and lightweight alternative, Optium Museum Acrylic offers the same exceptional benefits.

The Key Benefits of Choosing Anti-Reflective Glass

Understanding the science behind anti-reflective glass is one thing, but experiencing its impact is where the true magic lies. Choosing to upgrade isn’t just a technical decision; it’s an emotional one. It’s about transforming your relationship with the art you love, removing every possible barrier to create a pure, intimate connection. Let’s explore the beautiful, practical advantages that make anti-reflective glass for picture frames a worthy investment in your home and your memories.

Unmatched Clarity: It’s Like the Glass Isn’t Even There

Imagine leaning in to admire a piece of art and seeing every delicate brushstroke, every subtle texture, and every intricate detail without a hint of glare. That is the breathtaking experience of anti-reflective glass. This incredible, ‘invisible’ effect is why it’s considered the premium glazing used by framing professionals, creating a direct and unfiltered connection between you and the artwork. It doesn’t just display your art; it invites you into it.

[Image Placeholder: A split image showing a framed picture with standard glass (heavy reflection) on the left and anti-reflective glass (crystal clear) on the right.]

True Colour Fidelity: See the Art as the Artist Intended

Standard float glass often carries a subtle green tint, a slight impurity that can dull vibrant colours and alter the artist’s original palette. Anti-reflective coatings, however, are applied to an optically pure, low-iron glass. This ensures that the colours you see are the colours the artist intended-rich, true, and full of life. For fine art Giclée prints where colour accuracy is paramount, this feature is absolutely essential for an authentic viewing experience.

Enhanced UV Protection: A Vital Shield for Your Art

While its main purpose is to eliminate reflections, premium anti-reflective glass also offers a significant level of UV protection-typically blocking up to 70% of harmful rays. Over time, UV light is the primary culprit behind fading and damage to photographs, prints, and original works. Think of this as an insurance policy for your most treasured pieces, preserving not just an image, but a memory or a valuable asset for years to come.

Reduced Distractions for a More Enjoyable Space

In a modern home with bright windows and layered lighting, a standard picture frame can quickly become a frustrating mirror. You find yourself shifting positions, closing curtains, or turning off lamps just to see the image behind the glare. With anti-reflective glass for picture frames, this problem vanishes. Your art remains a spectacular focal point day or night, allowing you to design your space for comfort and beauty, not to fight reflections.

A visual comparison chart of three picture frame glazing types: Standard Float, anti-reflective glass for picture frames, and Museum Quality, showing differences in clarity, UV protection, and ideal uses for each.

Is Anti-Reflective Glass Worth It? A Practical Decision Guide

Let’s address the main question directly: premium anti-reflective glass costs more than standard options. We believe in transparency, and it’s important to see this not as an expense, but as an investment in the art you love. The real question is whether it’s the right investment for your specific piece. This guide is designed to help you decide with confidence.

To find the perfect balance between budget and visual perfection, consider these three key factors.

Consider the Artwork’s Value (Monetary and Sentimental)

The nature of your artwork is the best starting point. Not every piece requires the same level of protection or clarity. Think about what you are framing:

  • For original art, limited edition prints, or signed pieces: Museum-grade anti-reflective and UV-protective glass is essential. It preserves the monetary value by preventing fading and allows the artist’s true colours and textures to shine through without compromise.
  • For irreplaceable family photos and heirlooms: The sentimental value is immeasurable. Protecting these memories from light damage and ensuring they can be seen clearly from any angle makes the upgrade priceless.
  • For decorative posters or open-edition prints: If the piece is easily replaceable and displayed away from direct sunlight, our high-quality standard glass or acrylic may be perfectly sufficient for your needs.

Assess Your Room’s Lighting Conditions

The environment where your art will hang plays a huge role. The benefits of anti-reflective glass for picture frames are most dramatic in rooms with challenging light. Ask yourself:

  • Will the frame be placed opposite a bright window that gets hours of direct sun?
  • Is it going to be hung in a hallway or dining room directly under a spotlight?

If you answered yes, reflections will likely be a constant distraction. Here’s a simple test: hold an existing picture with standard glass in the exact spot you plan to use. If you see more of the room’s reflection than the image itself, an anti-reflective option will make a spectacular difference.

Budget vs. Long-Term Enjoyment

When you view the cost as part of the total bespoke framing project, it often represents a small fraction of the overall investment. This one-time upgrade ensures decades of perfect, uninterrupted enjoyment. Compare the modest additional cost-perhaps £30 to £60 depending on size-to the daily frustration of a glare-filled, poorly displayed piece. Investing in the right glass is an investment in your long-term connection to the artwork.

Ultimately, the choice is yours. Our passion is to ensure your art looks its absolute best on your wall. Get a bespoke framing quote with different glass options today, and our expert team will help you find the perfect solution for your art and your budget.

How to Choose and Care For Your Anti-Reflective Glass

You’ve learned the benefits, and now you’re ready to complete your project. Choosing the right glazing is a crucial final step in the bespoke framing journey. Here at First4Frames, we believe in empowering you with the knowledge to select the perfect finish and care for your beautiful investment for years to come.

Discussing Glazing Options With Your Professional Framer

The best way to understand the difference between glazing options is to see them for yourself. A trusted professional will have samples to demonstrate how each performs in the light. We encourage you to ask key questions to ensure you’re choosing the right protection for your artwork.

  • What level of UV protection does this glass offer? (e.g., 70%, 92%, or 99%)
  • Can you show me the difference in reflection between standard glass and this anti-reflective option?
  • Which material do you recommend for the size and value of my piece?

A passionate framer will be your partner, guiding you to a choice that perfectly suits your art and your space.

Glass vs. Acrylic (Plexiglass): Which is Right for You?

Both traditional glass and high-quality acrylic (often called Perspex or Plexiglass) are available as anti-reflective glass for picture frames. Your decision often comes down to the specifics of your project. Glass is renowned for its rigidity and superior scratch resistance, making it a premium choice for most standard-sized frames. Acrylic, however, is significantly lighter and shatter-resistant, making it the safer, more practical option for oversized artwork, frames in high-traffic areas, or pieces that will be shipped.

Cleaning and Maintenance: Protecting Your Investment

Proper care is essential to maintain the pristine, invisible finish of your anti-reflective coating. The most important rule is to never use ammonia-based cleaners (like Windex) or abrasive paper towels, as they can permanently damage the special coating.

For a perfect, streak-free finish, we recommend this simple method:

  • Step 1: Lightly spray an ammonia-free glass cleaner onto a clean, soft microfiber cloth-not directly onto the surface.
  • Step 2: Gently wipe the glass or acrylic in a circular motion to lift dust and smudges.
  • Step 3: Use a second, dry microfiber cloth to lightly buff the surface until it is crystal clear.

Following these steps will ensure your artwork remains the star of the show. To see beautiful examples of art protected by premium glazing, feel free to browse our online gallery.

The Final Frame: See Your Art, Not the Reflection

Choosing the right glazing is the final, crucial step in honouring your artwork. As we’ve explored, the difference is transformative: true anti-reflective glass provides an almost invisible barrier, offering superior clarity and vital UV protection that standard or anti-glare options simply can’t match. Making the decision to use high-quality anti-reflective glass for picture frames is an investment in the beauty and longevity of your most treasured pieces, ensuring they can be enjoyed without distraction for years to come.

At First 4 Frames, our passionate experts live and breathe this commitment to quality. With over 20 years of professional framing experience and a dedication to using only premium, conservation-grade materials, we ensure every piece is presented perfectly. Let us help you remove the reflections and reveal the true beauty of your art. Ready to see your art in perfect clarity? Explore our bespoke framing services today and discover the difference craftsmanship makes.

Frequently Asked Questions

How much more expensive is anti-reflective glass than standard glass?

As a premium product, anti-reflective glass represents a considered investment in your artwork’s presentation. While the exact cost depends on the size of the piece, you can generally expect it to be between £30 to £80 more than standard float glass for a medium-sized frame. This price reflects the advanced multi-layered coating that provides spectacular clarity, turning the glass virtually invisible so you can connect more deeply with the art itself.

Can I replace the glass in a picture frame I already own?

Absolutely. Upgrading the glazing in a beloved frame is a wonderful way to breathe new life into it and enhance the artwork within. We can professionally fit a new piece of bespoke anti-reflective glass into your existing frame, ensuring a perfect, secure fit. This simple change can make a dramatic difference, eliminating distracting reflections and allowing the true colours and details of your art to shine through without compromise.

Is anti-reflective glass the same as ‘museum glass’?

The terms are often used interchangeably, which can be confusing. “Museum Glass” is a brand name for a specific product that combines anti-reflective properties with high-grade UV protection (typically 99%). Many premium anti-reflective glass options we offer provide this same dual benefit of incredible clarity and conservation-grade UV filtering. Essentially, you are getting that museum-quality standard that protects and showcases your art perfectly.

Does anti-reflective glass scratch more easily than normal glass?

The advanced optical coatings on anti-reflective glass are more delicate than the surface of standard glass and require a little extra care. We recommend cleaning with a soft, ammonia-free glass cleaner and a clean microfibre cloth to avoid fine scratches. With proper care, its beautiful, reflection-free surface will remain pristine for years, ensuring your view of the artwork is always crystal clear. Think of it as caring for any piece of fine craftsmanship.

Is there an anti-reflective option that is also shatterproof for a child’s room?

Yes, there is a perfect solution. For spaces like a child’s room, nursery, or busy hallway, we recommend anti-reflective acrylic (often known as Perspex or Plexiglas). This premium material offers the same exceptional clarity and low-reflection properties as glass but is lightweight and shatter-resistant. It provides the ultimate peace of mind, ensuring your little one’s space is both beautiful and safe without compromising on the quality of the display.

Will anti-reflective glass stop my artwork from fading completely?

While no glazing can stop the effects of time completely, a high-quality anti-reflective glass for picture frames offers a spectacular level of protection. The best options block up to 99% of harmful UV light rays, which are the primary cause of fading and discolouration. This conservation-grade filtering drastically slows the ageing process, preserving the rich colours and fine details of your art for decades to come, especially when kept out of direct sunlight.

Posted on

Professional Canvas Stretching UK: The Ultimate Guide to Displaying Your Art

Professional Canvas Stretching UK: The Ultimate Guide to Displaying Your Art

That beautiful canvas you invested in-is it still tucked away in a tube, waiting for its moment to shine on your wall? Taking the step from a rolled artwork to a wall-ready masterpiece can feel daunting. The fear of damage, the confusion around terms like ‘stretcher bars,’ and the search for a trusted expert can be overwhelming. This is where the meticulous craft of professional canvas stretching UK specialists transforms your art, giving it the foundation and form it truly deserves.

Consider this your ultimate guide. We will walk you through the entire journey, demystifying the process from start to finish. We’ll explore the different types of stretching, break down the potential costs (in £), and help you decide on the perfect display style for your art and home-whether that’s a contemporary gallery wrap or a stunning bespoke frame. By the end, you’ll feel confident and inspired, ready to give your artwork the spectacular, sag-free display it was always meant to have.

What is Professional Canvas Stretching and Why is it Essential?

You’ve returned from a wonderful holiday with a beautiful, rolled-up painting, or perhaps you’ve purchased a stunning piece of art online that arrived in a tube. The question is, what now? That rolled canvas needs to be transformed into a display-ready masterpiece, and that’s where professional canvas stretching comes in. At its core, canvas stretching is the meticulous process of mounting a piece of canvas art or a print onto a bespoke wooden frame, known as stretcher bars. This gives the artwork structure, turning it from a delicate roll into a taut, flat surface ready to hang.

This craftsmanship is the essential first step to preserving and presenting your art correctly. To see the process in action, this video provides a fantastic overview of the care and technique involved.

Without proper stretching, a canvas is vulnerable to damage from creasing, cracking paint, and distortion. The process ensures the artwork is perfectly flat and drum-tight, eliminating any ripples or sagging. It prepares the piece for its final destination on your wall, allowing it to be hung as a contemporary, frameless “gallery wrap” or placed into a decorative outer frame. This is far more than simply putting a picture behind glass; it’s a structural necessity that honours the artwork and ensures its longevity.

The Anatomy of a Stretched Canvas

The secret to a long-lasting, beautifully displayed canvas lies in its hidden framework. The stretcher bars provide the essential tension and support. We use only premium, kiln-dried wood to construct these frames, a crucial detail that prevents the timber from warping or twisting over time due to changes in humidity. You can also choose the profile depth of the bars-a standard 18mm depth is perfect for framing, while a deeper 45mm “gallery” profile creates a bold, three-dimensional presence on the wall without an outer frame.

Who Needs This Service?

Our professional canvas stretching UK service is designed for a wide range of art lovers and creators. You might need this service if you are:

  • An art collector who has purchased un-stretched paintings directly from artists or galleries.
  • An artist preparing your work for an exhibition or for sale, ensuring a professional finish.
  • Anyone with a canvas print, such as a family portrait or a fine art reproduction, that needs to be displayed.
  • The owner of an older canvas that has loosened over time and needs to be re-stretched to restore its original tautness.

The Professional Stretching Process: A Look Behind the Scenes

Transforming a rolled canvas into a taut, gallery-ready masterpiece is a meticulous craft. While DIY kits exist, they lack the specialist tools and expertise needed to achieve a truly professional finish. Our process is a blend of precision engineering and artistic care, ensuring your artwork is not only beautifully displayed but also perfectly preserved. We handle every piece with the reverence it deserves, from initial measurement to the final, crisp corner fold.

Step 1: Measurement and Stretcher Bar Construction

Perfection begins with the foundation. We start by precisely measuring your canvas, carefully calculating the exact dimensions needed for the visible art and the portion that will wrap around the frame. Using this data, we construct a bespoke stretcher bar frame from high-quality, kiln-dried timber to prevent warping. Every joint is secured to create perfectly square corners-the non-negotiable first step for a flawless, professional result that will hang true on your wall.

Step 2: Stretching and Securing the Canvas

This is where skilled hands make all the difference. Using professional canvas pliers, we gently pull the canvas, achieving a perfectly even, drum-tight tension across the entire surface. This technique prevents sagging or rippling over time. We work methodically, securing the canvas to the back of the frame with a strategic stapling pattern that remains completely hidden. The final touch is creating immaculate, tidy corners without any unsightly bumps or excess fabric-a true hallmark of expert craftsmanship.

Understanding Canvas Wrap Styles

The way your canvas edge is finished has a significant impact on its final look. As a leading service for professional canvas stretching UK wide, we offer two primary styles to suit your art and décor:

  • Gallery Wrap: The image itself extends around the edges of the stretcher bars. This creates a stunning, contemporary look that is ready to hang without an additional frame, giving your art a modern, three-dimensional presence.
  • Museum Wrap: The full artwork remains on the front face of the canvas, while the edges are wrapped with a solid colour (typically white or black). This classic finish is the perfect choice if you intend to place your stretched canvas into a beautiful floating or traditional frame.

DIY vs. Professional Canvas Stretching: A Crucial Decision

When it comes to displaying your canvas art, you face a key choice: take the DIY route or entrust it to a professional. While home-stretching kits are readily available and may seem like a cost-effective option, the decision should always be weighed against the value-whether monetary or sentimental-of your artwork. A small saving simply isn’t worth risking permanent damage to a piece you love.

The difference between an amateur attempt and bespoke craftsmanship is immediately obvious. A professional has the experience to handle delicate canvases, apply perfect tension, and ensure the finished piece is worthy of your wall. Where a DIY mistake can be permanent, an expert touch guarantees a perfect result.

The Risks of a DIY Approach

Without the right tools and years of experience, stretching a canvas is a delicate process fraught with potential pitfalls. A single misstep can compromise the integrity and appearance of your art. Key risks include:

  • Damage to the Artwork: Using improper tension or the wrong tools can easily tear the canvas or cause the paint to crack, especially on older or heavily textured pieces.
  • Uneven Tension: The most common DIY mistake. This leads to unsightly ripples, sagging over time, and a distorted image that loses its intended impact.
  • Crooked Alignment: Ensuring the artwork is perfectly square to the stretcher bars is extremely difficult. A slightly skewed image looks unprofessional and can be very distracting.
  • Subpar Materials: Many DIY kits use low-quality, unseasoned wood for stretcher bars, which can warp or twist, placing stress on the canvas and causing long-term damage.

When to Always Choose a Professional

For certain pieces, the risk of a DIY attempt is too great. This is where services offering professional canvas stretching UK-wide provide essential peace of mind and a superior finish. You should always opt for an expert for:

  • Valuable Artwork: Any original painting, limited edition print, or piece with significant sentimental value deserves specialist handling to protect your investment.
  • Large or Oversized Canvases: The larger the canvas, the more difficult it is to achieve consistent, drum-tight tension across the entire surface without specialised equipment.
  • A Gallery-Quality Finish: If you want your art to hang perfectly flat with crisp, neat corners and a flawless appearance, only bespoke craftsmanship will do.

Your beautiful art deserves a perfect presentation that will stand the test of time. Trust your art to the experts. Get a stretching quote today.

An infographic compares DIY vs. professional canvas stretching UK, highlighting DIY risks such as damage, poor materials, and ripples versus the benefits of professional services such as preservation, quality materials, tight stretch, and neat corners.

Beyond the Stretch: Choosing the Perfect Frame for Your Canvas

Once your artwork is perfectly taut and secure, the journey isn’t over. Professional canvas stretching is the crucial first step, but the frame is the finishing touch that truly makes your art sing. A well-chosen frame acts as a beautiful bridge between your artwork and your room’s décor, elevating the final presentation from great to spectacular. Here at First 4 Frames, our passion for craftsmanship extends from our professional canvas stretching UK service directly into our bespoke framing. Beyond aesthetics, a frame provides a vital layer of protection, guarding the vulnerable edges and corners of your canvas against accidental bumps and scrapes for years to come.

The Floater Frame: A Modern Classic

The floater frame is the top choice for contemporary canvases, and for good reason. This style sees the canvas mounted inside the frame with a small, uniform gap, creating the stunning illusion that the artwork is ‘floating’ within its border. It’s a sophisticated and modern look that respects the integrity of the art, allowing the entire front surface and the painted sides of a gallery-wrapped canvas to remain visible. It adds definition without distraction.

Traditional Framing for Canvases

For a more classic or formal presentation, a traditional frame is a timeless choice. Unlike a floater frame, a traditional frame has a ‘rebate’ or lip that sits over the front edge of the canvas, neatly covering the staples and sides. This style works wonderfully with traditional paintings and can be chosen to complement ornate décor. We recommend this option for museum-wrapped canvases, where the sides are plain and not intended to be part of the display.

The Unframed Look: When to Go Bare

Sometimes, the art speaks for itself. A gallery-wrapped canvas, where the image continues seamlessly around the deep edges, can look spectacular hung directly on the wall. This unframed approach offers a clean, minimalist aesthetic that is perfect for bold, contemporary art. However, it’s important to consider that going bare offers less protection for the artwork’s edges and corners, making it more susceptible to damage in high-traffic areas.

Choosing the right finish is a personal journey, and our team is always here to offer expert advice. Explore our gallery to find inspiration and see how the perfect frame can complete your masterpiece.

How to Commission Your Professional Canvas Stretching

Ready to transform your rolled canvas into a gallery-worthy display? Commissioning your professional stretching service is a simple, straightforward process. We have refined our service to be completely hassle-free, ensuring your precious artwork receives the care and expert craftsmanship it truly deserves from the moment you contact us.

Getting an Accurate Quote

To provide you with a precise and transparent quote, our team just needs a few key details about your artwork. Having the following information ready when you get in touch helps us prepare everything perfectly for your piece:

  • Image Dimensions: Measure the exact height and width of the printed image itself, not including any white or unprinted borders.
  • Canvas Border: Note the amount of extra, unprinted canvas you have around the image (e.g., “5cm on all sides”). This is crucial for achieving a flawless wrap.
  • Stretcher Bar Depth: Decide on your preferred profile. We offer a standard 18mm depth or a more contemporary 38mm gallery depth for a bolder look on your wall.
  • Wrap Style: Let us know if you want a classic Gallery Wrap (image continues around the sides) or a clean Museum Wrap (plain white or black sides).

Once you’ve approved your quote, the next step is getting your artwork to our workshop. For safe transit, we recommend carefully rolling your canvas-with the image side facing outwards to prevent cracking-and placing it in a sturdy postal tube. Upon receipt, our typical turnaround time is 5-7 working days, after which your beautifully finished piece will be securely packaged and dispatched back to you.

Why Choose First4Frames for Your Canvas?

When you choose First4Frames, you’re not just getting a service; you’re partnering with passionate artisans dedicated to presentation. We are a trusted provider of professional canvas stretching in the UK for artists, galleries, and collectors alike.

  • Decades of Expertise: With over 20 years of bespoke framing and art handling experience, your work is in the safest, most skilled hands.
  • Premium Materials: We use only high-quality, kiln-dried, warp-resistant timber for our stretcher bars, guaranteeing your art remains taut and beautiful for years to come.
  • A Complete Service: As your one-stop shop for art services in Scotland and across the UK, we can seamlessly stretch and then custom frame your canvas to your exact specifications.

Ready to display your masterpiece? Contact our friendly team.

Give Your Canvas the Professional Finish It Deserves

Your artwork is more than just paint on canvas; it’s a story, an investment, and a centrepiece for your space. As we’ve explored, entrusting your piece to an expert ensures a flawless, gallery-ready presentation and protects it from damage and warping over time. This crucial step preserves its beauty and value for generations to come, making the choice between DIY and professional a simple one.

When seeking the best professional canvas stretching uk has to offer, experience and quality materials are non-negotiable. With over 20 years of expert framing craftsmanship, we use only premium, kiln-dried stretcher bars to guarantee your canvas remains taut and true. Trusted by artists and collectors across the UK, we are passionate about giving your art the platform it was made for.

Ready to see your art displayed at its absolute best? Let us give your masterpiece the exceptional presentation it deserves. Transform your artwork. Get a bespoke canvas stretching quote today!

Frequently Asked Questions

How much does professional canvas stretching cost in the UK?

The cost of professional canvas stretching in the UK varies depending on the size of your artwork and the depth of the stretcher bars you choose. As a guide, prices typically start from around £30 for a small canvas and can go up to £150 or more for a very large, bespoke piece. For an accurate, no-obligation quote based on your specific artwork, please contact our friendly team with your canvas dimensions. We pride ourselves on transparent and fair pricing for our craftsmanship.

Can an old, sagging canvas be re-stretched?

Absolutely. It’s quite common for older canvases to lose their tension over time. Our skilled artisans can carefully remove the canvas from its old frame, assess its condition, and expertly re-stretch it onto new, high-quality timber stretcher bars. This process can breathe new life into a beloved painting, restoring the taut, flawless finish it deserves and making it ready to be displayed beautifully once more. Let us help you preserve your precious art for years to come.

What is the typical turnaround time for canvas stretching?

Our standard turnaround time for most canvas stretching projects is between 7 to 10 working days, starting from the day we safely receive your artwork at our workshop. For exceptionally large or complex pieces that require bespoke solutions, the process may take slightly longer. We always believe in quality craftsmanship over speed and will keep you informed throughout the process, ensuring your artwork receives the dedicated attention it warrants before being returned to you, ready to hang.

How should I ship my rolled canvas to you safely?

To ensure your artwork arrives safely, we recommend rolling it with the painted or printed side facing outwards. This helps prevent the ink or paint from cracking. Place the rolled canvas inside a sturdy, wide-diameter cardboard tube, securing the ends firmly. For shipping within the UK, we suggest using a tracked and insured courier service like Royal Mail Special Delivery or Parcelforce. This provides peace of mind and protects your valuable art during its journey to our workshop.

What is the largest size canvas you can stretch?

We have extensive experience working with large-scale artwork and take great pride in our ability to handle ambitious projects. Our workshop is equipped to stretch canvases up to a spectacular 2.5 metres by 2.5 metres (approximately 98 x 98 inches). If you have an oversized piece that exceeds these dimensions, please get in touch. We love a challenge and can often provide a bespoke solution to ensure your magnificent artwork is displayed to its full potential.

Do you stretch canvas prints as well as original paintings?

Yes, we certainly do. Our expert service for professional canvas stretching in the UK is perfectly suited for both original works of art, like oil or acrylic paintings, and high-quality canvas prints, such as Giclée prints. We use the same premium materials and meticulous techniques for every piece, ensuring that whether it’s a one-of-a-kind painting or a beautiful fine art print, the result is a perfectly tensioned, gallery-ready finish that honours the artwork.

Is my artwork insured while it is with you?

Your peace of mind is our top priority. From the moment your artwork is delivered to our workshop until it is safely dispatched back to you, it is fully insured against damage or loss. We are a trusted professional service and treat every piece with the utmost care and respect, as if it were our own. You can be confident that your valuable art is protected by both our expert hands and our comprehensive insurance policy while in our custody.

Posted on

Gallery Wall Layout Ideas: 10 Inspiring Trends for 2026

Gallery Wall Layout Ideas: 10 Inspiring Trends for 2026

That vast, empty wall in your living room holds so much potential, but where do you even begin? If the thought of mixing different frames, choosing art that works together, and committing to nail holes fills you with more dread than delight, you’re in the right place. We believe creating a spectacular gallery wall should be a journey of artistic discovery, not a stressful puzzle. That’s why we’ve delved into the future of interior design to bring you the definitive guide to gallery wall layout ideas 2026.

Prepare to be inspired. In this article, you’ll explore ten of the most exciting trends, from the beauty of minimalist grids to the charm of eclectic clusters. We’ll share our expert advice on how to confidently plan and hang your artwork, ensuring you can create a display that not only fits your space perfectly but also tells your personal story. It’s time to transform that blank canvas into a beautiful, professional-looking feature you’ll love for years to come.

Before you hammer a single nail, the journey to a spectacular gallery wall begins with a thoughtful plan. A truly beautiful collection of art is more than just a way to fill a blank space; it’s a personal narrative, a reflection of your style and story. This practice of curating and showing art has a rich past, and understanding the history of displaying art can inspire us to create displays with meaning. Good planning is the secret to saving time, preventing misplaced holes, and achieving that perfectly polished, professional result you envision.

To help you visualise the latest trends and possibilities, take a look at this inspiring video:

Start with a Story: Defining Your Theme & Palette

Every great gallery wall tells a story. What will yours be? Decide on a unifying element that ties each piece together. This could be a consistent colour palette, a shared subject matter, or a specific feeling you want to evoke. Consider popular themes like travel memories, family portraits, botanical prints, or abstract forms. We recommend choosing two or three dominant colours to guide your art and frame selection, creating a cohesive and harmonious look.

Measure Twice, Hang Once: Mapping Your Layout

This timeless advice is the golden rule of gallery walls. To perfect your arrangement before making any permanent marks, use paper. Trace each of your frames onto craft paper or newspaper, cut them out, and use painter’s tape to test different layouts directly on your wall. This allows you to visualise the spacing and balance. As a rule of thumb, aim to hang your collection so that the centre point is at eye level, which is roughly 145cm from the floor. This step is crucial for executing the best gallery wall layout ideas 2026 without regret.

Finding Your Anchor: The Centrepiece of Your Wall

Most successful gallery walls have an ‘anchor’ piece. This is typically your largest, boldest, or most meaningful piece of art. It acts as the natural focal point and gives the entire arrangement structure. Begin by placing this piece first. For a more dynamic, modern feel, position it slightly off-centre. From there, you can build the rest of your layout outwards, balancing smaller pieces around it. This creates a gravitational pull for the viewer’s eye, making the collection feel intentional and expertly curated.

As we look towards 2026, interior design is embracing personal expression and curated comfort like never before. The classic gallery wall is evolving, moving beyond simple, rigid grids to become a more organic, story-driven feature of our homes. The best gallery wall layout ideas 2026 are less about perfection and more about personality. Let’s explore the key trends shaping how we display art, helping you find a style that truly reflects who you are and elevates your home’s aesthetic.

Trend 1: The Biophilic Flow – Organic & Asymmetrical

Inspired by the untamed beauty of nature, this layout shuns hard lines and perfect symmetry. The goal is to create a sense of movement and life on your wall. Arrange a mix of frame sizes in a flowing, almost cloud-like cluster that feels intuitive rather than planned. This style is the perfect home for botanical prints, spectacular landscape photography, and pieces with natural textures. Think of the sweeping, vibrant colours in the work of an artist like John Lowrie Morrison (Jolomo) to capture this spirit.

To fully embrace this trend, you can complement your botanical prints with a living feature wall or an indoor garden. For the specialist supplies needed to create this, you can visit Discount Hydro.

  • Best for: Living rooms, hallways, or any space needing a touch of natural calm.
  • Key elements: Varied frame sizes, curved lines, and nature-themed art.

Trend 2: Quiet Luxury – The Refined Grid

For those who find beauty in order and elegance, the Quiet Luxury trend is a masterclass in understatement. This layout focuses on premium materials and impeccable craftsmanship. It uses a precise, symmetrical grid with identical, high-quality frames to create a powerful sense of cohesion and calm. The focus isn’t on the layout itself, but on the quality of the art and framing. This approach provides a perfect, professional gallery feel for a series of black-and-white photographs or minimalist abstract prints.

  • Best for: Studies, dining rooms, and minimalist spaces.
  • Key elements: Identical premium frames, perfect symmetry, and a cohesive art collection.

Trend 3: Dopamine Decor – The Eclectic Storyteller

Embrace joy with a ‘more-is-more’ approach that tells your unique story. This layout is a vibrant, personal collection of art, photographs, and treasured objects. Don’t be afraid to mix different frame styles, colours, materials, and eras for a beautifully collected-over-time look. You can even incorporate small floating shelves, antique mirrors, or personal memorabilia among the frames. This is the most personal of all gallery wall layouts, one that grows and evolves with you.

This is the perfect trend for showcasing your unique hobbies and passions. For example, enthusiasts of classic video games can create a visually stunning feature wall with vintage game posters, framed cartridges, or console art. Sourcing these nostalgic pieces from a specialist like RetroFix can add an authentic and personal touch to your eclectic display.

  • Best for: Creative spaces, bedrooms, and anywhere you want to inject personality.
  • Key elements: A mix of frames and objects, bold colours, and personal significance.

Some gallery wall layouts are classics for a simple reason: they create immediate harmony and impact. These tried-and-tested arrangements provide a beautiful structure for any art collection, from family photographs to fine art prints. They are the reliable foundations of interior design. While new trends emerge, mastering these foundational templates is the secret to creating stunning displays in any room. We’ll show you how to give these enduring styles a fresh, modern update, ensuring they remain essential gallery wall layout ideas 2026 that feel both timeless and completely current.

The Symmetrical Grid: For Order and Impact

The grid is the epitome of clean, organised design, delivering a high-impact statement with its satisfying sense of order. It’s the perfect layout for showcasing a series of prints of the same size and orientation, creating a powerful, unified focal point above a sofa or bed. For flawless, professional execution, maintain equal spacing-typically 2-3 inches-between each frame.

  • The 2026 Twist: Elevate this classic look with oversized, crisp white mats and ultra-slim, minimalist frames in black or natural wood. This technique draws the eye inward, giving your art a true gallery-quality feel and allowing each beautiful piece to breathe.

The Staircase Gallery: Elevate Your Ascent

Transform a functional space into a personal journey with a staircase gallery wall. This layout beautifully follows the diagonal line of your ascent, telling a story as you move. A simple way to achieve this is the ‘step’ method: align the centre of each frame with the rise of the stairs, creating a natural, flowing line. It’s a wonderful way to display a timeline of cherished family photos, turning a simple walk upstairs into a trip down memory lane.

  • The 2026 Twist: Break up the linear arrangement by mixing in a few circular or oval frames. This small change adds a dynamic, contemporary rhythm, softening the hard angles of the staircase and adding unexpected visual interest.

The Centred Cluster: Above Furniture

Creating a balanced arrangement above a key piece of furniture-like a console table, fireplace, or headboard-anchors the entire room. The key is to treat your collection as one single, cohesive unit. The overall shape of the cluster should feel grounded, typically wider than it is tall, with the bottom edge of the lowest frames sitting 6-8 inches above the furniture. This ensures your art connects to the furniture without feeling cramped. If you’re searching for an inspiring piece to build your display around, you can find the perfect centrepiece in our ready-to-hang art collection.

Of course, the furniture itself sets the stage for your art. For a fantastic selection of console tables, sideboards, and other pieces that provide the perfect foundation for a gallery wall, you can check out Womacks Of Bawtry.

Infographic titled Gallery Wall Layout Trends 2026 spotlights top gallery wall layout ideas 2026: Biophilic Flow (organic, asymmetrical), Quiet Luxury (refined grid), and Dopamine Décor (eclectic, colourful), each with icons and descriptions.

Creative Solutions for Tricky Spaces

In the real world, few of us have vast, empty walls just waiting for art. More often, we face architectural quirks: tight corners, narrow hallways, or walls dominated by a television. But what if these challenges were actually opportunities? These expert tips are central to the most innovative gallery wall layout ideas 2026, designed to turn challenging spots into the highlight of your home.

With over twenty years of craftsmanship under our belts, we’ve learned that a thoughtful layout can conquer any space. It’s about seeing potential where others see problems and using beautiful, professionally framed art to redefine a room’s architecture.

The Corner Wrap: Thinking in Three Dimensions

Extend your collection beyond a single plane by wrapping it around an inside or outside corner. This creates a wonderfully immersive effect, drawing the eye around the bend and making the entire room feel more dynamic and spacious. We recommend placing a larger, statement piece on the main wall, with a series of smaller, complementary frames flowing onto the adjacent one for a surprising and sophisticated look.

The Vertical Stack: For Narrow Walls & High Ceilings

Perfect for those slender sections of wall between doorways or windows, the vertical stack is a simple yet powerful solution. This layout uses a single column of frames to create a strong vertical line that draws the eye upward, giving an illusion of greater height. For a polished, intentional aesthetic, use frames of the same width but play with varying heights. This maintains cohesion while adding beautiful visual interest.

Framing the Tech: Integrating a TV

Don’t let a black screen dictate your décor. By surrounding your television with a curated collection of art, you integrate it seamlessly into your room’s design. The key is connection. Use premium black frames that echo the screen, or choose artwork with deep tones to create a visual bridge. Suddenly, the TV is no longer just an appliance, but another considered piece in your beautiful gallery wall.

These forward-thinking gallery wall layout ideas 2026 prove that every space, no matter how awkward, has artistic potential. Ready to conquer your tricky corners? Explore our bespoke collection and find the perfect, professionally framed pieces to begin your masterpiece.

From Idea to Reality: Choosing Your Art & Frames

You’ve mapped out your grid, measured your wall, and planned your layout. Now for the truly creative part: selecting the art and frames that will transform your concept into a spectacular reality. Choosing the right pieces is what breathes life and personality into your design. We’ll guide you through curating your collection like a professional, ensuring every element works in beautiful harmony for a polished, cohesive finish.

The Art of the Mix: Combining Prints, Photos & Paintings

Don’t be afraid to create a rich narrative by mixing professional art with personal memories. A beautiful Giclée print can hang proudly next to a cherished family photograph or a child’s first painting. To create a sense of unity, consider converting all your photos to classic black and white or using the same style of mount for every piece. This blend of high and low, public and private, is what tells a richer story and makes a gallery wall uniquely yours.

Frame Game: How to Choose the Perfect Frames

The frame is the bridge between your artwork and your room’s décor, so choosing wisely is key. For many of the leading gallery wall layout ideas 2026, a thoughtful framing strategy is crucial to success. Consider these tips:

  • For a Cohesive Look: Stick to one or two frame colours and materials, like all-black or a mix of natural oak and white. This creates a calm, unified aesthetic.
  • For an Eclectic Look: Mix different frame styles, but keep one element consistent-such as the material (all wood) or the colour family (all metallics)-to avoid a chaotic feel.
  • Consider the Artwork: Let the art guide you. Modern, minimalist prints shine in slim, clean-lined frames, while classic portraits may call for something more ornate.
  • Perfect the Fit: For those non-standard sizes that are essential to your layout, bespoke framing is the perfect solution, ensuring every piece fits its designated space flawlessly.

Sourcing Your Collection: Finding Art You Love

Building a collection is a journey, not a race. Start by looking around your own home for treasures-sentimental postcards, favourite photographs, or your children’s drawings can become the heart of your wall. To supplement these, explore online galleries for premium Giclée prints from talented artists. Supporting local makers at art fairs is another wonderful way to find unique pieces that no one else has. Once you’ve gathered your favourites, let us frame your treasures with our bespoke framing service and bring your vision to life.

As we’ve explored, creating a stunning feature wall is about more than just hanging pictures. The best gallery wall layout ideas 2026 are a beautiful blend of personal expression and thoughtful composition, whether you’re embracing the understated elegance of ‘Quiet Luxury’ or the joyful energy of ‘Dopamine Decor’. By planning your layout and choosing pieces that tell your story, you can transform any space-even a tricky staircase or narrow hallway-into a true reflection of your style.

The final, crucial step is selecting beautiful art and the perfect frames to bring your vision to life. At First 4 Frames, we make this part simple and inspiring. With over 20 years of bespoke framing experience, we are trusted by homeowners and commercial clients across the UK to deliver exceptional craftsmanship. Our collection of premium Giclée prints from talented artists provides the perfect starting point for your masterpiece.

Ready to build your dream gallery wall? Explore our collection of art prints!

Embark on your creative journey today and curate a wall that you will love for years to come.

Frequently Asked Questions

How far apart should pictures be in a gallery wall?

As a general rule, we recommend spacing your frames 2 to 5 inches (about 5-12 cm) apart. The most crucial element is consistency across the entire arrangement. Maintaining a uniform gap creates a clean, professional look that allows each piece of art to breathe while still feeling connected to the collection. For more formal, grid-style layouts, a smaller, precise gap works best, whereas eclectic layouts can handle slightly more space between frames.

Is it okay to mix different frame colours and styles in one layout?

Absolutely! Mixing frame colours, materials, and styles is a spectacular way to add depth, personality, and a curated feel to your gallery wall. To create a cohesive look, find a common element to tie them together. This could be a consistent matting colour, a metallic finish that appears in multiple frames, or a single colour that is present in each piece of artwork. This thoughtful approach ensures the collection looks beautifully harmonious rather than chaotic.

Should all the pictures in a gallery wall have the same theme?

Not at all. While a single theme can be very impactful, many of the most personal and interesting gallery walls feature a diverse mix of art. You can unite different subjects-like abstract prints, family photos, and line drawings-by establishing a consistent colour palette throughout the collection. Alternatively, using the same style of bespoke frame for every piece can create a powerful sense of unity, turning varied images into a single, stunning feature.

What’s the best height to hang pictures for a gallery wall?

To achieve a professional, gallery-quality display, the centre of your entire arrangement should be at average eye level, which is typically 57-60 inches (145-152 cm) from the floor. This ensures the collection is viewed comfortably and feels perfectly balanced in the room. If you are hanging your gallery wall above a piece of furniture like a sofa or console table, a good rule is to leave a gap of 6-8 inches above the furniture.

How do I start building a gallery wall on a budget?

Creating a beautiful gallery wall doesn’t require a huge investment. Start by printing your own favourite photographs and mixing them with affordable art prints you can find online. Scour local charity shops and car boot sales for unique, pre-loved frames that you can often find for just a few pounds. This approach allows you to build a deeply personal collection over time, adding premium, professionally framed pieces as your budget allows to elevate the display.

Can I create a gallery wall without using nails?

Yes, you can easily create a beautiful display without making a single hole in your wall. Adhesive picture-hanging strips are an excellent damage-free option, perfect for renters. Just be sure to check the weight capacity of the strips against the weight of your framed art. Another stylish alternative is a picture ledge. This allows you to layer frames and easily update your gallery wall layout ideas 2026 without any commitment.